Greetings from the Pacific Northwest,
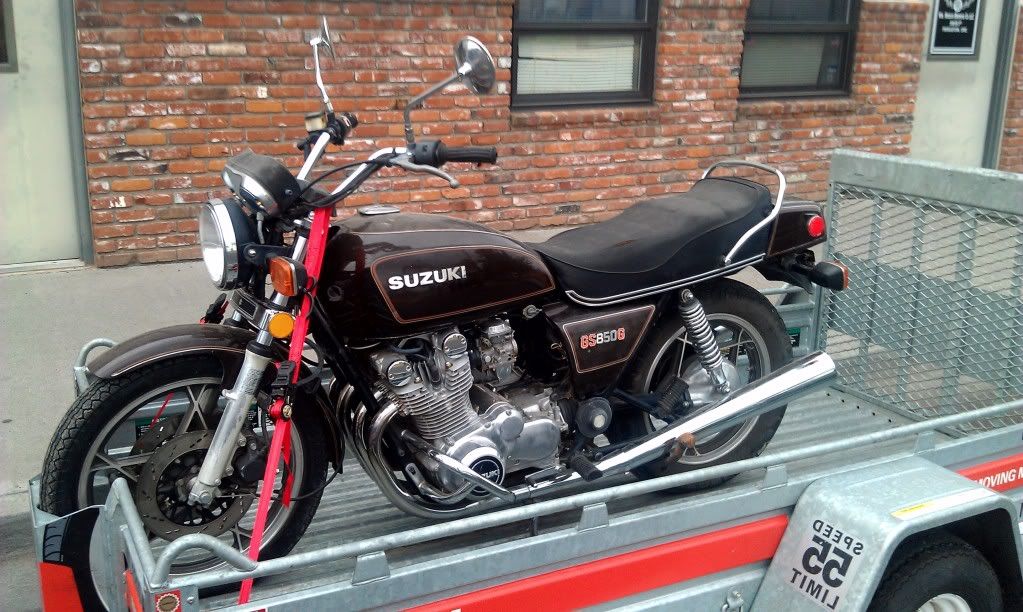
Somehow I managed to talk myself into picking up a lovely GS850G the other day for the sweet price of $400. Drove from Portland to Pendleton as I thought the deal too good to pass up. Driving back, one of the trailer tires disintegrated... sweet. Thanks U-Haul for not including spares!
Back to the bike...
It's been sitting for a year, the previous owner said he used it as a regular commuter on the backroads of Eastern Oregon. I was informed the starter button was not functioning, but other than that, the bike should be "good to go" with a bit of love. He charged the battery before I arrived and cranked it over by shorting the solenoid. The bike started, rev'd briefly, and died (using starter fluid). The engine sounded good, smooth and strong - however briefly I heard it run.
All electrical's are untouched and seem to be functioning as they should.
The tires seem to still have a bit of life in them as well, though I haven't checked the date codes.
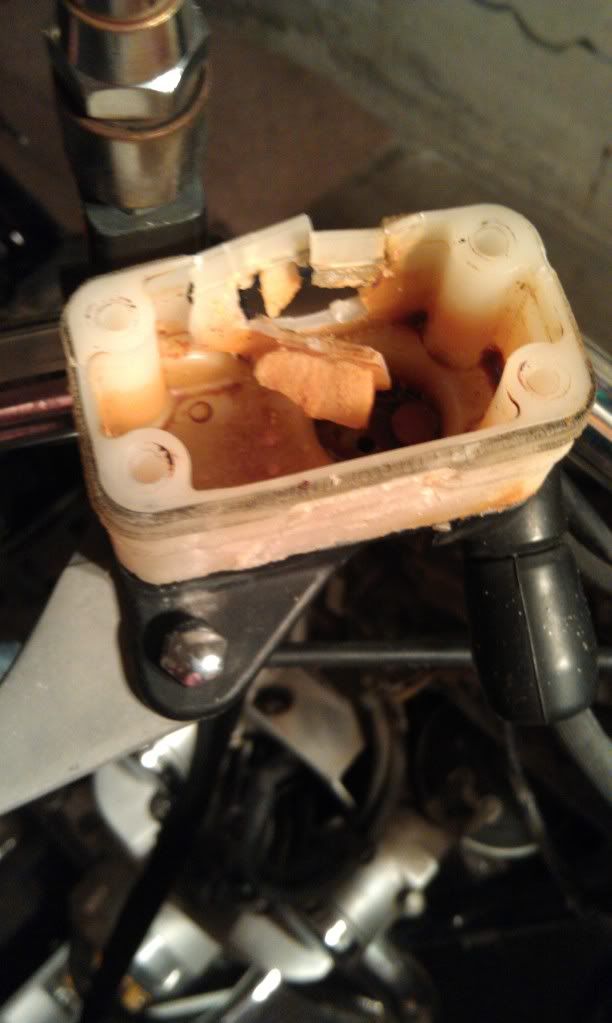
There was a corroded hole in the front brake reservoir, and the gooey stuff inside looked all sorts of goopy grossness.
I've tried to re-start it here in the valley and succeeded, getting to hear it run for all of 20-25 seconds before it chokes itself out. The PO stated that he didn't have, or know any of the maintenance records - classic story.
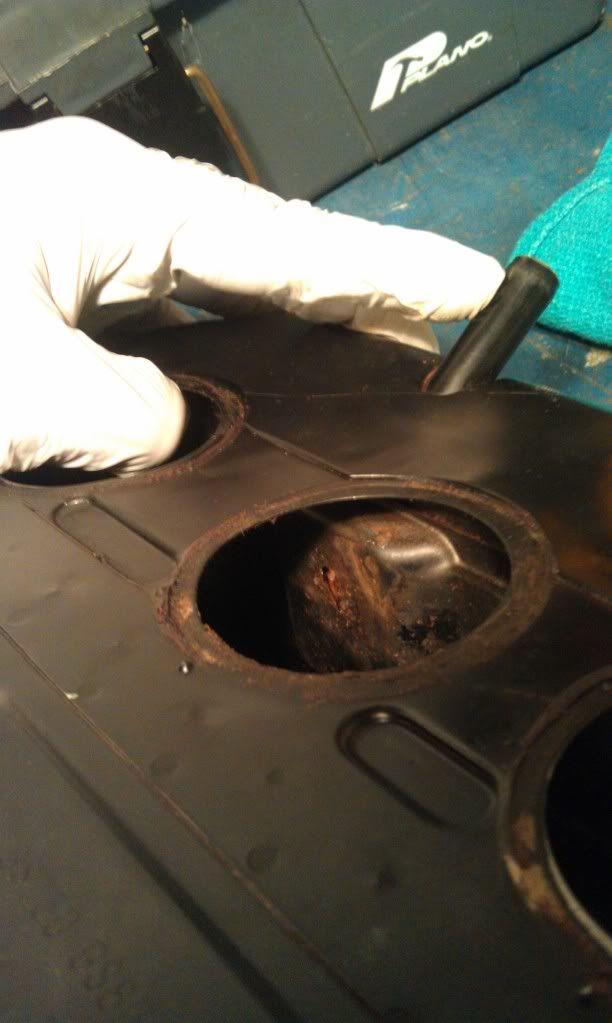
SO! Here we are. I've started by removing and cleaning the airbox, filter, and boots. The boots weren't 100%, so I ordered new ones. As I took apart the airbox, the filter felt mushy and was falling apart. I pulled all that off and shined up the metal bracket with simple green and steel wool. The gasket inside the box was also failing, so I scraped all that off and intend on installing some new weather stripping - any suggestions? or is standard weather stripping fine? I received a K&N filter that I plan on installing (unless I hear that stock is mo'betta). One note on the airbox, I'm noticing a slight amount of rust from the breather line on top of the airbox? Is this something to worry about/fix?
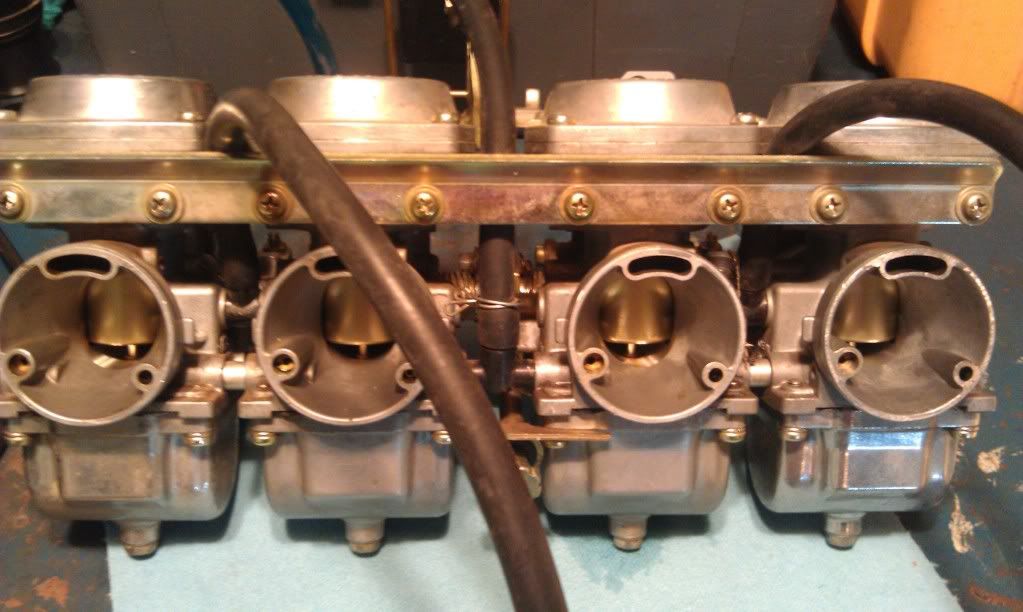
Removed the carbs as well, the seem to be relatively clean; though a full teardown is in order.
The intake boot removal project lasted a few days as I didn't have an impact screwdriver. The first screws came out ok, but then I hit the wall.

Before stripping them, I stopped working for the night and planned on a trip to sears the next day. Once properly equipped with the right tools, the job got a bit easier. My impact screwdriver is too long, so I had to remove the parts hanging on the battery box, remove the battery, then the battery cage to get enough clearance to swing the hammer. Good times.
I inspected the intake boots and decided that they are still good. They're still pliable, aren't deformed, and have no cracks.. seems like they should still be ok, plus I save $100 (for now).
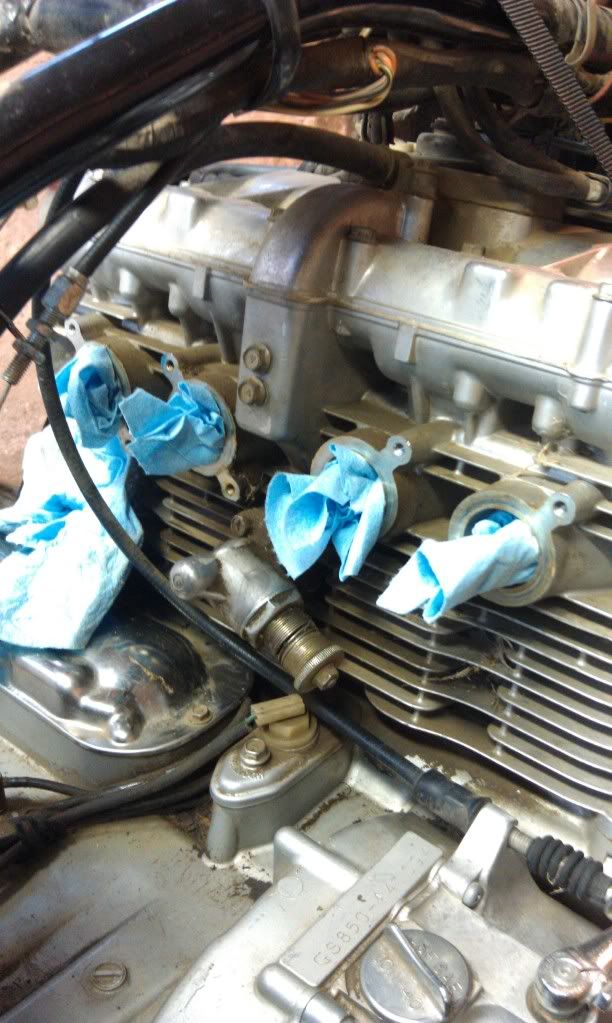
I have received the o-rings from cyclerings, but haven't installed yet. Here's my first question - any advice on cleaning this part of the engine since it's all exposed? Cleaning tools to use? What, a toothbrush? I'm a bit concerned about having the intake exposed while working with cleaning agents. My approach was going to be a spray down of WD-40, scrub, then spray simple green, scrub, then spray down with water, though not sure how to dry all the fins?
While I ponder on this and wait for feedback, I'm going to go read up on carb rebuilding.
Would it be better to do a valve adjustment at this time with the engine more open? Or is it easy enough when everything is reassembled?
Ah yes, progression.
Cheers,
Nick
Somehow I managed to talk myself into picking up a lovely GS850G the other day for the sweet price of $400. Drove from Portland to Pendleton as I thought the deal too good to pass up. Driving back, one of the trailer tires disintegrated... sweet. Thanks U-Haul for not including spares!
Back to the bike...
It's been sitting for a year, the previous owner said he used it as a regular commuter on the backroads of Eastern Oregon. I was informed the starter button was not functioning, but other than that, the bike should be "good to go" with a bit of love. He charged the battery before I arrived and cranked it over by shorting the solenoid. The bike started, rev'd briefly, and died (using starter fluid). The engine sounded good, smooth and strong - however briefly I heard it run.
All electrical's are untouched and seem to be functioning as they should.
The tires seem to still have a bit of life in them as well, though I haven't checked the date codes.
There was a corroded hole in the front brake reservoir, and the gooey stuff inside looked all sorts of goopy grossness.
I've tried to re-start it here in the valley and succeeded, getting to hear it run for all of 20-25 seconds before it chokes itself out. The PO stated that he didn't have, or know any of the maintenance records - classic story.
SO! Here we are. I've started by removing and cleaning the airbox, filter, and boots. The boots weren't 100%, so I ordered new ones. As I took apart the airbox, the filter felt mushy and was falling apart. I pulled all that off and shined up the metal bracket with simple green and steel wool. The gasket inside the box was also failing, so I scraped all that off and intend on installing some new weather stripping - any suggestions? or is standard weather stripping fine? I received a K&N filter that I plan on installing (unless I hear that stock is mo'betta). One note on the airbox, I'm noticing a slight amount of rust from the breather line on top of the airbox? Is this something to worry about/fix?
Removed the carbs as well, the seem to be relatively clean; though a full teardown is in order.
The intake boot removal project lasted a few days as I didn't have an impact screwdriver. The first screws came out ok, but then I hit the wall.
Before stripping them, I stopped working for the night and planned on a trip to sears the next day. Once properly equipped with the right tools, the job got a bit easier. My impact screwdriver is too long, so I had to remove the parts hanging on the battery box, remove the battery, then the battery cage to get enough clearance to swing the hammer. Good times.
I inspected the intake boots and decided that they are still good. They're still pliable, aren't deformed, and have no cracks.. seems like they should still be ok, plus I save $100 (for now).
I have received the o-rings from cyclerings, but haven't installed yet. Here's my first question - any advice on cleaning this part of the engine since it's all exposed? Cleaning tools to use? What, a toothbrush? I'm a bit concerned about having the intake exposed while working with cleaning agents. My approach was going to be a spray down of WD-40, scrub, then spray simple green, scrub, then spray down with water, though not sure how to dry all the fins?
While I ponder on this and wait for feedback, I'm going to go read up on carb rebuilding.
Would it be better to do a valve adjustment at this time with the engine more open? Or is it easy enough when everything is reassembled?
Ah yes, progression.
Cheers,
Nick

")

Comment