Announcement

Collapse
No announcement yet.

1983_GS750E - Rebuild

Collapse
X
 
  • Filter
  • Time
  • Show
Clear All
new posts

    Yup, saw your post, and I cringed, then, and even more so when it happened to me....I was just looking for some more feed back, thoughts, ideas, sympathy, or kick in the pants....LOL

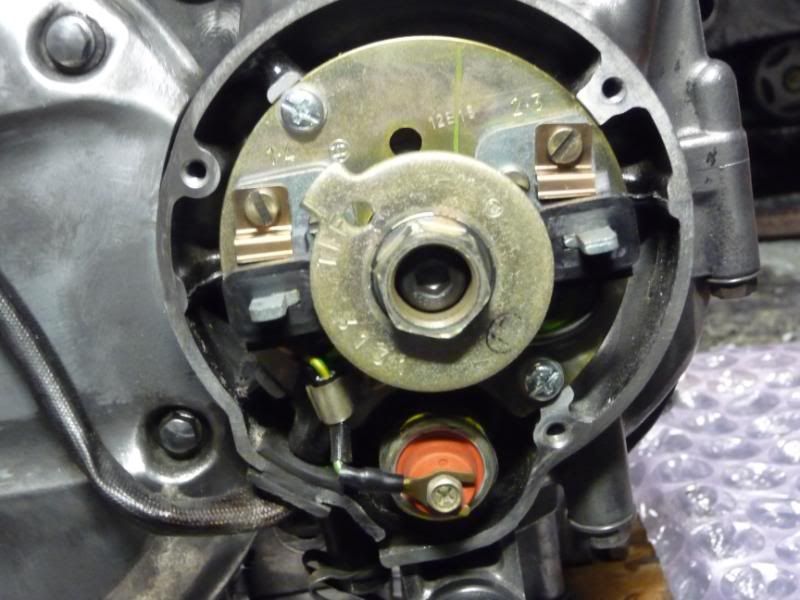
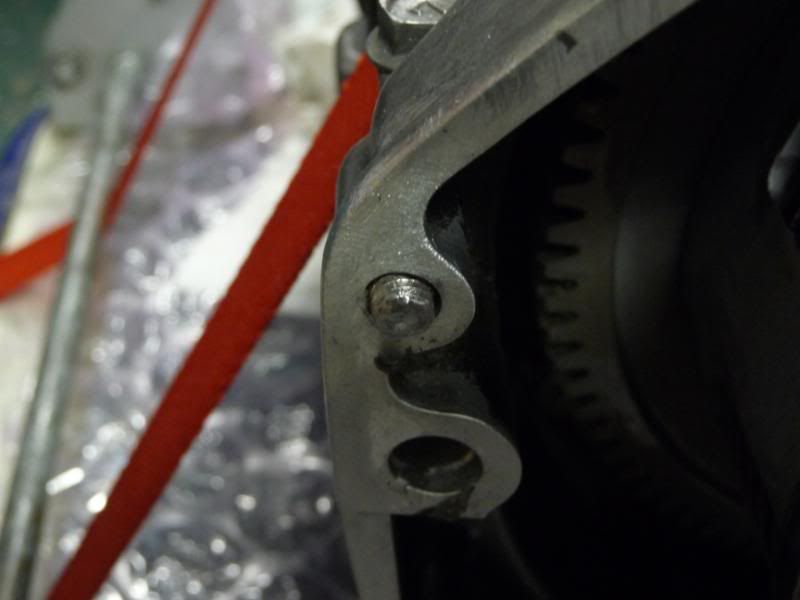
    I have no issue in drilling and tapping the hole, just wondering on how to get the correct angle of the hole now...

    I think I will go oversize to make sure I get rid of the old bolt completely, fill in the hole, and drill a completely new one, tap, and hope for the best.....

    might need to take this part of the engine to my brothers machine shop, and do the work there, throw it on the mill get the angle from the other holes, and make the new one....It's not really what I wanted to do.......means a partial tear down of the engine, and that was not what was in the budget....

    Comment


      I didn't want to tear down the motor as it was in running condition and worried about redoing the timing, gaskets, etc. a machine shop quoted me at $175 to get the bolts drilled out, eff that lol.

      Have a friend use a square and line the bolt up using both his point of view and yours, key to tapping the hole is to use lots of lubricant (PB buster I used) and backing it out every so often so that it doesn't tear the aluminum. The whole process for 5 bolts was about 1 hour give or take.

      Oh and if you can, dremel or grind down the bolt flush with the flange. And use a center punch. AND don't cheap out on a tap/die set, titanium carbide or bust.

      Comment


        If it's not savable I have a head here.Yours for shipping.

        Comment


          Originally posted by Motocrossx23 View Post
          I didn't want to tear down the motor as it was in running condition and worried about redoing the timing, gaskets, etc. a machine shop quoted me at $175 to get the bolts drilled out, eff that lol.

          Have a friend use a square and line the bolt up using both his point of view and yours, key to tapping the hole is to use lots of lubricant (PB buster I used) and backing it out every so often so that it doesn't tear the aluminum. The whole process for 5 bolts was about 1 hour give or take.

          Oh and if you can, dremel or grind down the bolt flush with the flange. And use a center punch. AND don't cheap out on a tap/die set, titanium carbide or bust.
          Nothing left to grind down, I have more or less, drilled it out, but in my wisdom, I did not drill the correct angle as the original, so even if I can tap new threads, the bolt will be at the wrong angle, as it sits right now.

          I will let this sit for now, and give it some thought on what I need to do and how to proceed.

          Originally posted by SVSooke View Post
          If it's not savable I have a head here.Yours for shipping.
          Thanks......this is greatly appreciated, and I might take you up on it, I just might get that other part that holds the mirror....LOL,,,,that shouldn't add too much to the shipping charge....hehehehehe

          I will keep this in mind, in case all other options to repair my booboo fail

          I was not looking at a engine rebuild, but hey, crap happens, and it might need to be done.

          The most I was going to do was a check of the top end, valves, and to make sure my gaps were in spec....


          Going to power wash the engine once more, and store it for a bit, I cleaned it a bit more, and found a bit of crud I missed, hopefully the high pressure wash will get rid of that, and then do the repair, and then paint....

          Gonna go and polish some covers, and wire wheel, other bits and pieces, get things ready for paint.....

          One good thing, I changed the oil in the SUV, it's now ready for the winter....

          Comment


            other things to occupy my time

            So tonight to get my mind off of the booboo I have with the broken exhaust bolt, and the bad extraction I tried to do, I decided to
            work a bit on the engine, and get it ready for one more wash down, before it gets really cold out, and things start freezing up outside.

            So I borrowed a cart from work, and strapped it onto it, used some tie downs, and it's about as secure as I can get it, now I can wheel it around
            and outside tomorrow, for the power wash, hopefully I will get the last remaining bits of gunk off, then I can let it dry, and when I am ready I can use some spirits wash her down, and apply some paint....

            Here is the setup for the weekend, well maybe a few more days, the holidays are coming up, and we really don't need the cart at work at the moment


            I also decided to take all the covers off, just to make sure they would come off, and to see what was behind each one as well

            looks good in here


            covers not bad either


            going to assume a bit of rust in here is nothing to really worry about, I will clean it up a bit, or do I need to worry about anything here ?


            Comment


              Cont...

              This seems to be in good order as well, no I have not done any stator testing as of yet, but I will


              cover looks good, and cleaned up the glass a bit as well


              not sure what to look for here, but it looks good, should I go deeper and remove more from here ?


              and it never fails, just when you think all is good, another bolt breaks.....this one I think I will handle in a different manner to get it out


              Well that's it for now

              Comment


                Everything looks good so far, the only thing I'd be concerned about is the surface rust on the stator side. Bad gasket could lead to that though, make sure you clean it up very well and then rub some motor oil on it to keep it from flash rusting again. Once you get the gasket back on it'll be okay though I think.

                Comment


                  Should I remove that part completely to clean it up, or just some fine sand paper or a wire brush, to clean it up and leave it in place. It's probably due to the gasket, as you can see it's still there but it had some silicone crap on it as well, so it probably got water in it somehow.

                  Which reminds me, once I was this engine, and paint it, and then it will sit for a while, what should I do to prevent any rusting of any internal components? should I pull the plugs and shoot a bit of oil into each cylinder, should I fill up the motor with oil ?

                  as it is right now, it's empty of all fluids, most of the holes are plugged and or have their bolts in place, and I don't want a seized engine, in a few weeks or months when I go to put it all back together. Or will it be OK, it will be in my garage, and I do have heat in there.

                  Cheers

                  Comment


                    Since you have it apart, remove the clutch springs and each of the plates and measure them to see where they are in relation to the service specs. If close or past the minimums, I'd replace as necessary now while you have it apart.

                    Looks like you have enough of that screw sticking out to just spray some PB Blaster, heat it and then grab on with a pair of vise grips and unthread it.
                    Cowboy Up or Quit. - Run Free Lou and Rest in Peace

                    1981 GS550T - My First
                    1981 GS550L - My Eldest Daughter's - Now Sold
                    2007 GSF1250SA Bandit - My touring bike

                    Sit tall in the saddle Hold your head up high
                    Keep your eyes fixed where the trail meets the sky and live like you ain't afraid to die
                    and don't be scared, just enjoy your ride - Chris Ledoux, "The Ride"

                    Comment


                      Hey, hey, steaming along nicely there, yes I would hit the flywheel with a wire brush and clean it up, no need to remove it, you not going to get it off anyhow, without the right puller, it's on a taper and they sit like they are welded to the crank.
                      Otherwise all looking good, I am with Scott, while you have it open, pull the clutch plates and measure them, if good put back, if not, replace, I would also replace the clutch springs as a matter of course, they are cheap enough, about $3 each or there abouts.
                      Nice to see the progress.

                      Comment


                        Thanks for the tips there guys....going to check the clutch plates, change the springs, wire wheel the flywheel, and try to get that broken bolt out, I really hope it comes out.

                        Have to get a couple of gaskets now as well, ohh well, I guess it goes with the territory...

                        Moving along well, but it really feels like not much is being done....how the heck does that happen.....

                        It's all the little things I guess, but once it starts going back together it will be all worthwhile.....so I keep telling myself....

                        But I have decided to purchase a new bike anyways, just waiting for the bike show now in January.....see what sort of deal I can get, and I am going to look for bits and pieces for this bike as well, gaskets, decals, clutch springs, spark plugs, tires, ohh my the list is getting long.....hahahaha
                        Last edited by Guest; 12-17-2011, 11:56 AM.

                        Comment


                          At a certain point you realize that all the little things you're doing are adding up to something nice and that's when the project gets really fun!

                          Comment


                            Yes, stick with it, the refurbishing and cleaning of bits before reassemly is tedious, but when it goes together looking better than new its all worth while, as k me, I been busy with Jennifer for 18 months now, and have barely started hanging bits back together.
                            Spent 5 hours today sanding fiberglass repairs, now that is mind numbing
                            At least I think I lost about 5Kg's perspiring.
                            Your work so far has been first class, so i have no reason to believe your bike is goig to be anything less than gorgeous when it is done, keep up the attention to detail.

                            Comment


                              Thanks Motocrossx23/Flyboy


                              And I am sticking with it.....no turning back now...

                              and here is the proof, I cleaned up that flywheel......


                              Ohh and a few other parts where put onto the wire wheel as well, I didn't take pics yet but I will....

                              Tomorrow a buddy is going to bring me his Dremel tool to see if we can cut a slot in that busted bolt on the oil cover and see if we can get it out,,, the picture shows as though there is some meat there, but there is not unfortunately....I even got some PB Blaster today to help things out

                              Comment


                                Looking good!!

                                Comment

                                Working...
                                X