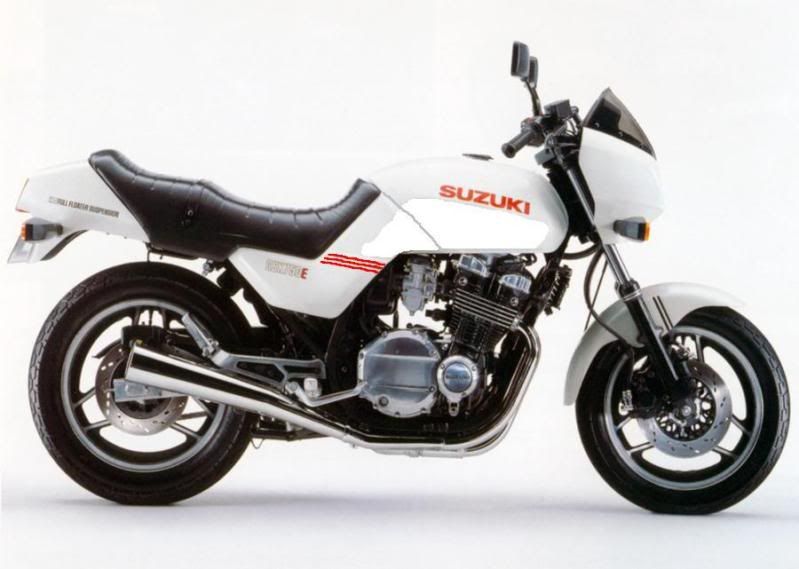
Announcement

Collapse
No announcement yet.

1983_GS750E - Rebuild

Collapse
X
 
  • Filter
  • Time
  • Show
Clear All
new posts

    Crushed in frame

    Gatekeeper, I think your frame needs some attention.


    The pipe looks crushed, while the frame as a whole may not be distorted, theres a whole lot of strength missing right there, a weak point that will flex. Just bogging it over with JB weld wont put the strength back.

    Here's a suggestion.

    Source some square tube about the same size and bend it to the same radius bend as that part of the frame. (use a bender die so it dosnt chrush) Split this tube diagonally at the corners, so you wind up with a right angle section but with the curve in it. weld this over the crushed section.

    This will be stronger than cuting the piece out and butt welding, plus theres less chance of distorting the frame with the cutting and welding.

    Do it neat with tapered ends and on both down tubes of the frame and it may well look like it was made that way.

    Comment


      Sorry GK, but JB Weld only adheres to the surface which means its holding strength will not be strong enough once you place any torque on the hole. Great stuff for filling holes and such but cannot be used for areas under stress.

      Another option is to find a solid welder who can weld the hole up with aluminum and then redrill and tap it. Have to find a guy who has real experience with aluminum though. I've seen this done before with good results.

      And sorry to hear about your issue with your bro. I've got two myself and sometimes can be a real PIA. But you know, in the end, they are family and nobody can love you like family. Hope you can Find a way to work it out.

      Sci85
      Last edited by Sci85; 01-04-2012, 11:40 PM.
      1982 GS550M Rebuilt Winter '12 - 550 to 673cc engine conversion.
      1989 Kawasaki ZX-7 Ninja
      2016 Ducati Scrambler Full Throttle

      Comment


        Originally posted by john82q View Post
        Gatekeeper, I think your frame needs some attention.


        The pipe looks crushed, while the frame as a whole may not be distorted, theres a whole lot of strength missing right there, a weak point that will flex. Just bogging it over with JB weld wont put the strength back.

        Here's a suggestion.

        Source some square tube about the same size and bend it to the same radius bend as that part of the frame. (use a bender die so it dosnt chrush) Split this tube diagonally at the corners, so you wind up with a right angle section but with the curve in it. weld this over the crushed section.

        This will be stronger than cuting the piece out and butt welding, plus theres less chance of distorting the frame with the cutting and welding.

        Do it neat with tapered ends and on both down tubes of the frame and it may well look like it was made that way.
        You are probably right, and I should get it done correctly, the funny thing is it's been like that ever since I had the bike, and honestly, never noticed the extent of the ding until now, never really looked at it so close, guess I have been lucky that it did not give way, break or anything else.

        I guess I will have to source out a welder/fabricator, and get it done right, might as well not half a$$ it now

        Thanks for the kick in the pants.............sometimes one needs it.....

        Originally posted by Sci85 View Post
        Sorry GK, but JB Weld only adheres to the surface which means its holding strength will not be strong enough once you place any torque on the hole. Great stuff for filling holes and such but cannot be used for areas under stress.

        Another option is to find a solid welder who can weld the hole up with aluminum and then redrill and tap it. Have to find a guy who has real experience with aluminum though. I've seen this done before with good results.

        And sorry to hear about your issue with your bro. I've got two myself and sometimes can be a real PIA. But you know, in the end, they are family and nobody can love you like family. Hope you can Find a way to work it out.

        Sci85
        Again probably words of wisdom here as well, I just figured the JB Weld stuff would be good enough, the holes are not all that big, neither are the bolts going into them, one is for the header and the other for the oil cover, but again there is some torque once those parts are put in place, and one has to stop an exhaust leak, and the other has to hold back the oil.

        I do have some Devcon, maybe that will be better....we used it in the shop on occasion, I will have to see it's strength compared to the JB Weld stuff, at leas for the repair of the holes

        I do have a really good welder, well through my bro, I guess I will try to get the name of the guy and his location to get it fixed up properly.


        Up family is family no matter how you dice it up, perhaps one day, we will set aside our differences and make peace.....

        Thanks to you as well......


        Originally posted by Hoosier Daddy View Post
        That polished wheel looks fantastic!
        Thanks, compliments are appreciated

        Comment


          Rear wheel polished

          Well I spent time on the rear wheel tonight, got it polished up, cleaned up and put the tape on, now both are ready for paint. I found VHT header paint to be in a matte black finish, I am wondering if I could use it for the rims ???

          I will search around a bit more to see what else I can find, before I commit to anything....

          I did find some filler primer today...wooohoooo, can use it on the body panels to fill in the small nicks and such, then a good light sanding and they will be ready for the painter.....

          Anyways here are a few shots of the rear rim


          I just noticed some crud in between the letters on the rim, going to have to clean that up before paint........


          one is taped and ready, the rear was done latter, but I didn't take any pics

          Comment


            Looking good. I need to hit mine so I can paint on Friday with the warmer than normal temps. Did you just do the outside, silver portion? What was your process?

            Sci85
            1982 GS550M Rebuilt Winter '12 - 550 to 673cc engine conversion.
            1989 Kawasaki ZX-7 Ninja
            2016 Ducati Scrambler Full Throttle

            Comment


              Yes just polished the non painted portions of the rims, the lip and the spokes.

              Started with a good cleaning, then used 400 grit, waterproof sandpaper, under running water, keeping it wet all the time, then a good rinse.

              then got a wire wheel a very fine one, and a well used one, to polish up a bit

              next was a polishing bit, and black compound, then a new bit and used the red compound

              between those 2 , I cleaned everything with paint thinner and rubbing alcohol

              last was a whole lot of rubbing and elbow grease with a terry cloth and micro fiber cloth, and a product called Blue Magic Metal Polish, but you can use what ever you have available, this stuff is a really fine polish, but will turn your cloths black really fast, so keep changing so your not rubbing in the black stuff back onto the rim.

              One final rub down with the microfiber cloth and rubbing alcohol, and then I did the taping.

              The metal polish has a silica residue or something like that it leaves behind on the metal to protect it, looks like good stuff, first time I have used this product

              I only wish I had some larger buffing wheel/pads that fit my drill, would have made it easier and a faster process

              Comment


                Looking SWEEEEEET

                Comment


                  Sweet indeed!

                  And +1 on the JB Weld comments earlier too, I definitely wouldn't trust it.

                  Hopefully your holes aren't too big and a helicoil will sort you out...
                  1982 GS450E - The Wee Beastie
                  1984 GSX750S Katana 7/11 - Kit Kat - BOTM May 2020

                  sigpic

                  450 Refresh thread: https://www.thegsresources.com/_foru...-GS450-Refresh

                  Katana 7/11 thread: http://www.thegsresources.com/_forum...84-Katana-7-11

                  Comment


                    Am I Wacked or what....

                    So I was thinking about paint on the bike, and somehow, white came to mind.....

                    Grabbed a picture I had handy, used MS Paint, and went at it.....

                    Ya I know it sucks in a sense of how bad the work is, but does the scheme look good ? is the bigger question......

                    Really I am ashamed to put this up, but, just looking for some feedback

                    good or bad

                    I really should leave this type of work to my son, and use Photoshop, to make a better pic, but hey it's a start.....right.....LOL


                    .
                    Last edited by Guest; 01-05-2012, 11:01 AM.

                    Comment


                      OK, a bit of a better pic, not my bike, and not really the same as what I envision, but close


                      Last edited by Guest; 01-05-2012, 12:00 PM.

                      Comment


                        Hmmm... I think that might look quite good...
                        1982 GS450E - The Wee Beastie
                        1984 GSX750S Katana 7/11 - Kit Kat - BOTM May 2020

                        sigpic

                        450 Refresh thread: https://www.thegsresources.com/_foru...-GS450-Refresh

                        Katana 7/11 thread: http://www.thegsresources.com/_forum...84-Katana-7-11

                        Comment


                          painted the rims

                          Well I did it..........hopefully they turn out, and if not, back to stripping, and we can do it all over again, I think there is one run, but maybe my eyes are seeing something that is not there or the run is on the taped portion

                          It's been a long time since I sprayed anything with a rattle can, and man o man the stuff comes out quick and lots of it, so I tried to do light coats but a lot of them, I will know better tomorrow, once it dries a bit harder.....

                          I used the engine enamel paint, same thing I will use for the engine, so lets see how it lays and shines......

                          Yes Flyboy I went the shiny route, might be tacky, might not, we shall see, I can always hit it with some clear satin varathane to dull it down a bit

                          well here are a few pics

                          almost like a crime scene


                          and letting them dry, don't have a heat lamp, but this contractor lamp gets things warm as well


                          Comment


                            Paint is dry to the touch, but I am not a happy camper......

                            I see spots that are not shiny, but rather dull and matte, as though the shine was never there, it is painted, just not shiny.....probably my painting skills for sure, so tomorrow I will have to grab another can, and do some touch up I guess.....

                            Just not sure if I should hit all of it with some very fine paper, and spray everything, or, just the parts that don't have the shine to them, ahhhhh I hate it when I don't know enough, but I am learning......maybe I sprayed it on too thick or not thick enough, I just hope I can remedy the issue..........

                            Comment


                              I would just go over it with another coat. More in the areas where it needs more paint. You want to spray the entire wheel again. If not the paint can look different.

                              Comment


                                bakirkwold is right, you want to give a full coat, not just touch ups, sounds like what you have is "blushing" where you have got a patchy appearance, some shiny and some dull.
                                Main cause of that is humidity, if there is too much moisture in the air this is the result, you need to pick your day for spraying when the humidity is low, unfortunately you guys are in the dead of winter now, and I would imagine it is pretty damp this time of year.
                                I forget the figures now, but I seem to recall that you need to have a humidity lower than 75% or something, hopefully Pete will chip in and correct me, I remember he had to sit on his hands a day or two waiting for dry weather when he painted the 450. I think he became the best 7 day forecaster in Australia.
                                Another thing that will give you a dull finish, is the paint going on too dry, maybe try moving the can in a little closer, give the paint time to settle on the rim before it starts drying, give slightly wetter coats.
                                I know that it is a greater risk of runs, but such is the beast, it is a balancing act between a wet enough coat to lay down the shine and not too wet as to run. Just practice, you will get the hang of it, we have all sanded runs, plenty of them, so don't feel bad about it, welcome to the club with a membership of millions.
                                I recon it is easier to sand the odd run and touch up than fix a bad coat anyway.
                                Keep at it, it will come out well in the end.

                                Comment

                                Working...
                                X