Announcement
Collapse
No announcement yet.
GS450S neaten up
Collapse
X
-
 DannyMotor
 -
 wally
wally
Thank you for the kind words!
It is a real sense of accomplishment...I never managed to finish my 69 Ranchero - just too much of mammoth task, plus all the other personal reasons...
My rotors are black and though did cross my mind to just freshen them up a bit to match the new paint. I think I will do just that!
Forgot to mention I still have to put the grab rail on - only once I have aligned all the body panels.
Can't wait to ride her again!
Comment
-
 Soyanarchisto
 -
 wally
wally
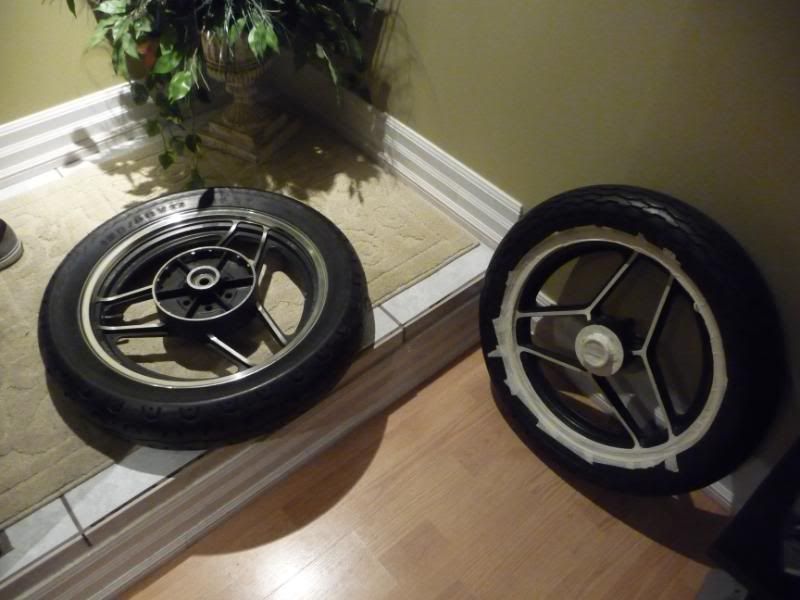
Thanx! Currently having the lip and spoke faces of the rear wheel polished - got tired of trying to get into the nooks and crannies - along with rear drum brake cover.
Looks like I went about it the wrong way.
Should have first got it polished, then taped off and painted, so it looks like I will have to redo the wheel painting. Guy showed me how to tape off properly and easily.
Now I know!
Ordered new carb boots for the cafe project and little cushions for the rear grab rail. Need to work on the tank emblems tonight.
Comment
-
 Soyanarchisto
 -
 wally
wally -
 GateKeeper
 -
 wally
wally -
 wally
wally
Parts fairy arrived today!
Albeit a very expensive fairy.. the misquoted me on the parts by not saying each, just a line saying "2x carb rubbers @ Rxxx" - no ea. at the end...
Busy fighting that one, but any case.
Got new intake boots and o-rings for the cafe project. Also bought the last 2 passenger rail cushions in South Africa it seems. Found GS450 being stripped around corner from me and 2 cushions look good, so I think I will take them.

Getting the rear wheel tomorrow, then I can start putting it all together! Will wait on the front wheel polishing for a month or so - no bucks right now...
Also have to find the electrical drain issue.
Then look at getting the other 450 up and running to see what the state is of the motor.
Comment
-
 wally
wally
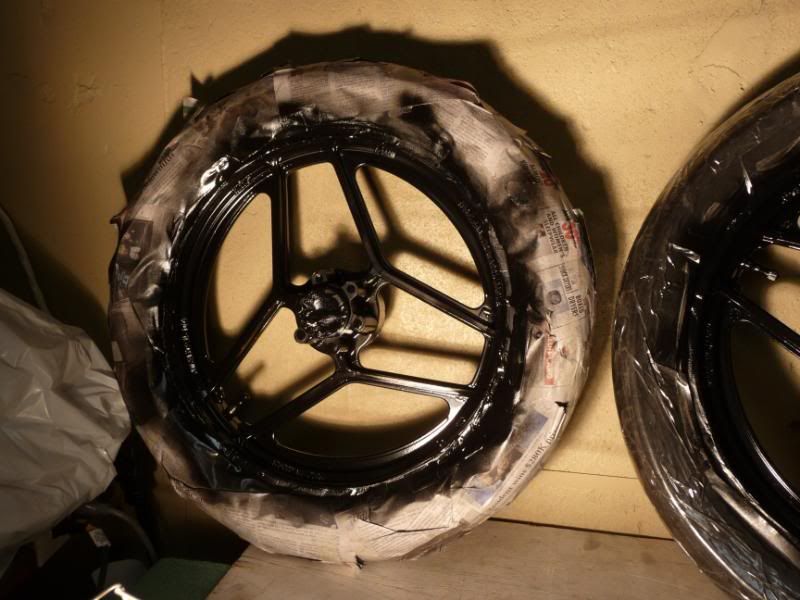
So this is for Soyanarchisto to show the taping process. Some of you might know this (or have better tips), but this was new to me.
Simple, but like any prepwork, takes some time to complete:
1. You will need:
Masking tape (various widths if you really want to) - I prefer painters tape which is less tacky than standard masking tape, but I was running low on it.
NT cutter/craft knife blade
Loads of patience and some time.
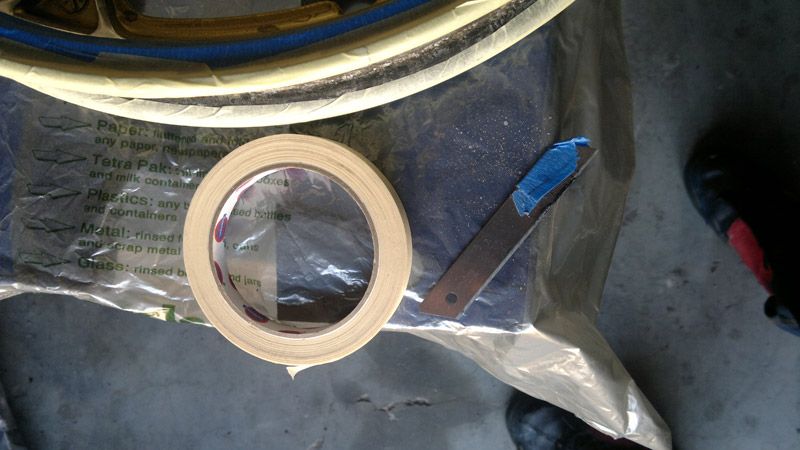
2. Taping:
I taped off the outer section first, then laid down tape over the polished spokes (thinner tape might cut down on your wastage).
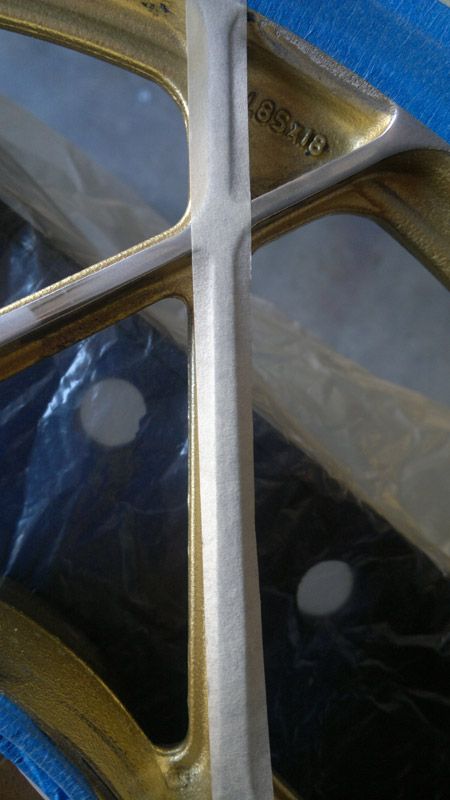
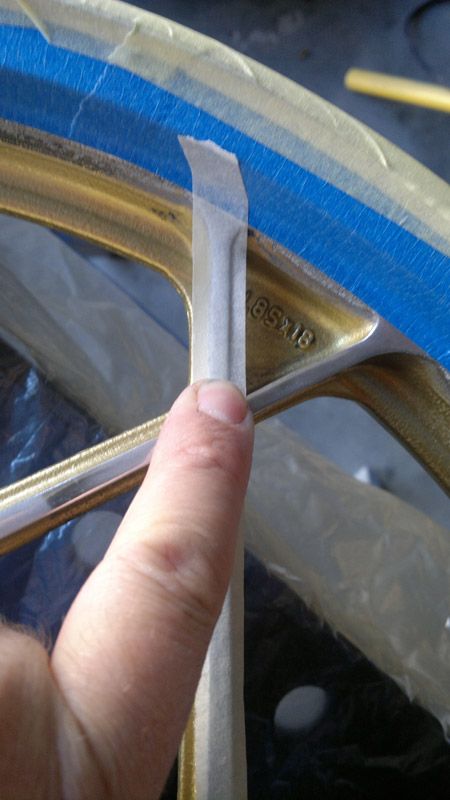
3. Rub down the tape:
So it sticks well - especially to the edges.
4. Trimming:
Using your NT cutter blade, drag it softly at an angle along the edge of the spoke a few times, until you see it scuffing through (it goes faster the more you progress).
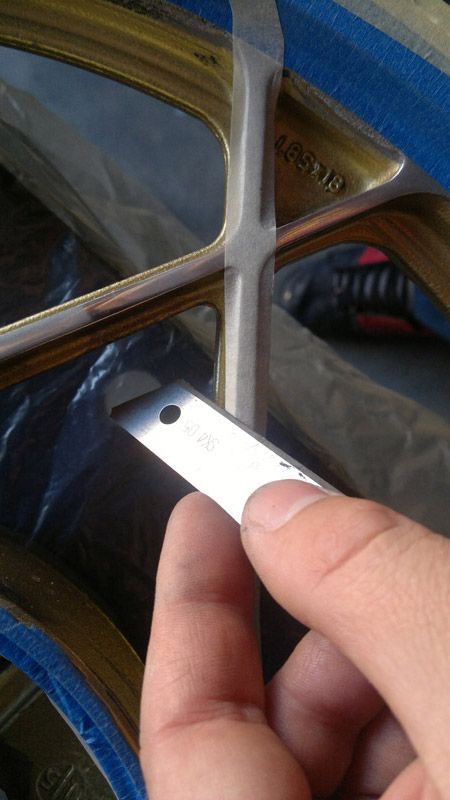
Pull tape off slowly
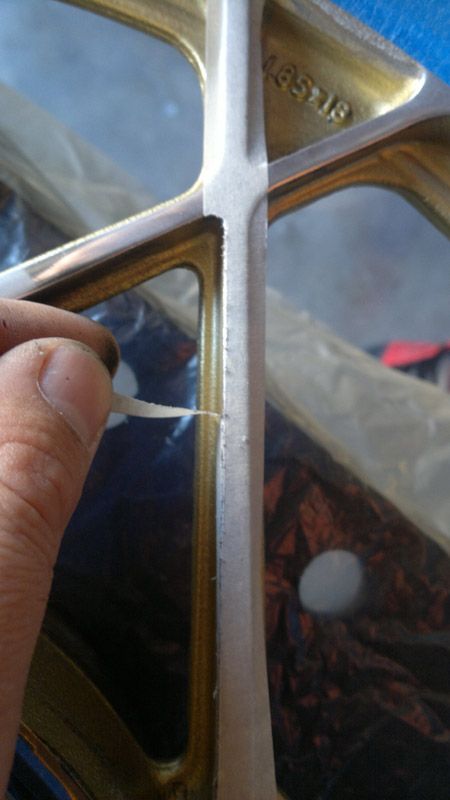
Perfectly masked spoke
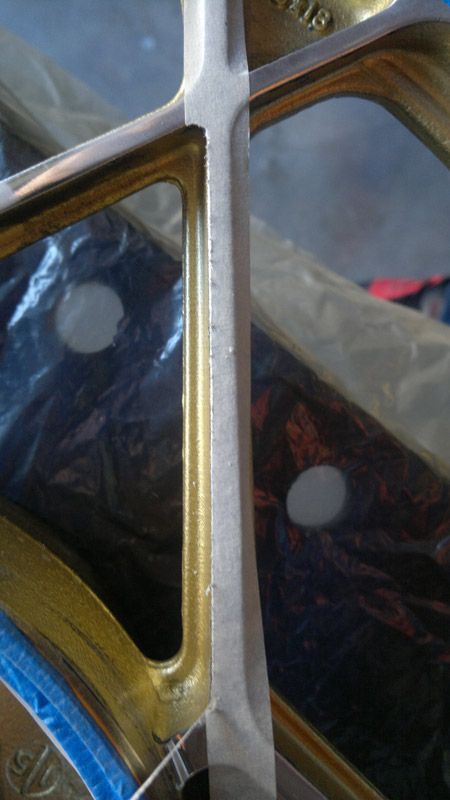
and not the way I went the first time by painted the spoke, sanding it down, trying to buff it back to shine!
That's how you learn, I suppose...
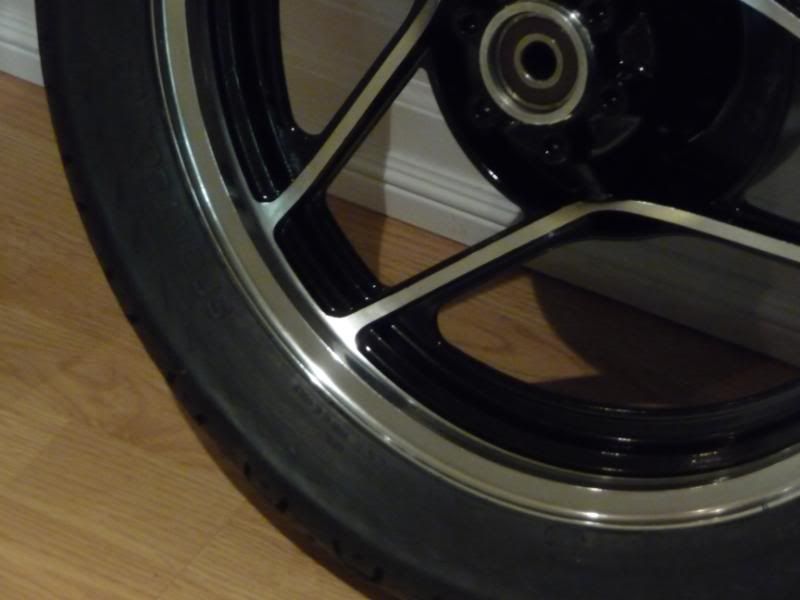
My other tape was crap and left some residue on the polished sections, so I need to wash it off and do quick buff at home:

Comment
-
 Soyanarchisto
 -
 GateKeeper
write up is great, the only thing I did differently, was I cut the tape using a brand new blade, instead of scoring it as your picture shows, I found if I got the right angle and the tape was pressed down really well, I was able to cut the excess, and ended up with a much cleaner edge
it's all trial and error, always do what works best for you.....

Comment
-
 wally
wally
Finally got the rear wheel back in place - getting the exhausts to co-operate was a mission, but they are on!
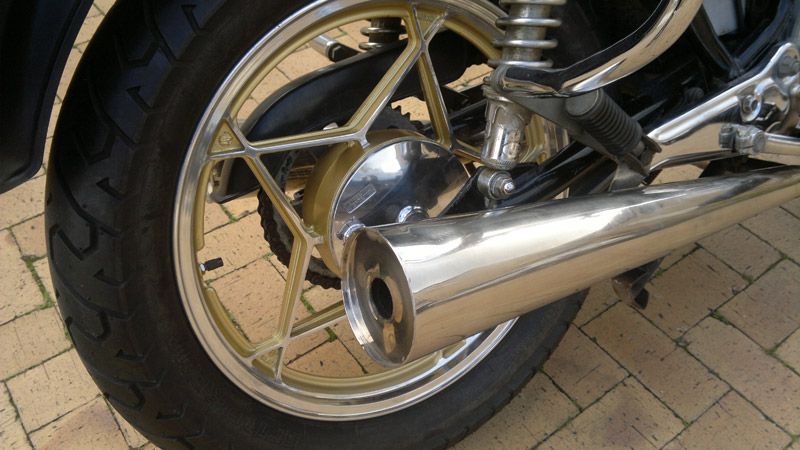
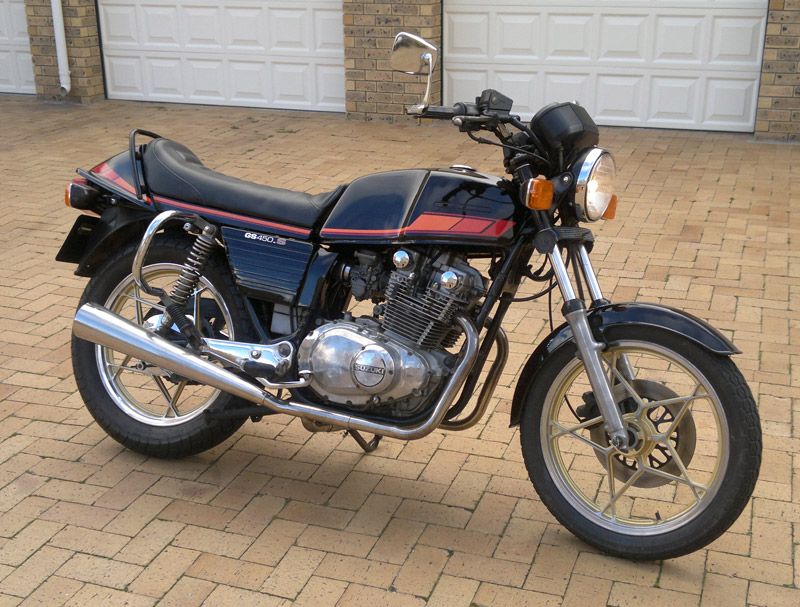
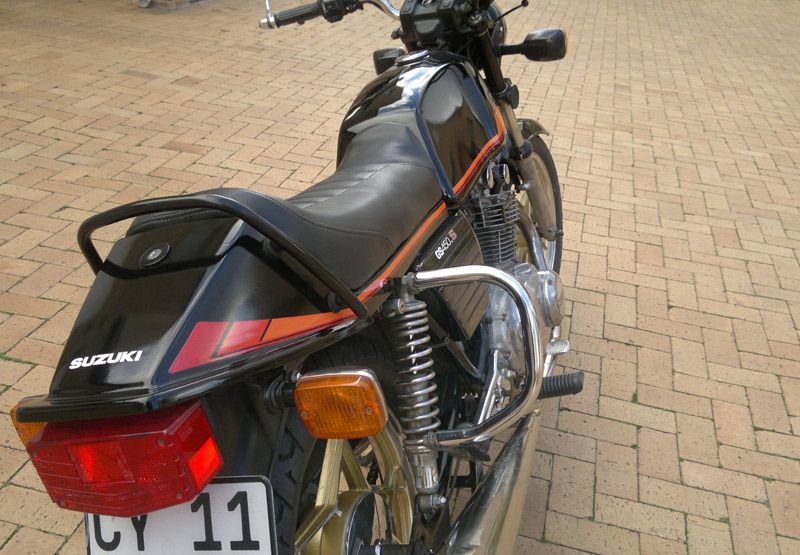
Busy with tank emblems and a few odds end ends to finish up.
Two big things are the oil leak on the cam tensioner:

And the electrical/battery issue. I have it on battery tender. Checked volts before turning ignition on and it was around 12.8V, switched on ignition and lights and it dropped to 11.5V or there about.
So I hope it might be a bad battery and not something else.
I also noticed the carb has no choke on it, which makes the cold starts really hard. Any way of adding that back? Not sure why it is off?
Comment
-
Looking real good Wally! Nice effort
As for the voltage drop with the key turning on, that could be due to dirty contacts in the igntion switch and kill switch.
I was losing 2 - 2.5v initially but after dismantling and cleaning them I only lose something like 0.5v now.1982 GS450E - The Wee Beastie
1984 GSX750S Katana 7/11 - Kit Kat - BOTM May 2020
sigpic
450 Refresh thread: https://www.thegsresources.com/_foru...-GS450-Refresh
Katana 7/11 thread: http://www.thegsresources.com/_forum...84-Katana-7-11
Comment
-
 wally
wally
Will check that out Pete, I had an issue earlier in the year where I rode to work and back (around 40-odd km round trip).
Stopped off at hardware store, came out and battery was dead. Also, when I put it on the battery tender after a run it takes 4+ hours to be fully charged and back on maintenance mode...
Also looking at ordering parts to fix cam tension leak soon.
Comment
.png)
Comment