Announcement

Collapse
No announcement yet.

'80 GS850 revamp

Collapse
X
 
  • Filter
  • Time
  • Show
Clear All
new posts

    '80 GS850 revamp

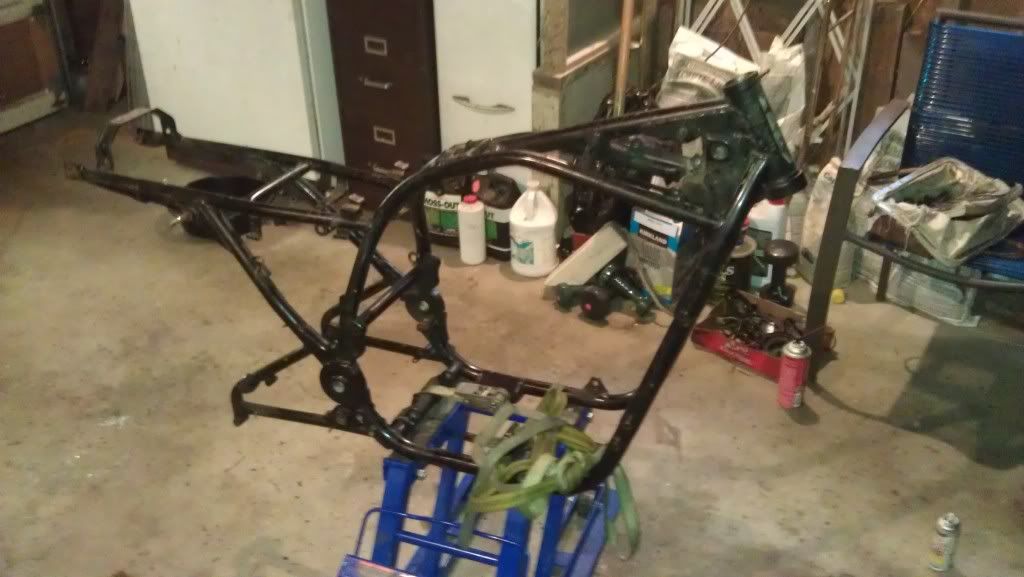
    I am at square one, on the verge of a project, the scope of which I have never ventured to, and more ready than ever to tackle it. I am committed, to say the least, as the bike is currently in hundreds of pieces. Don't worry, I used to do Legos.

    My hardware is meticulously labeled and sorted, but there remains much hardware to be purchased/replaced.

    The frame is at the powder coater, and should be ready in about a week. Many components are with the frame, and other parts need to go off for other services.

    I expect this thread to be active for a little while as I piece her back together, so might I start with a few questions?
    1) The engine is out and separated into the head, block and crankcase components. I don't want to invest in the rest of the bike and neglect the heart; to what depth is mechanical investigation prudent? I would like to check the head, block and pistons for abnormal/excessive wear, and would like to take it to a professional for said service. will they tell me all I need to know? Or is even that overkill?
    2) I want to get rid of those awful screws of the covers, as the heads are largely stripped out anyway (not my fault, PO!!!). Can I use different (suitable) hardware, or must they remain awful Philips head?
    3) Looking for good tips on cleaning the bejeezus out of the engine components, any good recommendations?

    I expect this project to run for up to 3 months, so these are, no doubt, the first of many questions, and I promise I will keep those interested with photos of progress

    #2
    Originally posted by 46hand View Post
    1) The engine is out and separated into the head, block and crankcase components. I don't want to invest in the rest of the bike and neglect the heart; to what depth is mechanical investigation prudent? I would like to check the head, block and pistons for abnormal/excessive wear, and would like to take it to a professional for said service. will they tell me all I need to know? Or is even that overkill?

    If you've already got the engine in pieces you can do the following. Check for any wear/heat/scoring in your cam journals and on the lobes. Check for blow-by of the piston rings, any scoring/rubbing on the piston skirts or the cylinder sleeves.

    Check valves for color. Should be nice and brown on all the intakes, and a smooth coating of black on all the exhaust.

    Other than that it's all about specs. Ring gap, tappet/shim gap, cam chain stretch, chain tensioner adjustment, and compression testing. Also, checking the head deck for warp.

    2) I want to get rid of those awful screws of the covers, as the heads are largely stripped out anyway (not my fault, PO!!!). Can I use different (suitable) hardware, or must they remain awful Philips head?

    Most people doing a restore change these bolts. Stainless Steel Allen-head bolts are the way to go. They're extremely hard to strip and won't corrode in the threads. Slap a little anti-seize on there and you'll be good to go! Make sure to take your old hardware with you, especially on the chain case (some long bolts there) and the clutch cover has a couple odd-ball long ones too. You can get away without a washer under them too.

    3) Looking for good tips on cleaning the bejeezus out of the engine components, any good recommendations?

    Cheap way: 2 gallons of "simple green" or "power purple" and start spraying the hell out of it... then power wash... recommendation: get boat-plugs / expandable rubber bungs for the intake and exhaust holes.

    Best way: Soda-blasting. Same deal with plugging the holes though. Soda blaster head, small compressor and a bag of non-food-grade soda should run you about $200... but you'll use it for EVERYTHING you want to strip.

    See above answers in red:

    Looks like you're going to have fun! I just finished my frame and motor... and still wanting to tweak things before I go further with installation.

    Keep us posted!

    Comment


      #3
      Originally posted by 46hand View Post
      Don't worry, I used to do Legos.
      The bike should be in good hands then.
      We will require pictures.
      http://img.photobucket.com/albums/v5...tatesMap-1.jpg

      Life is too short to ride an L.

      Comment


        #4
        Sounds like you are headed in the right direction. Can't wait to see how the lego bike turns out. (Did you build space ships or motorcycles out of Legos?)

        With the case bolts, I replaced mine with stainless alen/socket head bolts. Z1 Enterprises sells sets. I would recommend them. BUT only depending on how many are stripped. The bolts are metric M6's. I had two that were stripped and have not been able to locate any M7 stainless bolts. Only a hex head bolt. Fortunately mine is on the bottom and can't be seen easily, but it works.

        I don't know about going up to an M8, but you can find those bolts in SS socket head pretty easily. You will also need a tap and die set.

        Comment


          #5
          Mr. Good Times, I built anything that could be constructed from Legos... Crowning achievement was the good ol' X-Wing. Other circumstances made it more impressive than it may sound...

          Mr Danny Motor, great answer!!!! I very much appreciate the time you put into it. I removed and documented all hardware in side covers, found them to be M6-1.0 x 20-65mm, in almost every size in between. I'm gonna check Fastenal for the SS Hex cap screws. Are the screws covering the tach sending unit (?) M5's. or is it just me? They certainly are larger than M4-0.70, but smaller than the M6-1.0...

          Glad I got into the engine!!!!
          Piston inspection revealed major faults in #2, without taking it to a machine shop.

          Time to buy a good dial caliper. Any recommendations?

          #2's rings are caked shut. #1's are 50% free. The crowns on 3/4 look more used, I think I wasn't getting very good combustion out of 1/2...

          As promised (Mr tkent02 especially), there are pics of the pistons. The frame is still at the powder coaters...
          I don't want to clutter this post with all of these, so the link to the piston pics is
          Store your photos and videos online with secure storage from Photobucket. Available on iOS, Android and desktop. Securely backup your memories and sign up today!


          Comin' right along!!!

          Comment


            #6
            Your pistons indicate the classic bad petcock washing #2 syndrome
            1978 GS 1000 (since new)
            1979 GS 1000 (The Fridge, superbike replica project)
            1978 GS 1000 (parts)
            1981 GS 850 (anyone want a project?)
            1981 GPZ 550 (backroad screamer)
            1970 450 Mk IIID (THUMP!)
            2007 DRz 400S
            1999 ATK 490ES
            1994 DR 350SES

            Comment


              #7
              What exactly does that mean? I was thinking about possibly replacing the petcock, is there anything else I should do to rectify the situation?

              Comment


                #8
                Fuel leaks down through the failed petcock diaphragm into the vacuum line, then into #2 cylinder and causes problems. A new petcock every thirty years or so will fix it.
                Why did you take the engine apart, was there something wrong with it?
                http://img.photobucket.com/albums/v5...tatesMap-1.jpg

                Life is too short to ride an L.

                Comment


                  #9
                  Lots of leaking oil... Going to do a set of gaskets, and was concerned about my compression, so I decided to investigate.

                  Comment

                  Working...
                  X