Announcement

Collapse
No announcement yet.

78 GS550 build

Collapse
X
 
  • Filter
  • Time
  • Show
Clear All
new posts

    78 GS550 build

    Hey gsresources

    I bought a 1978 gs550 that was beat to hell - a PO had started converting it to a cafe racer by chopping the stock 4-2 exhaust right past the junction and then lost inspiration and left it sitting in his Pacific Northwest lawn for 6 years.

    I immediately disassembled everything and assessed the damage:
    -Rust, rust everywhere
    -Gas tank had a little rust on the inside
    -Wiring harness was basically useless
    -No clutch lever or cable
    -Throttle cables were rusted beyond use
    -Front and back wheels were rusty
    -Fork tubes were slightly pitted

    So far I have cut off the extra seat tabs, Kreme'd the gas tank, tried my hand at making a fiberglass cafe seat (poorly), thrown on clubmans, attached rearsets from Dime City, put on the front end from a donor 1980 gs1100 and the swingarm from it as well

    I have no idea if it runs, it turns over just fine with the kick starter but haven't gotten a battery or hooked up the fuel system to test it - hopefully next weekend I'll get that done.

    Does anyone know where I can get roller bearings to fit the new gs1100 front end? the stem is the exact same length and width as on the gs550 triple tree. The top roller bearing is a perfect fit but the lower bearing is slightly larger on the gs1100 so it will not fit the head tube on the gs550 frame. Right now I have the new front end in the frame but there is no lower bearing.

    Also, Does anyone know or have any input on what I should do to get the gs1100 swingarm to fit the gs550 frame? It is on the frame now, but the bolt that holds the swingarm on is about 1/8" wider on the gs1100 than the 550, so the swingarm has a little side to side instability. The width of the swingarm where it attaches to the frame is the same on both, but the through bolt is larger on the 1100. I want to use the 1100 swingarm because it is made of aluminum instead of the rusty steel one from the 550, and fits the alloy wheel and disk brake from the 550 (an upgrade from the spoked drum brake wheel on the 550)
    Last edited by Guest; 07-22-2012, 11:56 PM.

    #2
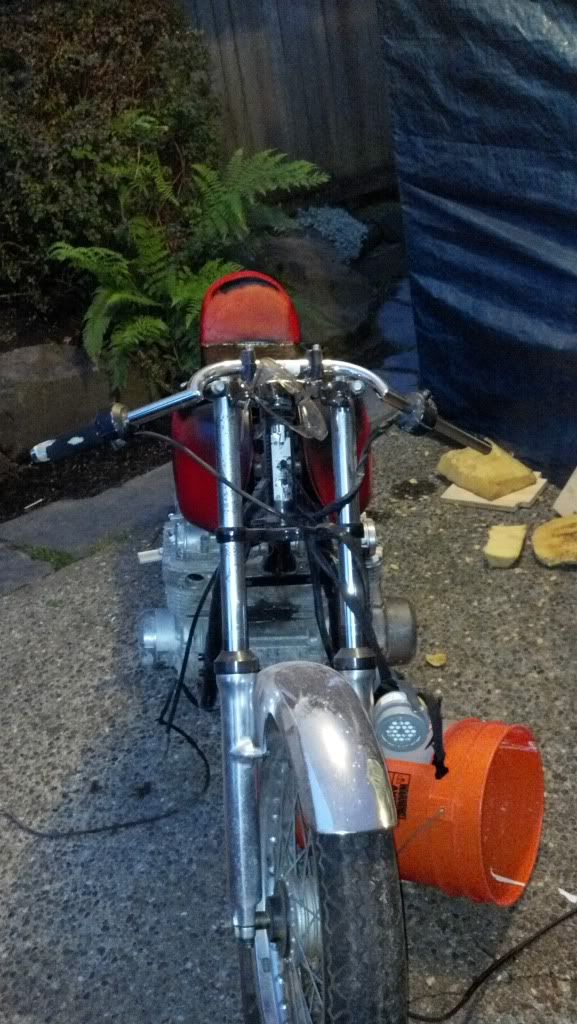
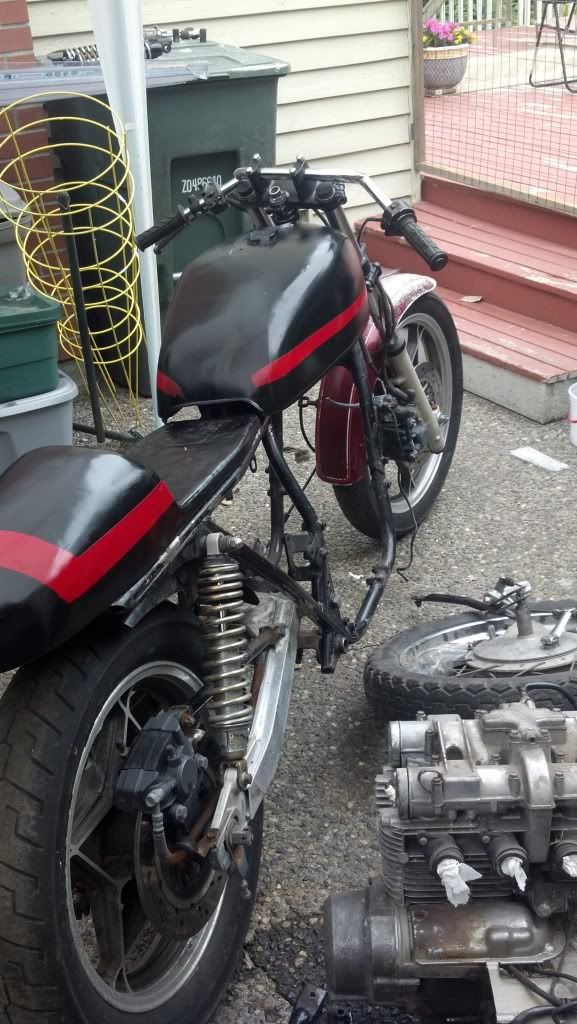
    Here are some pics


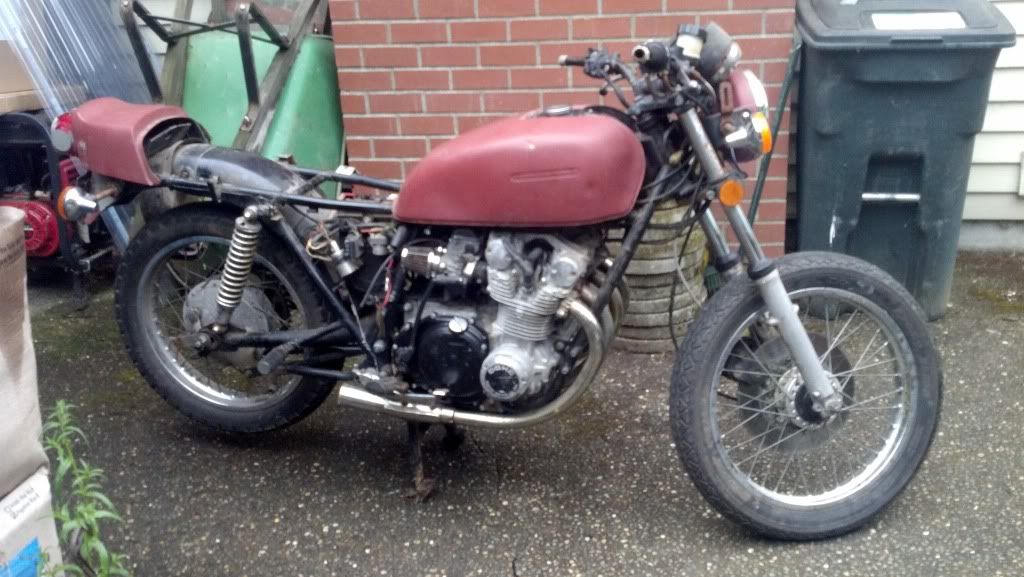
    This is what it looked like when I first brought it home, check out the sweet exhaust


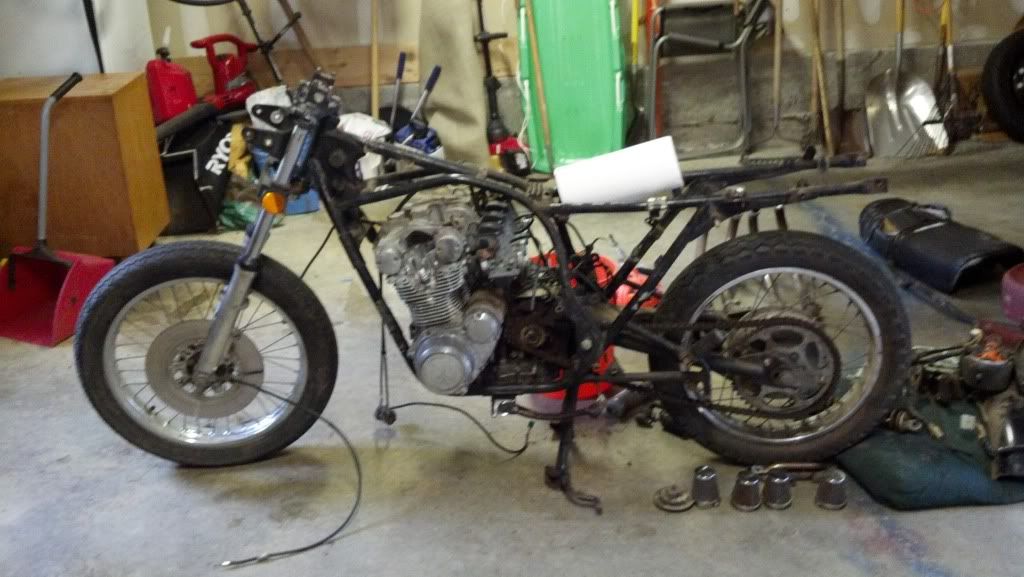
    Started taking stuff off


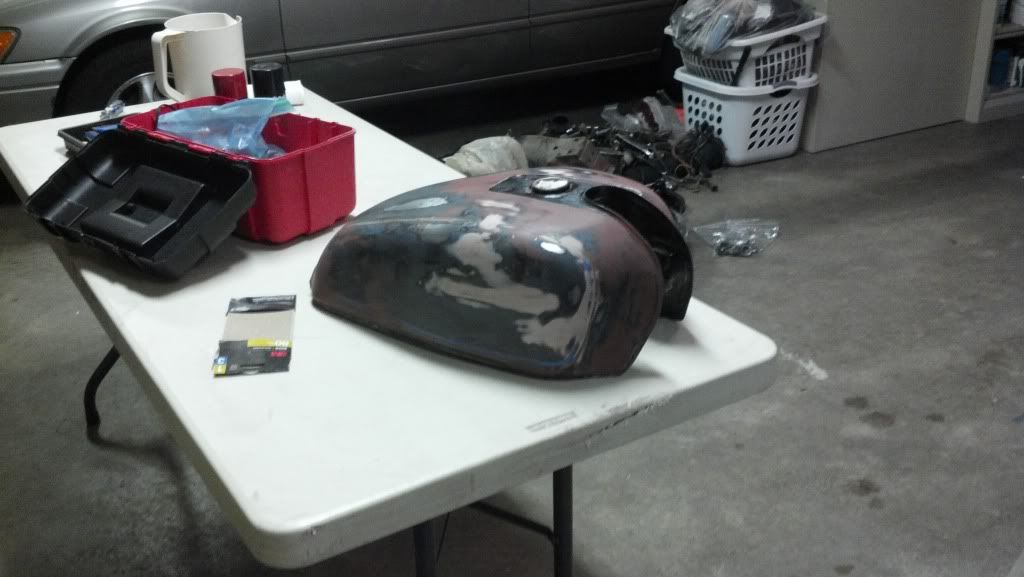
    Bondo is your friend


    Here's what my amazing skills with fiberglass produced - This will definitely have to get replaced down the road


    It's hard to tell in the picture, but there is quite a bit of pitting on the right side inner tube in between the upper and lower triple tree - and the fork seals are leaking a bit


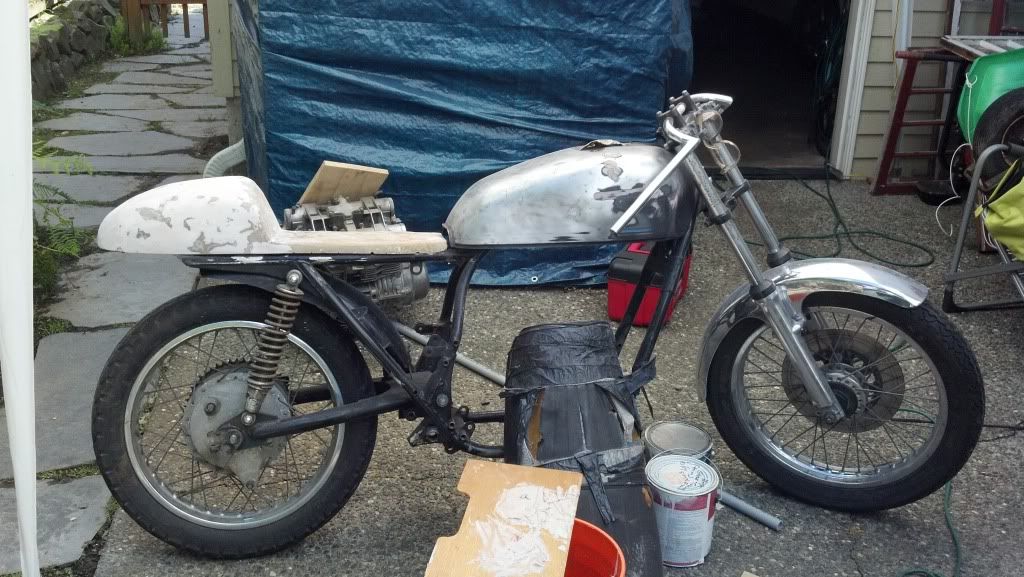
    And finally, this is what it looks like now with the new front end and swingarm on, and a sweet and very premature paint job (This is gonna be a BA Bike, reminiscent of the BA Van from the A-team that mr. T drives)


    I forgot to mention that I am a total noob to motorcycles and my only mechanical experience has been with single cylinder .15cc remote controlled cars and lawn mowers. If a mechanic is someone who fixes stuff, I am what you would call a brokechanic, I break stuff -_______-

    Comment


      #3
      For the front end bearings go to , http://www.allballsracing.com/index.php/forkconversion

      Then for the swinger you need to drill your frame out to 16mm I believe it is, to fit the larger swingarm pivot bolt. But do so at your own risk, you can ruin the frame if not done correctly....

      Do some site searches...thats how I have found the info .....

      Comment


        #4
        Thanks for the info, ill try to drill out the frame for the larger bolt

        Comment


          #5
          Double check that 16mm, as I am not completely positive. I haven't physically measured mine yet...just going from memory...and at 45, it's not the best anymore...LOL...

          Comment


            #6
            I used a 5/8" regular HSS drill bit with a power drill and a ton of lube - which is a little tight, but since I used a hand drill instead of a press I drilled the holes a little crooked anyways so when I straightened the holes I ended up widening them enough for the pivot bolt to fit.

            Comment


              #7
              I've decided that I am going to take a break from aesthetics and actually do some mechanical work. Does anybody out there have a colored wiring diagram? I have a black and white wiring diagram from the Clymer manual but it's really difficult to see/read

              Comment


                #8
                Question for those out there with some knowledge about incandescent to LED turn signal conversions: What relay do I need to use to compensate for the lower amperage of the new turn signals?

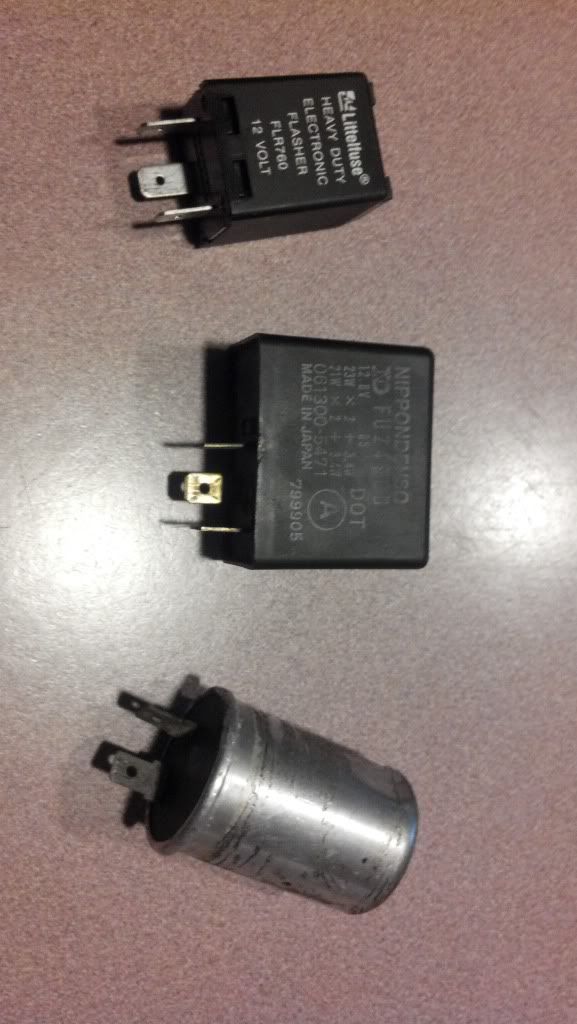
                The old flasher is a NAPA 536 2 pole thermal flasher - I went to Oreillys and they gave me a 3 pole electronic flasher by littelfuse FLR760 which of course I can not get to work at all. No combination of grounding the third pin and connecting the other two yields any success. I have also tried a nippondenso FU249CD electronic relay from a 1980 gs1100 and can get the turn signals to stay lit in one combination and to give off a very brief single flash in another.

                Comment


                  #9
                  Really easy Electronic flasher.
                  Connect power and ground and it will flash no matter what is hooked up to the other lead.
                  Its more popular in regular automotive stores these days but definitely on E-bay


                  Like this http://www.ebay.ca/itm/3-Pin-CF13-El...item256ed60e45
                  Last edited by Mekanix; 07-30-2012, 12:55 AM.
                  Stephen.
                  1981 GSX540L "Frankintwin"
                  1989 GS500E Resto-mod .

                  400 mod thread
                  Photo's 1

                  Photos 2

                  Gs500 build thread
                  GS twin wiki

                  Comment


                    #10
                    Thanks Mekanix, I went ahead and got this motorcycle 2 pin electronic flasher

                    This Universal Electronic LED Flasher Relay for Motorcycle supports a 0.02-20 amp range and operates on 12 VDC. Eliminates the need for load resistors; turn signals will flash at a normal rate with or without LED bulbs. Check out our Vehicle Bulb Finder.


                    It seems like a lot of people on youtube have had success with this and I'll give it a shot since it's only $9 and so far I haven't had any luck with 3 pole electronic flashers

                    Comment


                      #11
                      I don't think the one you were using was the same electronic one I've seen. If it was, it would work as soon as anything was connected to the third leg. The two pin must be solid state for it to work with such low current.
                      Last edited by Mekanix; 07-31-2012, 12:00 AM.
                      Stephen.
                      1981 GSX540L "Frankintwin"
                      1989 GS500E Resto-mod .

                      400 mod thread
                      Photo's 1

                      Photos 2

                      Gs500 build thread
                      GS twin wiki

                      Comment


                        #12
                        I hope that relay I got will work Mekanix, it seems that a few people on youtube used it with success on their modern sport bikes to solve the hyper flash problem they were experiencing.

                        It should arrive this afternoon - We'll see if it works or not. In the mean time, I have gotten the starter to work and hit the engine with some White Bleche, which is tire cleaner that another user recommended (it works alright).

                        Does anyone have experience with Seattle Powder Coat? They quoted me $225 for the frame to be P/C'd gloss black but I have no idea if this is a competitive rate.

                        Comment


                          #13
                          I had my frame media blasted and powder coated for $200 by a place a little west of you in Sequim, so that price seems in the ballpark.

                          Comment


                            #14
                            The led flasher from superbrightleds is working now, there is no audible click but I don't think that's an issue. I also got the ignition system working so hopefully this weekend I'll get it running and I'll post a link to youtube

                            Thanks for all your help so far GS'ers

                            Comment


                              #15
                              I've been having some issues with running the engine so far - at first, I was missing the fuel line but managed to get it started by flooding the vacuum hose (whoops!) mistaking it for the fuel line. I finally got my hands on a proper fuel hose.

                              Then, the PO had rebuilt the carbs and never set the floats properly, so they were always closed. Finally, I checked the jets and o-rings to see if the PO had changed those as well. The main jet is a 95 and the pilot is a 50. From what I have been able to find on Basscliff's website the stock jets are 80 and 15, respectively - so the PO must have put the larger jets in.

                              The problem is that the engine will still only run normally with the choke almost all the way on. To address the problem of the chopped exhaust and pod filters instead of the stock setup, I put duct tape over the pods to restrict some airflow and clamped the spout of a soda can over the end of each chopped muffler.

                              Edit: When I start to open the choke (let more air in), the motor starts to rev higher and higher until it seems out of control. It isn't dieseling, it turns off immediately as soon as I flip the kill switch. The bike also idles easily around 1200 rpm with full to almost full choke and no throttle.

                              I also bought some cheap ass Jones Exhaust glasspacks off ebay that I can hopefully use to add a little backpressure and growl. Make fun all you want
                              Last edited by Guest; 08-16-2012, 11:18 PM.

                              Comment

                              Working...
                              X