Did you ever feel like you were getting in over your head? I do!
Announcement
Collapse
No announcement yet.
New GS1100 G Restoration Project. Rebuilding my Dad's bike
Collapse
X
-
Blooming heck you guys. This is getting serious. Those butterfly screws are very shallow. Can't use an impact. Now I need to buy JIS crossheaded screwdrivers AND I have to source butterfly O rings. I don't think even CycleORings has them.
Did you ever feel like you were getting in over your head? I do!Richard
sigpic
GS1150 EF bought Jun 2015
GS1150 ES bought Mar 2014: ES Makeover Thread AND blog: Go to the Blog
GS1100 G (2) bought Aug 2013: Road Runner Project Thread AND blog: Go to the Blog
GS1100 G (1) Dad bought new 1985 (in rebuild) see: Dad's GS1100 G Rebuild AND blog: Go to the Blog
Previously owned: Suzuki GS750 EF (Canada), Suzuki GS750 (UK)(Avatar circa 1977), Yamaha XT500, Suzuki T500, Honda XL125, Garelli 50
Join the United Kingdom (UK) Suzuki GS Facebook Group here
-
I don't think I'd tackle taking the butterfly's apart. Tried it on my 650 and gave up. That spring does look like it needs attention. What do I know. I'm not that experienced.
cgsigpic
83 GS1100g
2006 Triumph Sprint ST 1050
Ohhhh!........Torque sweet Temptress.........always whispering.... a murmuring Siren
Comment
-
Last edited by londonboards; 02-12-2013, 05:14 PM.Richard
sigpic
GS1150 EF bought Jun 2015
GS1150 ES bought Mar 2014: ES Makeover Thread AND blog: Go to the Blog
GS1100 G (2) bought Aug 2013: Road Runner Project Thread AND blog: Go to the Blog
GS1100 G (1) Dad bought new 1985 (in rebuild) see: Dad's GS1100 G Rebuild AND blog: Go to the Blog
Previously owned: Suzuki GS750 EF (Canada), Suzuki GS750 (UK)(Avatar circa 1977), Yamaha XT500, Suzuki T500, Honda XL125, Garelli 50
Join the United Kingdom (UK) Suzuki GS Facebook Group here
Comment
-
Day 176 Carb Breakdown (Part 3)
It was suggested that I should take out the butterfly valves on the carbs. Something I didn't really want to do. Looked like it was beyond my wrenching capabilities. I gave it a go nevertheless. And another mountain has been scaled. I just need one victory every day and it keeps me going.
I just wonder why all the carb strip down tutorials out there don't do this part. Any ideas?
See My GS1100G Blog - Carb Breakdown part 3
This is what I did:

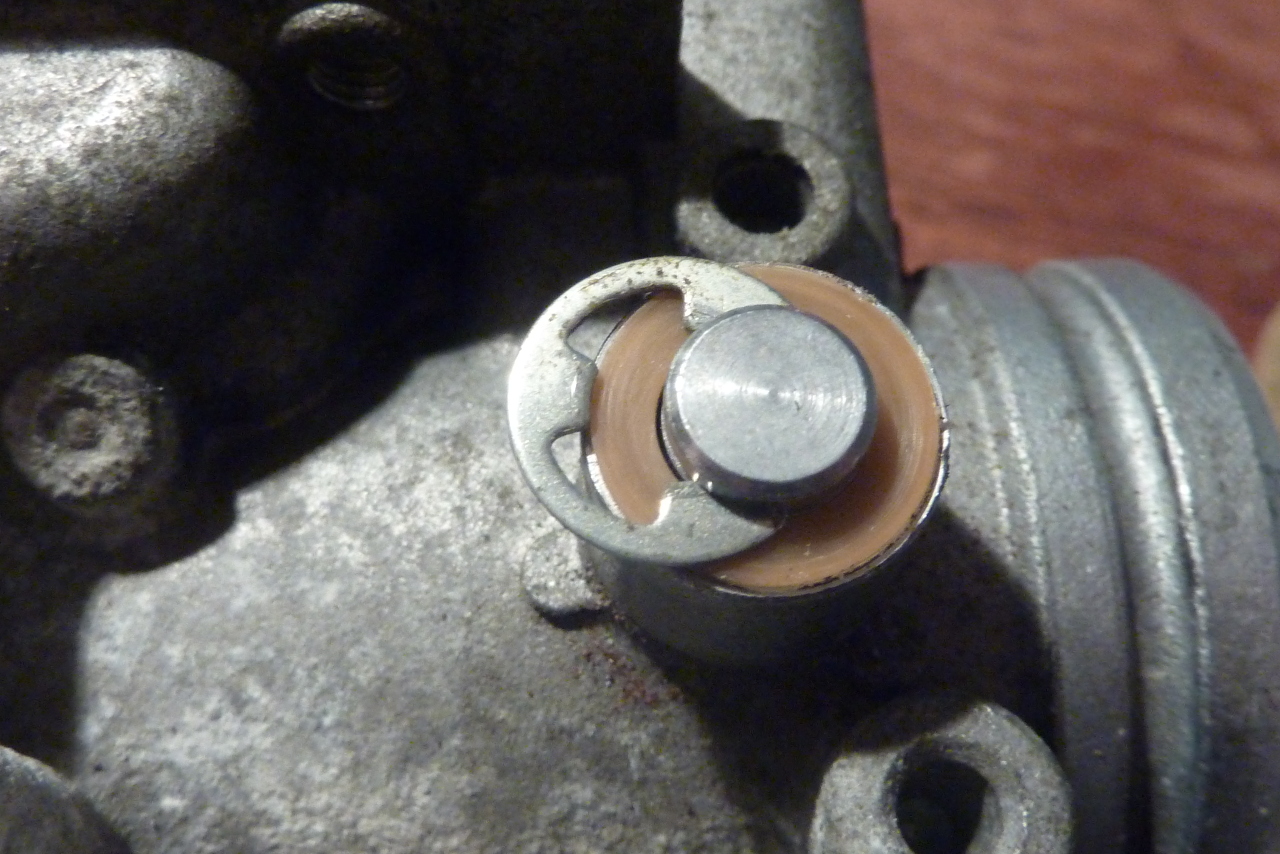
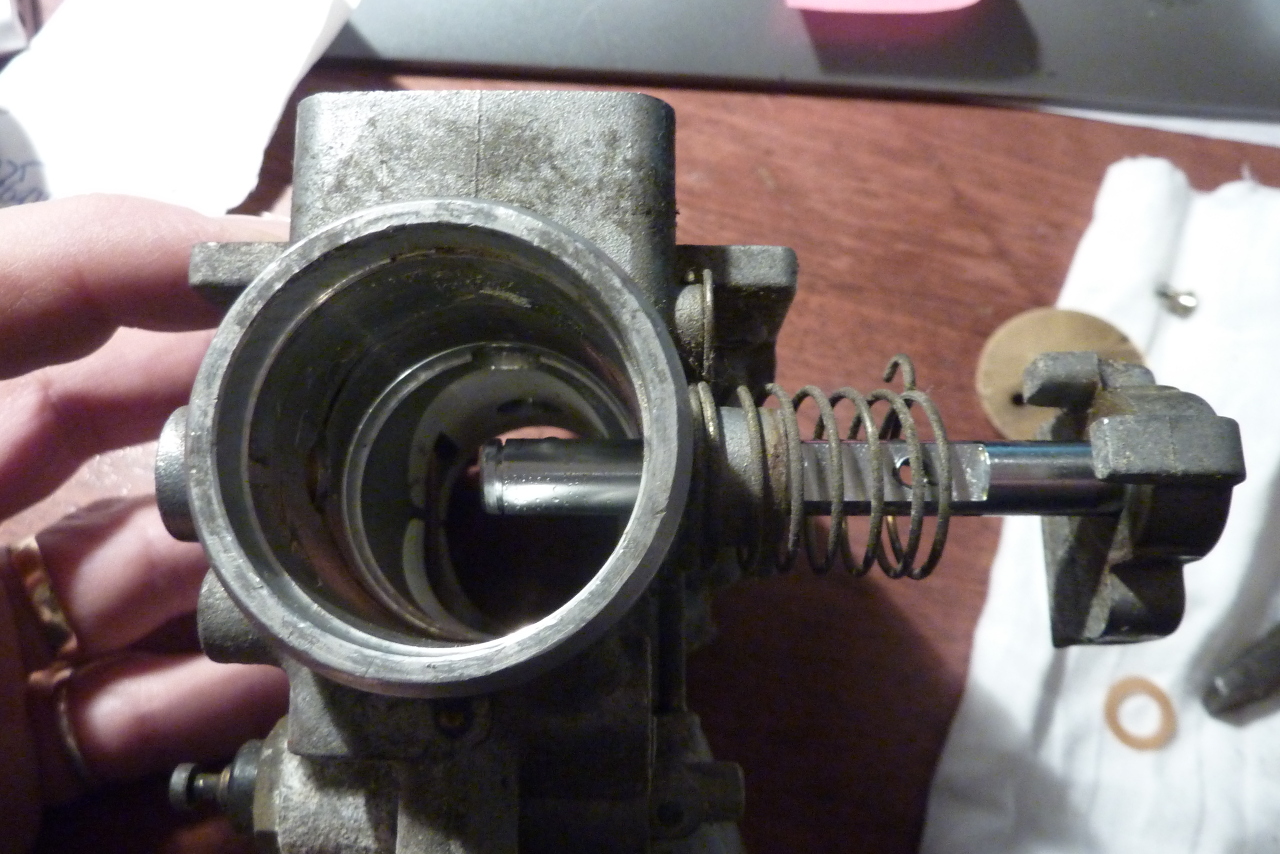
Then you can get the seals out:

I also discovered O rings under the choke assembly nuts. No one mentions these anywhere. Mine are going to be replaced:
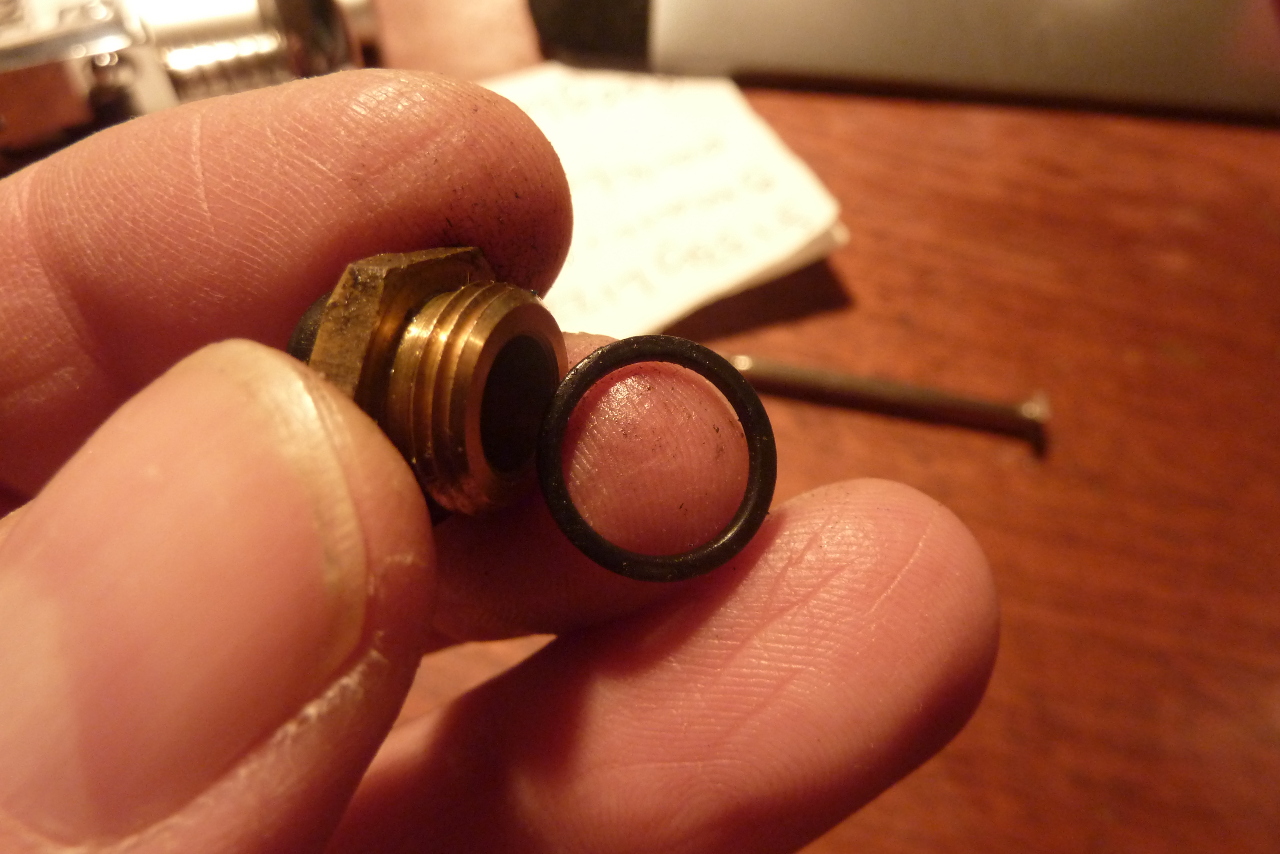
GreetingsRichard
sigpic
GS1150 EF bought Jun 2015
GS1150 ES bought Mar 2014: ES Makeover Thread AND blog: Go to the Blog
GS1100 G (2) bought Aug 2013: Road Runner Project Thread AND blog: Go to the Blog
GS1100 G (1) Dad bought new 1985 (in rebuild) see: Dad's GS1100 G Rebuild AND blog: Go to the Blog
Previously owned: Suzuki GS750 EF (Canada), Suzuki GS750 (UK)(Avatar circa 1977), Yamaha XT500, Suzuki T500, Honda XL125, Garelli 50
Join the United Kingdom (UK) Suzuki GS Facebook Group here
Comment
-
There's more fastener damage than just for changing jets and the jets themselves. If a shop did that type of work, they wouldn't be in business long. Or maybe shouldn't be in business long. Butchers.Originally posted by londonboards View Post
The only logical explanation is that the shop that serviced the bike (in Burlington, Ontario) must have, at some stage, needed to clean the carbs or change the jets.1983 GS1100E
Comment
-
Day 179 Carburetor Break Down Part 4
I was a little too quick to think that getting all the butterflies out would be as easy as it was getting the first one out. Pride before a fall. Carbs 1 and 4 are the easy ones with the cap and circlip. Carb no. 3 has a nut on the end of the butterfly spindle with a bent over washer holding it tight. But carb no. 2 is another matter.
See My GS1100G Blog - Carburetor Break Down Part 4
This is carb no. 3:

It has a nut with a bent over washer. I should be able to manage that:

But carb no. 2 is more problematic:
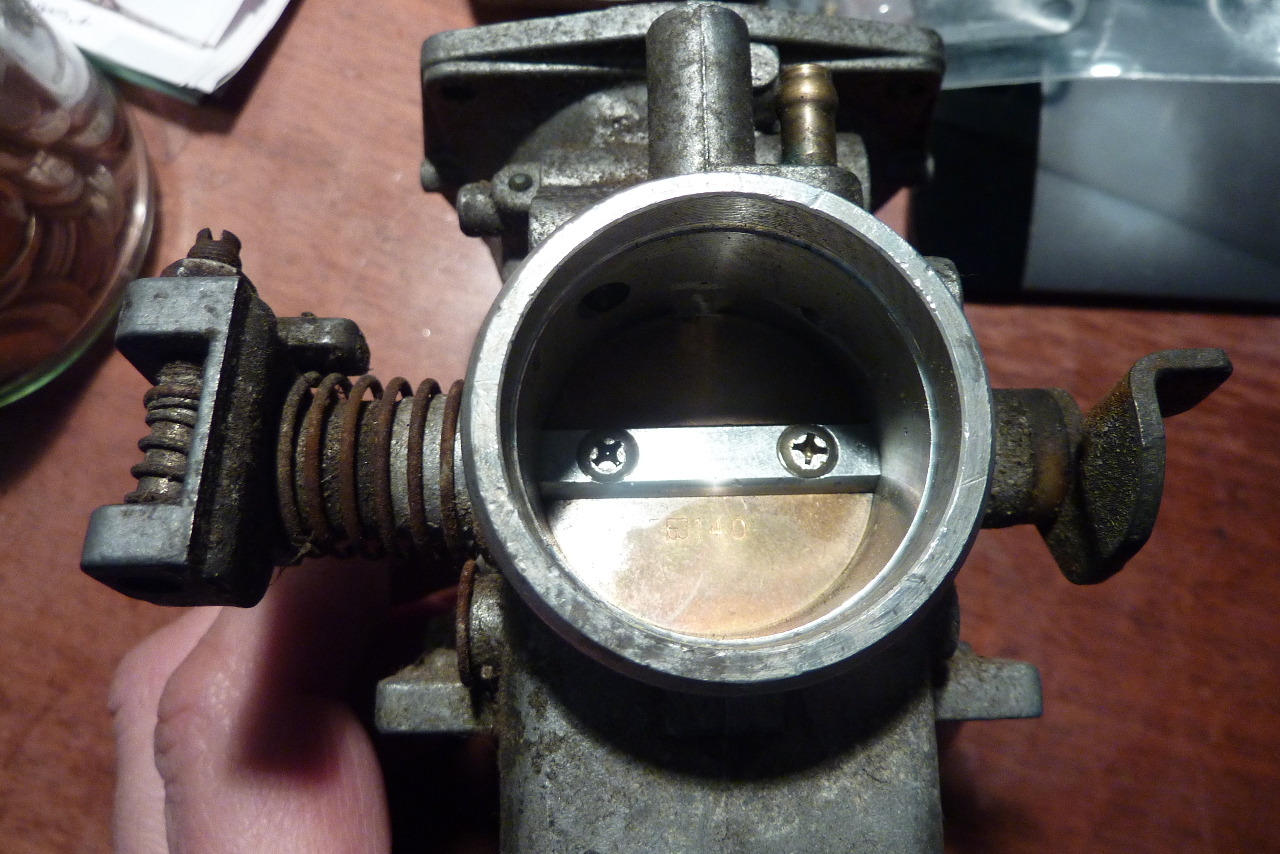
You can't get this end off:
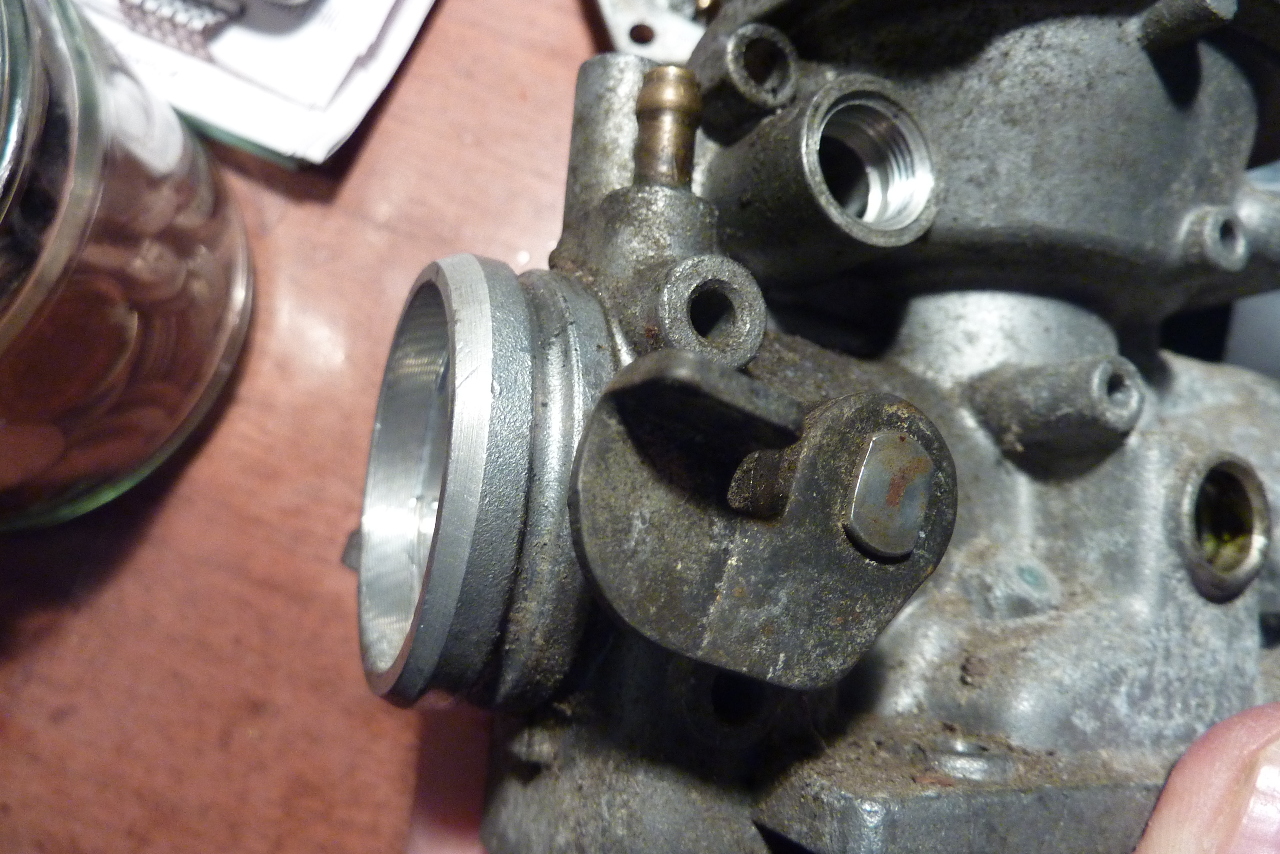
And there just has to be some trick to getting this off:

Anyone have any ideas?
Edit: Don't answer that please. I have just discovered the answer and it looks like the forum is very divided about removing butterflies. Some say it is straightforward, other say there is no need. I have a need to get my parts clean and I have started the job so there is no turning back for me. I also have all the seals on order.
If you are interested in the debate, read this old thread (go at least three quarters of the way down the first page which is where the debate about butterflies starts):
I agree this is a "do not do this at home children" moment. I have however (don't tell anyone) got a complete set of CV carbs as spares should the worst happen.
GreetingsLast edited by londonboards; 02-13-2013, 05:26 PM.Richard
sigpic
GS1150 EF bought Jun 2015
GS1150 ES bought Mar 2014: ES Makeover Thread AND blog: Go to the Blog
GS1100 G (2) bought Aug 2013: Road Runner Project Thread AND blog: Go to the Blog
GS1100 G (1) Dad bought new 1985 (in rebuild) see: Dad's GS1100 G Rebuild AND blog: Go to the Blog
Previously owned: Suzuki GS750 EF (Canada), Suzuki GS750 (UK)(Avatar circa 1977), Yamaha XT500, Suzuki T500, Honda XL125, Garelli 50
Join the United Kingdom (UK) Suzuki GS Facebook Group here
Comment
-
i think "tutorials" dont mention disasembling buterflies because as you have discovered it can be a tedious job ... but it's a proper way to do it if you want to eliminate all sources of a potential leak further down the track
small cross head buterfly screws are availavle and so is the thread lock fluid (such as loctite) so "no prob" really GS850GT
Comment
-
i think you'll also find that the gs bikes found in the US have typically done a lot less milegae then the gs bikes found elsewhere (SA, NZ, UK, OZ, EU...) so these moving parts dont get as much wear hence most people on this forum (being in the US) dont consider it a likely problem.
it's just a theory but i have observed it in relation to some other parts that are on the forum typically expected to be "OK" - such as bottom end or wheel or steering bearings, or valve stems diameter, etc
This may well be so when the bike's done say 20-50k miles but once the bike has done 100k miles or more you just cant take these things for granted...
my carbs have leaked on those very buterfly shaft seals (the two outermost on the carb rack) GS850GT
Comment
-
Day 182 Carburetor Break Down Part 5
This carb break down malarky just goes on and on. But there are so many parts. When I have finished I am going to count every single part. Guess now how many parts you think there are in a complete set.
I am emotionally drained today. It was hard work and I had some disasters and some victories.
See: My GS1100G Blog - Carb Break Down Part 5
I had a major problem with "nasty" screw

which needed Dremeling

and then it snapped off once

then twice
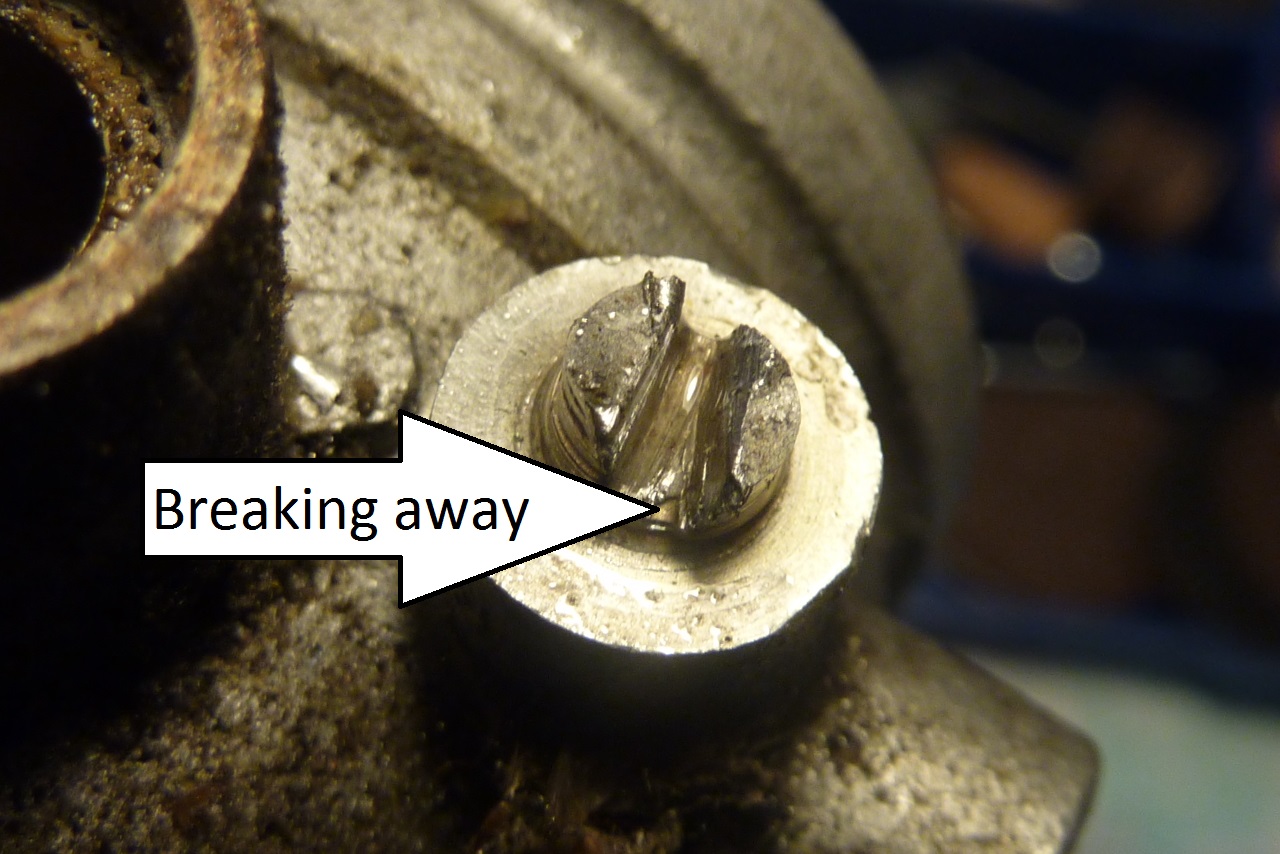
then I drilled it out
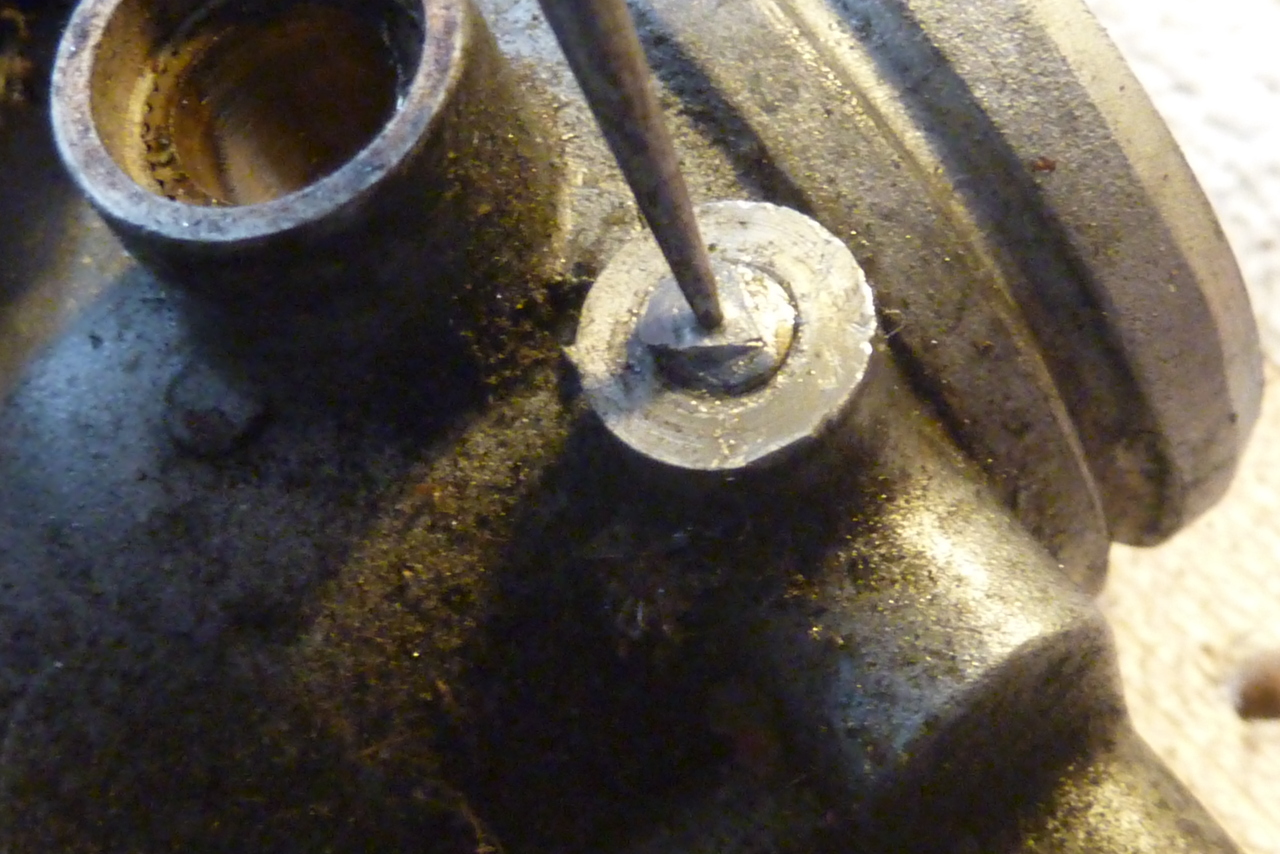
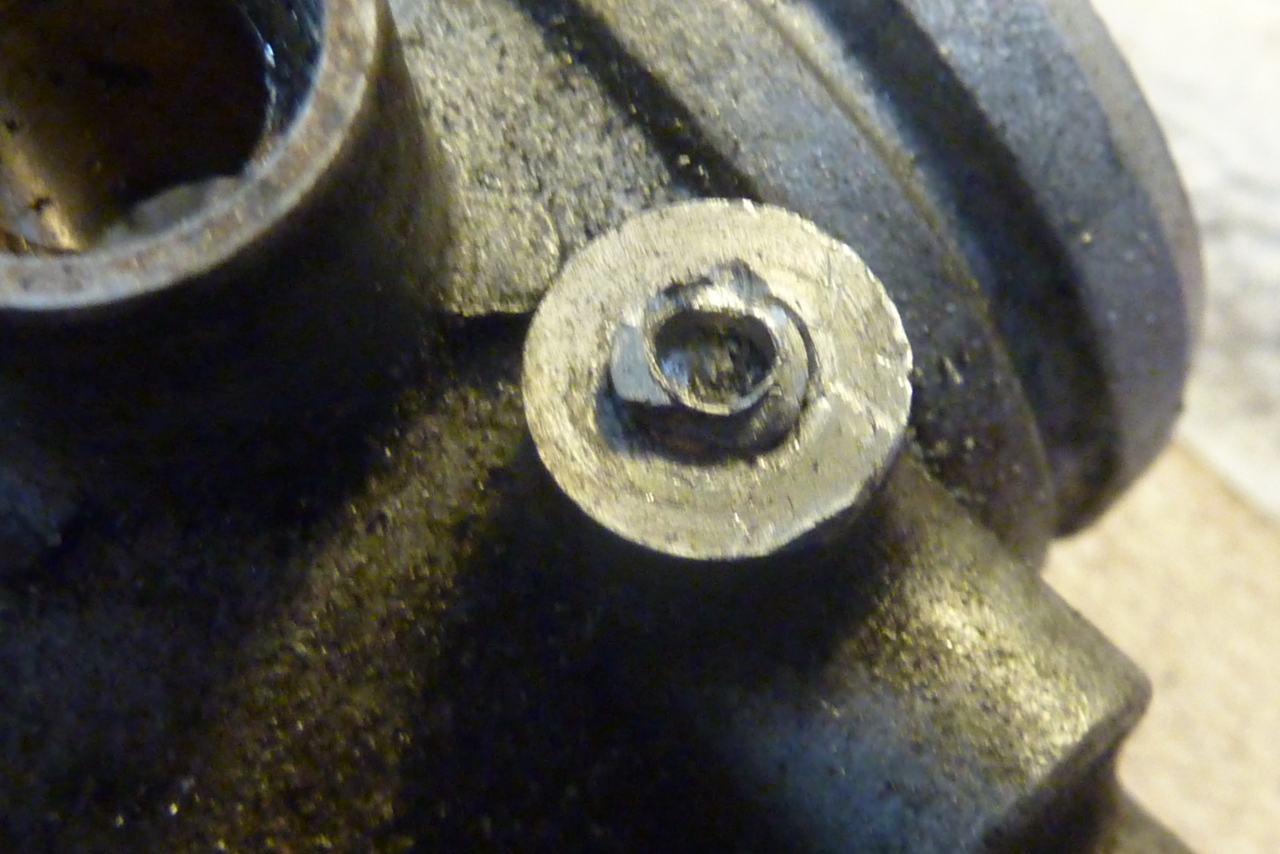

but I went too far and drilled straight through the carb body

I got it all out though


GreetingsLast edited by londonboards; 02-16-2013, 03:31 PM.Richard
sigpic
GS1150 EF bought Jun 2015
GS1150 ES bought Mar 2014: ES Makeover Thread AND blog: Go to the Blog
GS1100 G (2) bought Aug 2013: Road Runner Project Thread AND blog: Go to the Blog
GS1100 G (1) Dad bought new 1985 (in rebuild) see: Dad's GS1100 G Rebuild AND blog: Go to the Blog
Previously owned: Suzuki GS750 EF (Canada), Suzuki GS750 (UK)(Avatar circa 1977), Yamaha XT500, Suzuki T500, Honda XL125, Garelli 50
Join the United Kingdom (UK) Suzuki GS Facebook Group here
Comment
-
I also had to drill out the pilot air jet on this no.3 carb

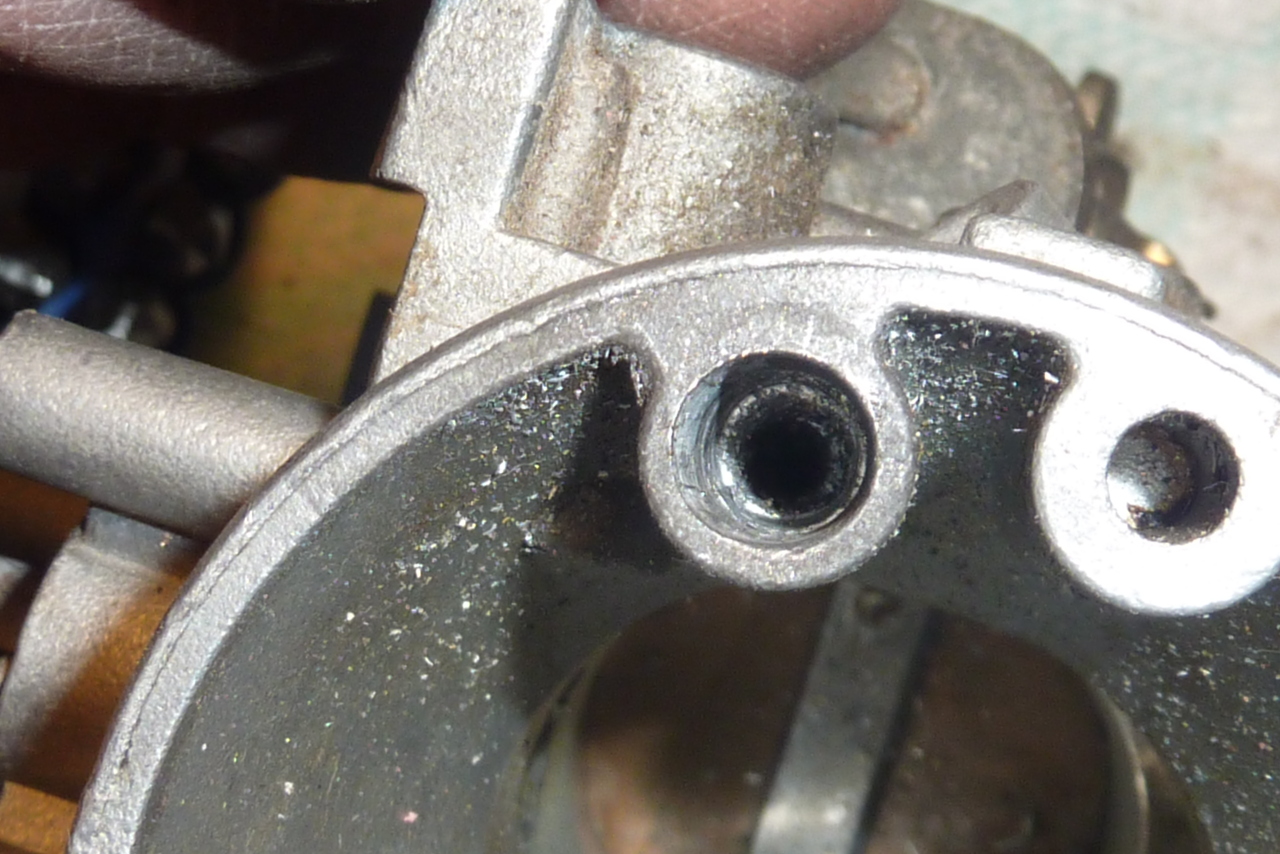
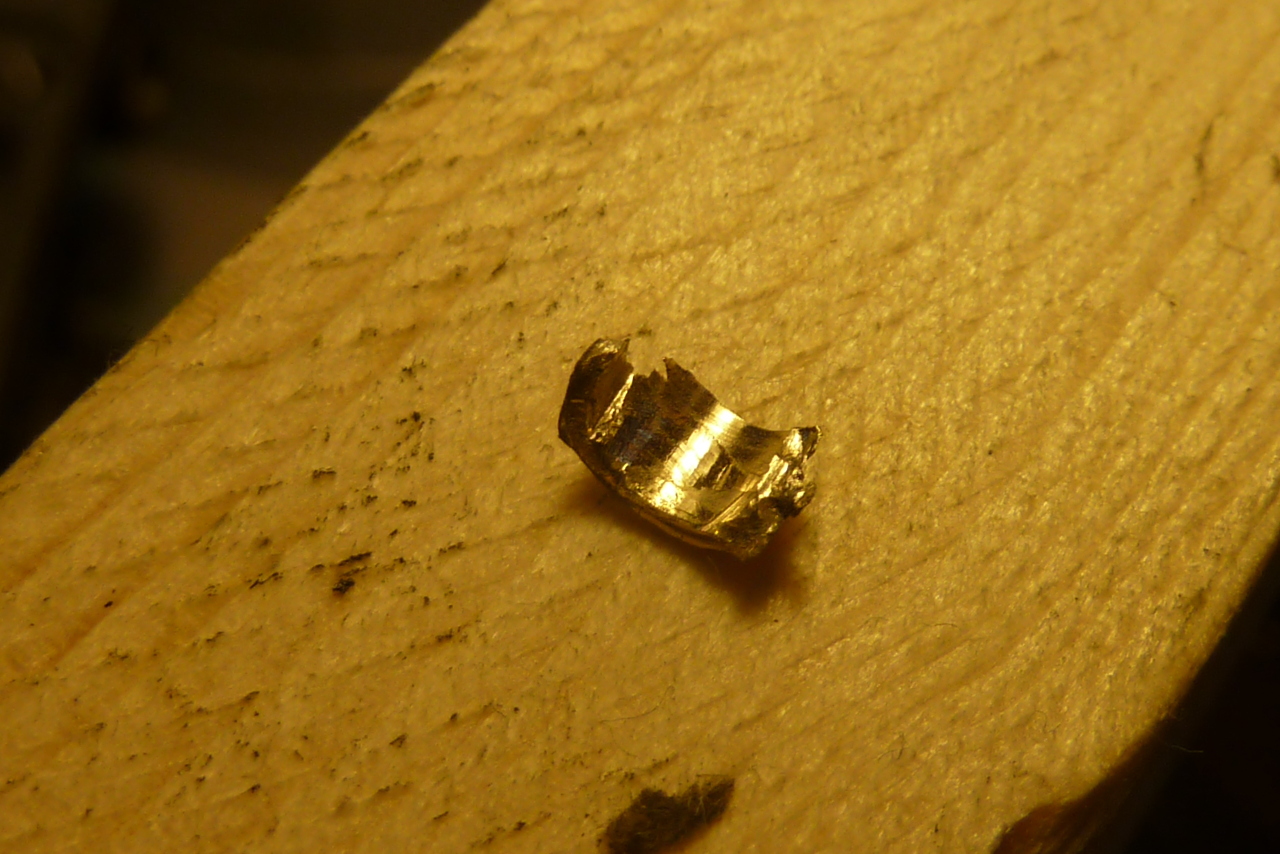
but I over drilled again. I have lost most of the threads on the carb body and I went too deep.
I now need to get this drilled out and a helicoil or insert fitted. If that is not possible then this carb body it toast. Very glad I have some insurance.
GreetingsLast edited by londonboards; 02-16-2013, 03:33 PM.Richard
sigpic
GS1150 EF bought Jun 2015
GS1150 ES bought Mar 2014: ES Makeover Thread AND blog: Go to the Blog
GS1100 G (2) bought Aug 2013: Road Runner Project Thread AND blog: Go to the Blog
GS1100 G (1) Dad bought new 1985 (in rebuild) see: Dad's GS1100 G Rebuild AND blog: Go to the Blog
Previously owned: Suzuki GS750 EF (Canada), Suzuki GS750 (UK)(Avatar circa 1977), Yamaha XT500, Suzuki T500, Honda XL125, Garelli 50
Join the United Kingdom (UK) Suzuki GS Facebook Group here
Comment
-
 Paul
Paul
I'd be applying some heat right at the start, as most of these are going to be fused together... good thing about the spares now!!
Comment
-
 Paul
Paul
just incase I get the same with mine I've just ordered one of these
Comment
-
Paul - you were quick!
Yes I bought one of those suckers when I was trying to get my exhaust bolts out (exhaust bolts OUT) but I could never get it to work. I can't get it filled up. I get the butane refills, turn it upside down and push them together. The gas then sprays all over my hands and about 3 seconds worth goes into the torch. I think the refills have the wrong nozzle on them or something.
I did (which I failed to mention) heat the carb bodies up with a fan heater before working on them today as a poor substitute.
GreetingsRichard
sigpic
GS1150 EF bought Jun 2015
GS1150 ES bought Mar 2014: ES Makeover Thread AND blog: Go to the Blog
GS1100 G (2) bought Aug 2013: Road Runner Project Thread AND blog: Go to the Blog
GS1100 G (1) Dad bought new 1985 (in rebuild) see: Dad's GS1100 G Rebuild AND blog: Go to the Blog
Previously owned: Suzuki GS750 EF (Canada), Suzuki GS750 (UK)(Avatar circa 1977), Yamaha XT500, Suzuki T500, Honda XL125, Garelli 50
Join the United Kingdom (UK) Suzuki GS Facebook Group here
Comment
-
 motomike
Brother I feel for you. Glad to see you have lots of patience. Good job with your progress thus far & good luck with the rest of the project.
Comment
-
Naked Carb Bodies
My carbs are now totally naked. Looking like the day they were born.
See My GS1100G Blog - Naked Carb Bodies
which means I can clean them up with some Simple Green and boil them up with lemon juice:


and this is the after boiling look:


Next job is to do the same to the carb top and bowls, then take the whole lot to be ultrasonically cleaned (I'll pop all the internal bits in that as well) and finally to be vapour blasted.
My before and after shots are going to be stunning!
Also looking at the idea of anodizing them. Possibly with a natural (aluminum or silverish) colour. We shall see. I want something on them that will ensure no maintenance for ever.
GreetingsRichard
sigpic
GS1150 EF bought Jun 2015
GS1150 ES bought Mar 2014: ES Makeover Thread AND blog: Go to the Blog
GS1100 G (2) bought Aug 2013: Road Runner Project Thread AND blog: Go to the Blog
GS1100 G (1) Dad bought new 1985 (in rebuild) see: Dad's GS1100 G Rebuild AND blog: Go to the Blog
Previously owned: Suzuki GS750 EF (Canada), Suzuki GS750 (UK)(Avatar circa 1977), Yamaha XT500, Suzuki T500, Honda XL125, Garelli 50
Join the United Kingdom (UK) Suzuki GS Facebook Group here
Comment
.png)
.png)

Comment