Announcement

Collapse
No announcement yet.

1978 gs750 C

Collapse
X
 
  • Filter
  • Time
  • Show
Clear All
new posts

    1978 gs750 C

    I am starting a build thread on a bike that I started restoring in May of 2011. I wanted to do a build thread, but never got around to it. A few things have changed, I got a smart phone with a decent camera, a laptop so I don't have to compete with the wife for computer time, and over the weekend I made a decision on the bike that will result in a much longer build.

    I am not very far along really, money is a big factor, but I am taking my time because I am really enjoying myself and learning so much! I would certainly have quit a long time ago without this forum and the help I have received from the gs gurus here.

    I hauled her home on May 4th 2011, the day before I joined the forum. Got it off Craig’s List for $200. A 1978 Suzuki gs750. 32,486.6 miles. Current tabs, in 1994! She had been sitting a long time, and she was parked outside when I went to take a look. This is what I saw:
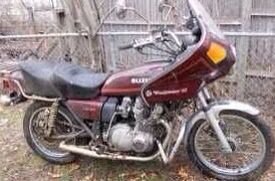
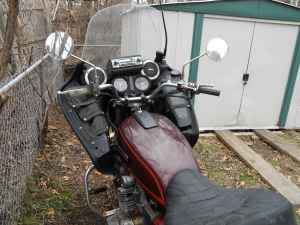


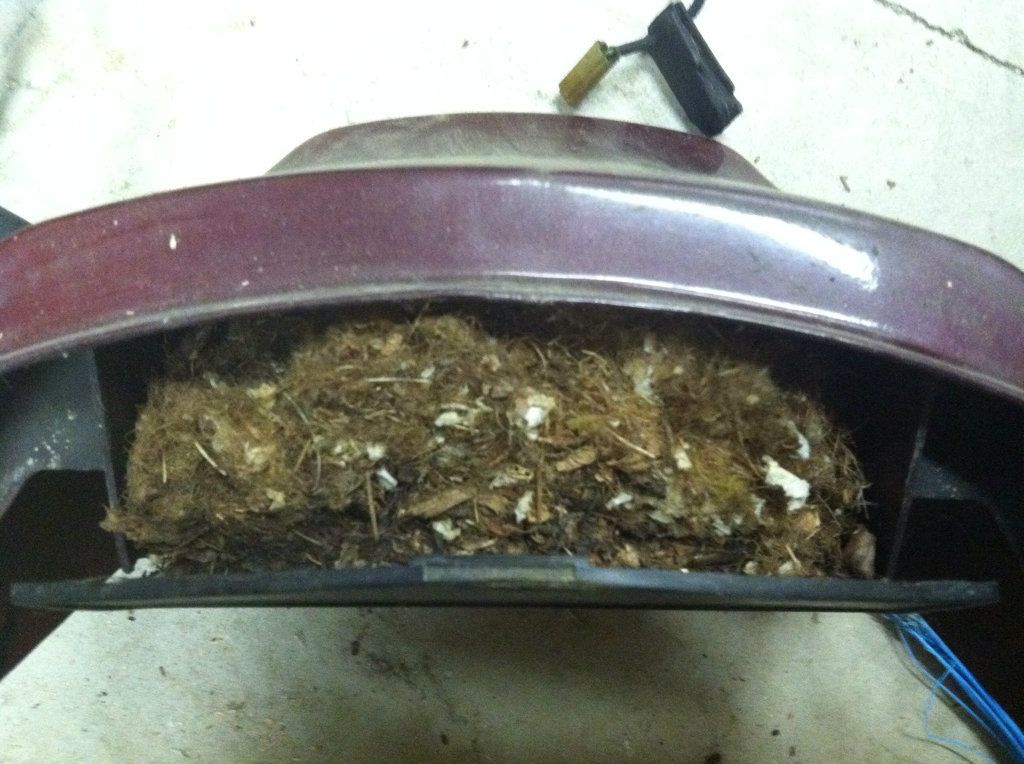
    The pipes were completely rotted, the engine and clutch were locked up, there were mice living in the air box, but everything was there. He had the title and the key. He told me it ran fine when he quit riding it. I offered him $200 and he took it.

    I want to turn this bike into something of a vintage sport bike. Not a café racer, but in that vein. I have K&N pods and a black Mac 4 into one to put on (carbs are already cleaned, rebuilt and re-jetted based on advice from rustybronco and MisterCinders).

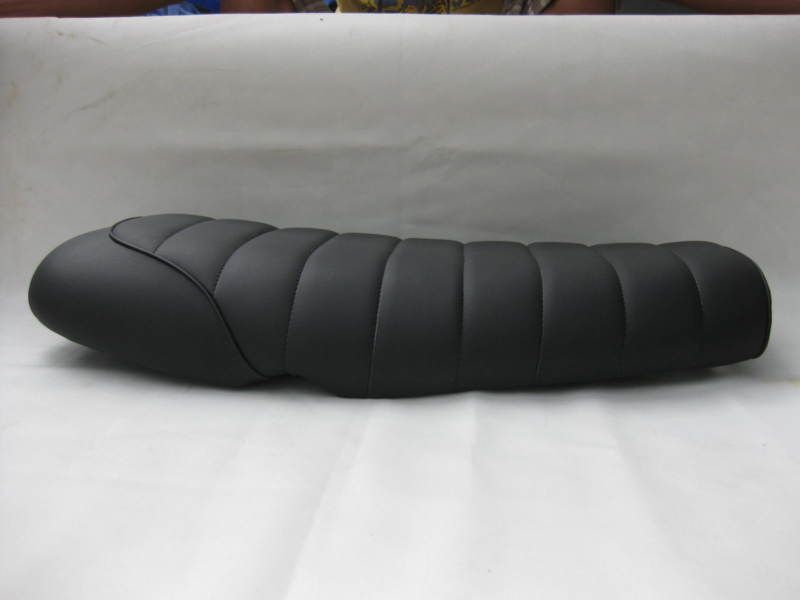
    I am thinking either Norman Hyde M bars or Euro Sport bars. No side covers if I can hide a scooter battery somewhere and boot her to life. I bought a 1981 front fender from andreashweiss that I plan to turn into a hugger rear fender. Here is the seat I plan to put on her:

    Anyway, I got it home and in the shop and started on the clutch. Took it apart from both sides. The springs were out of spec so I ordered new ones. The cable was petrified. And besides that the clutch release, the thing with the three balls in it that rotates to release the clutch, was froze up. I have replaced the springs and cleaned up the release mechanism, but have not put it back together yet. Freeing up the pistons became my obsession once I realized that the bike would shift.

    After 2 weeks of shooting PB Blaster through the spark plug holes and trying to free up the pistons, I pulled the head and ended up using a block of wood and a hammer to beat on the pistons until I got 1/8 inch of movement! After that she turned over easily!

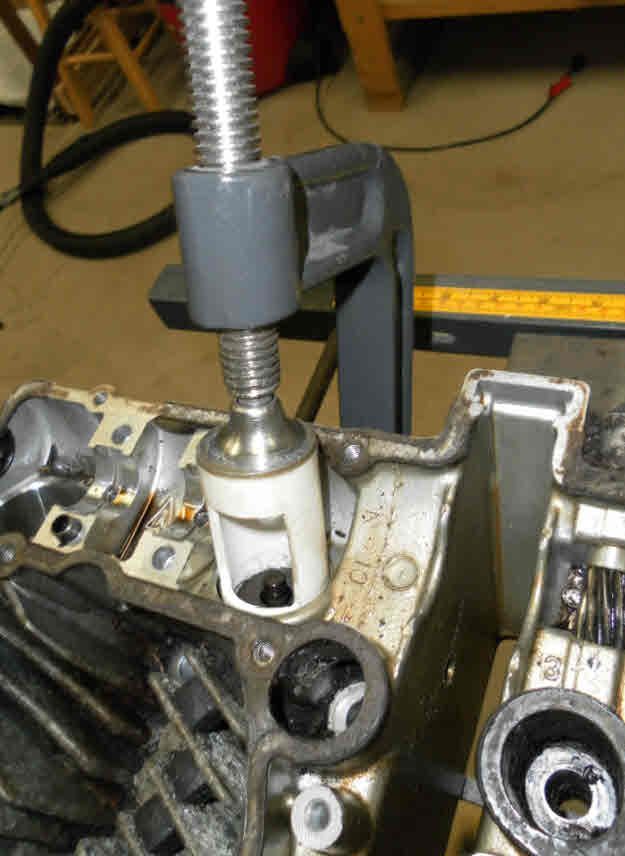
    So, now that I needed to buy head gaskets and everyone strongly suggested a new base gasket (I bought both NOS off ebay), I figured this was the time to rebuild the top end. I pulled the valves with my homemade basically free puller from plans online:


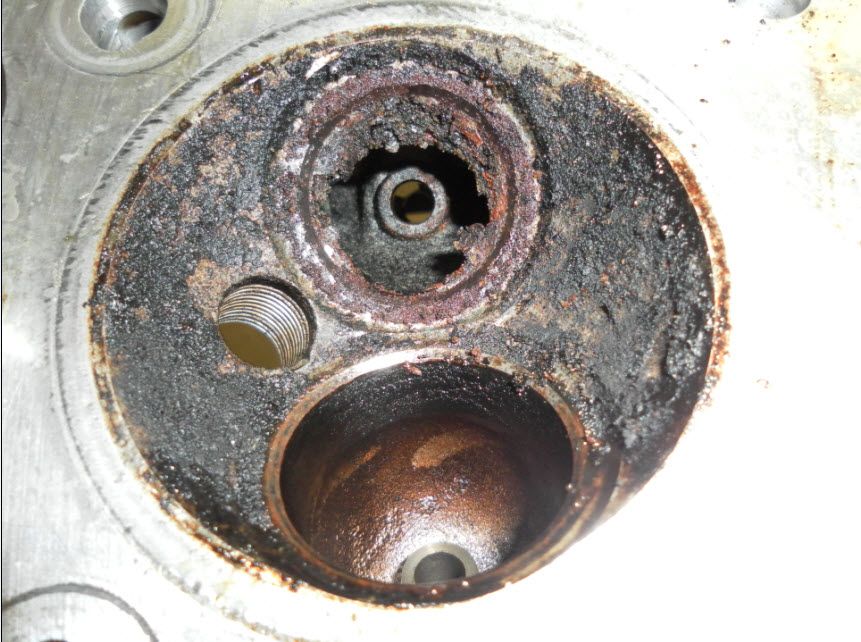
    The valves and seats were in pretty bad shape:


    It also took quite a bit of work to get the cylinders off. One of the studs was so rusted that I couldn’t get the cylinders off. I ended up cutting the stud, then had to weld a nut to it to unscrew it from the case.

    I tried to lap the valves by hand but they were too far gone. I took the head to a local shop and they reground the valves, bead blasted the inside of the head and replaced the seals. Two of the valves were too far gone. The shop could get new ones for something like $80 for the pair. I bought 2 used ones from Cycle Recycle for $10 each. The shop guy had never heard of buying used valves, but like I told him, the other 6 were used, and it turned out the 2 used ones I bought are the nicest ones in the head! They also drilled out a broken exhaust bolt that snapped in the teardown. I also brought in the cylinders and pistons. They measured and honed them. They measured within specs, so I found NOS rings on ebay.


    By now it was last October and in MN it starts getting cold. I knew that I would not get her running before winter, so I decided to spend the winter cleaning up the head and cylinders for paint the following spring. I was planning to paint the clutch and stator covers because they were in such bad shape. But the pics of some of the polishing work that some of the guys on the forum have posted got me thinking, and I realized that most of the work is done by the time the parts are sanded with 320 grit for paint. It didn’t take much more work to go from 320 to 1000 grit. I bought a few buffing wheels and spun them with my mini lathe. The polishing is fun, quite addictive. I haven’t polished any hidden parts yet, but I understand why some folks do. Mine are not show quality, and I still need to paint the badges, but I am pleased with the results:
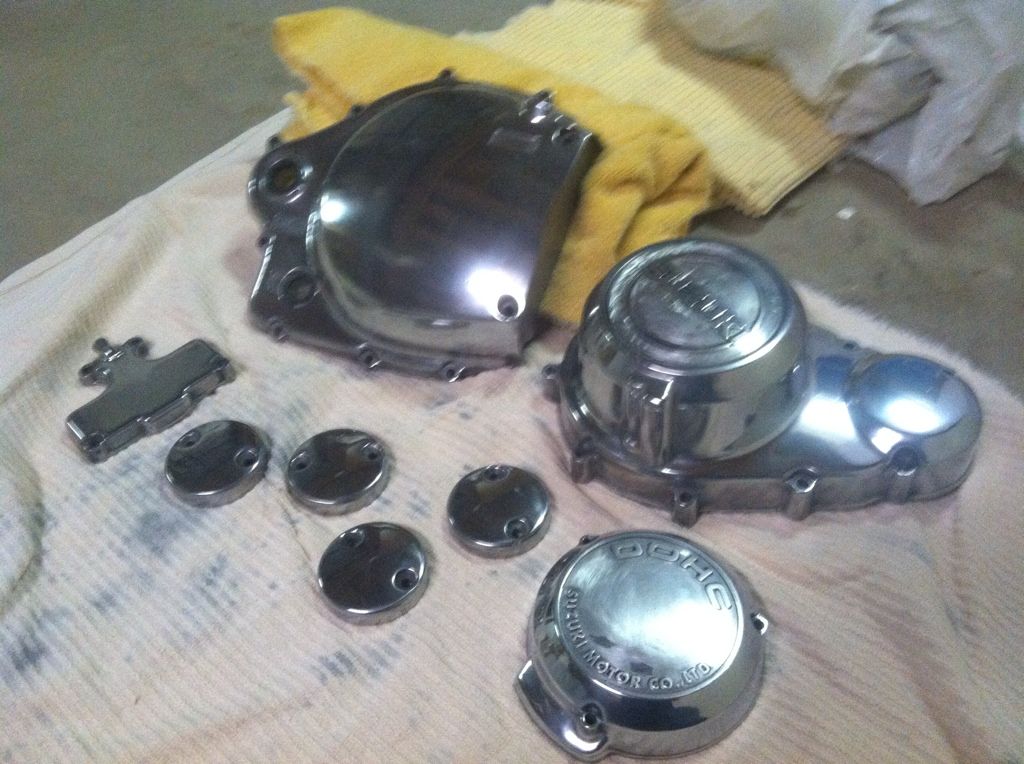


    I painted the cylinders, head and head cover with VHT Engine Primer and Universal Aluminum paint. I am very pleased with the results. I have always said that jobs like these are 80% prep, and I have hours upon hours of scrubbing those parts clean.
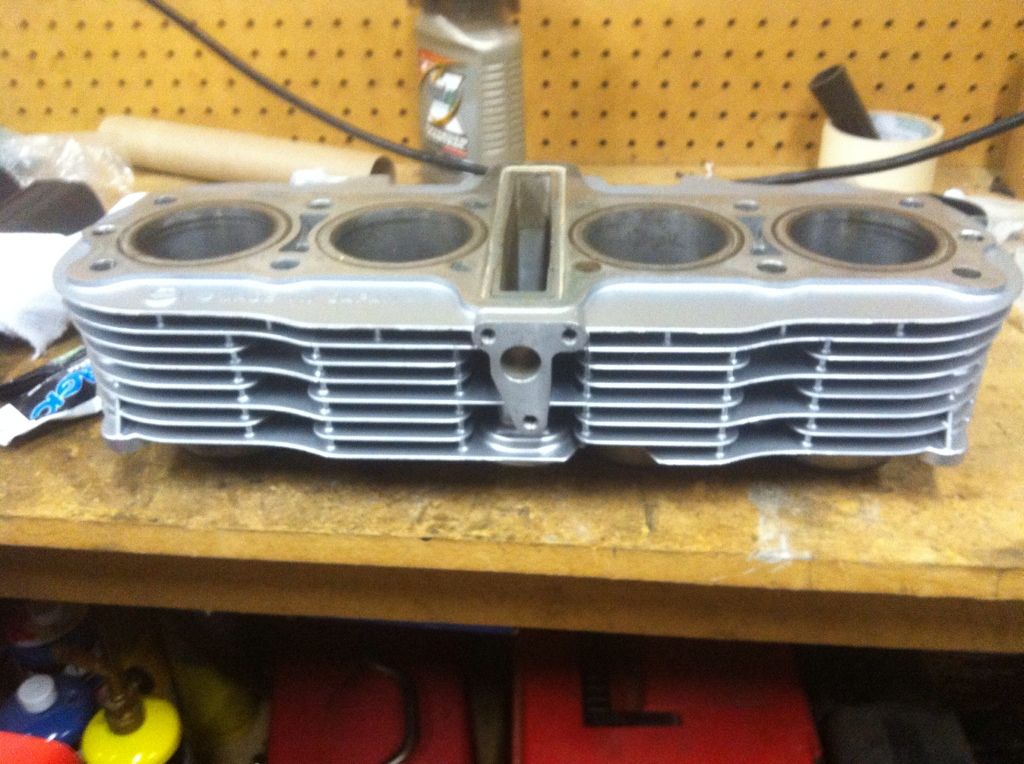
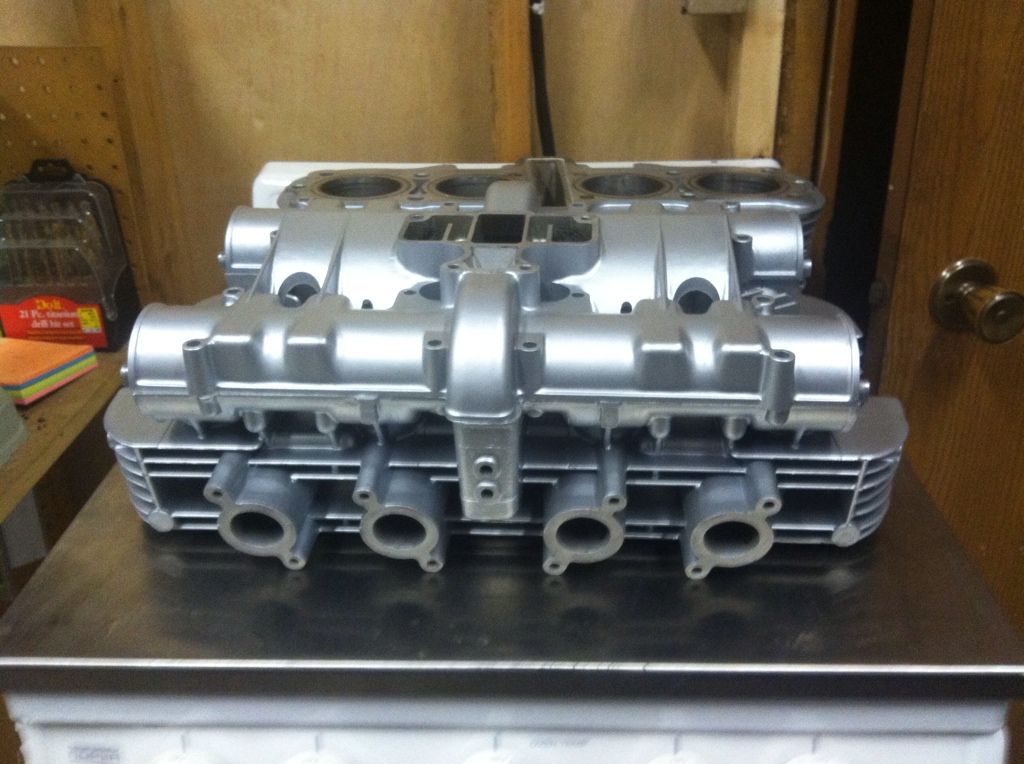


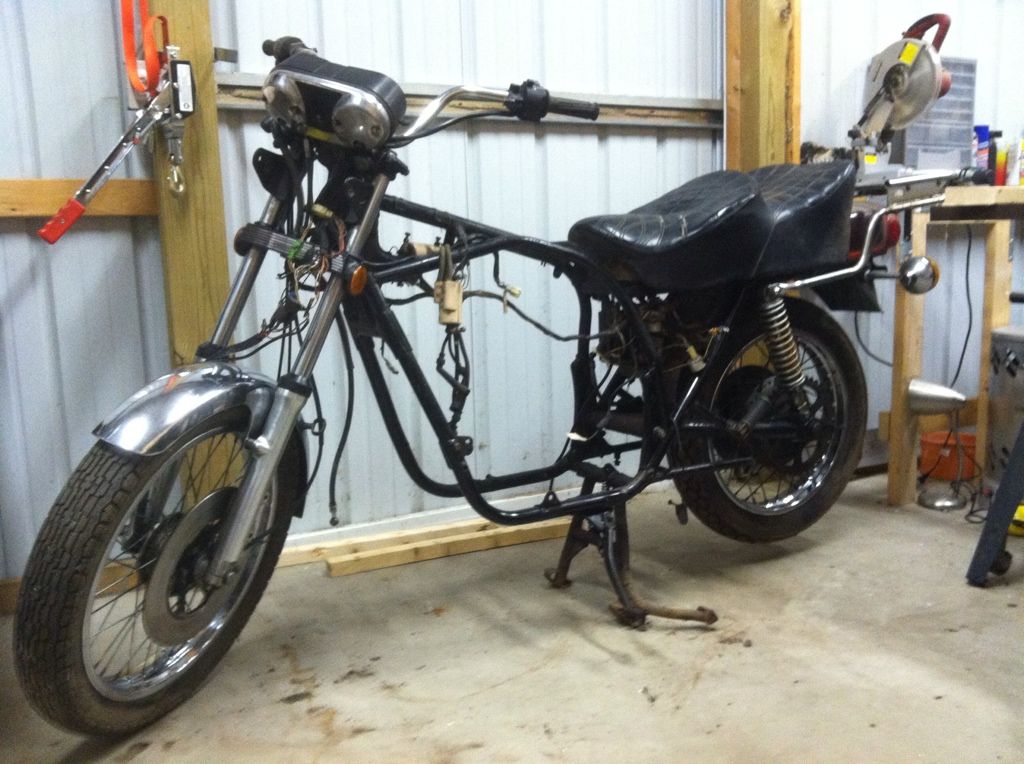
    This brings me to last weekend and my big decision. All the parts look so nice that I can't bring myself to put them back on a frame that looks like crap, so I am stripping her down to the frame and building her back up. I work slow, so this thread might not get updated every day, but I will document my journey.

    #2
    Nice thread

    Good job, fun read, good pics, what everybody seems to like the best on here!
    sigpicSome of the totally committed probably should be.
    '58 + '63 Vespa 150's' (London, GB/RI, US)
    '67 X6 T20 ('67 Long Beach, Ca.- misty-eyed)
    '71 Kaw. A1-ugh ('71 SF, CA- worked @ Kaw dlr)
    '66 Yam. YL1('72 SF-commuter beater)
    '73 Kaw. S2A-2Xugh ('73 SF-still parts slave)
    '78 GS 750C ('77 SF-old faithful-killed by son)
    '81 KZ 750E ('81 SF-back to Kaw. dlr)
    '81 GS 650G ('08 back to NE&ME- (project)
    '82 GS '82 (2) GS650GZ, L, Middlebury, G current

    Comment


      #3
      Man I hope I don't see that in my valves, scary stuff!

      Comment


        #4
        Originally posted by recycled64 View Post
        Good job, fun read, good pics, what everybody seems to like the best on here!
        Thanks! I enjoyed writing it. As I go forward with the thread in mind, I should have better documentation.

        Comment


          #5
          Originally posted by GSequoia View Post
          Man I hope I don't see that in my valves, scary stuff!
          I was scared by what I saw! That buildup looked like a broken part! It really made me wonder about the PO's claim that it ran fine until he parked it. Well I think we all know how much you can trust someone trying to sell you a 34 year old motorcycle that wont even roll! It was all good though, I took the head to a trusted shop and everything checked out fine, and they rebuilt it for me with no issues on the head itself, just the 2 valves that needed replacing.
          Last edited by Guest; 10-12-2012, 07:52 AM. Reason: Added comment

          Comment


            #6
            You've contracted the GS virus and it's wormed its way deep inside. There is no cure. You can only hope to satisfy its need by feeding at Z1, Boulevard Suzuki and a little Fleabay. The day you ride her off down the driveway the smile you'll be wearing will be priceless!
            -Mal

            "The only reason for time is so that everything doesn't happen at once." - B. Banzai
            ___________

            78 GS750E

            Comment


              #7
              Originally posted by allojohn View Post
              The day you ride her off down the driveway the smile you'll be wearing will be priceless!
              You are so right! I have already played that scene 1000 times in my mind. I also get the instant gratification of being a member of the elite club that is motorcycle owner. I love talking bikes with the folks on the forum, my buddies at work, anyone who will listen!

              Comment


                #8
                "The engine has left the frame!"

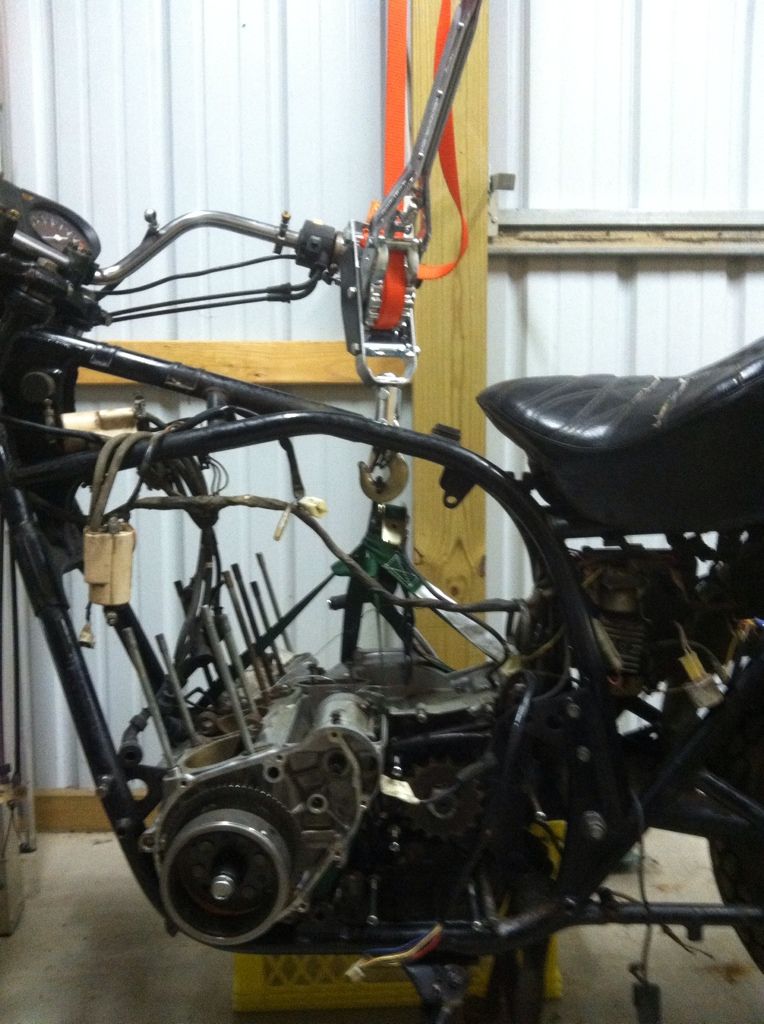
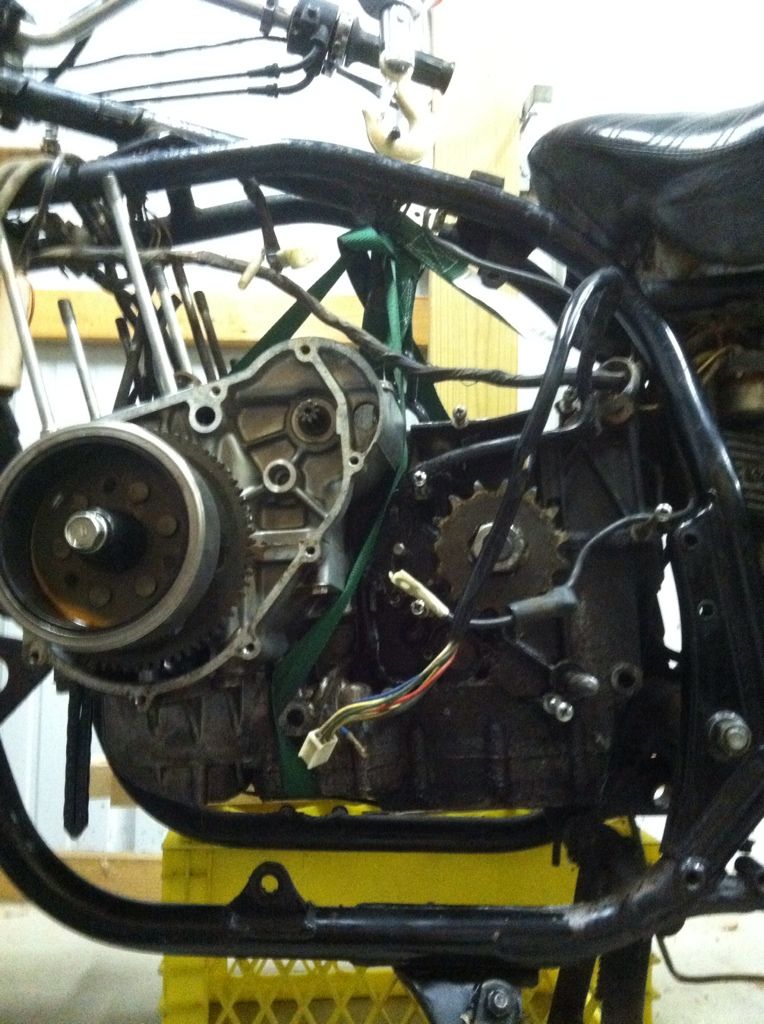
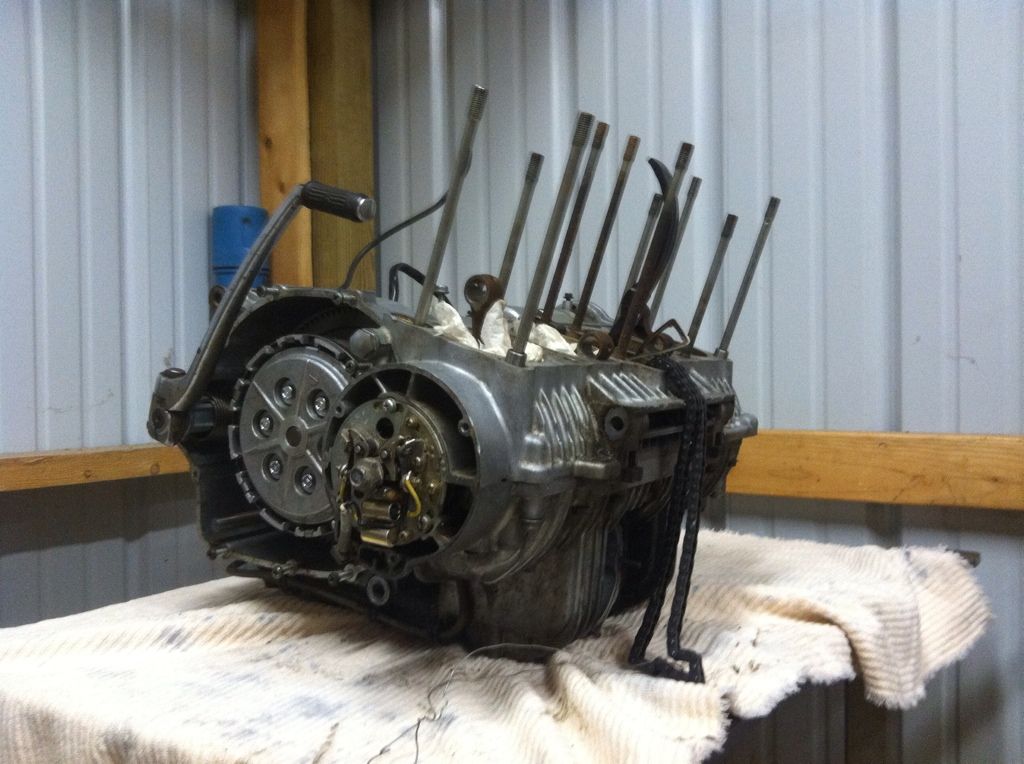
                Finally got to spend some quality time in the shop this weekend. I have been preparing to remove the engine. The mounts were all loose. The wiring has been disconnected. The head and cylinders are off, as well as the stator and clutch covers. I wanted to do this by myself, and didn’t want to just horse it out. I wanted to find a way to get it out that would also work to get it back in, and back in would mean not scratching the newly painted frame. I decided to use my come along as a hoist. I used a nylon strap to go around the engine front to back and side to side, and hooked that all together with one hook. then I brought the hook on my come along through the frame so it would be centered, and attached the harness hook. I attached the other end of the come along strap to a beam in my shop.


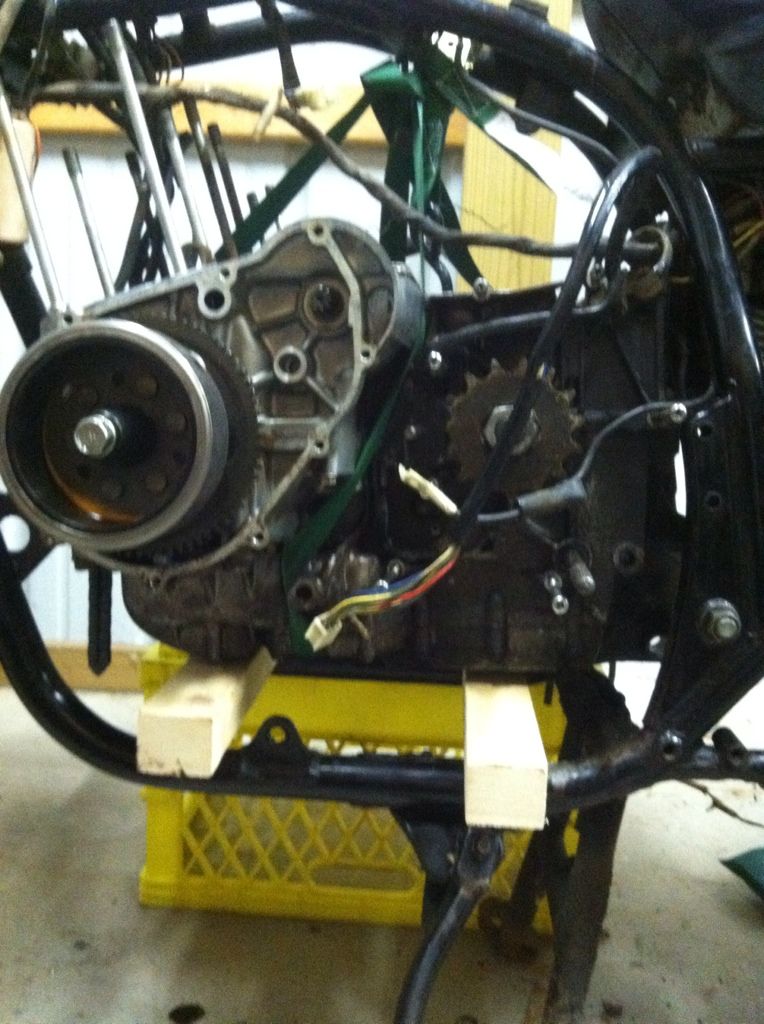
                Then I hoisted her up far enough to get a couple of 2X2's under the case. They are long enough to reach over the top of a milk crate next to the bike.


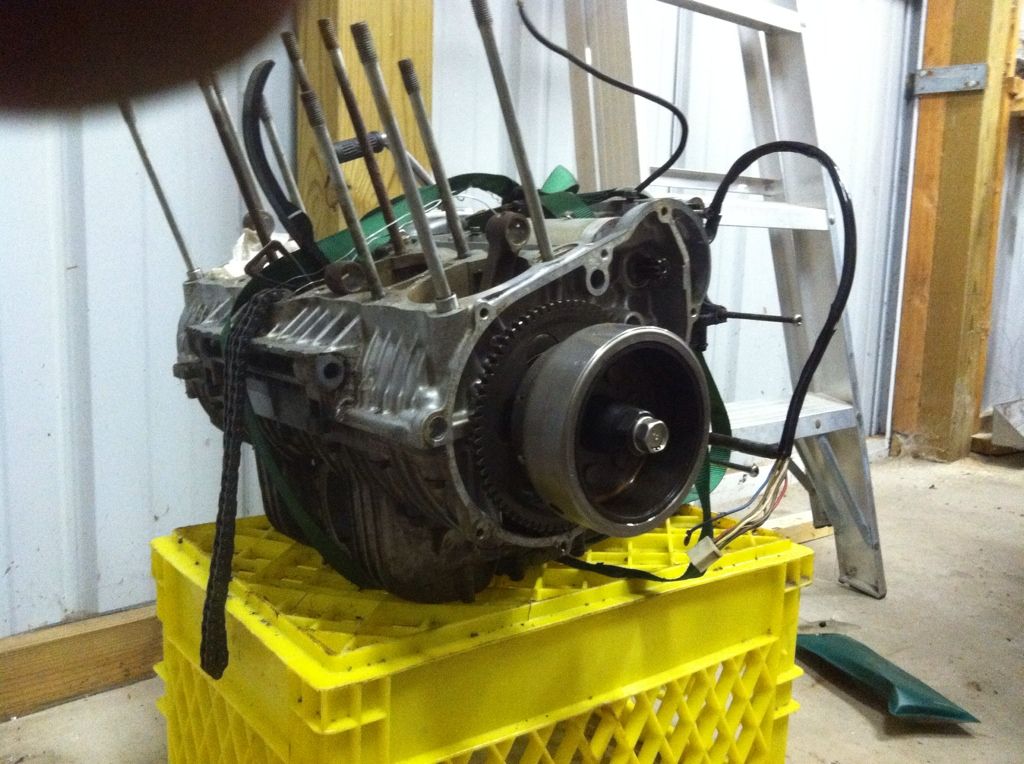
                Then I lowered the engine onto the 2X2's, unhooked the come along, and slid her out on the 2X2's onto the milk crate.


                The engine is now on my welding table, where it will spend the winter, while I tear the rest down to the bare frame. I think this process in reverse should work well for reassembly.

                Comment


                  #9
                  An inspiring build Mike. Great work so far. Id go ahead and powder coat that frame nothing is tougher and the frame will take a lot of abuse.

                  And yeah,it's great fun mucking around with motorcycles. I've been doing it since my father bought me my first bike, a 1971 JT60 Yamaha that you see as my avatar. I've been tinkering ever since. I've been inside many a motorcycle engine and these GS's are some of the best engineered ever. I only wish I would have discovered them much earlier. So, here's to continued progress, more bench racing, and the fine folks on this forum who encourage and help as we struggle with this disease.

                  Keep the updates coming!
                  1982 GS550M Rebuilt Winter '12 - 550 to 673cc engine conversion.
                  1989 Kawasaki ZX-7 Ninja
                  2016 Ducati Scrambler Full Throttle

                  Comment


                    #10
                    Mike, thanks for posting this thread. It's inspiring to see someone working on a bike very similar to mine, who is about a year ahead of where I am. Very encouraging stuff!

                    Comment


                      #11
                      Originally posted by Sci85 View Post
                      An inspiring build Mike. Great work so far. Id go ahead and powder coat that frame nothing is tougher and the frame will take a lot of abuse.
                      Thanks for the encouragement, it inspires me to keep the thread going! I was planning to just paint the frame, but I think I will look into powder coating; it would probably be worth it.

                      Comment


                        #12
                        Originally posted by Ledyard View Post
                        Mike, thanks for posting this thread. It's inspiring to see someone working on a bike very similar to mine, who is about a year ahead of where I am. Very encouraging stuff!
                        Thanks for the encouragement! Good luck with your project!

                        Comment


                          #13
                          Mouse on a Motorcycle?


                          Comment

                          Working...
                          X