Announcement

Collapse
No announcement yet.

78 GS750E in Indiana

Collapse
X
 
  • Filter
  • Time
  • Show
Clear All
new posts

    #31
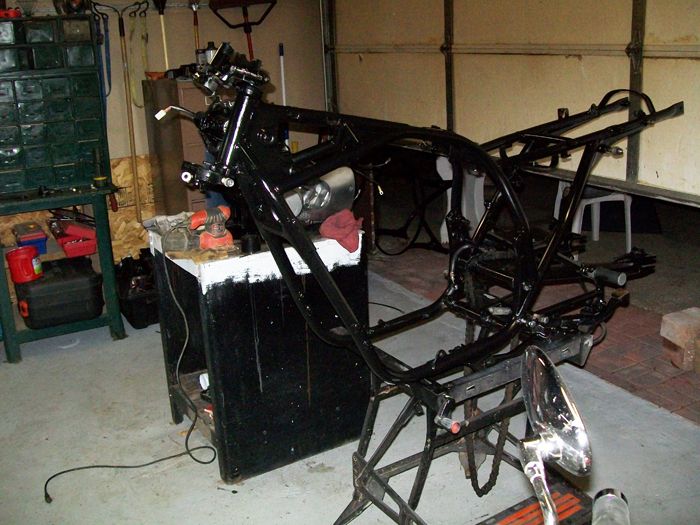
    For one of the more awe inspiring entries to my build thread, I present my frame. Yes, ladies and gentlemen, not one, but two pictures of my frame. Both revealing that it got painted. Hold onto your hats now, it was painted BLACK. This boy is a revolutionary. I have no intention of making you wait a moment longer....so here it is.


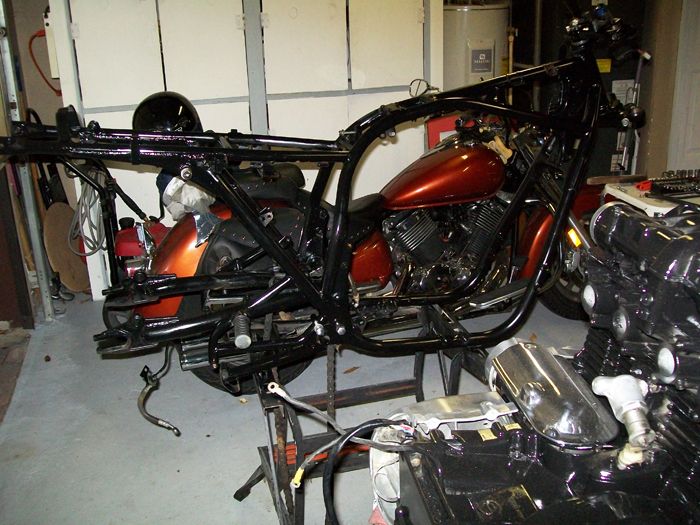
    You're gonna think your looking in the mirror, but no, it's the other side of the frame. It's BLACK TOO!!


    The Suzuki's younger, bigger, brother sits behind that great looking frame. Now it's time to start hanging things on it.

    Next post is one you won't want to miss. Pictures of my drive to Toledo two weeks ago. Stopped for gas twice. In my truck.

    I did get a deal today for that V-Star. I've been wanting a bat wing fairing for it and found one at my local previously owned motorcycle parts outlet. Junkyard. Needs paint, has windshield. $10.00 Saved me several hundred. Kind of like picking up a hitchhiker and it's Brooklyn Decker. Actually it is not like that at all, but you get the picture.

    Comment


      #32
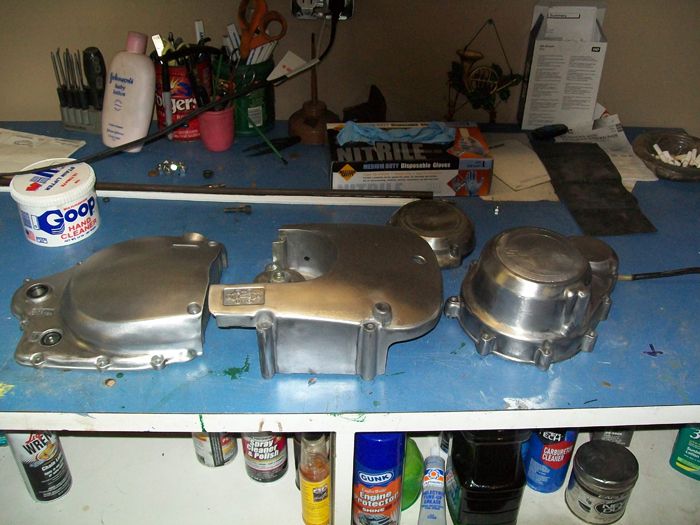
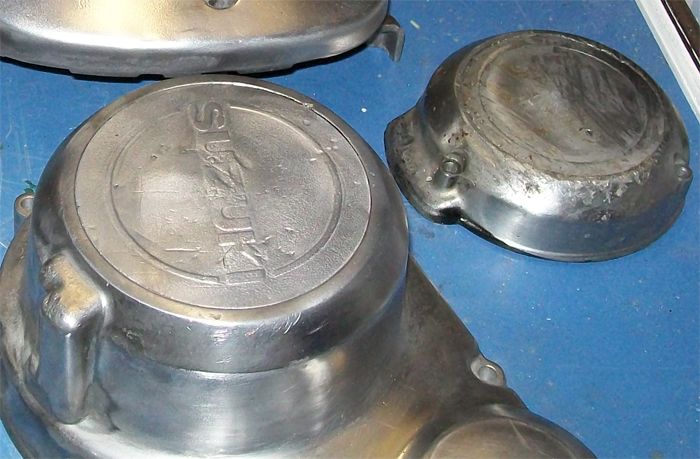
      I've been working on cleaning the side covers. I'm pretty happy with the sprocket cover, and the clutch cover, but the stator cover has a couple of dings and the nameplate is stumping me as to how to fill it in with paint. I tried masking it off and spray painting it, but it looked like shiat.

      You can see in the second picture the points cover. There is a fellow here with one that I want to get and I hope it is better and I don't have to get a new one someplace. Frankenstuff has them and they are cool, but not stock. Even a see-through, but that might be cheesy. The one I have is terrible, looks like it was strapped under a tire and used for a skate.


      Parts n More had a set of hex bolts for all of the side covers for $20 bucks or so in a kit and I went ahead and ordered them. My past experience is that you never get the old cheapo screws in tight enough and the covers leak. The V-Star has them everywhere and I bought a set of ratchet allens and I love them.

      Comment


        #33
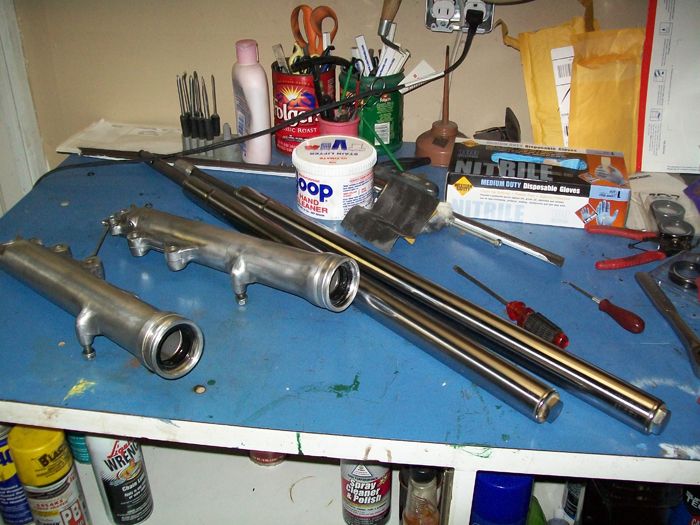
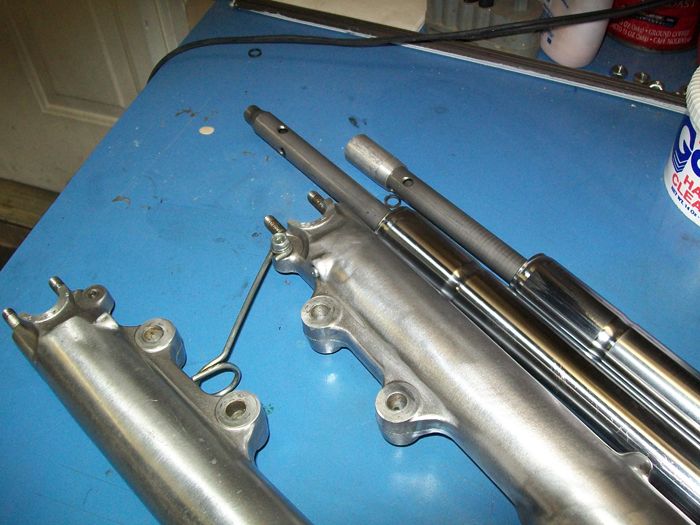
        Started to work on the forks tonight. Everything came off pretty easily and the forks are going to clean up nicely. But I need to get the seals out of there and I've never had this much problem before. But then again I haven't done this on a GS. Any help would be appreciated. Hate to take them to the stealer and it cost me a million dollars.


        Need to dig out the end cap that is threaded on the bottom fork. It is crappy in there so it needs to come out. Will try that tomorrow.


        Otherwise the sliders look very good. They are nice and clean without pitting and the dust covers are in great shape. Lots of oil all over everything, but these are going to come out nice. I took a wire wheel to the top one and it will buff out nice.

        I'm not going to change the springs yet, just see how the bike handles. For all I know someone has already changed them to progressive springs. A guy can hope you know.

        Comment


          #34
          Originally posted by Don-lo View Post
          That would be a Shoei FM2 (the FM3 would have a rectangular headlight opening). They are good solid fiberglass fairings. How much do you want for it?
          PM sent.
          Never meant to hijack the tread.

          Comment


            #35
            Originally posted by wedoo2 View Post
            I'm not going to change the springs yet, just see how the bike handles. For all I know someone has already changed them to progressive springs. A guy can hope you know.
            The OEM springs are in two pieces, the Progressives one.
            -Mal

            "The only reason for time is so that everything doesn't happen at once." - B. Banzai
            ___________

            78 GS750E

            Comment


              #36
              Originally posted by Shwartz View Post
              PM sent.
              Never meant to hijack the tread.
              No problem sir, hope you guys work it out.

              Comment


                #37
                I've been pretty lucky so far on this build. I have an office in my home and it allows me access all of the time to my garage and whatever projects I have going on. I have been able to work on the bike most every day. Keeps me from thinking about what I'm going to do, just able to do it.

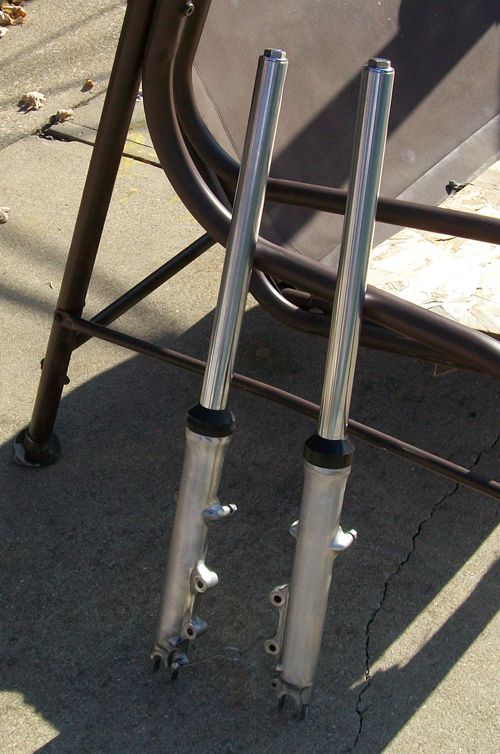
                Today I got the forks pretty much ready, Shined up and new seals. Still need to add oil to them but I will wait until I get them clamped in the triple tree. I hate to put them in a vise to get the top nut off. The old seals wanted to stay in and fought me. Heat, chisels, broken tools. Jeez, what a mess. I won.


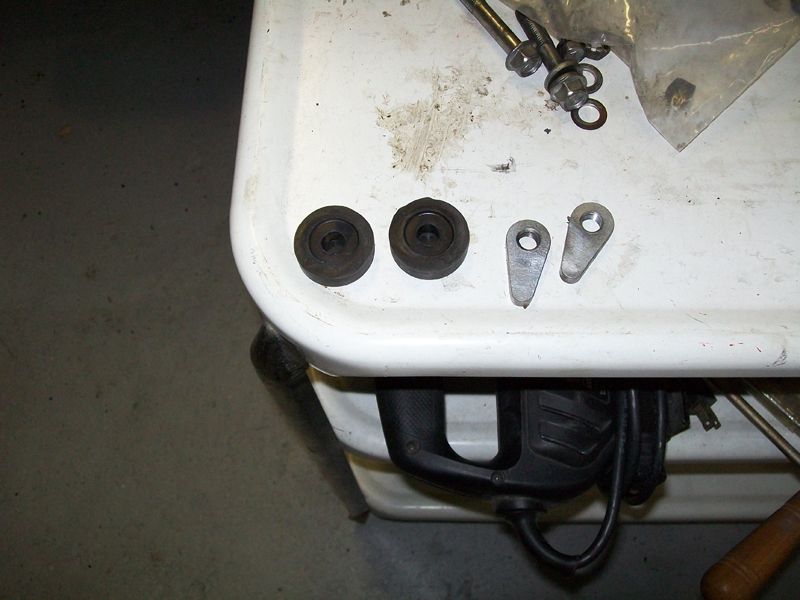
                I will be putting the motor back on the frame this weekend. But I want to run past everyone (and I'm going to post this to the regular forum) this picture of two rubber pucks and two odd shaped thingys. Came from the frame somewhere when I pulled it from the motor. Let me know what they are. I cannot find them in my manual.


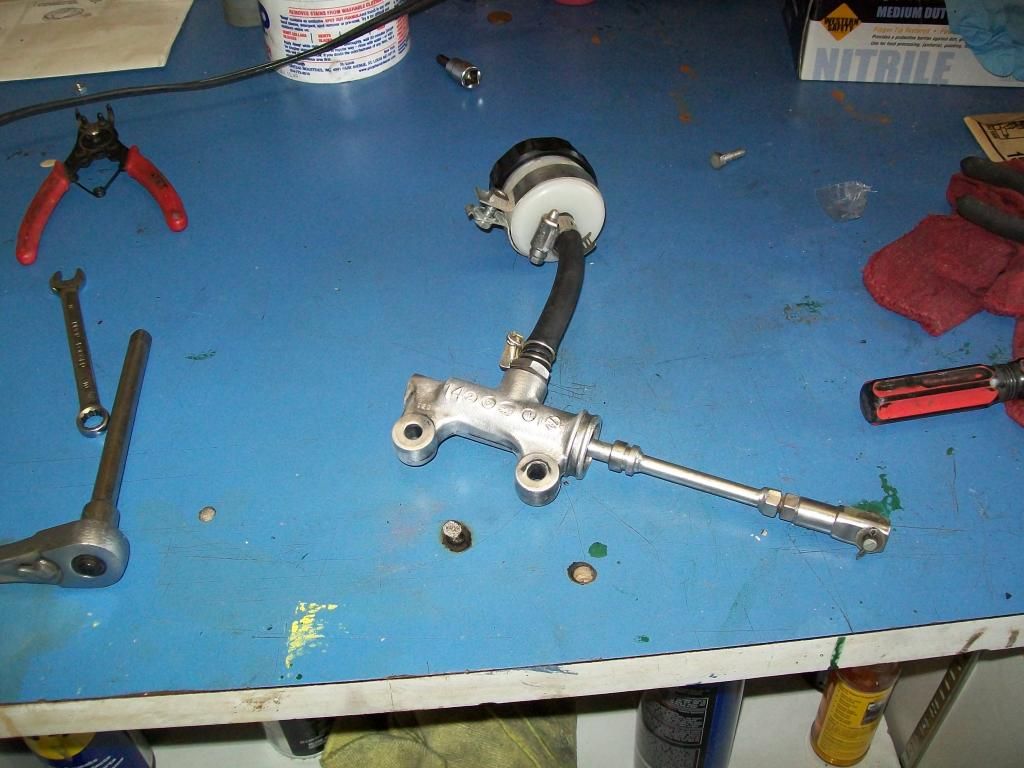
                Had time to rebuild the rear master cylinder. It was painted black but I like the silver look better. I doubt, from the shape it was in, that there was anything wrong with it, but just to be safe. The back calipers are another story.


                Cleaned up nice. Has the boot on it now and new tubing. On it goes.

                Comment


                  #38
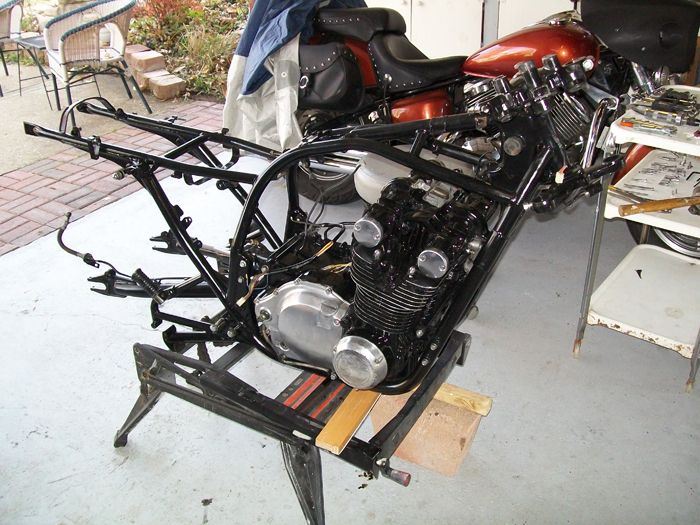
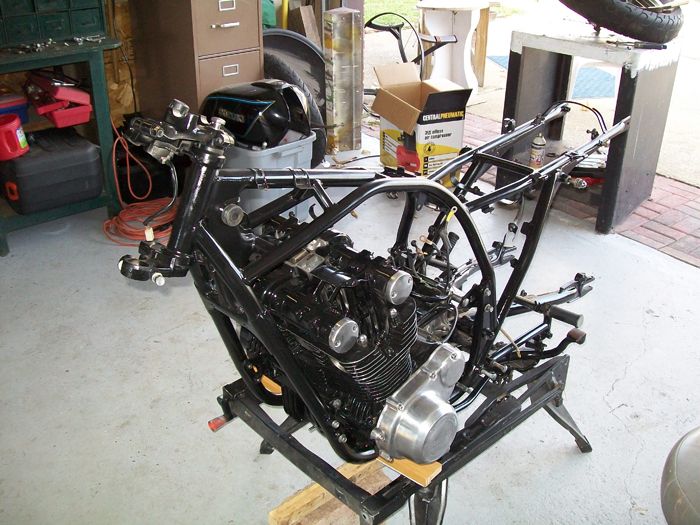
                  Got the motor back in the frame. It was such a nice day out today. Had a couple of buds help me get the motor in, did some leaf killing and worked on the bike. Here are a couple of pictures of it in the frame.

                  While taking apart the back wheel I knocked out one of the wheel bearings. I was going to replace them anyway, but now I've looked in several places and people aren't carrying them. First I am having problems with front caliper kits, now rear wheel bearings. What is up with this 750? It is not rare.


                  I took care of the front master cylinder problem finding a rebuild kit for it. The good people at Cycle Re-cycle sold me a new Yamaha unit for $60.00. Now it will have more modern brakes up front. I was in Indy yesterday and stopped by. The store is in an area of town that holds no country clubs; building is old. But man, the guy sure has parts and he knows parts. Shout out to him.

                  Comment


                    #39
                    Wow, nice looking build you have going there. Always good to see another 8 valve 750 in Indiana. I'm doing much the same thing you are, and your bike literally looks exactly like mine did when I got it. I mean, mine even has a dent on the tank in the exact same place, though not quite as deep. If you haven't seen already, you might want to take a look at Salty monk's twinpot brake upgrade. I rebuilt all of my stock front brake system when I got my bike and it still wasn't up to my standards, but the upgraded brakes are absolutely fantastic. Single best upgrade I've done to the bike. Here's what they look like (pardon the incomplete gear. I'm better now.):


                    I don't know if you're interested at all, but I have a somewhat rusty stock system that I had listed on Craigslist for $40, though I'm quite flexible on it. The header pipes have slight pitting. The underbelly pipes and clamps are factory and good, if I remember right. The rust is in the rear of the muffler cans. You can kind of see where it's deformed a bit and where the holes in the back are. It looks like this:


                    Comment


                      #40
                      PM sent Gearhead. Yours looks great. These bikes look so long.

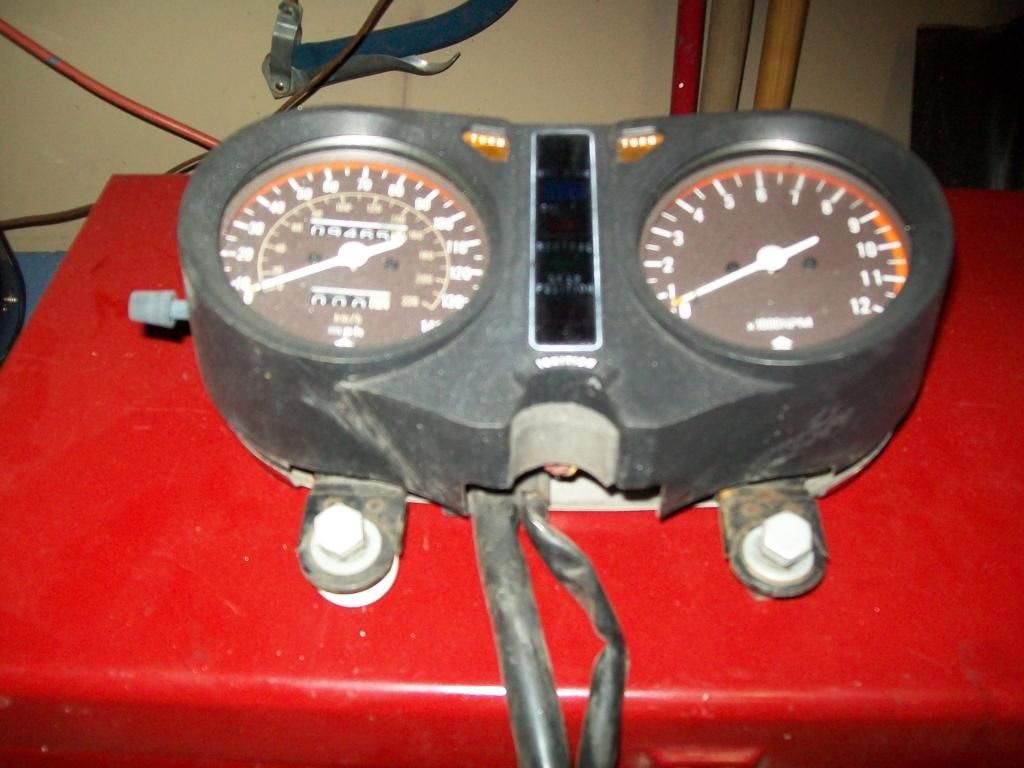
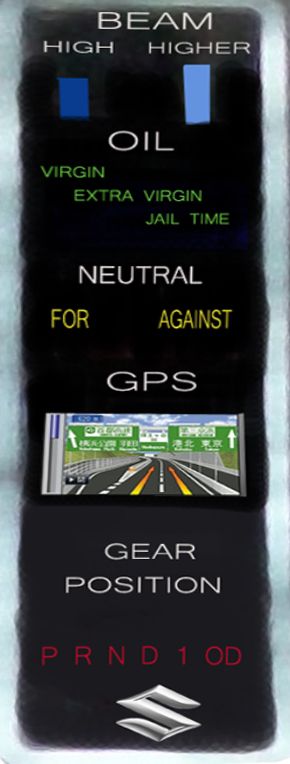
                      I am getting ahead of myself in this, but I have a photo of my instrument cluster below; it is in good shape except for the lettering for the idiot lights. Has anyone restored these with new lettering or have some sort of solution? Pic is blurry.


                      Comment


                        #41
                        Originally posted by wedoo2 View Post
                        PM sent Gearhead. Yours looks great. These bikes look so long.
                        Haha that's a good thing - I'm 6'4". I look and feel pretty goofy on anything much smaller. PM replied, btw.

                        back when I had stock gauges, I just wet sanded the remains of the white paint and the lettering off and then buffed the plastic. Short of buying a better gauge nacelle off of Ebay or here, or custom cutting some vinyl, I'm not sure there's another great way to do it.

                        Comment


                          #42
                          Originally posted by wedoo2 View Post
                          PM sent Gearhead. Yours looks great. These bikes look so long.

                          I am getting ahead of myself in this, but I have a photo of my instrument cluster below; it is in good shape except for the lettering for the idiot lights. Has anyone restored these with new lettering or have some sort of solution? Pic is blurry.
                          Do a search....there was a thread on here not too long ago where someone had made up a complete set of decals and was selling them to interested parties.
                          -Mal

                          "The only reason for time is so that everything doesn't happen at once." - B. Banzai
                          ___________

                          78 GS750E

                          Comment


                            #43
                            Originally posted by gearheadE30 View Post
                            Short of buying a better gauge nacelle off of Ebay or here, or custom cutting some vinyl, I'm not sure there's another great way to do it.
                            That's what I ended up doing. A guy was cafeing his bike and was going with an aftermarket cluster. His was in a great shape. Mine looked a lot like yours.

                            Someone with a vinyl printer and a lot of skill could probably replicate them and clear coat them on. That might work. Not sure how it would look though.

                            Comment


                              #44
                              In case you haven't figured it out yet, the 2 rubber pucks are off the front gas tank perches and the egg shaped nuts are for the bottom center motor mounts.

                              Comment


                                #45
                                Thanks Oldenuff. As soon as I got an answer on that I had a duh moment; of course it is. I'm plenty oldenuff myself.

                                And I went ahead and made my own idiot light deal.

                                Comment

                                Working...
                                X