Announcement
Collapse
No announcement yet.
78 GS750E in Indiana
Collapse
X
-
XXWoodmanXX
Here's the link to the stock idiot decals. Hopefully, Frank has what you need. I have a set and love them, for the price.
-
wedoo2
Comment
-
D-Mac
Originally posted by wedoo2 View Post
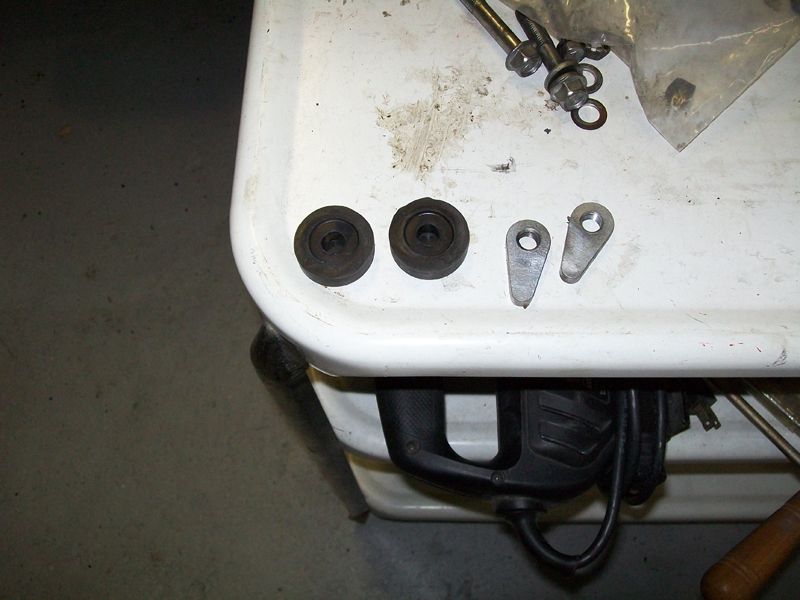
I will be putting the motor back on the frame this weekend. But I want to run past everyone (and I'm going to post this to the regular forum) this picture of two rubber pucks and two odd shaped thingys. Came from the frame somewhere when I pulled it from the motor. Let me know what they are. I cannot find them in my manual.
The two odd-shaped things are used to fasten the brackets on the bottom-middle of each side of the frame to the engine. They go inside of the little 'boxes' built into the engine case (on the bottom, about 1/2 way along each side you can find the 'boxes' I'm talking about). A bolt reaches from the fastener bracket (held to the frame with bolts), then through a hole in the engine, and finally screws into one of the "thingys." The "thingys" can only turn a little bit when in place, which allows you to tighten each bracket tight to the engine. I can photograph mine if you'd like (just installed my engine last weekend) - a pic is worth 1000 words with these things.
Comment
-
wedoo2
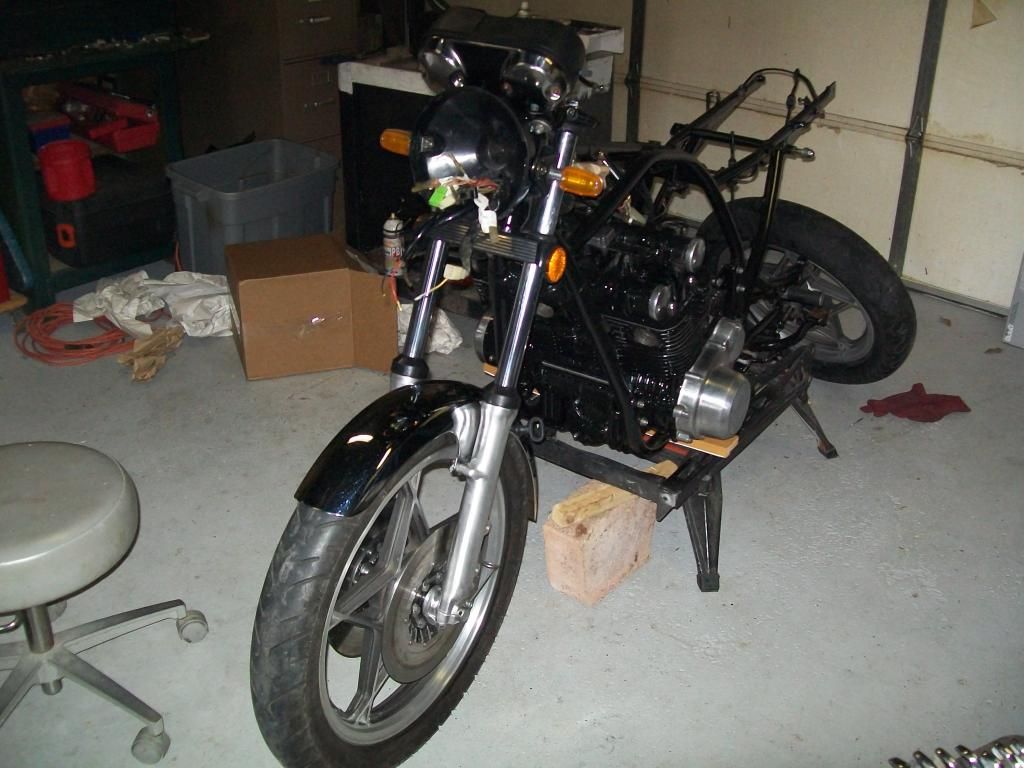
Got back to my project after taking a few days off for the holiday. Let's see,
Got the wheels clean, had to order a set of rear bearings as one fell out
Fork seals are in and new fork oil mixture is in
Mounted the headlight after a new coat of paint
Mounted the instrument cluster
Got my pretty new, chromed air breather cover from Boulevard.
Ordered the other side breather cover since I didn't know I ordered a chrome one.
Hung the wiring harness and will have to start that process now.
And one wierd problem.
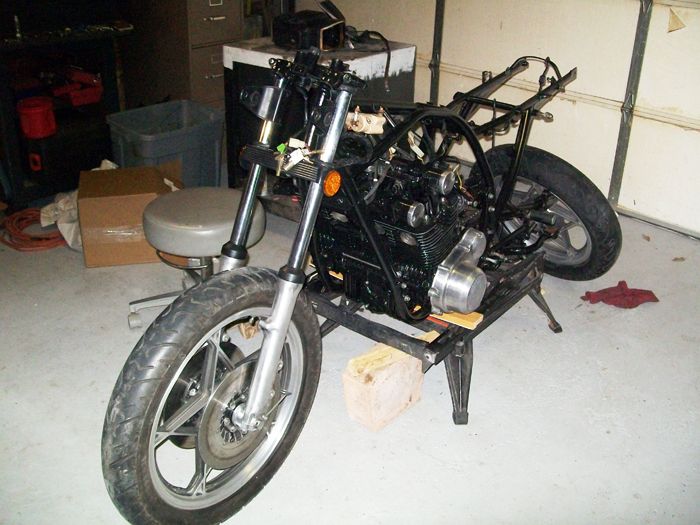
Got the bike off that stand. Kind of scared me anyway.
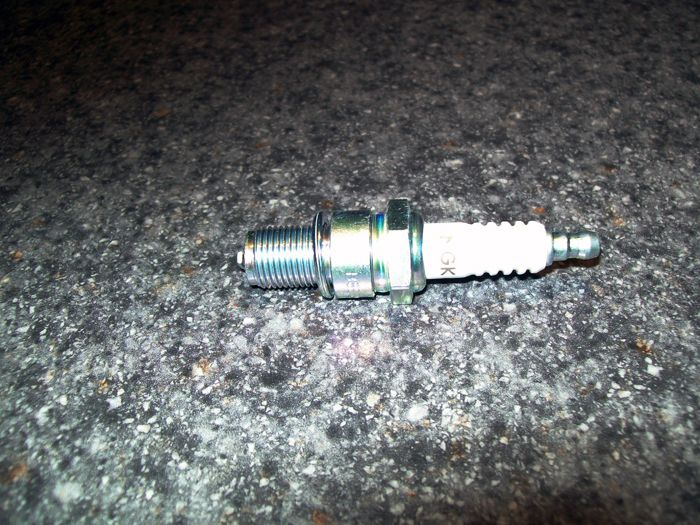
Need to put the oil pan back on. I gapped the plugs but I can't get the little cap of the things without unscrewing the entire top. first time I've ever had the problem. Will not fit in the spark wires without coming off.
Things are coming along nicely. Should have a running bike in a couple of weeks. Not sure what good that will do, too cold for me to ride it. After things are done, I need to do some upgrading. Such as new shocks for the back and new rubber. New electronic ignition. I intend to put on a Windjammer, or something similar so I can ride it at first warmth. Radio maybe, although I have found that my iPhone is good. Pandora, you know.
These are great bikes and this is going to look good.
Comment
-
That little cap on the end of your plug needs to come all the way off so it leaves just the threaded piece underneath.Cowboy Up or Quit. - Run Free Lou and Rest in Peace
1981 GS550T - My First
1981 GS550L - My Eldest Daughter's - Now Sold
2007 GSF1250SA Bandit - My touring bike
Sit tall in the saddle Hold your head up high
Keep your eyes fixed where the trail meets the sky and live like you ain't afraid to die
and don't be scared, just enjoy your ride - Chris Ledoux, "The Ride"
Comment
-
MAJikMARCer
Originally posted by wedoo2 View PostI gapped the plugs but I can't get the little cap of the things without unscrewing the entire top. first time I've ever had the problem. Will not fit in the spark wires without coming off.
Comment
-
wedoo2
I got the NGK B8ES, but they are the solid terminal type. Who'da thunk it? That will teach me to go by the manual.
Comment
-
wedoo2
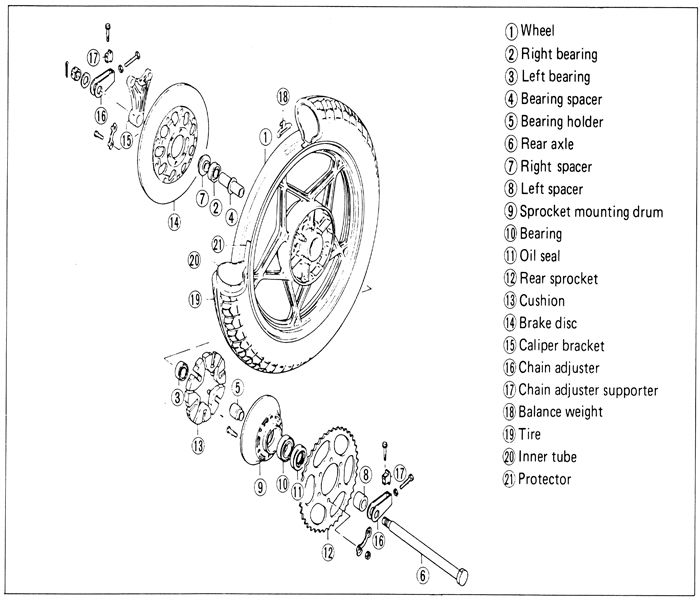
Please look at the diagram below. What I am confused about is the spacer, number 4 on the chart, has a ring around it.
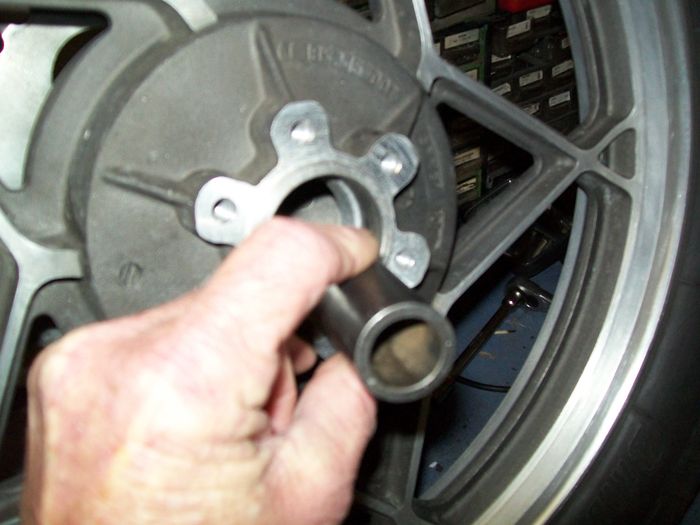
Now, Ive either lost it, or it was not on the bike when I tore it down. I have a picture here of where that spacer goes, but it will just jiggle around if I put it in like this. Or, I'll never get the axle through it. Besides it does not come flush with both bearings anyway. Can this be eliminated altogether?
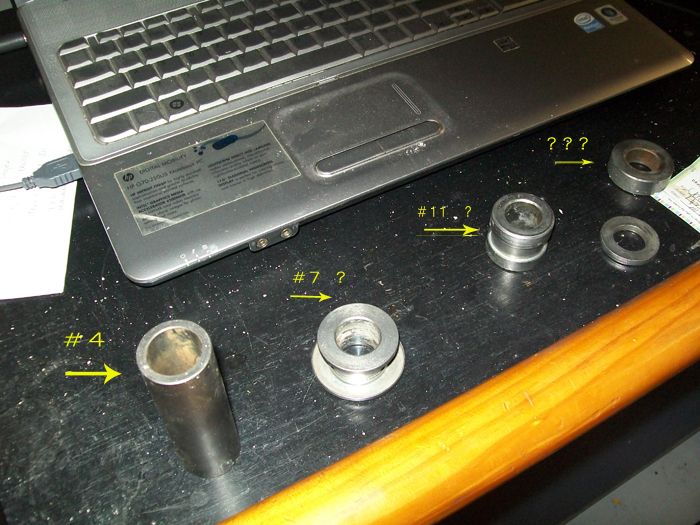
Kinda blurry, sorry. The parts below are what I have left except for the chain alignment pieces, axle and the castle nut. Any comments?
Need to dust off the computer a bit.Last edited by Guest; 11-29-2012, 08:01 PM.
Comment
-
wedoo2
I am wanting to add an accessory outlet someplace. Can anyone tell me the best wiring without connecting directly to the battery? I would rather the port come on when the key is on rather than using some kind of switch and forget to turn it off.Last edited by Guest; 12-03-2012, 09:08 PM.
Comment
-
I'm tying mine into the fuse block that is connected into the main switched connections. My only issue is finding a good spot to mount it; probably will be under the headlight bucket.Cowboy Up or Quit. - Run Free Lou and Rest in Peace
1981 GS550T - My First
1981 GS550L - My Eldest Daughter's - Now Sold
2007 GSF1250SA Bandit - My touring bike
Sit tall in the saddle Hold your head up high
Keep your eyes fixed where the trail meets the sky and live like you ain't afraid to die
and don't be scared, just enjoy your ride - Chris Ledoux, "The Ride"
Comment
-
wedoo2
I imagine that I will eventually end up with a Vetter fairing, but until then I though I would need something close to the handlebars to plug in the iPhone. I see what you mean about where your plan is. Think the charging system, all things being equal, is up to a charging port for the phone or a cig lighter? I've seen some GPS units hooked up to some of the bikes here.
Comment
-
wedoo2
Thought I would update my build thread. Things are proceeding along nicely. Picked up a set of stock pipes over the weekend from a member that lives in Indianapolis. also got to go by Cycle-Recycle while I was over there. I picked up some mirrors for my fairing and switched out the plugs for the right kind. Decided to get some new throttle cables while I was at it.
The guy who runs that has been there, I think, for about 30 years. Has more than one warehouse and he knows just about everything about every metric bike and every part. He is amazing.
I also got some work done. I rebuilt the rear brakes, master cylinder and the calipers with new everything. It all went back together pretty well. When I put the rear wheel back on I stripped the axle bolt and went to my local mc junk yard and found one that works. One of these days I'll get a Suzuki part and change it out.
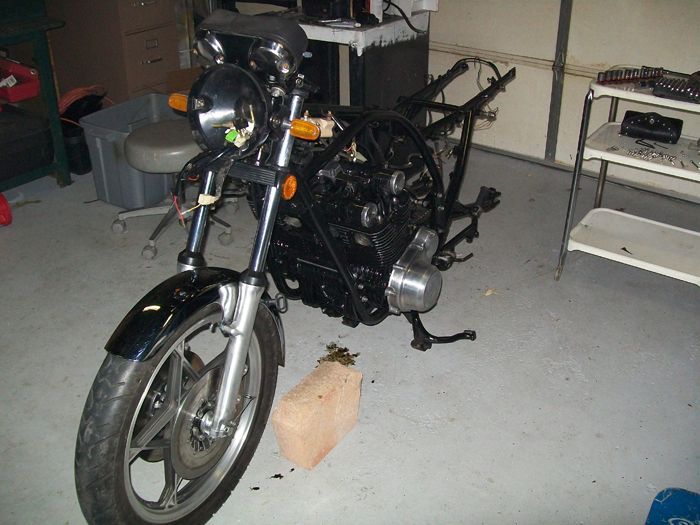
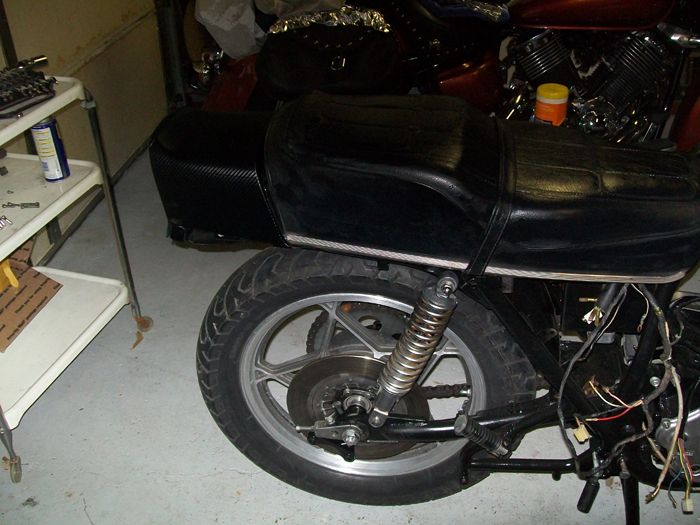
I also got some of the carbon fiber vinyl and covered the back tail piece. Kinda cool. Not a good pic, but I now have a rolling chassis. I'm going to incorporate the carbon fiber stuff on the tank when the time comes.
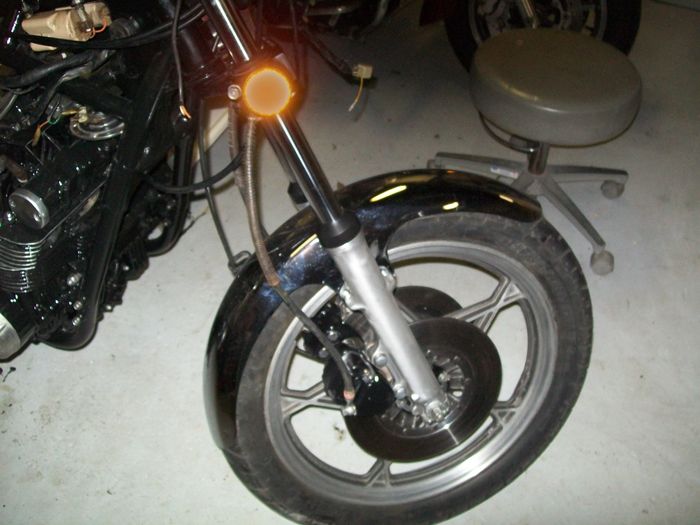
Rebuilt the front brakes as well with all new stuff. Mounted the calipers and put in the tach and speedo cables. The front end is ready to go except for bleeding the brakes. I'll do both ends some time this week.
All of the case covers are on, filled with oil again. I have the wire loom in, but not everything is hooked up yet. That will take some time. Have had problems finding a colored wiring diagram. Maybe someone will see this and point me in the right direction.
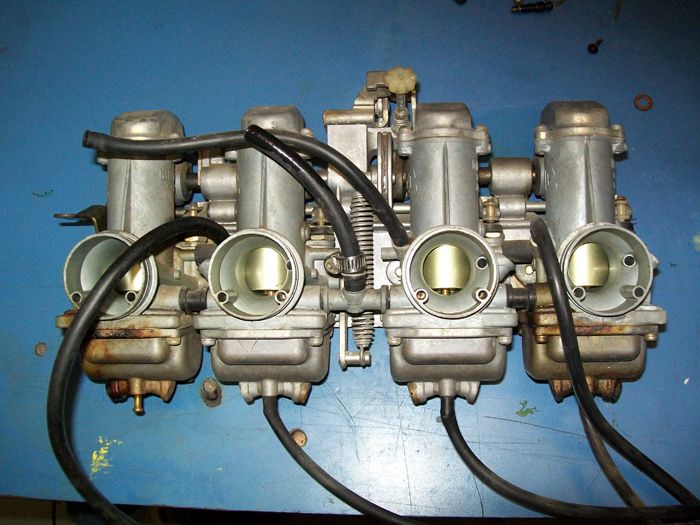
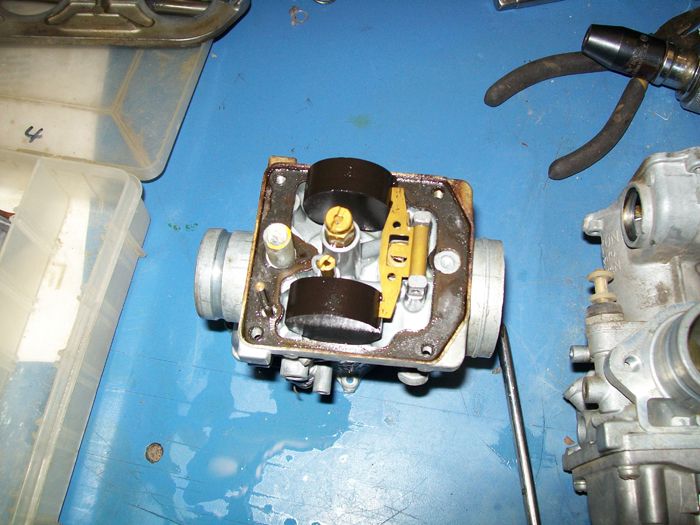
Now I've started the carb rebuild. Here they are at the beginning.
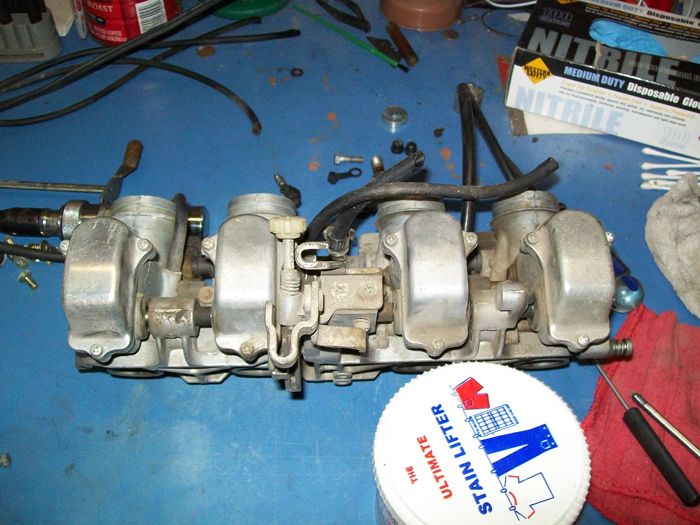
They are not terrible and should clean up good. Here is the top of their heads looking at ya.
And inside the bowls.
When I first looked inside the carbs I'm thinking what a clean deal. Most people may not have even cleaned everything out. Obviously I am not going to do that. I have the parts, I have the tools and the time. Duh. But I was surprised that things looked so good. Stock jets too. I was concerned that there may be something weird in there since I suspect that the bike has been on the track, and the PO was running straight pipes. But nothing out of whack here.
Then problems
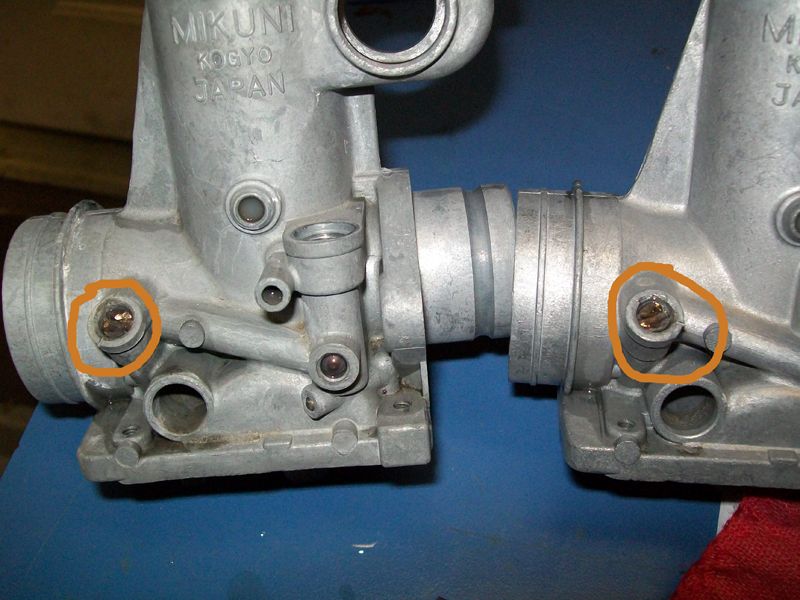
Two of the pilot air screws are pretty well stripped. I can see them better now that the carbs have soaked in Berryman's, but I'm afraid of these guys. Anyone have an idea of how to get these out? I have new ones. One other thing, the Berryman's stripped the parts okay, but also my marker on the carb order. Not positive which is 1,2,3 or 4. Help!
Comment
-
btbarb
Wiring Diagram URL
Originally posted by wedoo2 View PostI have the wire loom in, but not everything is hooked up yet. That will take some time. Have had problems finding a colored wiring diagram. Maybe someone will see this and point me in the right direction.
Comment
-
wedoo2
That is about the coolest thing I have seen in a long time. A page for every system I think. Thanks Bryan. This ought to be a sticky or something.
Oh, and with a little help, I have got one of the air screws out of the carburetor, but one is stuck in there like two dogs in heat.
TMI?
Comment
-
wedoo2
I was putting in the clutch cable and, for one thing, it is long enough but there is not enough of the cable showing to put in the adjuster on the handlebar. It will go on the handle okay, but not enough line. The clutch does seem to work okay, fairly easy to pull even though I have it rigged up without the adjuster on it. But....
What have I done? When I pull in the clutch the shifter will not change gears, Hard as a rock. Like I say the clutch does pull in and the motor turns over fine with the kickstarter. But it will not go into a gear, up or down. Like it is frozen there. Someone tell that I just forgot to do something and call me an idiot. I don't care. I'd rather be an idiot than have a bad transmission. It worked before I took the motor off.
Comment
Comment