Announcement

Collapse
No announcement yet.

81 GS 750L Bobbed

Collapse
X
 
  • Filter
  • Time
  • Show
Clear All
new posts

    #16
    Header Leak

    I've noticed that the middle two pipes of my header, when bolted down tight, still do not feel very tight against the motor and there is exhaust gasses getting through. When I originally removed them for the heat wrap, I noticed two metal shims that alight inside the lip on the end of the header. Well I replaced these in the same position that they were before but it still seems to be leaking.

    Has anyone seen this same problem on their bike? Is there a truly specific way to align those shims or is there a gasket that I may want to invest in?

    Thanks.

    Comment


      #17
      those are your header gaskets. i replaced mine when i took off and put back my exhaust. they are crush washers so when you tighten them down it fills all the small gaps between the pipe and head to keep gases from escaping that way. the gasket must be deformed and not seated around either the header or the head well in a few spots. the gaskets arent much to get some new ones.

      Comment


        #18
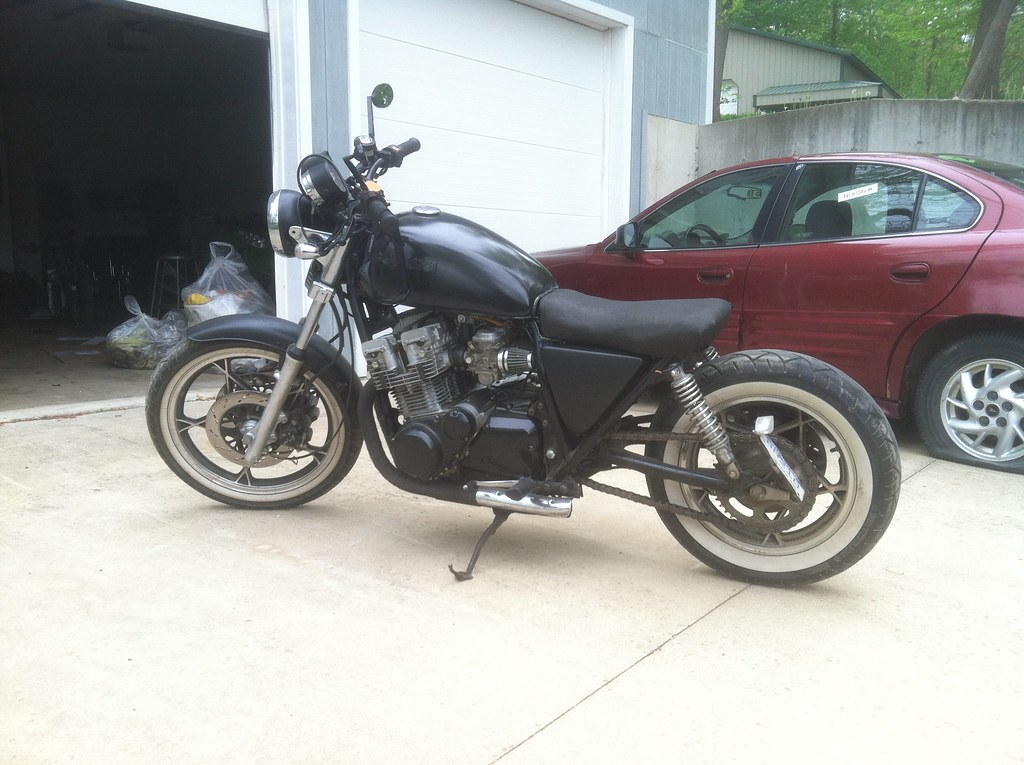
        Nice! I was trepidatious for the white walls on alloy rims, but you brought me an answer here.

        Comment


          #19
          Originally posted by Rockgs1000 View Post
          those are your header gaskets. i replaced mine when i took off and put back my exhaust. they are crush washers so when you tighten them down it fills all the small gaps between the pipe and head to keep gases from escaping that way. the gasket must be deformed and not seated around either the header or the head well in a few spots. the gaskets arent much to get some new ones.
          Awesome thanks!

          Originally posted by bhm View Post
          Nice! I was trepidatious for the white walls on alloy rims, but you brought me an answer here.
          Yeah they really turned out well! I get a lot of compliments on the WW.

          Comment


            #20
            Got bored this weekend and used an old leather jacket I had to reupholster my seat. I was going to get it professionally done but I'm short on cash right now. Turned out pretty good!


            Also got my side covers painted and mounted and my mirrors installed!

            I live on a dirt road so its really dirty right now but....

            Comment


              #21
              Speedometer Update

              So after my accident I destroyed my tach and did some pretty good damage to my cluster in general. The speedo was going out before I wrecked also. My question is, does anyone know where a quality aftermarket replacement gauge is available at? I've seen a nice simple on on Dimecitycycles that was just a speedo with all the indicator lights on it(oil, blinker, high beam, neutral) all in LED and looked great; although they are sold out. I wouldnt mind going down to a single gauge; weather it be just a tach or just a speedo.

              Anyone know of some good sources/projects that people have done where the clusters were replaced with something aftermarket? I know that most of you like to retain the stock look of your bikes-which i totally respect- but I'm looking some more modern looking features on my classic bike.

              thanks a lot guys!

              Comment


                #22
                have a look here http://www.thegsresources.com/_forum...ht=koso+gauges

                it will give you some ideas....

                .

                Comment


                  #23
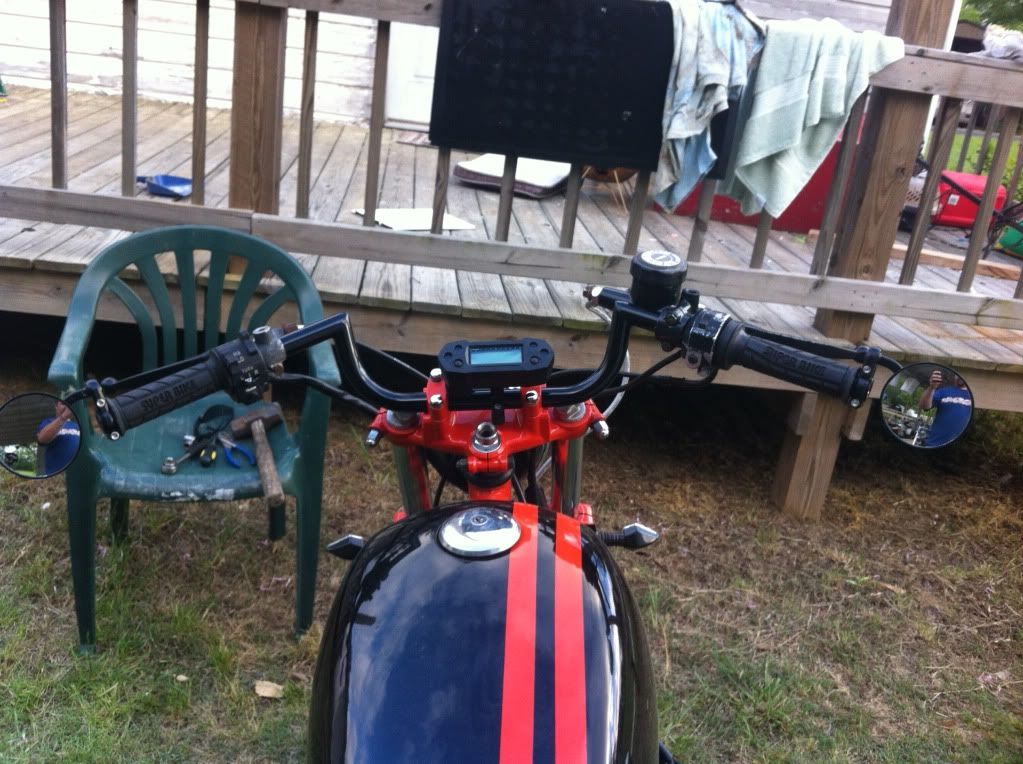
                  I went with a Koso digital gauge. Has Speedo,tech,fuel level, and all indicator lights in a small package

                  Comment


                    #24
                    Carb Issues

                    So i need some advice and guidance, any help will be very appreciated! So i've decided to take the winter and pull the motor and fix the oil seeping/burning issue that I have. Also, the #2 carb has been getting stuck and causing my bike to flood out so i decided to dip and restore them... that is the issue that I am in the process of currently.

                    The former owner of this bike must have cleaned the carbs at some point, because he managed to ruin 90% of the hardware inside and outside the carb bodies. about 3 jets seem they should be replaced. with one being unable to remove and one pilot screw also stuck. I managed to get all the rest of the hardware out thankfully.

                    The bike ran pretty well other than the #2 carb issue. After looking inside I'm very surprised, especially fitted with pod filters.

                    First off the Pilot screw #2

                    pilot screw by Weeksteeze, on Flickr

                    What would be the best method for removing this. I cant get any bite on it with a flathead-its toast.

                    Next is the Pilot Jet #3


                    pilot jet by Weeksteeze, on Flickr

                    The head of this thing looks like it was put into a blender. I've tried every size flathead and even bought two more to hopefully be able to get some torque on it but no luck. heat and pb blaster with no luck either. I dont want to damage it anymore than it already is-if in fact that is possible. Seems like this one will be pretty tough because of the small opening. Thoughts?

                    and finally these Float seats and float pin #2.


                    float needle by Weeksteeze, on Flickr
                    This float pin has a small indent on it where it seems like it was forced out previously or something... They mention in the tutorial that if any of the tapered end has a ridge then it should be replaced. Does this go for the tapered end on this side? It is possible that the float couuld get caught on this?

                    then the float seats.... I cannot get these things out. I've watched videos online and it seems they just pop right out with needle nose pliers. Well I dont want to damage them but they will NOT budge. I've tried pretty hard and have began to mark the sides of them. I dont want to conttinue until i solve this but I've tried needle nose pliers. Light grip with vice grips and tried screwdriver to put leverage under it where the indent is scored around the sides. No luck. Should it be this tough to remove?

                    Thanks very much for any help.
                    Last edited by Guest; 03-19-2014, 08:27 PM.

                    Comment


                      #25
                      So more fun as I get further into the rebuild.

                      Ordered a set of carbs from Witttom(thanks) yesterday so I decided to start and tackle the top end. One of the Cylinder head bolts had been broken off with only about 1/8 of an inch exposed once the head is off. Then I look inside the cam reservoir area and there is a chunk of aluminum from the thread of the same bolt that has sheered off into and landed beneath the cam!... hard to explain with out a picture but its part of the threaded sleeve that the bold goes into-you can see the sheered bolt inside.... I Will post pictures later but It doesn't look like it will really cause any issues but I'm not sure.

                      My Exhaust cam is also scored... well I wouldn't say scored because you cant catch a fingernail on the rubbed area but the finish has defiantly had some friction on it.

                      So after removing the cam tensioner and setting I get my 10 mil ratchet out and begin to remove the cam journal bolts. They are pretty much all snapping! just about 4-5 threads down!!! so I did some research and my only guess is that when the previous owner did the work, he over torqued these bolts and weakened them, which in turn caused the excessive wear on my cam. And when Now i am trying to remove them and they just snap at the stretch area before the head threads. I'm no professional but is this a good guess??? They aren't oxidized at all and very lubricated with oil. I've stopped after I broke four so if you have other ideas let me know.

                      I'm going to get a center punch and an extractor kit and have some fun here in the next week.

                      Comment


                        #26

                        Comment


                          #27
                          So this is how a majority of the ones I got out look like.

                          by Weeksteeze, on Flickr

                          The rest look like this
                          by Weeksteeze, on Flickr

                          Also Here is the chunk that I found just laying next to my valve


                          by Weeksteeze, on Flickr

                          by Weeksteeze, on Flickr

                          Whats your thoughts on this?? More product of over-torquing??

                          Untitled by Weeksteeze, on Flickr

                          I got some cleaning done, leaking gaskets and living on a dirt road do not mix. Thankfully all my cylinder sleeves are smooth and not scored like I had previous thought possible. Might just to a minor DIY hone but they are very smooth for the most part.

                          Comment


                            #28
                            Thanks for the advice everyone!!!!!

                            Whats up with this scoring on the inside of this piston? Normal wear??

                            Untitled by Weeksteeze, on Flickr

                            My handy valve tool.


                            by Weeksteeze, on Flickr

                            Comment


                              #29
                              Originally posted by Weeksz View Post
                              Thanks for the advice everyone!!!!!

                              Whats up with this scoring on the inside of this piston? Normal wear??

                              Untitled by Weeksteeze, on Flickr

                              My handy valve tool.


                              by Weeksteeze, on Flickr
                              There shouldn't be any wear inside the piston, and I don't see any. What exactly are you talking about? Also what are you seeing as over torqued on the picture of the whole crankcase? Again, don't see anything, unless you mean the broken off studs..

                              Nice looking red and black gas tank, I like the red triple clamp. got any pics of the whole bike?
                              http://img.photobucket.com/albums/v5...tatesMap-1.jpg

                              Life is too short to ride an L.

                              Comment


                                #30
                                Maybe little to late but about your gauges but, i have dimecitycycles gauges on my bike and I love them!

                                Comment

                                Working...
                                X