Announcement

Collapse
No announcement yet.

81 GS 750L Bobbed

Collapse
X
 
  • Filter
  • Time
  • Show
Clear All
new posts

    #31
    Inside the piston boss where the wrist pin slides. lookes like waves with a small fracture.

    Untitled by Weeksteeze, on Flickr

    And when I say over torqued. i'm talking about how this chunk of aluminum ended up inside my valves. do you see the large threaded piece of metal that is missing from the side of the head bolt-sleeve? I'm just wondering if this is something that will give me problems down the road. I'd no professional and when I see damage on or wear to the internals I'm not sure what is supposed to raise a red flag ect.

    Untitled by Weeksteeze, on Flickr

    Comment


      #32
      That isnt my tank. thats RockGS1000's btw.


      Originally posted by Spiff View Post
      Maybe little to late but about your gauges but, i have dimecitycycles gauges on my bike and I love them!
      I still havent gotten a set so I'll keep these in mind. I was looking into them back when I was really trying to get some but its probably going to be further down the road now. I'll keep it in mind thanks!

      Comment


        #33
        I think the piston is fine, normal casting make it look like that. And I think it was overtorqued probably a few times to break the bolt, to break the casting took some serious torque..
        http://img.photobucket.com/albums/v5...tatesMap-1.jpg

        Life is too short to ride an L.

        Comment


          #34
          Originally posted by Spiff View Post
          Maybe little to late but about your gauges but, i have dimecitycycles gauges on my bike and I love them!
          Just wanted to say that I also had the Dime City gauges and loved them... Until both the speedo and tach failed. The speedo needle started to jump around and eventually broke at only 350-ish miles. Soon after, my tach needle simply broke off... I then had to fight tooth and nail with the returns dpt, and even Herm (the owner of dime city himself) in order to get the gauges returned. Long story short, there was some poor communication, but everything worked out in the end. Just don't buy those gauges...

          Comment


            #35
            Originally posted by Weeksz View Post
            First off the Pilot screw #2

            pilot screw by Weeksteeze, on Flickr

            What would be the best method for removing this. I cant get any bite on it with a flathead-its toast.
            Your best bet there is to use a Dremel tool with a large cut-off wheel to cut a slot down the entire tower and cut a new slot in the end of the screw.
            When you are done, they will look like this:


            Originally posted by Weeksz View Post
            Next is the Pilot Jet #3


            pilot jet by Weeksteeze, on Flickr

            The head of this thing looks like it was put into a blender. I've tried every size flathead and even bought two more to hopefully be able to get some torque on it but no luck. heat and pb blaster with no luck either. I dont want to damage it anymore than it already is-if in fact that is possible. Seems like this one will be pretty tough because of the small opening. Thoughts?
            What did you use for "heat"? A propane torch works very well.

            If that does not work, use some left-handed drill bits and a slow speed on the drill. At slow speeds, the drill will tend to 'bite', which just might drag the jet out with it. Obviously, you will need new jets. Soak it with penetrating oil first, either way you go.


            Originally posted by Weeksz View Post
            and finally these Float seats and float pin #2.


            float needle by Weeksteeze, on Flickr
            This float pin has a small indent on it where it seems like it was forced out previously or something... They mention in the tutorial that if any of the tapered end has a ridge then it should be replaced. Does this go for the tapered end on this side? It is possible that the float couuld get caught on this?
            The "tapered end" is hidden between your thumb and finger. That little indent will not affect operation at all.


            Originally posted by Weeksz View Post
            then the float seats.... I cannot get these things out. I've watched videos online and it seems they just pop right out with needle nose pliers. Well I dont want to damage them but they will NOT budge. I've tried pretty hard and have began to mark the sides of them. I dont want to conttinue until i solve this but I've tried needle nose pliers. Light grip with vice grips and tried screwdriver to put leverage under it where the indent is scored around the sides. No luck. Should it be this tough to remove?
            Yes, sometimes they are very tough to remove. Soak with penetrating oil first. Grab with needle-nose pliers, twist and pull, then THROW THEM AWAY. Get new ones, along with new needles, you will not have to worry about them for another 30 years. I get mine from =custom&filters[year]=1981]Parts-n-More. They are not OEM, but I have never had any problems with them.

            .
            sigpic
            mine: 2000 Honda GoldWing GL1500SE and 1980 GS850G'K' "Junior"
            hers: 1982 GS850GL - "Angel" and 1969 Suzuki T250 Scrambler
            #1 son: 1986 Yamaha Venture Royale 1300 and 1982 GS650GL "Rat Bagger"
            #2 son: 1980 GS1000G
            Family Portrait
            Siblings and Spouses
            Mom's first ride
            Want a copy of my valve adjust spreadsheet for your 2-valve per cylinder engine? Send me an e-mail request (not a PM)
            (Click on my username in the upper-left corner for e-mail info.)

            Comment


              #36
              Hey, a GSXR1100 head goes right on to fix the broken head. And, where are the mufflers??
              G
              sigpic1983 1100 Katana - soon to be turbo Busa powered.
              2007 GSXR1K-Sold-But not forgotten.
              Have 2X ZG14 engine's for '81 GS750E project.
              '82 GS750E frame is TITLED awaiting GSXR1127/12B engine and '81 1100E slowly being built.:eek:

              Comment


                #37
                All I can say is WOW!!! That poor engine has been through a lot of abuse. Good luck with the restore.

                I'm assuming that you did remove the retaining screw and plate before you attempted to remove the float seats. If so, then I'd do as Steve recommended and just grab that sucker with some pliers and twist as you pull. Then get some new ones.
                Last edited by JTGS850GL; 04-14-2014, 12:52 PM.
                http://img633.imageshack.us/img633/811/douMvs.jpg
                1980 GS1000GT (Daily rider with a 1983 1100G engine)
                1998 Honda ST1100 (Daily long distance rider)
                1982 GS850GLZ (Daily rider when the weather is crap)

                Darn, with so many daily riders it's hard to decide which one to jump on next.;)

                JTGS850GL aka Julius

                GS Resource Greetings

                Comment


                  #38
                  Originally posted by Steve View Post
                  Your best bet there is to use a Dremel tool with a large cut-off wheel to cut a slot down the entire tower and cut a new slot in the end of the screw.
                  When you are done, they will look like this:

                  .


                  That is a good idea as I hadnt thought of that before. I ordered some new carbs that just arrived today so hopefully they will all play nice.


                  Originally posted by Steve View Post
                  What did you use for "heat"? A propane torch works very well.


                  If that does not work, use some left-handed drill bits and a slow speed on the drill. At slow speeds, the drill will tend to 'bite', which just might drag the jet out with it. Obviously, you will need new jets. Soak it with penetrating oil first, either way you go.
                  yes I used a propane torch but I think the threads are damaged and making the removal much harder especially on an already stripped screw head. I was able to screw it further in then back it out only to a certain point where it would get stuck. The must have been some damage to the threads from a screwdriver having so much use in there.


                  Originally posted by Steve View Post
                  The "tapered end" is hidden between your thumb and finger. That little indent will not affect operation at all.


                  Yes, sometimes they are very tough to remove. Soak with penetrating oil first. Grab with needle-nose pliers, twist and pull, then THROW THEM AWAY. Get new ones, along with new needles, you will not have to worry about them for another 30 years. I get mine from =custom&filters[year]=1981]Parts-n-More. They are not OEM, but I have never had any problems with them.

                  .
                  Thanks for the advice. I did get them to come out with some force and new seats will indeed be on order. I just didnt know if these were some of the good oem brass parts that you want to keep.

                  All I can say is WOW!!! That poor engine has been through a lot of abuse. Good luck with the restore.

                  I'm assuming that you did remove the retaining screw and plate before you attempted to remove the float seats. If so, then I'd do as Steve recommended and just grab that sucker with some pliers and twist as you pull. Then get some new ones..
                  Yeah she needs some serious tlc but she'll be back here soon, thank you. Yes I did remove that plate and screw (i know it remains in the photo).

                  Comment


                    #39
                    What are the little jets that sit on top of the crank case, one on each side? At the base of the top end next to the studs there are little brass-what i assume to be-oil jets. Do these get seated all the way down? And should they be adjusted/cleaned? Unlike the rest of the brass parts on the bike, it appears these hadn't been touched by the previous owner.

                    Thanks

                    Comment


                      #40
                      Should piston rings be replaced with doing a top end? The cylinder bore is smooth and they dont look damaged or "used" much. I'd rather not spend the money on 4 new oem sets for $100. But I will if that is a must.

                      Thanks

                      Comment


                        #41
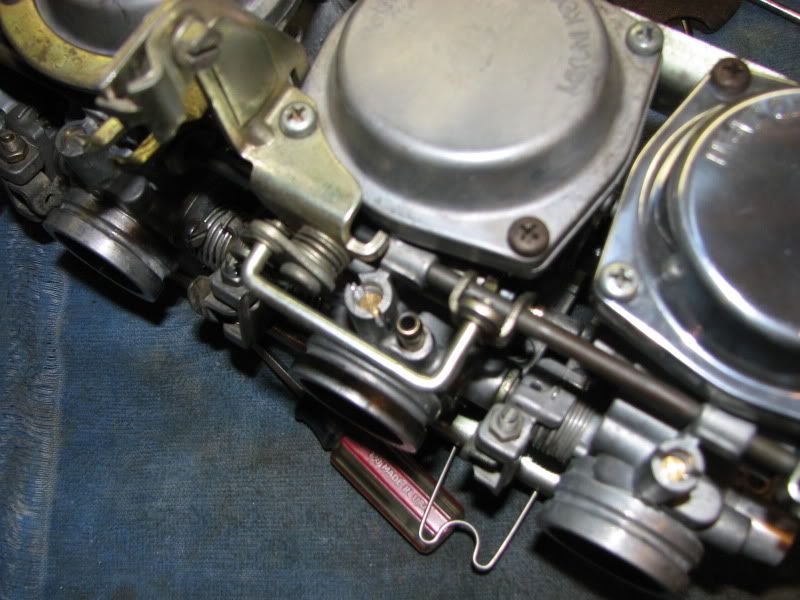
                        Does anyone know what the model number for Mikuni carbs are on a 1981 GS750 L?

                        Are any of these carbs able to run on bikes if they are a year older or newer? I was told that I was receiving the carbs for my bike but they appear to have a different throttle assembly than my set (that is torn apart so I cannot directly compare.

                        Comment


                          #42
                          Bs32ss is what I have on my L. And if your throttle and choke stays are different just use your old ones like I did when I ordered a new set. Hell mine that I ordered were even spaced a little differently overall. I just put a bit of oil on the boots and wiggled them in. Thank god for flexible longish rubber boots.

                          Comment


                            #43
                            Originally posted by Weeksz View Post
                            Does anyone know what the model number for Mikuni carbs are on a 1981 GS750 L?

                            Are any of these carbs able to run on bikes if they are a year older or newer? I was told that I was receiving the carbs for my bike but they appear to have a different throttle assembly than my set (that is torn apart so I cannot directly compare.
                            model no. for your carbs BS32SS

                            Comment


                              #44
                              Fantastic thank you.

                              Comment


                                #45
                                So I got my head back from the machine shop and all the sheered cam journal bolts extracted but they said that it was gonna cost me a lot to get everything jet-washed. I'm wondering a good way to ensure that all the metal flake is out of there before I start rebuilding.

                                My plan is to use brake cleaner and then spray out with a compressor. Or should I use a power wash? Ideas?? I'm trying to save cost too.

                                Also, I asked this in another thread with no response. How important is it to get the carbon deposits out of the intake and exhaust ports?? Is this something that's just going to build back up after an hour of riding it again? Or is this something that you want to spend a lot of time on? I've gotten the vavle seats and valves good with some Seafoam and i'm going to lap my valves but what about in the ports??

                                Thanks for any input.

                                Comment

                                Working...
                                X