Announcement

Collapse
No announcement yet.

82' GS850G project bike

Collapse
X
 
  • Filter
  • Time
  • Show
Clear All
new posts

    #16
    Your "resistor" is neither a resistor nor a fuse.

    It is a self-resetting circuit breaker.

    Nice item to have, but it should be more than 10 amp capacity. The stock MAIN fuse is 15 amps, but it does not have to carry the full output of the R/R. It only supplies the bike with power until the engine is running, then it takes what's left over from the stator output and sends it back to recharge the battery. That circuit breaker is apparently in a direct line from the R/R to the battery, it should be 25-30 amps.

    .
    sigpic
    mine: 2000 Honda GoldWing GL1500SE and 1980 GS850G'K' "Junior"
    hers: 1982 GS850GL - "Angel" and 1969 Suzuki T250 Scrambler
    #1 son: 1986 Yamaha Venture Royale 1300 and 1982 GS650GL "Rat Bagger"
    #2 son: 1980 GS1000G
    Family Portrait
    Siblings and Spouses
    Mom's first ride
    Want a copy of my valve adjust spreadsheet for your 2-valve per cylinder engine? Send me an e-mail request (not a PM)
    (Click on my username in the upper-left corner for e-mail info.)

    Comment


      #17
      Originally posted by Steve View Post
      Your "resistor" is neither a resistor nor a fuse.

      It is a self-resetting circuit breaker.

      Nice item to have, but it should be more than 10 amp capacity. The stock MAIN fuse is 15 amps, but it does not have to carry the full output of the R/R. It only supplies the bike with power until the engine is running, then it takes what's left over from the stator output and sends it back to recharge the battery. That circuit breaker is apparently in a direct line from the R/R to the battery, it should be 25-30 amps.

      .
      So, I should keep it hooked to the battery? Just with a bigger self resetting breaker? Or would it be okay to hook it up to the ignition side like some other forums I've read?

      Comment


        #18
        Originally posted by Hakamisu View Post
        So, I should keep it hooked to the battery? Just with a bigger self resetting breaker? Or would it be okay to hook it up to the ignition side like some other forums I've read?
        The original R/R fed the positive back into harness (so it could power the bike needs with any surplus going to battery)- some PO got befuddled with the Shindengen R/R upgrade and went direct to battery (or so it seems from your pics). As Steve said, you need a 25 amp fuse for this approach; a simple inline fuse is fine- no need for circuit breaker. On my my bike, I split the hot feed from the R/R- I connect to harness and have a 20 amp inline fuse direct to battery positive as backup.
        1981 gs650L

        "We are all born ignorant, but you have to work hard to stay stupid" Ben Franklin

        Comment


          #19
          I am going to comment on your first post about the tear down. I have done many and the best advise I can give is that you bag and tag every piece so you can identify all of it when it comes time to put things back together. Take a lot of pictures as it will help you remember how things reassemble and you won't feel stupid asking why "this doesn't fit". Clean everything, order a bolt kit from Z-1 Enterprises that replaces the old crappy screws with new stainless steel allen head bolts. Very cheap. Buy Suzuki parts when available. Once you start doing this it is addictive.

          Comment


            #20
            Originally posted by tom203 View Post
            The original R/R fed the positive back into harness (so it could power the bike needs with any surplus going to battery)- some PO got befuddled with the Shindengen R/R upgrade and went direct to battery (or so it seems from your pics). As Steve said, you need a 25 amp fuse for this approach; a simple inline fuse is fine- no need for circuit breaker. On my my bike, I split the hot feed from the R/R- I connect to harness and have a 20 amp inline fuse direct to battery positive as backup.
            As I am going to be doing a wire harness clean up/rebuild I will probably work it into the new harness instead of running it straight to battery.
            Last edited by Guest; 06-09-2013, 03:51 AM.

            Comment


              #21
              Originally posted by wedoo2 View Post
              I am going to comment on your first post about the tear down. I have done many and the best advise I can give is that you bag and tag every piece so you can identify all of it when it comes time to put things back together. Take a lot of pictures as it will help you remember how things reassemble and you won't feel stupid asking why "this doesn't fit". Clean everything, order a bolt kit from Z-1 Enterprises that replaces the old crappy screws with new stainless steel allen head bolts. Very cheap. Buy Suzuki parts when available. Once you start doing this it is addictive.
              Thanks for the sound advice. As I am (was) an aircraft mechanic, I understand the bagging and tagging method. Unfortunately I didn't realise a lot of what the PO did with the Harness until I disconnected everything and started to remove it (Should have known better). Will be taking way more pictures with my good camera from now on.

              I am not going to be re-installing some stuff though, so it is going in a "refurb and resell" pile (if I can ever find time to get to it).

              Also, thanks for the info on the bolt kit, I was definitely going to go down to the Fastener place in town and start going to work. You probably saved me at least a whole wasted day (and money), Thanks.

              Comment


                #22
                Originally posted by Hakamisu View Post
                Also, thanks for the info on the bolt kit, I was definitely going to go down to the Fastener place in town and start going to work. You probably saved me at least a whole wasted day (and money), Thanks.
                In the long run, ordering the kit from Z1 will be much cheaper.

                They already have all the bolts you need, in the sizes that you need. If you go to "the fastener place" don't forget to factor in the valure of your time travelling, then searching for all the sizes that you need, as well as waiting for the parts they don't have in stock. One simple call to Z1, and your bolt kit will be in your mailbox in about three days.

                .
                sigpic
                mine: 2000 Honda GoldWing GL1500SE and 1980 GS850G'K' "Junior"
                hers: 1982 GS850GL - "Angel" and 1969 Suzuki T250 Scrambler
                #1 son: 1986 Yamaha Venture Royale 1300 and 1982 GS650GL "Rat Bagger"
                #2 son: 1980 GS1000G
                Family Portrait
                Siblings and Spouses
                Mom's first ride
                Want a copy of my valve adjust spreadsheet for your 2-valve per cylinder engine? Send me an e-mail request (not a PM)
                (Click on my username in the upper-left corner for e-mail info.)

                Comment


                  #23
                  Just some clarification. The bolt kit, was it only for the engine? Or is there a whole bike kit that I just can't seem to find?

                  Comment


                    #24
                    Well, It's been too long (as far as I'm concerned) for an update, but here it is. Sometimes having a life can be unproductive. I am thankful though, I was suppose to have traveled to Eureka, NU, but things have been delayed so here we go.


                    So I was able to remove the exhaust, carbs and foot pedals/brackets.

                    A nice pic of why I'll need to to change the exhaust gaskets.


                    So, I've been itching to get this bike done sooner then later and maybe hold off doing the engine. As you'll see in these next couple of pictures, not going to happen.


                    Here she is so far.
                    Last edited by Guest; 06-19-2013, 01:45 AM.

                    Comment


                      #25
                      Clean that engine reallly well be fore you are tempted to pull it apart.

                      Simple Green worked well for me and a few stiff nylon or brass brushes and elbow grease.
                      2018 Honda Africa Twin AS
                      2013 DR 650 Grey, sold 1981 GS 650E Silver,

                      1980 GS1000ST Blue & White, X2

                      2012 DL650 Vstrom Foxy Orange, in storage
                      1981 CT110 X2 "Postie Bikes" Gone to a New Home.
                      2002 BMW 1150 GS Blue & White - Sold
                      1975 BMW R90/6 Black - Sold 1984 GS1150EF Sold
                      1982 BMW R100 Africa trip, Stolen - Recovered- Sold
                      1977-1980 Suzuki GS550, GS1000E, GS1000S GSX750, GSX1100,s
                      Hondas ST90, CR125 CB175 , CB350 CB750, NSU Quickly, Yamaha RD's 350/400,

                      Comment


                        #26
                        Yep. Put on a simple green clinic. I cleaned mine after I pulled the motor. I am having flashbacks to my build after looking at your pictures.

                        Take your time. Do it right. Ask a lot of questions on the forum. Take a break and walk away from it when you get frustrated. Get OEM gaskets and parts when you can. (although I used Real Gaskets on my breather cover and valve cover).

                        Feel free to peruse my thread and learn from my mistakes.

                        Good luck and have fun.

                        When you're finished you'll love the result.

                        Comment


                          #27
                          Kiwi Canuck and Good Times,

                          Thanks for the insight. I was lucky enough to have a friend that has a huge jug of Simple Green in his garage and has never used it (Now belongs to me). I'll have to go buy a nylon brush now and get to work.

                          Oh, on another note. One of my co-workers is introducing me to a guy that is going to Sand Blast, Prime and Re-paint my bike for me for a couple of cases of beer. He's also going to teach me as he does it. Man I love my job.

                          Comment


                            #28
                            Hey guys,

                            Could someone tell me if I remove the TACHOMETER DRIVE GEAR and cap the hole, will that mess anything up? Like balance or vibration? Would it just be easier to cap the Drive Gear itself?

                            And has anyone replaced the caps for the forks with non-valve caps and if so where could I get some? I am going to be doing the progressive spring upgrade and am trying to clean up the triple.

                            Comment


                              #29
                              So, I have been shopping, and building up my wish list. Which brought me to the issue with my seat pan. (I will post pictures of it tonight). It is rusted pretty bad. Especially right where one of the mounting pads is supposed to go (that's right, no pad). Now, I have found more seat covers for this bike than I could possible imagine, but finding a seat is quite hard.

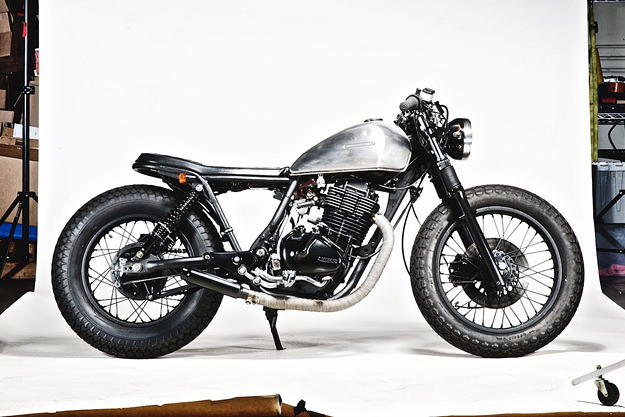
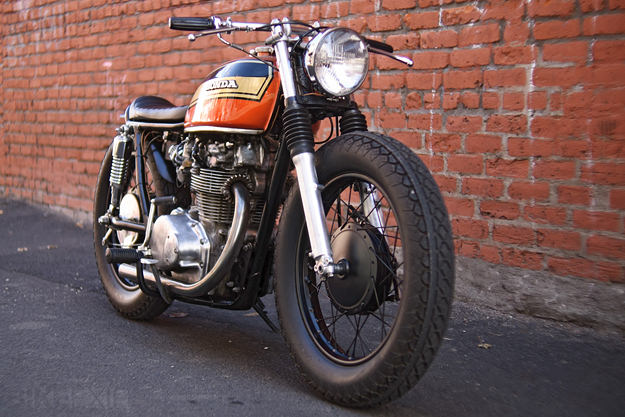
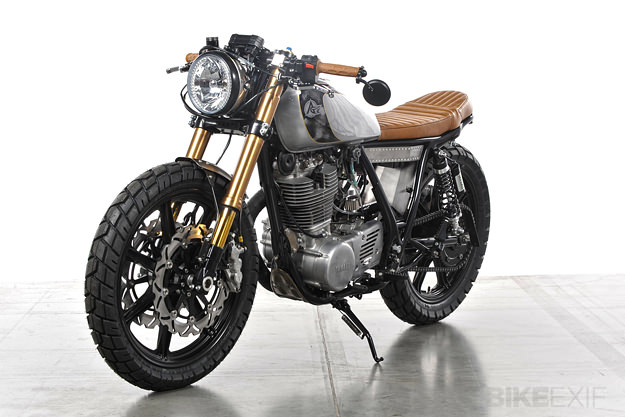
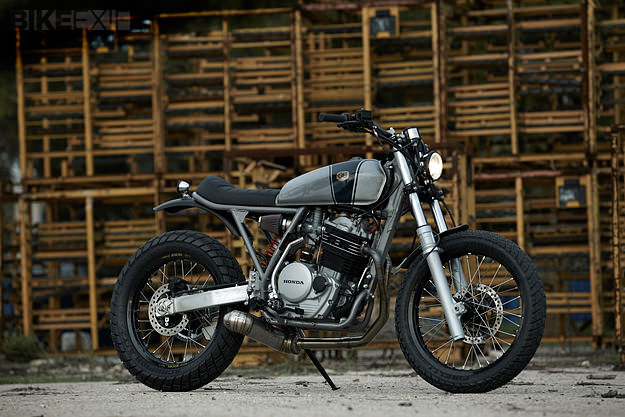
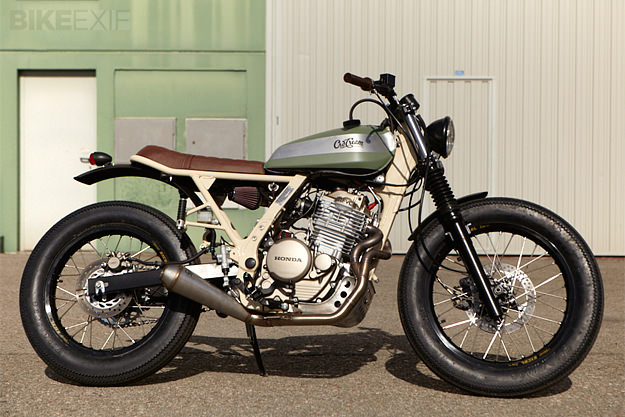
                              So, I decided to make my own... well with some help from my metal bashing friend. And then I figured, if I was going to change the seat, why not more. Well, here is some of my inspiration (One of my co-workers/friends introduced me to this site)

                              The Suzuki GN400 is one of those increasingly rare custom motorcycles that can be built for under $1,000—without looking like it was built on the cheap.

                              Eric Meglasson lives in Bend, Oregon, and his motorcycling journey has had its fair share of twists and turns. “Over the years, my bikes kept getting faster and faster,” says Eric. “But I started longing for a slower, more fun, naked bike to ride on the street at more reasonable speeds.” Although Eric owned a…

                              Tony Prust of Analog Motorcycles has built his reputation with a raft of elegant, mid-capacity customs: the perfect bikes for barhopping and cruising around town. This 1979 Yamaha SR500 has more of a raw edge though, and a name to match—‘Bruto.’ It was commissioned by Mark Wator, who wanted a machine for evening and weekend…

                              Here’s the latest custom to roll out of the Madrid workshop of Cafe Racer Dreams. Once again, there’s an off-road influence—but this time, the Spanish workshop has taken a dirt bike and realigned it for road use, rather than the other way round. CRD #19 is called ‘Apolo’ and is based on a 1991 Honda…

                              I’m starting to wonder if the NX650 is set to replace the CB750 as the favorite Honda platform for custom builders. In Europe, a Honda Dominator is easy to find: it was the ubiquitous inner-city dispatch bike. Tough, reliable and comfortable on the dirt as well as the asphalt, it’s an underrated all-rounder. This is…


                              So, What do you guys think?

                              Comment


                                #30
                                Originally posted by Hakamisu View Post
                                Hey guys,

                                Could someone tell me if I remove the TACHOMETER DRIVE GEAR and cap the hole, will that mess anything up? Like balance or vibration? Would it just be easier to cap the Drive Gear itself?
                                Can't comment on the other stuff, but yes, you can remove the tach drive gear and plug the hole without any issues. (Except for not having a tachometer afterward.)
                                Charles
                                --
                                1979 Suzuki GS850G

                                Read BassCliff's GSR Greeting and Mega-Welcome!

                                Comment

                                Working...
                                X