Announcement

Collapse
No announcement yet.

1980 GS550L build- lots of pics

Collapse
X
 
  • Filter
  • Time
  • Show
Clear All
new posts

    1980 GS550L build- lots of pics

    I picked up this non-runner off CL for 300$, of course with the familiar story-"it ran fine when it was parked" , and "I got it from a guy who got it from a guy who... Just get a new title with this bill of sale"... Blah, blah, blah


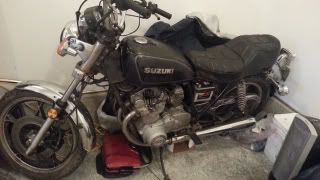
    Well, it hadn't been registered or run since 1990, but with help from this forum and a few new parts, I got it running easily. Only then did I let myself start in on the fun stuff. This bike is for my wife, who has never ridden, and has a very eclectic, retro style. She loves the old Pin-Up girl look.
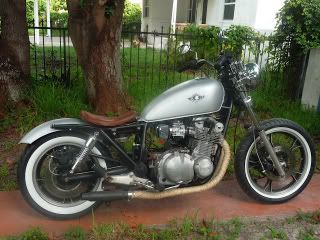
    After lots of looking, her favorite bike style comes from right here on this site- enter Scaylabs' 1100GL. This became the inspiration bike


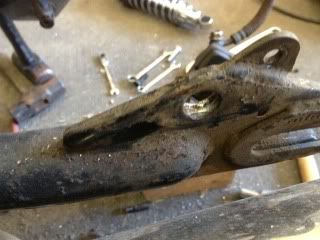
    Wife is only 5'2", so I lowered the rear end with some 11"" sportster shocks. The shock mounts were not only a tiny bit smaller, but they were so corroded that there was severe errosion on the shank where the bushing had been stuck for so many years. I drilled them out and re-welded new grade 8 hardware in.


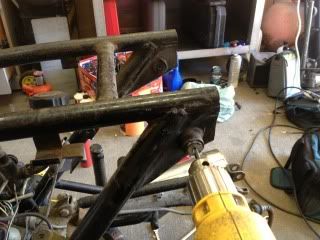
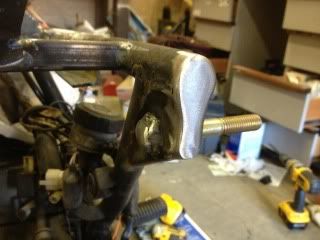
    As you see, I also capped off the ends of the frame where it was trimmed for a solo seat.
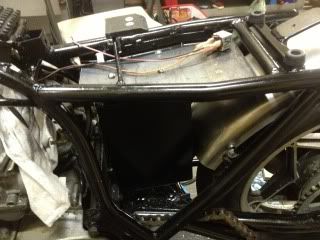
    I'm going without sidecovers and putting the electrical in a pan under the seat


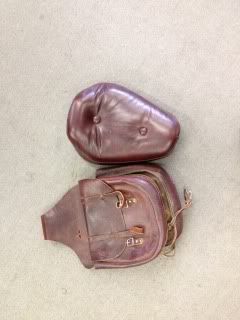
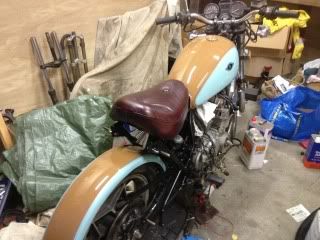
    She picked the parts she wanted. My dad had given her a pair of his old horse saddlebags, and I found a sportster seat that matches it perfectly.


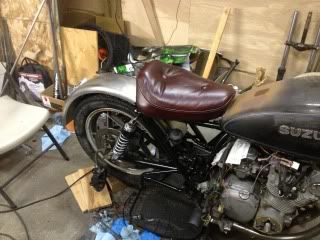
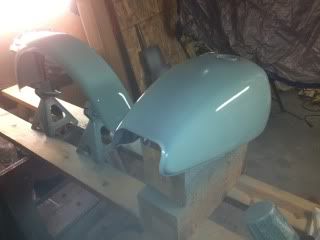
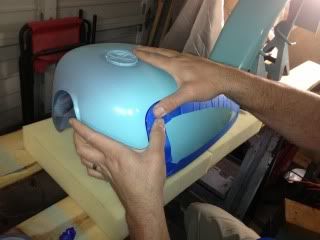
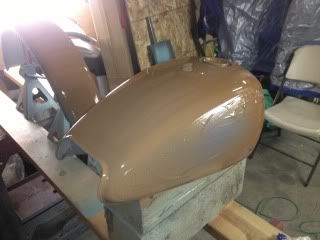
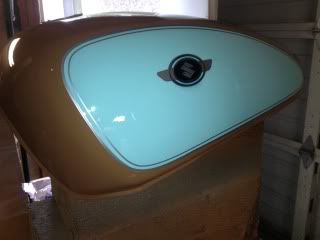
    She chose a long rear fender for a more vintage look, so I fitted it up with the seat- note the paint testing on the tank! Lol


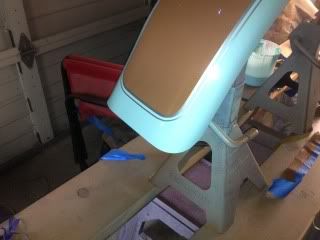
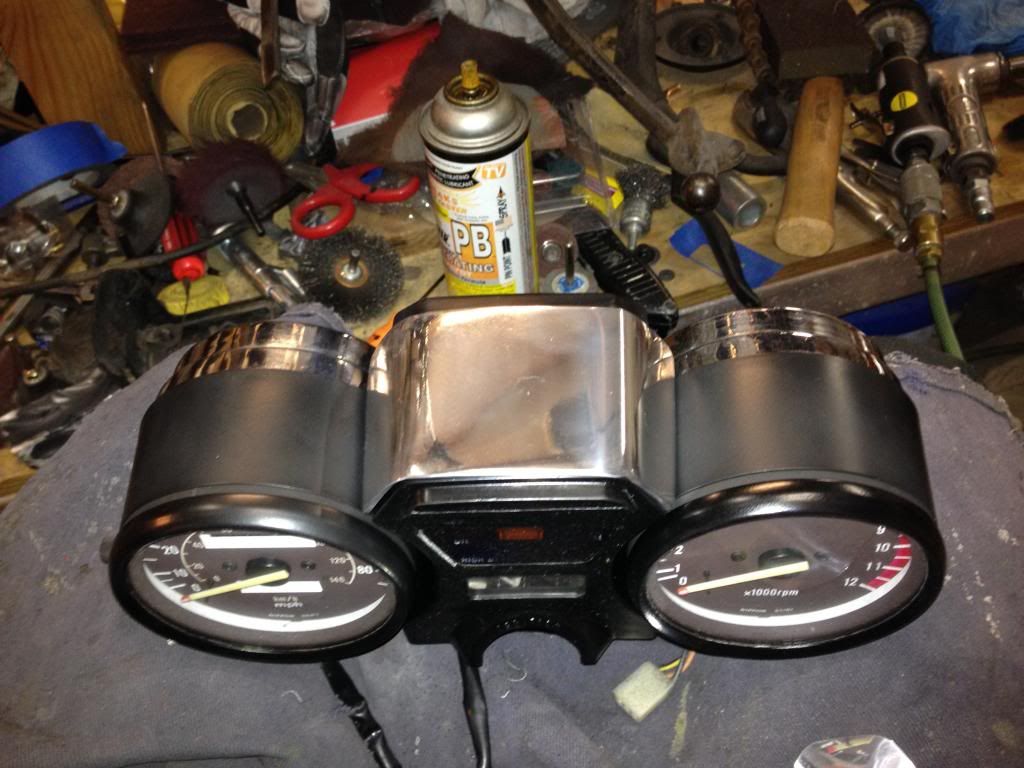
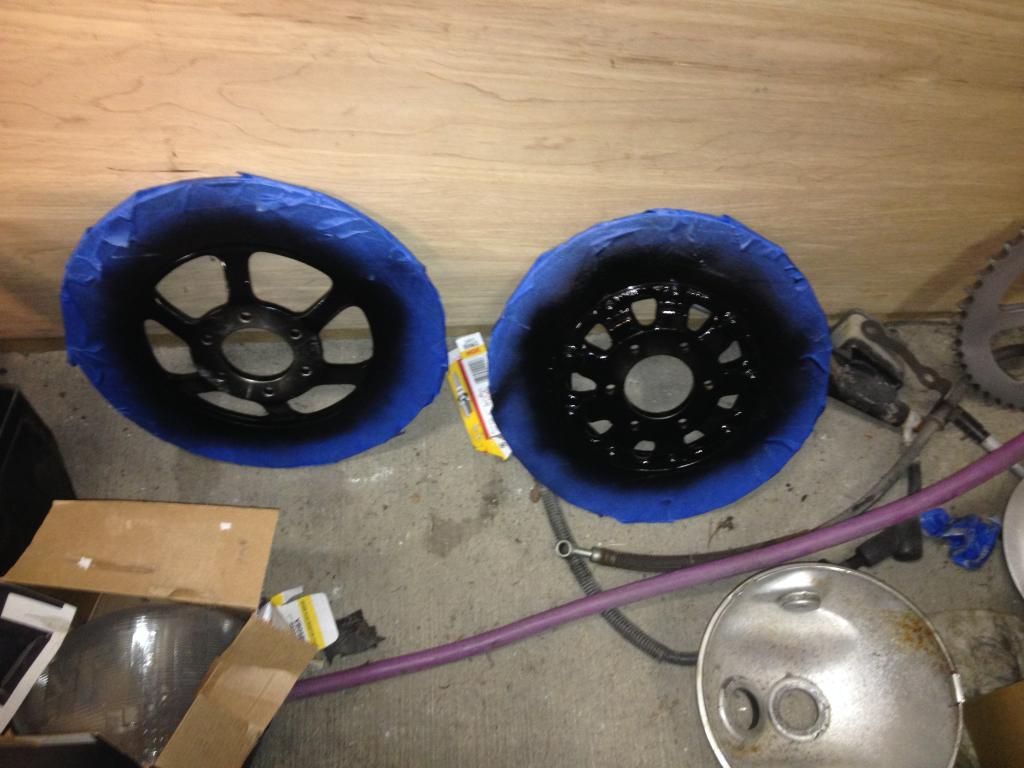
    Next, on to the body work!

    #2
    Paint Weekend! :
    First color to match her favorite nail polish


    A little tape work-


    Color #2 to match her cowboy boots-


    A little pinstriping and some VERY sweet decals I had made thru an ebay vendor
    All buried under several coats of clear!


    I mocked it up the next day, and this is pretty much where it sits now, as I wanted to hold off on any more work to the frame and motor until I got the title situation under control


    The fender is just sitting on the tire, it really sits much closer to the seat

    Comment


      #3
      Nice work! Can't wait to see the finished product! Are you planning on using the saddlebags for the bike, or were they simply the inspiration for the seat?

      I might have gone with a lighter color to accent the blue, but as long as the wifey is happy, am I right? Besides, nobody cares what I think! lol

      Comment


        #4
        Thanks
        The saddlebags are indeed part of the plan. I just need to come up with a clever way to mount them. It would be much easier on a hardtail. I'll have to cut the strap off of them and create a frame to carry them. I plan to try to utilize the exhaust and/or the rear peg mounting points

        Comment


          #5
          A little update on our project-
          Life tends to get in the way, but I have been slowly plugging away on this. I have completed rebuilding the forks, rebuilding the front brake, new front m/c, new stainless brake lines. I have wheel bearings here and ready to go. I have wheels stripped and ready for paint. They are currently at a buddies place awaiting polishing of the lips and faces. New tires are here and ready to go. I still need to fab up some new brackets to support a new headlight.
          Here's what I've been up to with the front end-

          I wanted to clean up the gauges, as they were pretty sad. I like some of the aftermarket looks available, but for my wife, I like the idea of things like the fuel gauge and turn indicator lights. Not to mention that the extra money would be a stretch right now.
          The top of the housing was smashed and cracked, and all the plastic was oxidized and shabby.


          I disassembled and cleaned everything, gave it all a coat of krylon fusion satin black. I cleaned and polished the chrome housing backs, as there was only a tiny bit of surface rust, and they were easy to save.
          To spark it up a bit and cover the damage, I broke out some aluminum covers and polished them-


          I think it turned out pretty cool


          You can also sort of make out in the pic that I polished the upper fork crown. That was a ton of work, as the casting is really rough under the factory paint. It took a ton of sanding, and it's still a little bit rough around the edges. It really looks great though and most importantly, the wife loves it!

          Comment


            #6
            Originally posted by MatBirch View Post

            A little pinstriping and some VERY sweet decals I had made thru an ebay vendor
            All buried under several coats of clear!
            Very nice, love the attention to detail.


            Any leads on the ebay vendor?
            http://img.photobucket.com/albums/v5...tatesMap-1.jpg

            Life is too short to ride an L.

            Comment


              #7
              LOVE the tank. My wife likes it too and loves that you're building it for your wife Nice classy retro look. I painted a Norton themed Suzuki logo on my L.

              Comment


                #8
                Originally posted by tkent02 View Post
                Any leads on the ebay vendor?
                I have him saved in my account. I'll dig it up

                Comment


                  #9
                  Well- took a real bad spill into a big ole tree on my mtn bike, so I had to take the day. By late afternoon, my shoulder had loosened up enough, and I was stir crazy enough to get out to the shop. Wrapped up a few loose ends that I've been working on.

                  I had planned on polishing the wheels, but the guy who was gonna do it has too much on his plate. There was also quite a bit of damage that he couldn't get cut out. Easy enough to paint though-


                  Took a roloc disc to the rotors and got them painted as well-


                  AND- after much trial and error and test fitting, i finally got the new headlight mounts finished, polished and installed. The entire front end is just about there!


                  Up next- finish reassembling the wheels and get some rubber on them, get the rear brake rebuilt, and get this sucker back on the ground!

                  Comment


                    #10
                    Bars

                    I'm looking to swap bars on my 81 550L.

                    Which bars did you go with on yours?

                    Comment


                      #11
                      Originally posted by A-train View Post
                      I'm looking to swap bars on my 81 550L.

                      Which bars did you go with on yours?
                      Daytonas
                      I took the specs from a few different bars and bent up 3/4" emt conduit to match. Set my wife up until she found one she liked. Kept me from ordering and returning...

                      Comment


                        #12
                        What paint did you use? A can of paint then a can of clearcoat? Or did you use a sprayer? I'm gonna be painting up my gas tank eventually, but I've never painted anything other than drywall in the past.

                        What front caliper and master cylinder did you use?

                        Also, the aluminum covers for the gauges? Mine are crap, this would be awesome.

                        I hope you don't mind the questions, haha. Thanks!

                        Comment


                          #13
                          Originally posted by srg View Post
                          What paint did you use? A can of paint then a can of clearcoat? Or did you use a sprayer? I'm gonna be painting up my gas tank eventually, but I've never painted anything other than drywall in the past.

                          What front caliper and master cylinder did you use?

                          Also, the aluminum covers for the gauges? Mine are crap, this would be awesome.

                          I hope you don't mind the questions, haha. Thanks!
                          The paint on the bodywork is all PPG's fleet line of base/clear. The wheels are just Duplicolor rattle can wheel paint. I've had really good luck with it the past, so what the heck. Easy to touch up. I sandblasted them first and spent lots of time cleaning and prepping.
                          The caliper is the stock one, just cleaned up and rebuilt. The M/C is an ebay special. Looks good and got good reviews, but. I have no other feedback yet.
                          The aluminum covers are just scraps of 14 gauge sheet the I cut, bent, shaped and polished. Attached with VHB tape.

                          Comment


                            #14
                            Is that pinstripe tape or painted pinstripes under the clear? I've been looking at the best method to do the pinstripes on my GS1000G but can't seem to find double row pinstripes that can do the tight turns without wrinkling.
                            http://img633.imageshack.us/img633/811/douMvs.jpg
                            1980 GS1000GT (Daily rider with a 1983 1100G engine)
                            1998 Honda ST1100 (Daily long distance rider)
                            1982 GS850GLZ (Daily rider when the weather is crap)

                            Darn, with so many daily riders it's hard to decide which one to jump on next.;)

                            JTGS850GL aka Julius

                            GS Resource Greetings

                            Comment


                              #15
                              Originally posted by JTGS850GL View Post
                              Is that pinstripe tape or painted pinstripes under the clear? I've been looking at the best method to do the pinstripes on my GS1000G but can't seem to find double row pinstripes that can do the tight turns without wrinkling.
                              CheapO pinstripe tape from Napa. It takes some practice!! Lots of patience, a little bit of heat gun, then bury it in clear! A good color sanding and it's nice and smooth.

                              Comment

                              Working...
                              X