Announcement

Collapse
No announcement yet.

1978 GS550ET top end inspect/rebuild

Collapse
X
 
  • Filter
  • Time
  • Show
Clear All
new posts

    1978 GS550ET top end inspect/rebuild

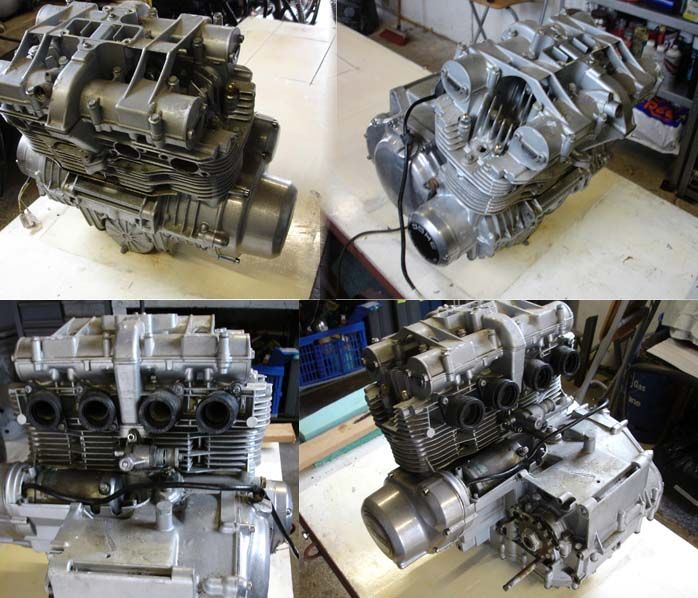
    Hi all, just joined after stripping bike and engine removal.....few pics of that but I'm going to take lots from now and post them as I go hopefully.
    Reason for work is low compression....usual tests seem to point to rings/bore so it's head off time and have a look.

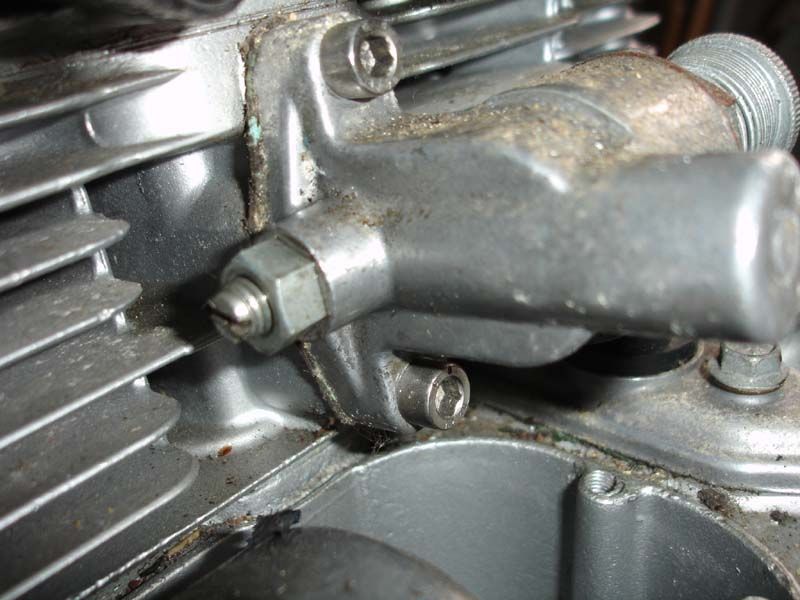
    1st photo is the before...just cam end caps removed


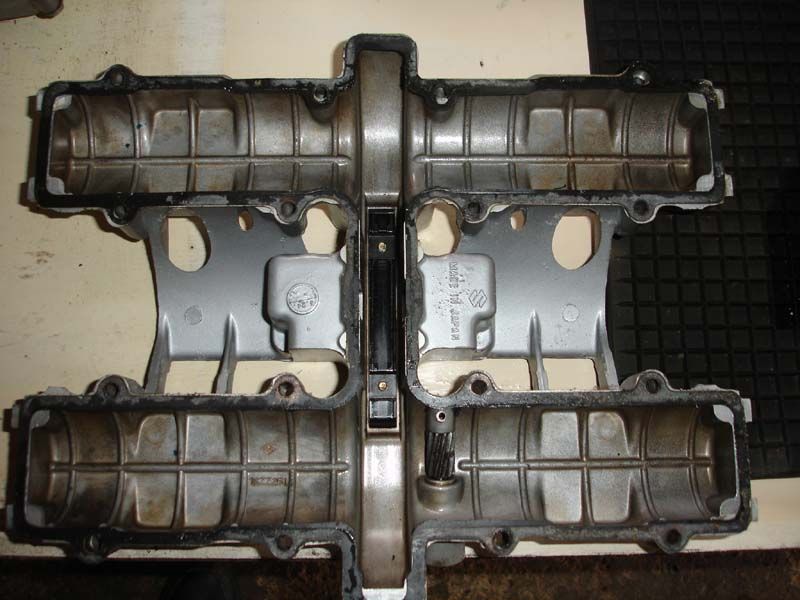
    Next is cam cover removed. Interesting that one of the bolts was newer/different and that some had washers...others did not.


    Now inside cover showing tach drive


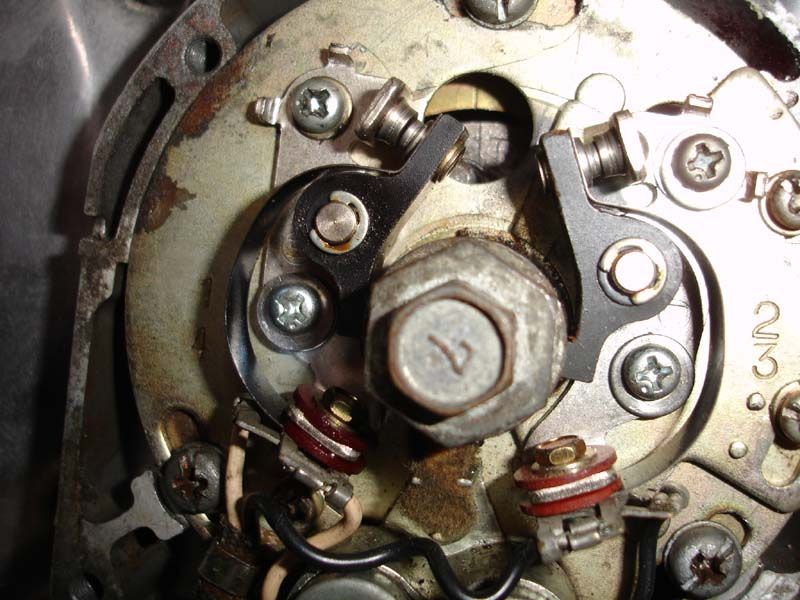
    Next, contact cover removed and TDC aligned


    Next is cam tensioner to be removed....note Allen bolts....a lot of covers have had allen bolts fitted...this was too.


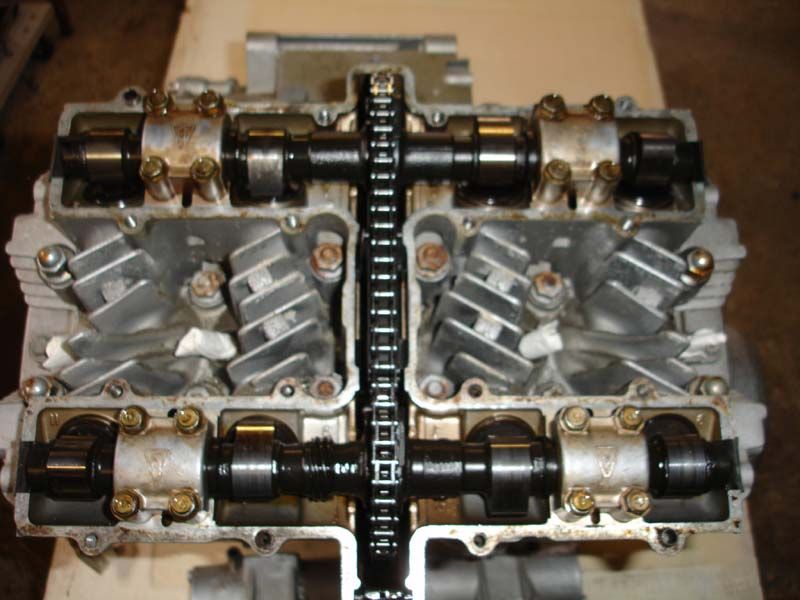
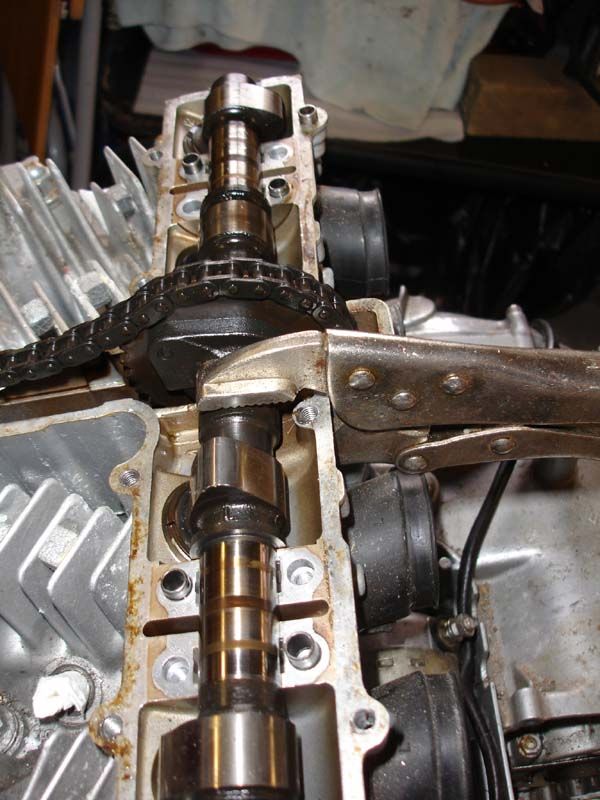
    Next, cam bearing caps removed....note grips securing cam.


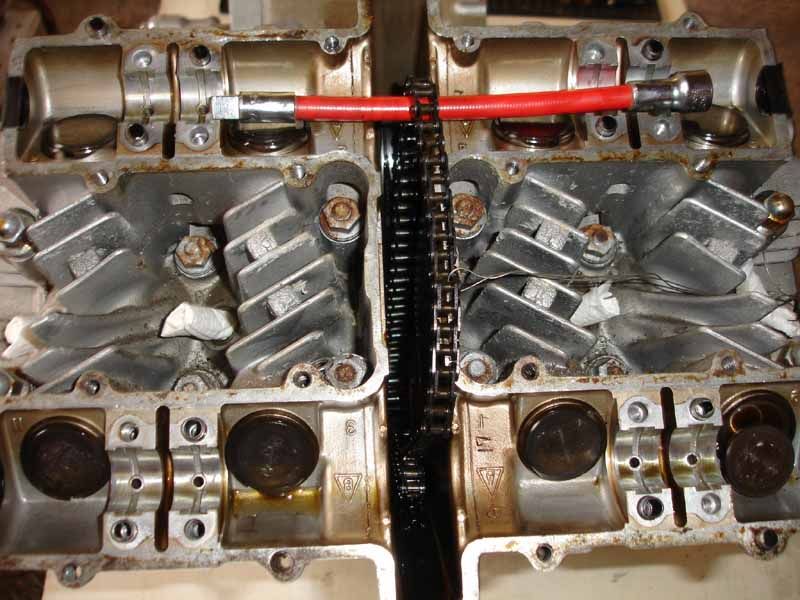
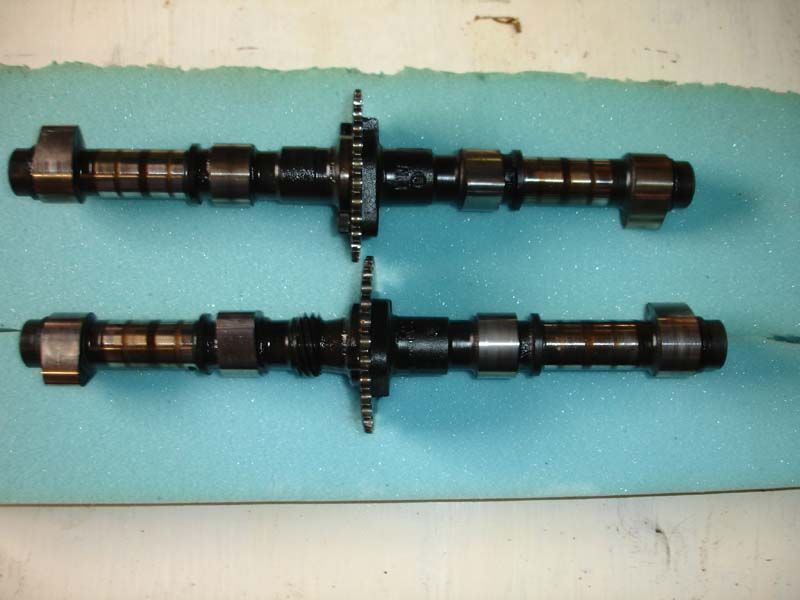
    Next, cans removed...locking wire and flexi extension keeping chain up....do not want to lose this...!!


    Last edited by Guest; 08-18-2013, 03:01 PM. Reason: add pics

    #2
    No worry letting the cam chain fall into the tunnel.
    Ed

    To measure is to know.

    Mikuni O-ring Kits For Sale...https://www.thegsresources.com/_foru...ts#post1703182

    Top Newbie Mistakes thread...http://www.thegsresources.com/_forum...d.php?t=171846

    Carb rebuild tutorial...https://gsarchive.bwringer.com/mtsac...d_Tutorial.pdf

    KZ750E Rebuild Thread...http://www.thegsresources.com/_forum...0-Resurrection

    Comment


      #3
      You going with the 675cc setup?
      http://img.photobucket.com/albums/v5...tatesMap-1.jpg

      Life is too short to ride an L.

      Comment


        #4
        Hi, kinda want to keep it as stock as possible. My mate owned this for 13 years...sold to me 6 years ago. He still lives close....in fact he was one of the helpers to get the engine out. There's a small possibility he wouldn't speak to me again if I did too much...!!!

        Hit my first problem today.....I'm on my own and when I was removing bearing caps it was difficult to do without the engine rotating....managed though. I figured no chance with the head nuts/bolts. Secured to the bench with ratchet strap...seems OK. Next it was off to the auto shop as I had no 1/2" drive long reach sockets. Came back with that and began removal of the head. 1st bolt came out no prob but second was difficult. Took a while but in the end it was out...now for the main nuts. Was working my way round but came to 1 nut that appears to be a different size...? Back to the shop and now we hit good old Sods law.....the ONLY one they didn't have was of course the one I needed. Quite happy to sell me a full set of course! Off I went and no-one has in stock. None of my friends have 1 so it's phone time....fingers crossed I can get this tomorrow.

        Comment


          #5
          Originally posted by tkent02 View Post
          You going with the 675cc setup?
          Originally posted by Nicholk View Post
          Hi, kinda want to keep it as stock as possible. My mate owned this for 13 years...sold to me 6 years ago. He still lives close....in fact he was one of the helpers to get the engine out. There's a small possibility he wouldn't speak to me again if I did too much...!!!

          Seems a silly reason not to improve a motorcycle, but if you keep the 550 valve cover he would never even know.
          http://img.photobucket.com/albums/v5...tatesMap-1.jpg

          Life is too short to ride an L.

          Comment


            #6
            Mmmm.....not something I'd considered or researched.....no doubt there is a load of info on the site....
            I'll spend an evening looking and see what's involved.

            I've reached the point I've been dreading.....the cylinder head removal.
            1st 2 nuts were no problem....next 2 do NOT want to move. Spent an hour with a small wire brush trying to clean up the nuts and now it's penetrating fluid time...not holding a lot of hope for that. Called a friend for assistance and we'll try again tonight....fingers crossed.

            Keith

            Comment


              #7
              Just curious, did you check the valve clearances before you tore it apart?

              And has this bike sat for years or have you ridden it a couple hundred thousand miles?
              Last edited by tkent02; 08-22-2013, 06:33 AM.
              http://img.photobucket.com/albums/v5...tatesMap-1.jpg

              Life is too short to ride an L.

              Comment


                #8
                Yes, valves were checked and OK....1 slightly out but not enough to cause problem on other cylinders. Done 58k but did sit for 18mths whilst I was "off the road" with illness as well . Thought rings had gummed up but nothing I tried made any difference.
                Renewing attack on head nuts tomorrow a.m

                Comment


                  #9
                  There's always one..!

                  Only this time it was two..!
                  What a couple of days this has been.......I'd dreaded this stage...taking the head off. I'd already had problems with the head nuts...2 different sizes..??!!
                  I had to get assistance from my friend and together we managed to get everything done but not without casualties. 1 sheared stud.....looking at it you can see the amount of corrosion under the nut. The second nut would not move. Copious penetrating fluid,heat and even grinding down chamfer on socket head to give more purchase didn't shift it. In the end we had to use the dremel and grind the nut/chisel it off.
                  Once these were off all the rest came free but at least 2 did not undo the nut....instead,the stud came out....not too worried....still allows removal and I should be able to free the nuts at my leisure. It does worry me though about the condition of the other studs.
                  Had to stop work for a while now....overdid it a little and my hands are a little painful..


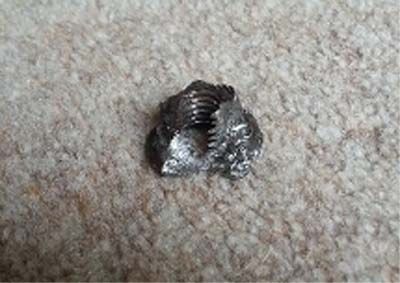
                  1 savaged nut...!!


                  OK, photobucket will not let me copy direct link for stud photo...will have to try again later


                  Sheared stud...........note severe corrosion under nut.
                  Last edited by Guest; 08-26-2013, 06:51 AM. Reason: add pic

                  Comment


                    #10
                    Head and barrels removed

                    Okay, back to the GS today...hands still a little painful but not planning to do too much and still have use of a friend which helps.
                    After some gentle persuasion the cylinder head came off without too much difficulty. The barrels were another matter but after a LOT of gentle persuasion they moved. We slowly brought them up the studs but strangely seemed to hit a stop. Careful checking came up with no reason and the barrels moved down again with no problem. The pistons were clear and all that was left were the studs themselves. The barrels appeared to be "hanging up" at the very top...but only a couple. 1 stud was removed completely but the other did not feel like it would so was left. Eventually we worked the barrels off.After that, we removed the pistons.
                    I was expecting to see a problem with the rings/bore and was surprised that there was nothing obvious. We haven't checked dimensions or anything as yet however.
                    What I did see was the discolouration between the head and barrels as well as on the gasket.
                    I'll get the valves out and start checking the dimension/clearances etc asap


                    Head removed


                    Gasket


                    Close up of valves and head


                    No1 Piston


                    Barrels


                    Anyone seen this before...?

                    Comment


                      #11
                      Originally posted by tkent02 View Post
                      Seems a silly reason not to improve a motorcycle, but if you keep the 550 valve cover he would never even know.
                      Only if you use the early model head, the later model 650 heads have a different number of bolts in them.

                      Comment


                        #12
                        Valve removal

                        Finally received the valve spring compressor and got round to removing the valves No problems with this thankfully
                        I've also managed to remove the nuts from the 2 studs that came out...lots of penetrant and heat worked nicely. Managed to get 2 nuts on the stud that had the nut drilled off....there is some thread damage so thought it would benefit from replacement butt that one does not want to move either.
                        Might have to take the lower engine to a specialist to get these removed.
                        Meantime, a few more photos:


                        Valves removed


                        Inlet valve...this is the worst of the valves....will soak before using brass brush to clean.


                        Exhaust valve before and after 1st run with brass wire brush

                        Comment


                          #13
                          OK, spent the w/e gasket scraping and valve cleaning. Took several short sessions as my fingers do give me trouble when gripping small items and using...have to be inventive with grips and clamps..! Still, the valves are looking OK now but more work reqd with gaskets still.
                          Cut a slot in the broken stud for impact driver...more penetrant soaking and heat etc to be applied but not much joy yet....gonna give my fingers a break for a few days and get some help to try again.


                          Before and after valves.

                          Comment


                            #14
                            Eye protection

                            Very important.....be sure to use eye protection when
                            using brass wire brush on Dremel....lots of small bits come off valves.

                            Comment


                              #15
                              Hallelujah....

                              Well, after putting things off for a while I carried on trying to remove the 2 studs. Ground a slot in the broken one and managed to fit 2 nuts to the damaged one. Lots of penetrant and heat.......still no joy. Fitted a 3rd nut...still nothing. Called in some help and went through the routine of penetrant/heat then with me on the slot and my mate on the shaft with a stilson.....it moved. After the initial movement the sheared stud came out.
                              The same now on the damaged stud.....me on the nuts and my mate once again on the stilson but this time all we did was damaged the shaft. We persevered though and after a lot of cursing and vocalising.....this one also moved....just a fraction. More penetrant and heat and this one also finally came out.......cue some loud cheers and a very happy man..!!! Thank you Mr Stilson. I'd been having nightmares over this. I'm now trying to source replacements before continuing.....hopefully this will be no problem otherwise it's find a shop to make them....fingers crossed.

                              The offending articles:

                              Comment

                              Working...
                              X