Announcement

Collapse
No announcement yet.

Just bought non-running GS850

Collapse
X
 
  • Filter
  • Time
  • Show
Clear All
new posts

    #16
    Originally posted by tirebiter View Post
    I'm going to edit an earlier post to include the photos.
    What's wrong with just posting here, where it came up in the discussion, rather than making everybody look for it?

    EDIT: I just went back, saw your pictures. That "mystery piece" is, as I suspected, your tool tray. You will be needing a new battery anyway, so get the proper battery, your tool tray will snap into place above it.

    .
    Last edited by Steve; 08-09-2014, 02:07 PM.
    sigpic
    mine: 2000 Honda GoldWing GL1500SE and 1980 GS850G'K' "Junior"
    hers: 1982 GS850GL - "Angel" and 1969 Suzuki T250 Scrambler
    #1 son: 1986 Yamaha Venture Royale 1300 and 1982 GS650GL "Rat Bagger"
    #2 son: 1980 GS1000G
    Family Portrait
    Siblings and Spouses
    Mom's first ride
    Want a copy of my valve adjust spreadsheet for your 2-valve per cylinder engine? Send me an e-mail request (not a PM)
    (Click on my username in the upper-left corner for e-mail info.)

    Comment


      #17
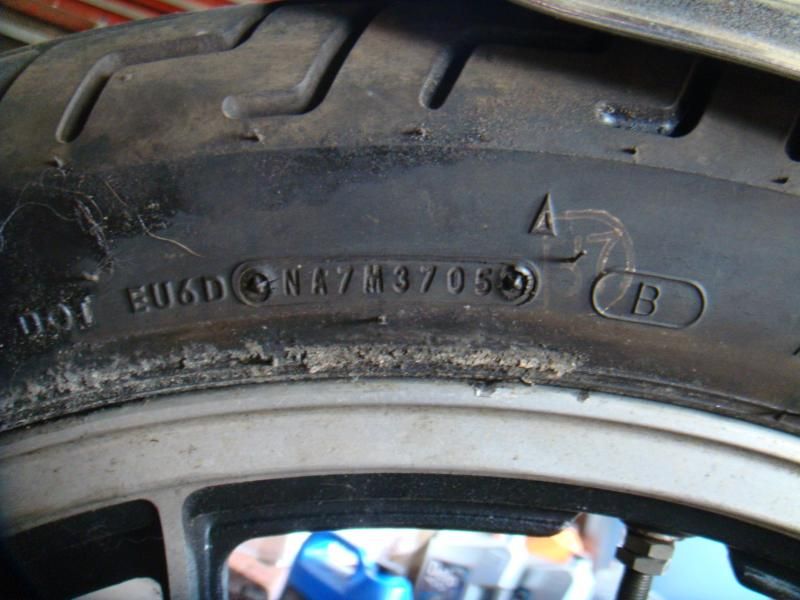
      Front tire DOT number. Does it mean it's almost 10 years old ?


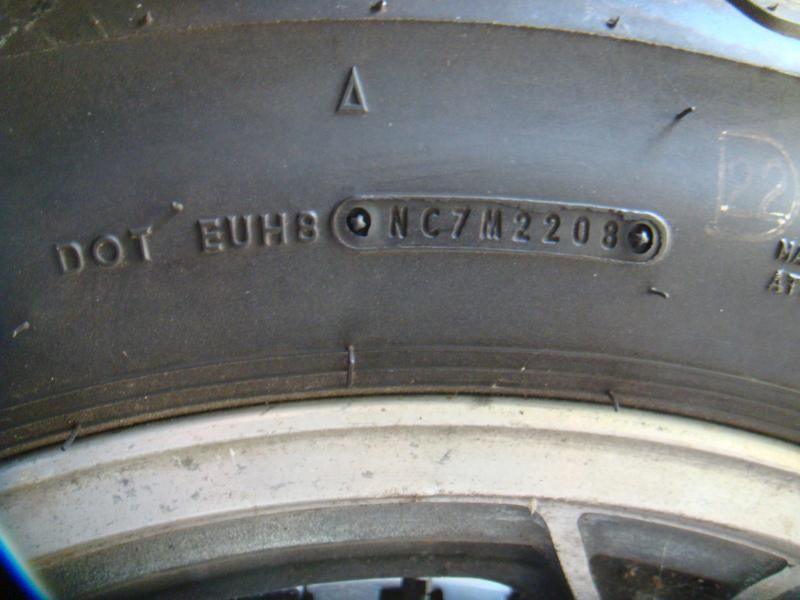
      REAR tire DOT number :


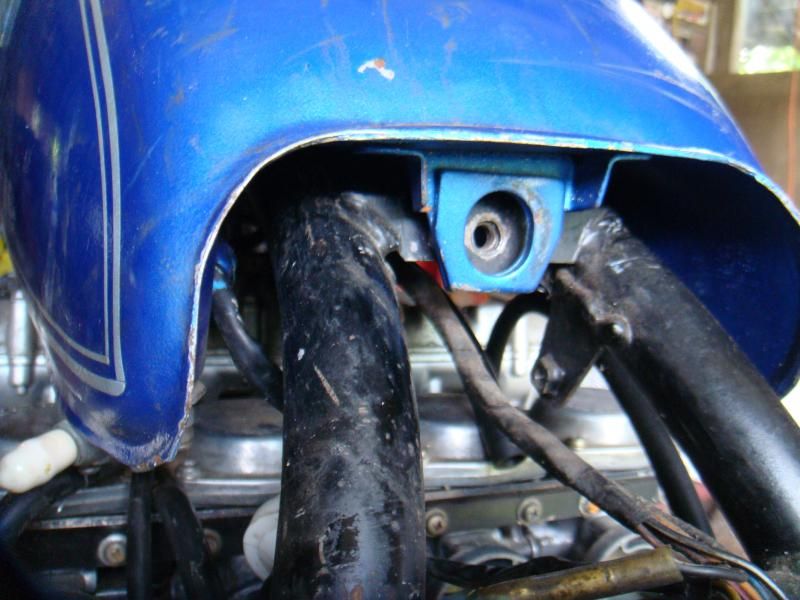
      Missing tank mount here :


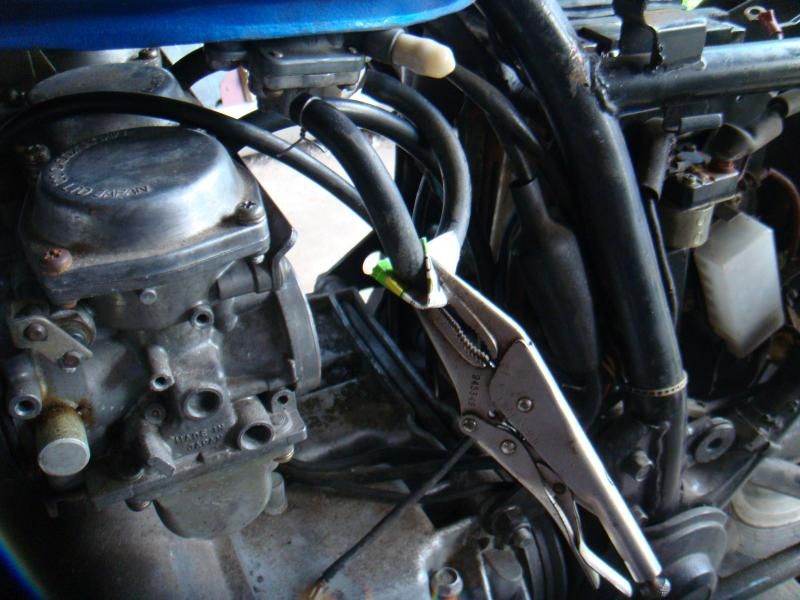
      Temporary fuel cut-off ... until I get a replacement petcock. This one has no diaphragm in it, as it was when I opened it up there was no diaphragm in it and there were no gaskets under the bolt heads. Fuel leaked out a LOT when I put some gasoline in. I cut up an old innertube to make a gasket to go between the petcock and the tank. It allowed me to take a test drive :

      Last edited by Guest; 08-10-2014, 12:34 PM. Reason: wrong pics and added text

      Comment


        #18
        I think I've got the hang of this uploading the pics now. Corrected some previous postings if anyone is interested.

        Here's some more.

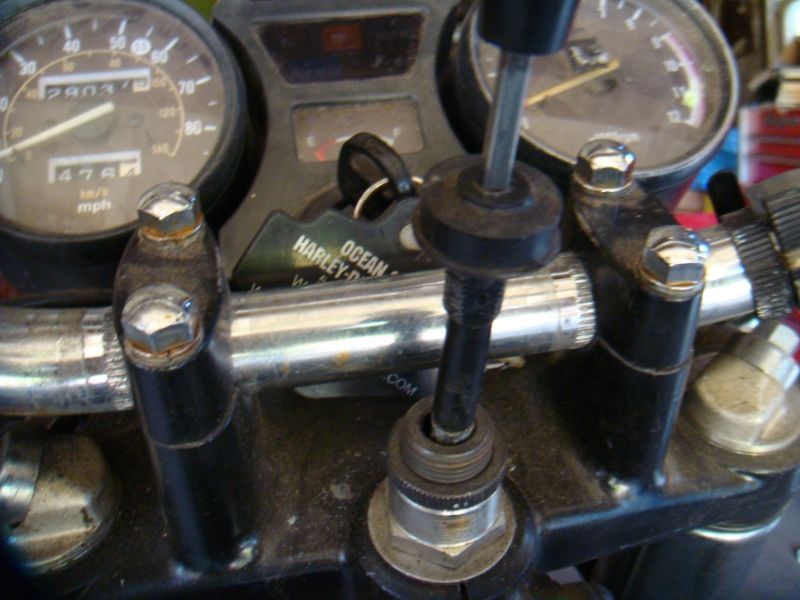
        Loose choke cable and missing panel/handlebar mount cover :


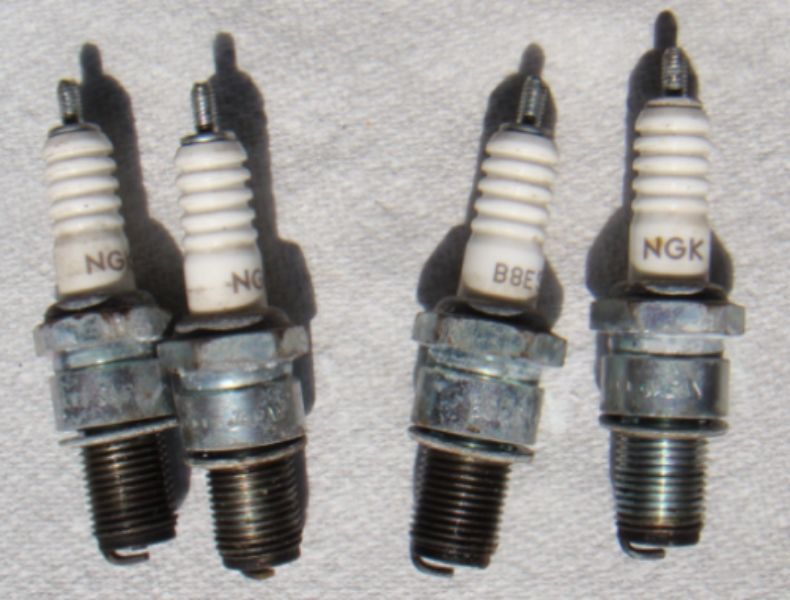
        Spark plugs look OK to me if not a little rich running, or flooded from non-functioning petcock or poor spark, previously :


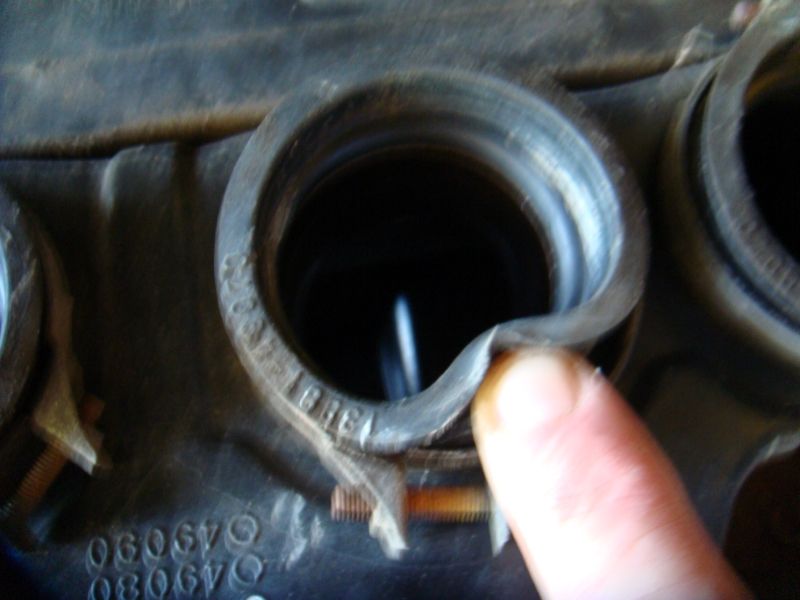
        Airbox rubber tubes to carb inlets seem pliable enough. Notice how sharply the rubber kinks without a crack in it. it did not take too much pressure to bend it this far :


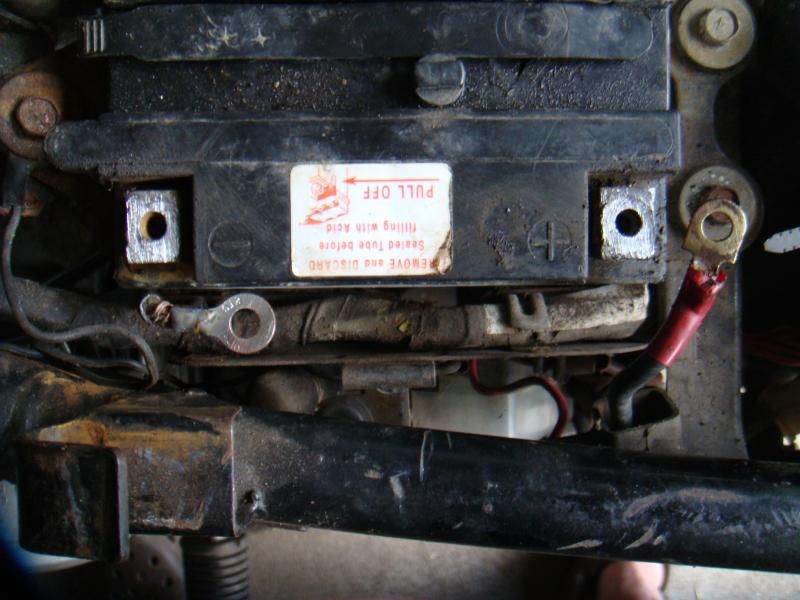
        I started cleaning up electrical connections beginning at the soruce :


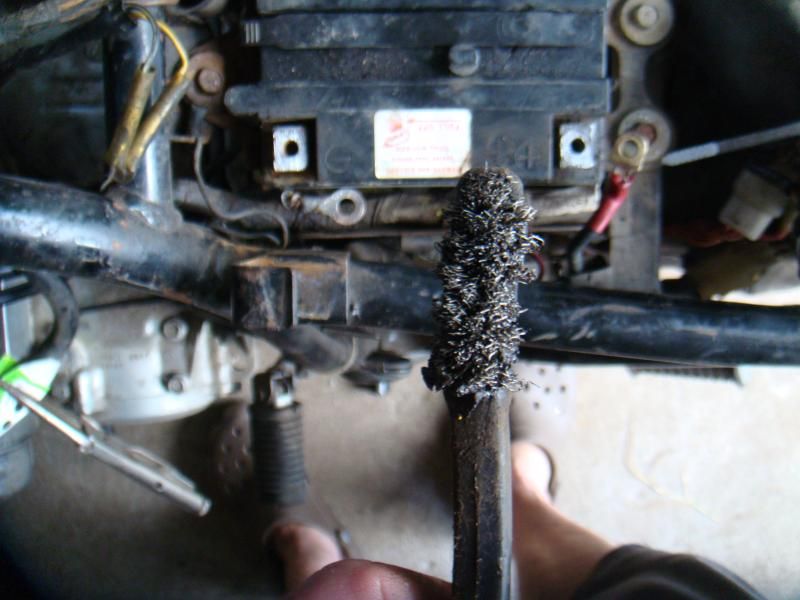
        My electrical connection cleaning tool of choice is a Stainless Steel bristle brush. It's about the size of a large toothbrush and shows it has served me well for quite a while :


        More pics to follow ...

        Comment


          #19
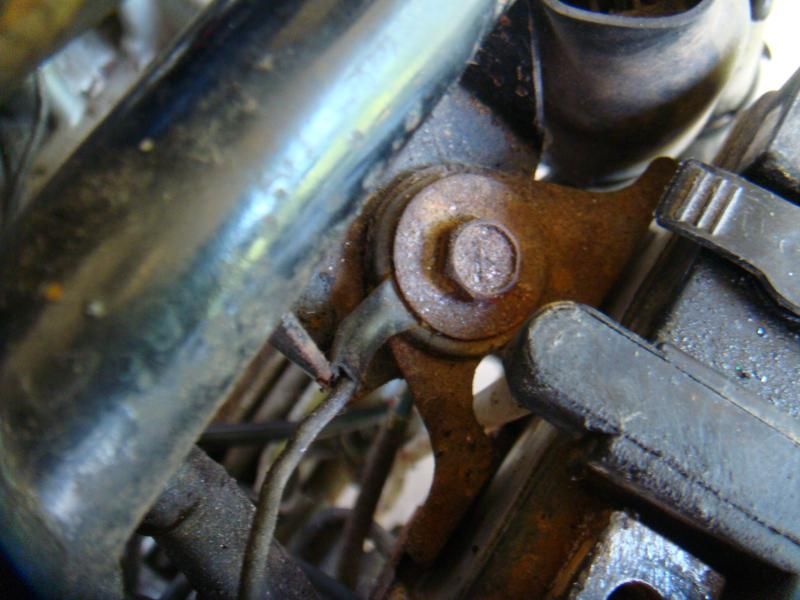
          More pics of cleaning electrical connections. Right in front of the battery I discovered what could be a real problematic connection. I believe this is the main harness ground and everything electrical on my 850 relies on this one connection. Notice the ring terminal is UNDERNEATH the washer, against the rubber bushing and spacer inside the bushing :


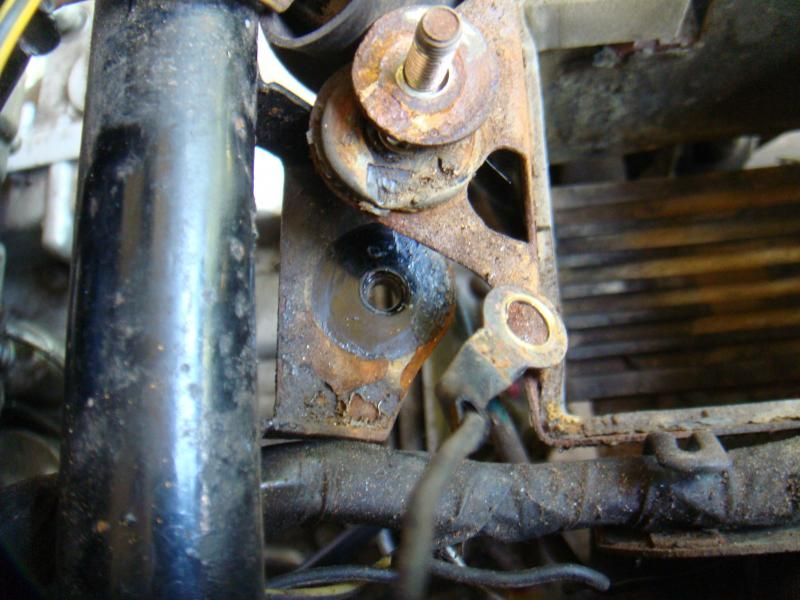
          Here is what I found after I unscrewed the bolt. I was hoping my starter button might work better after I clean this :


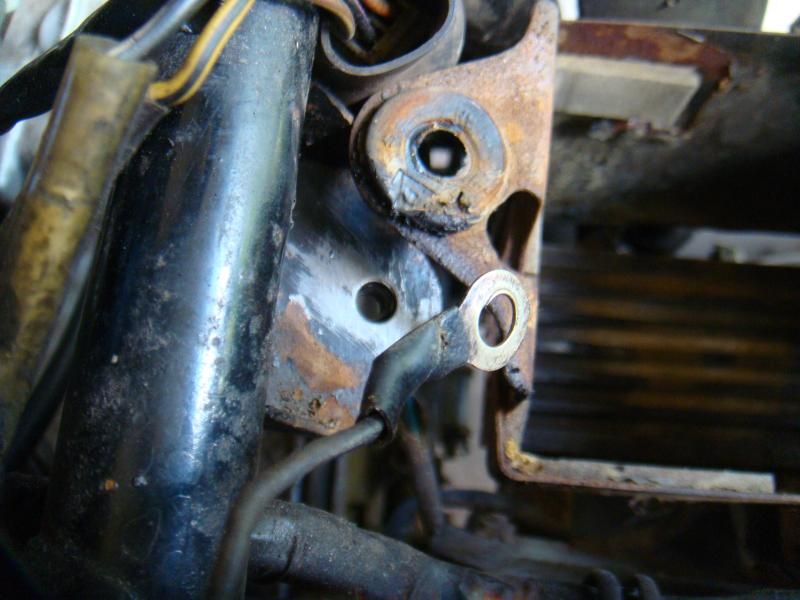
          Here is the main harness ground connection after I spent some time cleaning it. The important thing is to have clean surfaces AND that they are securely fastened. I put the ring terminal under the bolt head instead of under the washer when I screwed the bolt back in. The electrical grounding path goes from the wire, through the ring terminal to the washer to the spacer inside the rubber bushing and then to the frame tube of the bike. I was looking to see if there was a better place to ground the harness but apparently Suzuki put it on the battery box mounting bolt, so I did the same. I just changed where in the stack - of bolt head, washer, rubber bushing, spacer - it is :


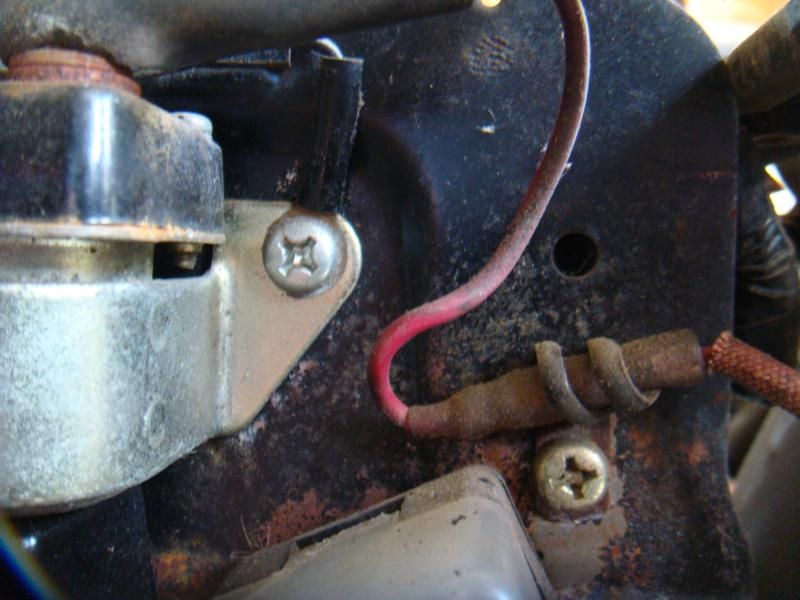
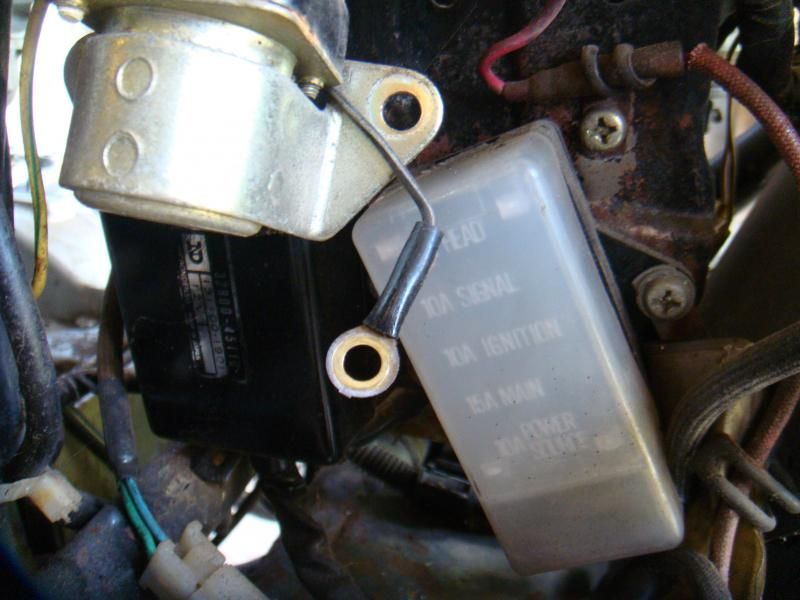
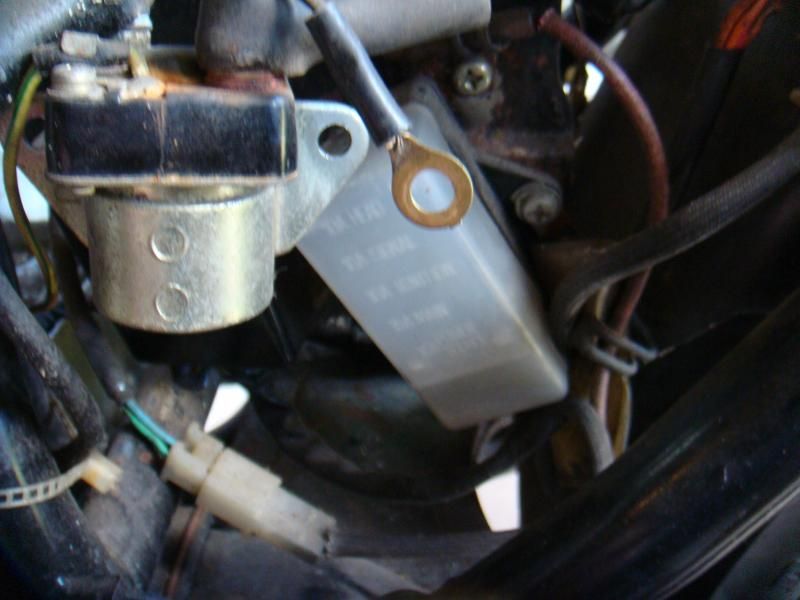
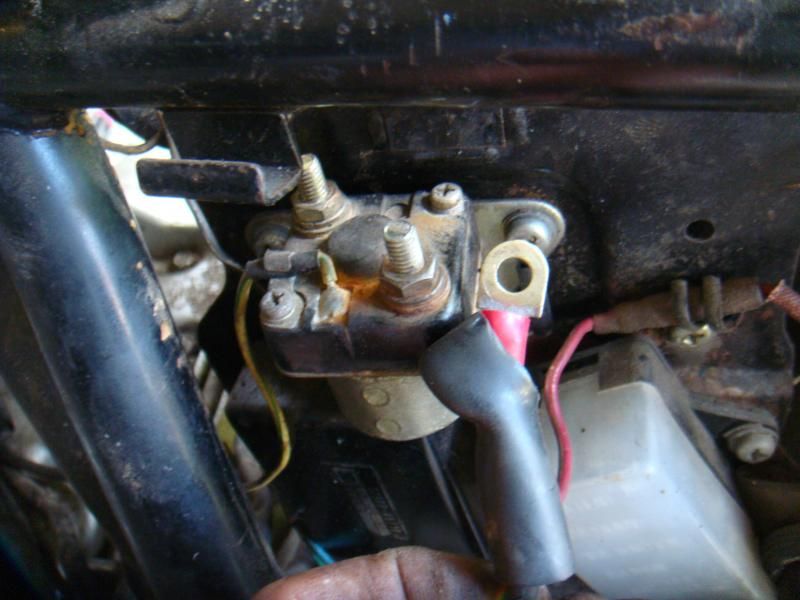
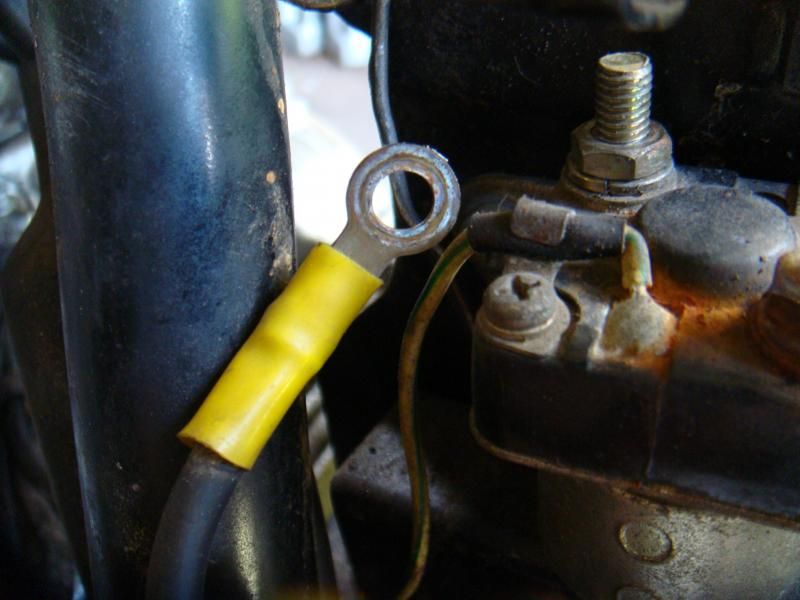
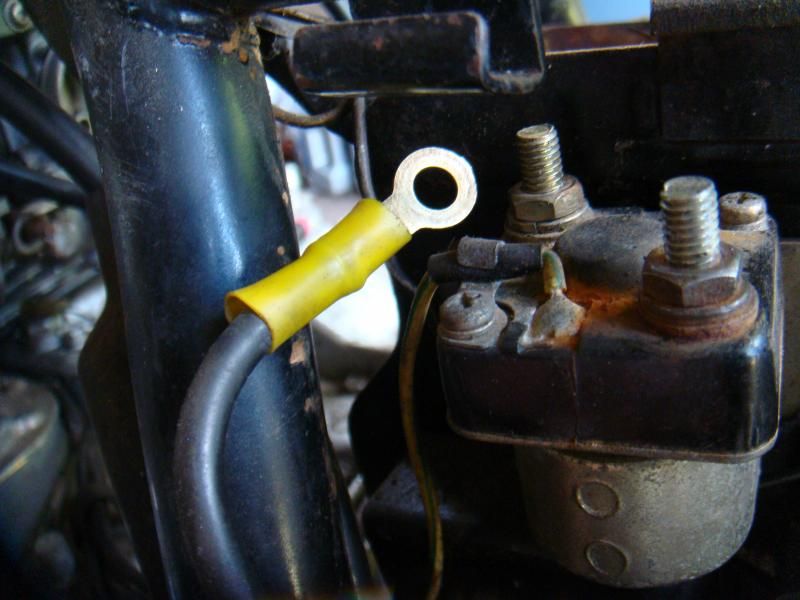
          The Starter solenoid connections were next. Although the solonoid ground was not too bad to start with, I read that it has caused problems for some people and I am trying to be thorough and go through every single connection on this bike. Here's the starter solenoid ground. The wire to it made a sharp bend towards the front of the bike immediately from this point :


          Starter solenoid ground wire ring terminal disconnected BEFORE cleaning :


          Starter solenoid ground AFTER cleaning :


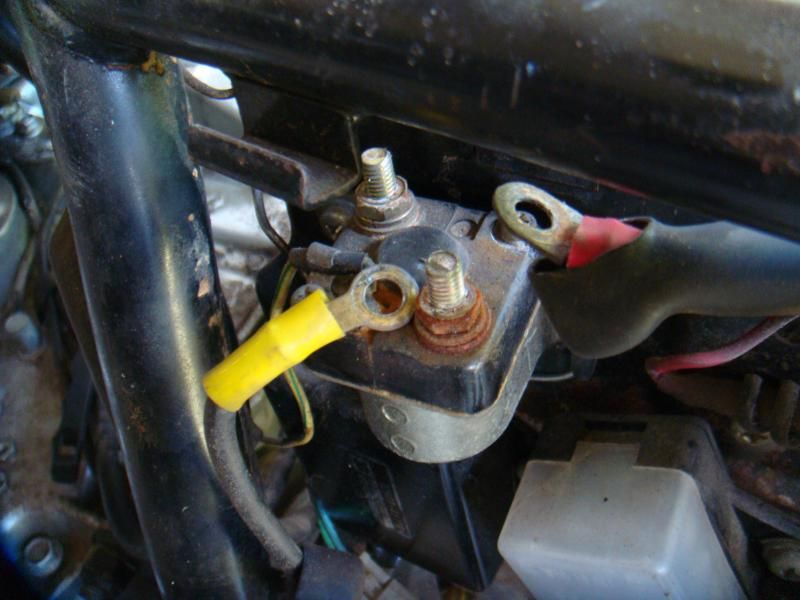
          The starter solenoid terminals got "the treatment" also. Here is what they looked like BEFORE :


          and the terminals on the wires too. Battery wire AFTER :


          Starter wire BEFORE :


          Starter wire AFTER :


          After making sure all the wire terminals were securely fastened to their respective connections, I was happy to find that the starter button worked first time ... and every time since doing this tedious work. The starter button had become increasingly reluctant to operate properly and at best was intermittant to the tune of actually operating the solenoid and cranking the engine over once in every 5-10 tries. I also re-routed the grounding wire for the starter solenoid so it goes underneath the solenoid now and comes up to the solenoid mounting/grounding screw. Not sure if that is original or not but it seemed like a better arrangement and I am not a purist by any means.
          Last edited by Guest; 08-10-2014, 02:02 PM.

          Comment


            #20
            I am going to comment inside your quote.
            Originally posted by tirebiter View Post
            Front tire DOT number. Does it mean it's almost 10 years old ?
            Yep, I see a code of 3704, meaning that it was made in the 37th week of 2004. (late September, early October)

            REAR tire DOT number :
            I see 2208, meaning the 22nd week of 2008. (late May/early June)

            Missing tank mount here :
            Those parts are cheap and easy to get. Less than $10 for the bolt, washer, spacer and two rubber pieces.

            Temporary fuel cut-off ... until I get a replacement petcock.
            Hopefully that is VERY "temporary". Just get a new petcock and be DONE with it.

            I think I've got the hang of this uploading the pics now. Corrected some previous postings if anyone is interested.
            Looking good, thanks for making the effort.

            Loose choke cable and missing panel/handlebar mount cover :
            A new cable will take care of that.

            Spark plugs look OK to me if not a little rich running, or flooded from non-functioning petcock or poor spark, previously :
            Can't tell from that view, we need to see up inside the business end.

            Airbox rubber tubes to carb inlets seem pliable enough. Notice how sharply the rubber kinks without a crack in it. it did not take too much pressure to bend it this far :
            Yes, but it's the KINK that is the problem. Properly-pliable boots won't kink like that, are are much softer.

            I started cleaning up electrical connections beginning at the soruce :
            Looking good.

            After making sure all the wire terminals were securely fastened to their respective connections, I was happy to find that the starter button worked first time and every time since. It had become increasingly reluctant to work and at best was intermittant to the tune of once in every 5-10 tries.
            Welcome to the other side of "we told you so "
            .
            sigpic
            mine: 2000 Honda GoldWing GL1500SE and 1980 GS850G'K' "Junior"
            hers: 1982 GS850GL - "Angel" and 1969 Suzuki T250 Scrambler
            #1 son: 1986 Yamaha Venture Royale 1300 and 1982 GS650GL "Rat Bagger"
            #2 son: 1980 GS1000G
            Family Portrait
            Siblings and Spouses
            Mom's first ride
            Want a copy of my valve adjust spreadsheet for your 2-valve per cylinder engine? Send me an e-mail request (not a PM)
            (Click on my username in the upper-left corner for e-mail info.)

            Comment


              #21
              Originally posted by tirebiter View Post
              I think I've got the hang of this uploading the pics now. Corrected some previous postings if anyone is interested.

              Here's some more.

              Loose choke cable and missing panel/handlebar mount cover :


              .
              Part of the overall problems with your bike is bad mojo from that tag on the key. I'd take that tag off and melt it with a torch or sumpin'....just sayin"....

              Comment


                #22
                Steve addressed pretty much everything I was going to say. I'll just add:

                - Those tires, pitch 'em. The front one for sure. The rear one is highly iffy at 6 years old, but you might be able to get a season out of it if the bike was stored properly and you don't push it too hard. If it were my bike, I'd replace it.

                Shinko Tourmaster(?) 230s:
                * Front: 100/90V-19
                * Rear: 130/90V-17

                - The choke cable on my bike was the same way when I bought it. Had to replace it. It was easy.

                - I don't believe there is a "panel/handlebar mount cover" on this bike.
                Charles
                --
                1979 Suzuki GS850G

                Read BassCliff's GSR Greeting and Mega-Welcome!

                Comment


                  #23
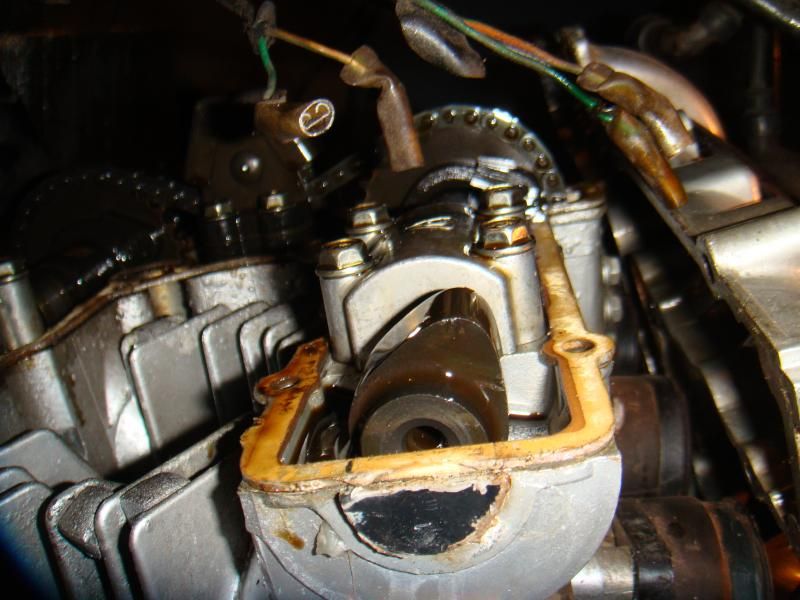
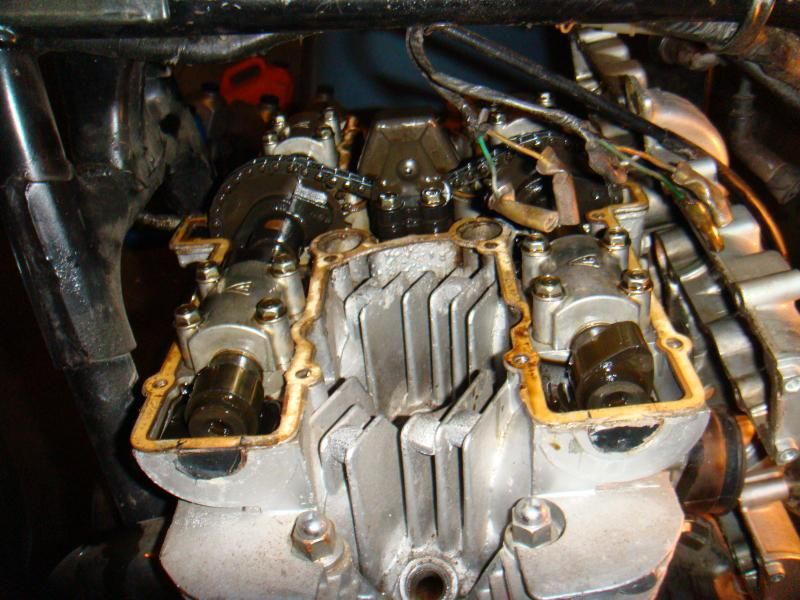
                  Valve clearances are all less than 0.002" and all the tappets rotate easily by hand when the camlobes are not pushing on them. Is there such a thing as a 0.001" feeler gauge ? Is this what the stock camlobe looks like :


                  or :


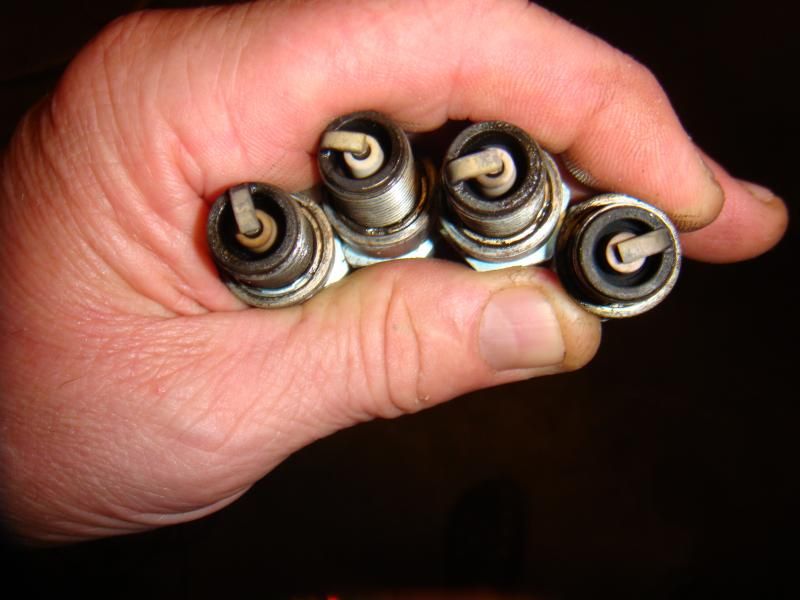
                  One way to clean sparks plugs is to put them in a good running engine. #1 has me wondering ... even though it's only been a few 1/2 mile test drives on a dirt road, so far :


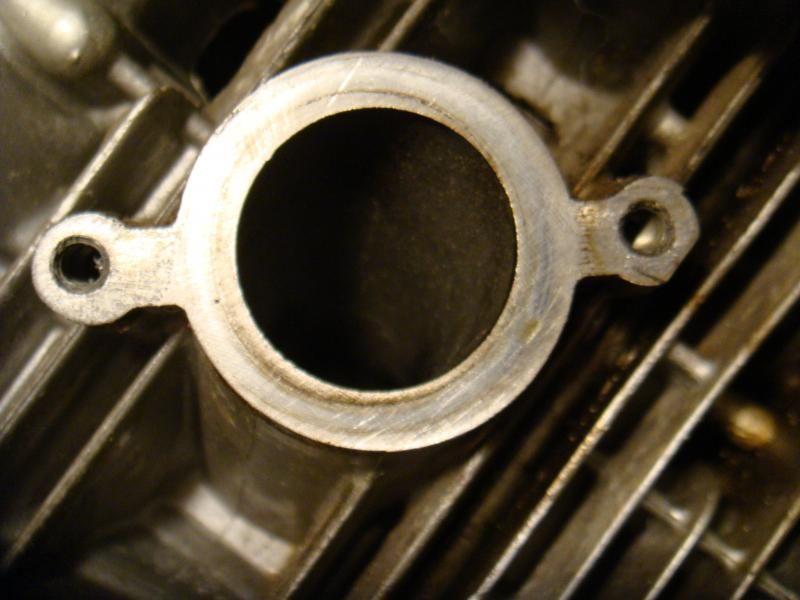
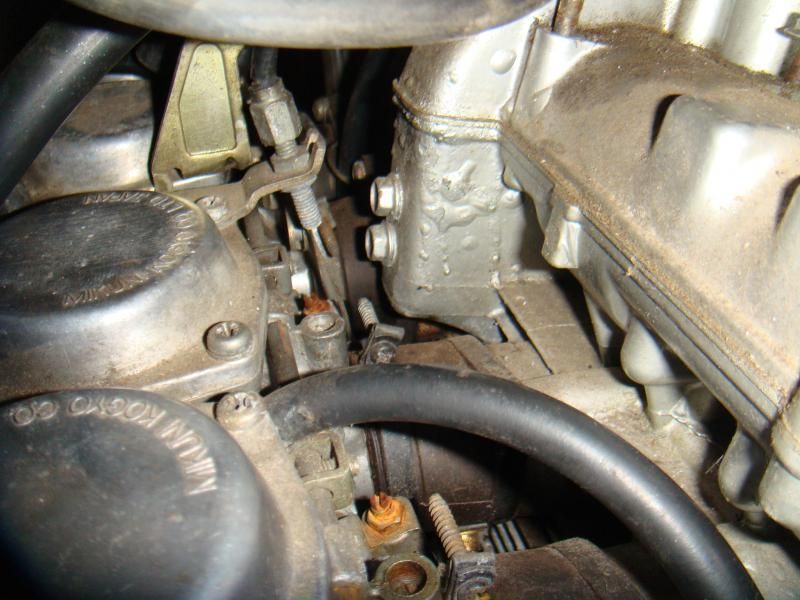
                  Wondering if there is something I need to worry about how well the intake rubbers fit :


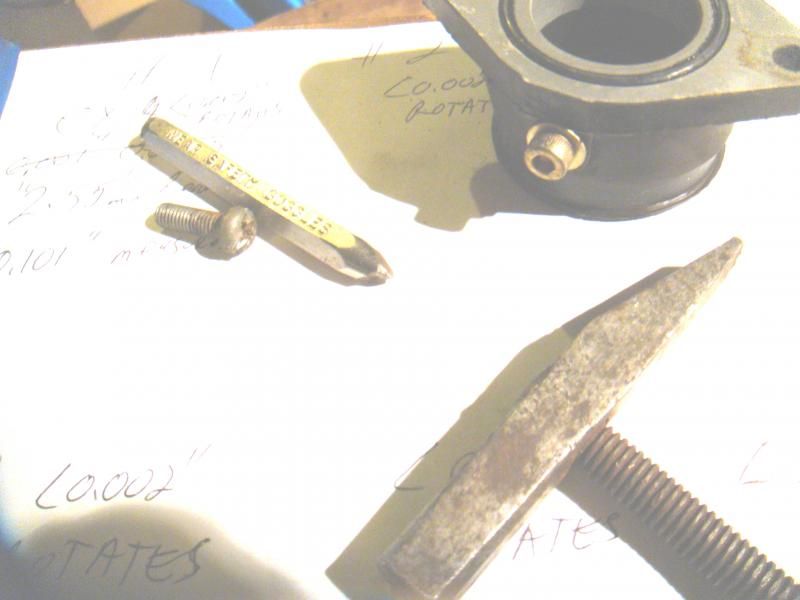
                  When necessary, I resort to the small tappy-tappy and a very special chisel I reworked on a grinding wheel, to remove screws that have been previously damaged :


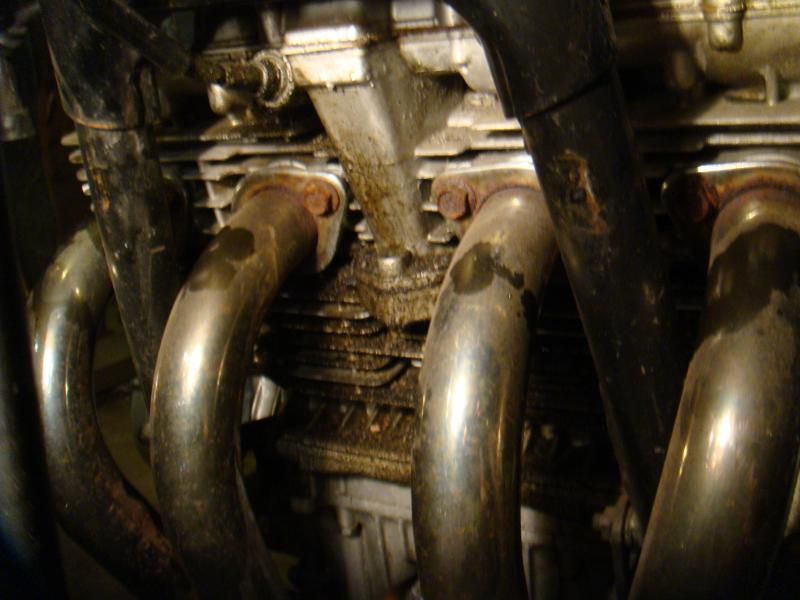
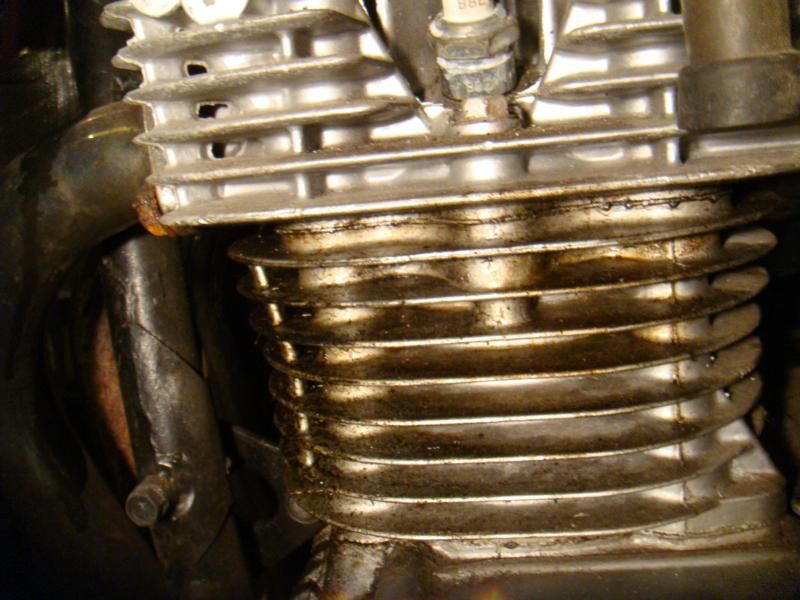
                  This is what worries me the most. I have read that oil leaks here can get worse over time. Maybe I'll get lucky after putting a torque wrench on the cylinder/head nuts. Will keep my fingers crossed until tomorrow or the next day when I have time to do so :


                  I know it's time to look at the Factory Service Manual to figure out what this is but I'm assuming the factory did not paint the spring :


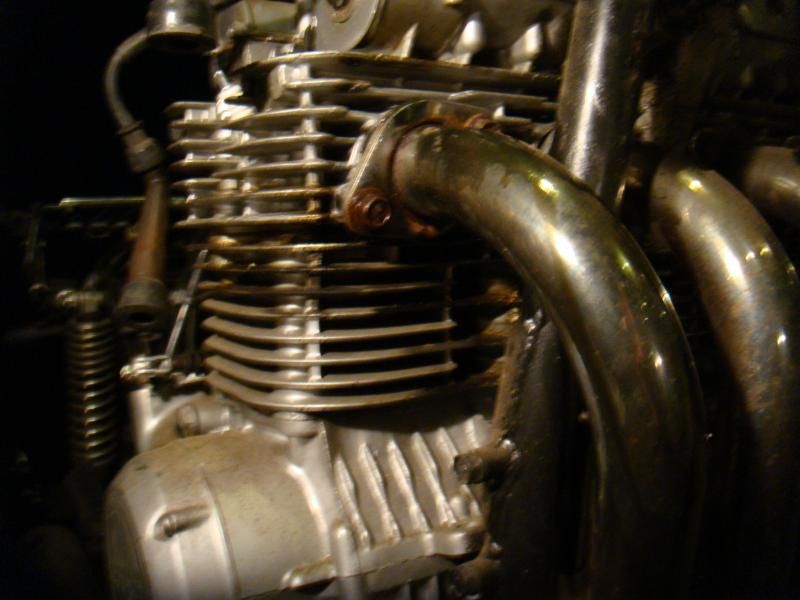
                  If my guess is right, here is more evidence of a non-factory paint job on this engine :


                  For now, I'll have to wait and see what advice I get as far as valve clearances and what appears to be some head gasket leakage. Next up will be the dreaded carb "O"-rings.
                  Last edited by Guest; 08-11-2014, 12:55 AM.

                  Comment


                    #24
                    Originally posted by eil View Post
                    I don't believe there is a "panel/handlebar mount cover" on this bike.
                    I was going to challenge you on that, but looked it up first.

                    Strangely enough, the '80 850G had a cover, but the '80 850GL did not.


                    Originally posted by tirebiter View Post
                    Is this what the stock camlobe looks like :
                    I don't know about what anybody else sees, but all I see is a message from PhotoBucket that says the image was moved or deleted.

                    You said you thought you had the hang of uploading pictures. Evidently not quite there yet.
                    By the way, you don't "upload" them, you just post the IMG link to Photobucket.

                    .
                    sigpic
                    mine: 2000 Honda GoldWing GL1500SE and 1980 GS850G'K' "Junior"
                    hers: 1982 GS850GL - "Angel" and 1969 Suzuki T250 Scrambler
                    #1 son: 1986 Yamaha Venture Royale 1300 and 1982 GS650GL "Rat Bagger"
                    #2 son: 1980 GS1000G
                    Family Portrait
                    Siblings and Spouses
                    Mom's first ride
                    Want a copy of my valve adjust spreadsheet for your 2-valve per cylinder engine? Send me an e-mail request (not a PM)
                    (Click on my username in the upper-left corner for e-mail info.)

                    Comment


                      #25
                      I was busily reloading the images at a larger size, Steve. They all look right, now.

                      Comment


                        #26
                        Originally posted by tirebiter View Post
                        I was busily reloading the images at a larger size, Steve. They all look right, now.
                        Yes, they look fine now.

                        I have not looked at the "new" format for Photobucket lately to see the exact steps, but you can go into your personal preferences, I think there was an "advanced" page, and tell Photobucket to automatically re-size any incoming picture. I have my preferences set to "800 on the long side", which seems about what you have. By having Photobucket do the re-sizing, you keep your full-size pictures on your computer, and don't have to worry about maintaining a separate file for the re-sized ones.

                        .
                        sigpic
                        mine: 2000 Honda GoldWing GL1500SE and 1980 GS850G'K' "Junior"
                        hers: 1982 GS850GL - "Angel" and 1969 Suzuki T250 Scrambler
                        #1 son: 1986 Yamaha Venture Royale 1300 and 1982 GS650GL "Rat Bagger"
                        #2 son: 1980 GS1000G
                        Family Portrait
                        Siblings and Spouses
                        Mom's first ride
                        Want a copy of my valve adjust spreadsheet for your 2-valve per cylinder engine? Send me an e-mail request (not a PM)
                        (Click on my username in the upper-left corner for e-mail info.)

                        Comment


                          #27
                          The best feeler gauges to use are metric ones:


                          Because they start at 0.02 mm and go in 0.01 mm increments up to 0.09 mm. The non-metric feelers that I have seen rarely have a useful range of sizes for doing GS valve clearance checks.

                          Unfortunately, these metric feelers are rarely available locally. The best place to get them is eBay. If memory serves, under $10 for ones that ship from the U.S. or under $5 for the same ones that ship from China but will take 2-3 weeks to arrive.
                          Charles
                          --
                          1979 Suzuki GS850G

                          Read BassCliff's GSR Greeting and Mega-Welcome!

                          Comment


                            #28
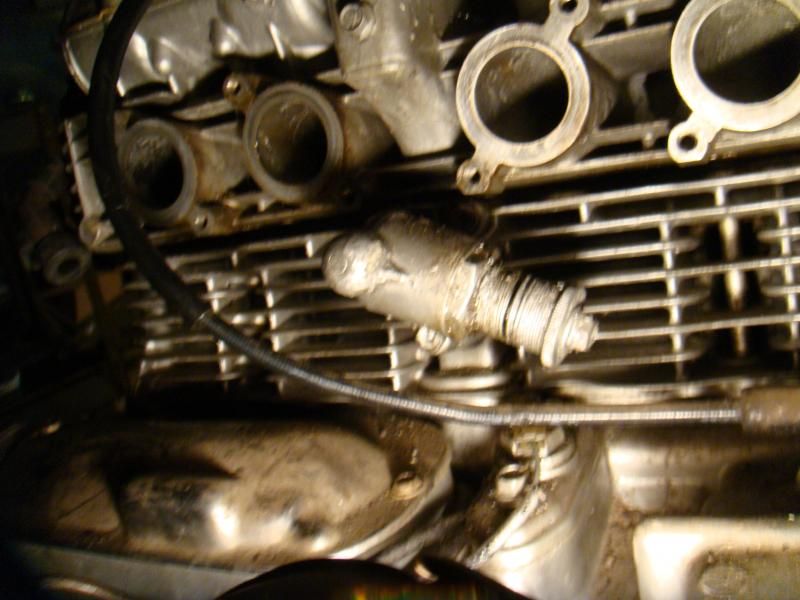
                            Judging from the next three photos, I would guess that a large percentage of your oil leaks is coming from the valve cover and the point where the revcounter cable enters the cylinder head.


                            I know it's time to look at the Factory Service Manual to figure out what this is but I'm assuming the factory did not paint the spring :

                            You do have the Factory Service Manual for your bike from BassCliff's site, right? You will find the correct procedure for adjusting the valve clearances in the manual, together with all the information on every other system on your bike. That "thing" is the automatic cam chain tensioner, and No, the spring was not originally painted, and Yes, that bubbly paint is evidence of a quick rattle can job. Also on BassCliff's site you will find a tutorial on how to rebuild and properly set that cam chain tensioner if it also leaks oil.

                            1981 GS850G "Blue Magic" (Bike Of The Month April 2009)

                            1981 GS1000G "Leo" (Bike Of The Month August 2023)

                            Comment


                              #29
                              2BRacing,

                              I appreciate the mention of metric feeler gauges. I have never seen a set of feeler gauges inch or metric, that gets that thin. 0.00078" (= 0.02mm) is unbelievably small, super thin, foil-like. What kind of unobtainium are these feeler gauges made from anyway ? I'll be scouring the web and eBay for a set.

                              How critical is it that the valve clearance is more than 0.001" ? I'm doing another assuming thing here and thinking as long as there is any clearance - no matter how slight when the engine is cold - even as little as half a thou ( 0.0005" ), the valve clearance starts increasing as soon as the engine begins to warm up and the aluminum starts to expand. Thus enough clearance to allow the valves to cool properly when seated, during their closed part of the camshaft rotation.

                              Air cooled engines I have any experience with typically offer about 0.007" - 0.012" of an increase in valve clearances from cold to operating temperature. Do these engines act a lot different than that rule-of-thumb, I am used to ?

                              I have some more photos to post and will be doing that later tonight after I get to eat something ... long day today for sure.

                              Comment


                                #30
                                Originally posted by tirebiter View Post
                                How critical is it that the valve clearance is more than 0.001" ? I'm doing another assuming thing here and thinking as long as there is any clearance - no matter how slight when the engine is cold - even as little as half a thou ( 0.0005" ), the valve clearance starts increasing as soon as the engine begins to warm up and the aluminum starts to expand. Thus enough clearance to allow the valves to cool properly when seated, during their closed part of the camshaft rotation.

                                Air cooled engines I have any experience with typically offer about 0.007" - 0.012" of an increase in valve clearances from cold to operating temperature. Do these engines act a lot different than that rule-of-thumb, I am used to ?
                                You may as well be asking "how important is it that I add air to my tires? After all, there is air trapped in there when I mount them."

                                Seriously, if you are going to use inch measurements, make sure you have 1.5 to 4 thousandths (0.0015-0.004"). If you use metric measurements, make sure you have 0.03-0.10mm. I don't think anybody has bothered to avoid burning themselves in an effort to measure the clearances at operating temperatures, so we can't really say what the "hot" clearances are. What we do know is that when the clearance gets too small, especially on the intake valves, there is enough leakage or blow-by, due to cam timing, to make cold starting VERY difficult. The bike starts easier, runs better and gets better fuel mileage with looser clearances. If none of that convinces you, feel free to set them wherever you like, just please post your results so the rest of us can learn.

                                No idea what engines you have experience with, but be aware that these might expand in different amounts or different locations than you are used to. The hot clearance might get larger, it might get smaller, we simply don't know for sure. You want to volunteer to get those measurements for us? Keep in mind that they need to be at FULL operating temperature.

                                .
                                sigpic
                                mine: 2000 Honda GoldWing GL1500SE and 1980 GS850G'K' "Junior"
                                hers: 1982 GS850GL - "Angel" and 1969 Suzuki T250 Scrambler
                                #1 son: 1986 Yamaha Venture Royale 1300 and 1982 GS650GL "Rat Bagger"
                                #2 son: 1980 GS1000G
                                Family Portrait
                                Siblings and Spouses
                                Mom's first ride
                                Want a copy of my valve adjust spreadsheet for your 2-valve per cylinder engine? Send me an e-mail request (not a PM)
                                (Click on my username in the upper-left corner for e-mail info.)

                                Comment

                                Working...
                                X