Announcement

Collapse
No announcement yet.

Just bought non-running GS850

Collapse
X
 
  • Filter
  • Time
  • Show
Clear All
new posts

    #31
    Steve said, "The bike starts easier, runs better and gets better fuel mileage with looser clearances."

    This is enough to convince me that I should go for the upper end or 0.003" clearance. So far the bike starts surprisingly easy though. If I had not removed the valve cover to check valve clearances I may not have noticed the major oil leak until numerous miles into my first actual road excursion. For now I'm thinking it makes more sense to buy a front tire for instance instead of a set of valve shims .002" thinner than what I have now.

    I don't have an unlimited budget and hopefully I don't have to spend a lot, in order to make this bike reliable. Not perfect but a good bi-weekly commuter. Right now, I'm more concerned about the oil leak and oil soaked shoes & pants, than I am about the valve clearances. Will definitely be checking into the tach drive, where it enters the head.

    Charles, I should have thanked you for the metric feeler gauge link. Like I said, it's been a long day. Yes, I have the Factory Service Manual I downloaded from Cliff's website.

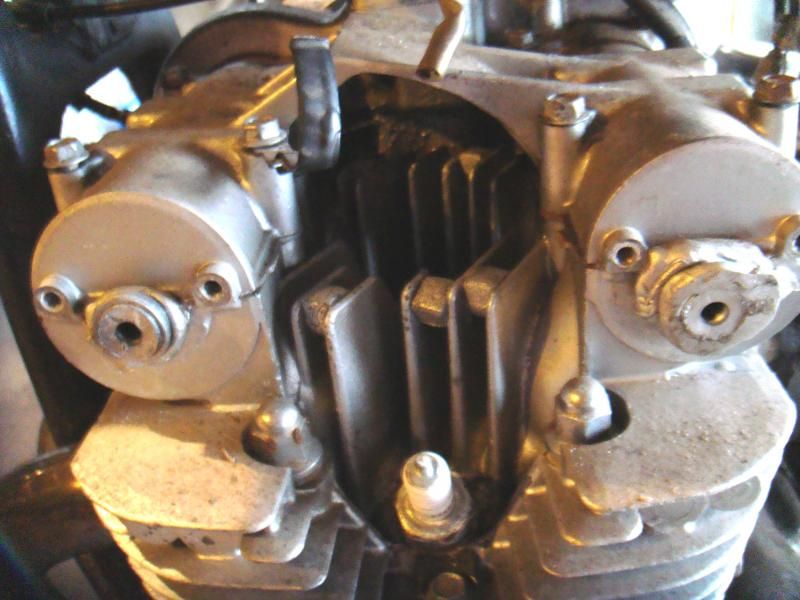
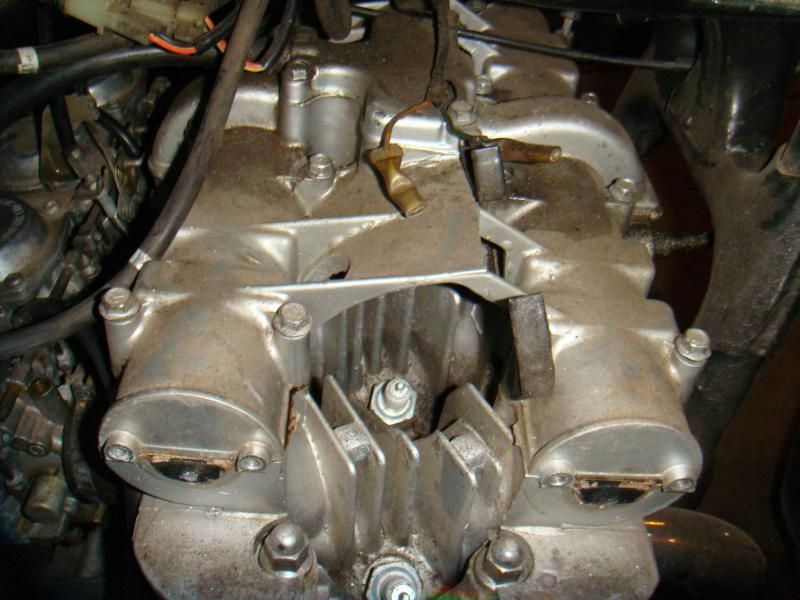
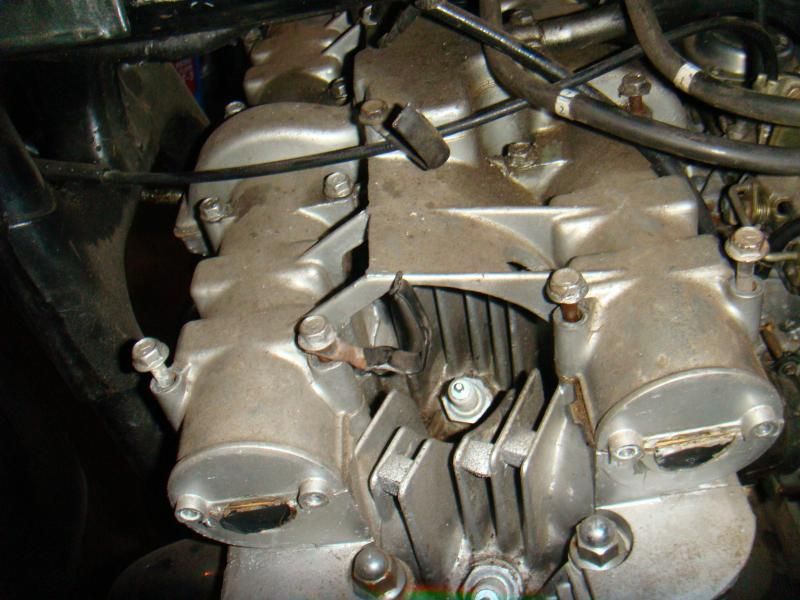
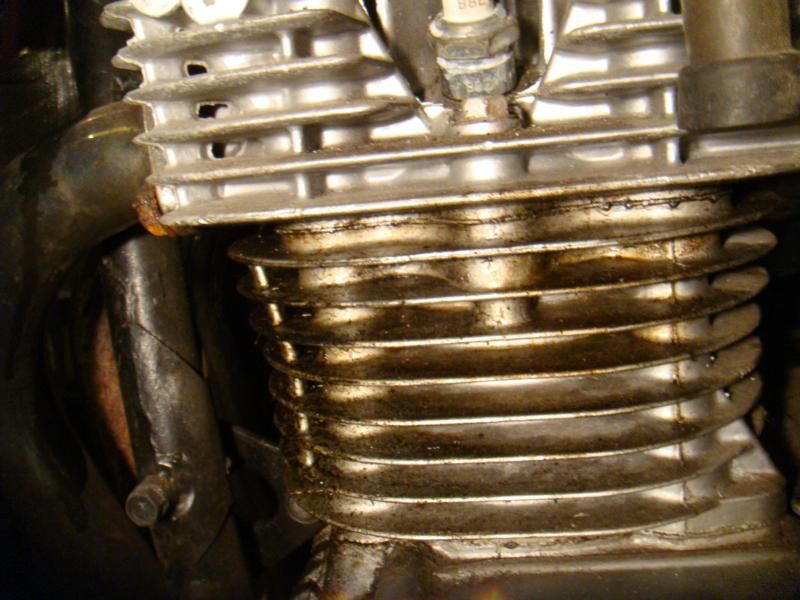
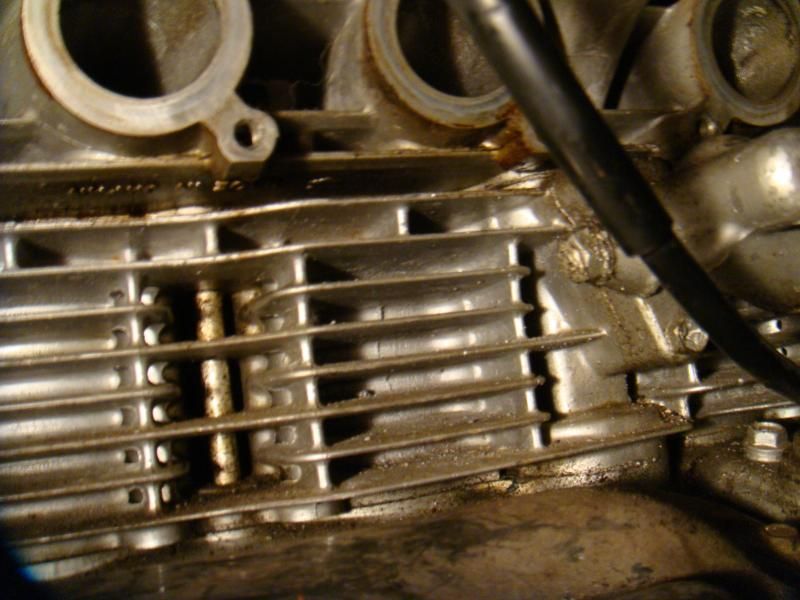
    2BRacing, I am very thankful you spotted where the oil seems to be originating from is not necessarily the head gasket but above that and likely the tach drive entry point. The oil on the exhaust tubes was spillover after I had removed the valve cover. The gritty, grimy, greasy film of oil on the aluminum is 100% from a leak. These pictures show how the leaking oil has migrated around the engine, between the fins where the head meets the block :




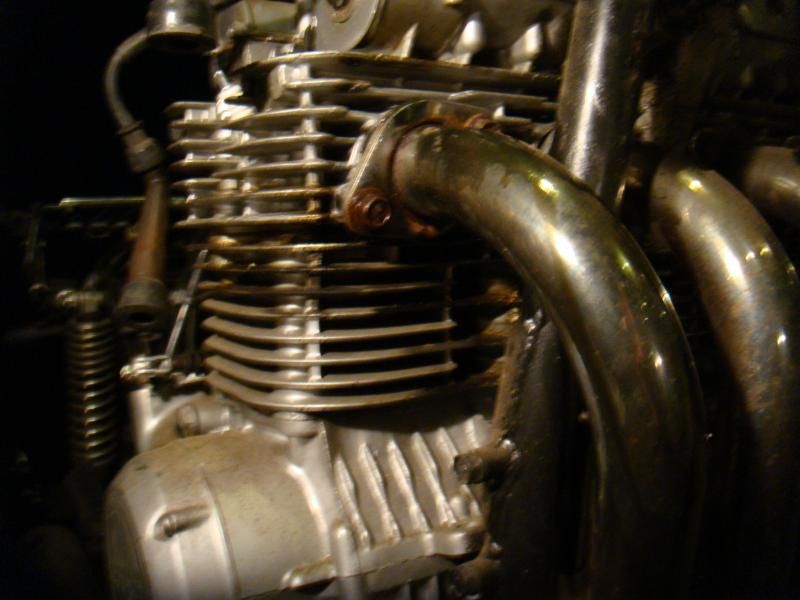
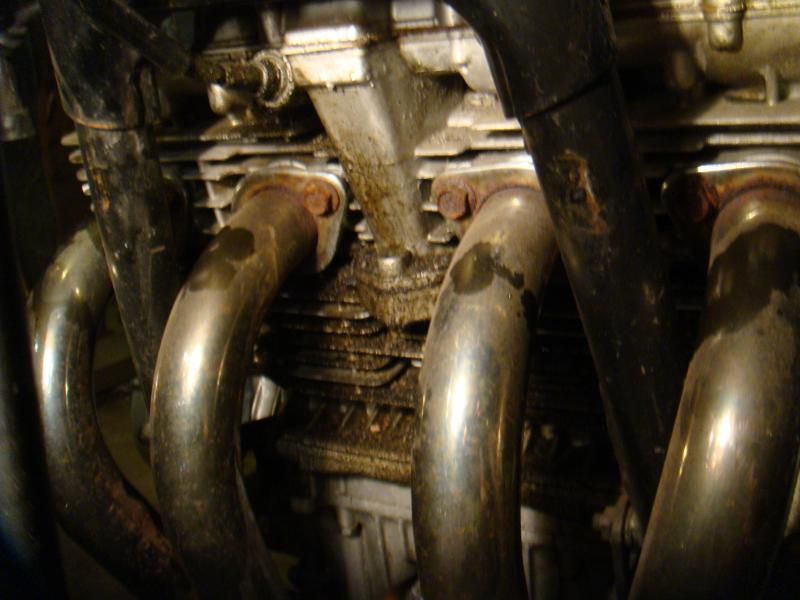


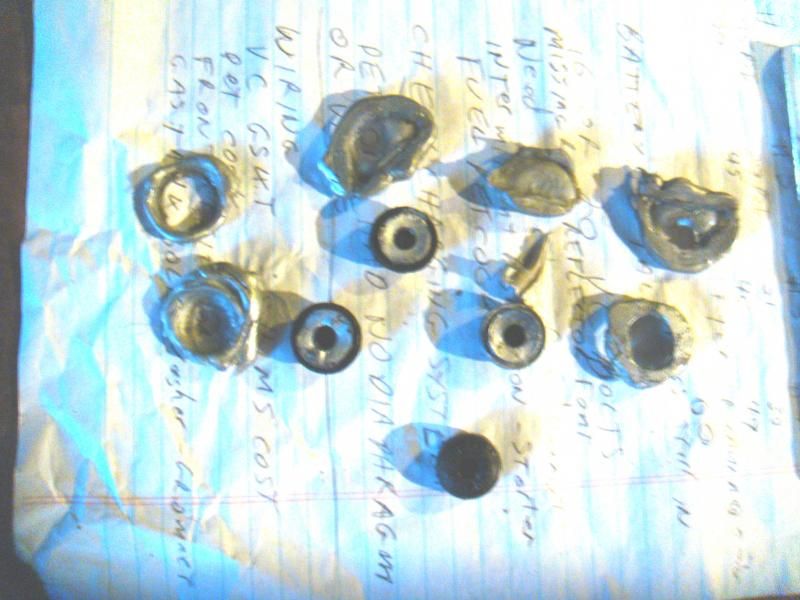
    Speaking of carb O-rings ... I guess i know what it feels like to hear "I told you so" :
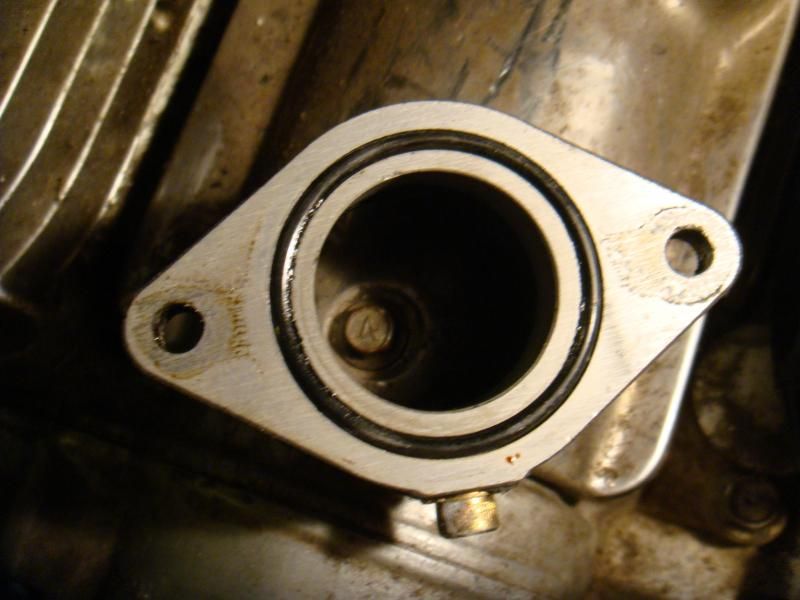


    A few more tasty photos will get posted tomorrow. I'm BEAT and have a little less than a week and a half to get this thing roadworthy ... or get laughed at.
    Last edited by Guest; 08-11-2014, 10:15 PM.

    Comment


      #32
      This ratcheting screwdriver holds several different tips inside the handle. A couple of the tips have always done good work on Japanese Phillips head - JIS - Japanese Cross-Head screws for me through the decades that I've owned it. Until reading why, right here in this thread (thank you Steve) I never knew exactly why. Now I do know why. The cam end-cover screws were not damaged and yes, the screwdriver is being held in a horizontal position by the screw head. No trick photography here :


      I did not expect what I found after removing the covers though. At least they were all dry in there :


      I'm thinking maybe somebody's idea of sound deadening ar insurance against the half-moons from falling out. Ever the frugal one - me - I think I might be able to use two of the rubber pieces for the rear gas tank mount :


      Dry even underneath the gobs of silver colored silicon gasket sealer material :


      On both sides of the engine :


      The following can go in the "In case anyone is wondering" category :

      My air-cooled 4/cycle engine experience is most recently with a Kawasaki twin in the new riding mower, here at home. Part of the maintenance includes adjusting the valves, which yes, I have performed on occasion. Less recently there was this Kohler single cylinder engine in an older lawn tractor here. It still gives service after many years (was built in 1975) and I've done about eveything that can be done on an engine with it, including valve adjustments. I had previously owned a Honda CB 400 and then a 750 four and both were needing work when I got them. Believe it or not I adjusted the valve clearances in them also.

      Too bad for me the 100 or so VW valve shims I own are about .5mm too large in diameter to fit into the Suzuki tappet. The SAAB shims are way too small in diameter as are the ones in my Jaguar shim collection but those do not ride against the camlobes anyway. The Alfa and Fiat shims I have worked with are a very close match if memory serves me correctly, but I don't have any of them to check against. Oh well ...

      Yes there are myriad automobile engines I have worked on but they were - for the most part - water cooled and this is getting off-topic anyway. heading out to clean off the residue and check the tach-drive seal. If time I am planning to pull off the float bowls and take an inventory of the jets, needles and emulsion tubes. I still think I got lucky buying this bike and about to find out just how lucky - or not.
      Last edited by Guest; 08-12-2014, 01:50 PM.

      Comment


        #33
        Finished looking into one of the carbs. Quite literally ... top off, float bowl removed. Seems like all the jetting is stock. Obvious signs of screwdriver abusing a jet or two. VERY clean inside. No tears, pinholes or cracks in the slide diaphragm. Someone obviously spent some time in there before me and fuel never coagulated to cause the gummy residue that usually occurs from the bike sitting for a lenghty spell. Surprisingly cleaner than I though it would be. Float height appears ok too. Metering needle cone-shaped tip (metal) looks brand new ! Absolutely no sign of wear, no groove or any mark on it.

        I have a question regarding the size of the carb-to-head, mounting tubes. Can anyone tell me what the Inside diameter of the aluminum part (closest to the intake port) of the carb mount is supposed to be. What I am seeing is a slightly smaller tube and it is aligned spot-on and feels like a flush port wall near one mounting screw. The opposite mounting screw is next to where the aluminum mounting flange/tube is not matched to the intake port by about 1/16". The mounting flange is smaller than the intake port !

        Is this on purpose ? A manufacturing defect ? An anti-reversionary tactic ? Are there different sized mounting tubes available ?

        Comment


          #34
          Cleaned the area around the tachometer drive gear in the front of the engine where all the leaking oil may have come from. The tachometer cable was not screwed in very tightly and the threads had a fair amount of grit in them. Had to do a fair amount of wiggling and jiggling to get it unscrewed all the way. If only the tachometer cable was about 2 inches longer ...

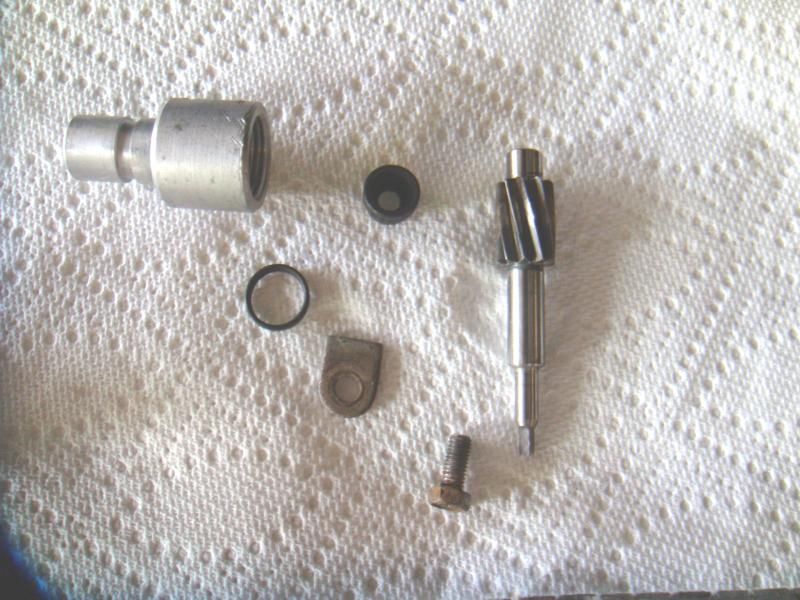
          Took out the tach drive gear sleeve next and checked the band. It was a good tight fit and appears to be ok. The sleeve was clean on that end at least. The other end was not clean at all. There was quite a bit of grit in the threads and when I looked inside the sleeve, there was grit inside the seal also !

          Took the spring loaded lip seal out of the sleeve next and cleaned all the grit from the threads and inside the seal. Miraculously, the seal looks like new with a good sharp edge ! So does the tach drive gear :


          After putting the tach drive back into place and cleaning the tach cable end and screwing that into place tightly, I started the engine. Let it warm up a good long time then shut off the fuel supply (remember my temporary fuel cuttoff ?) until the carbs ran out of gas. That was last night. This morning I checked the area and YAY ! NO leak. Not from the tach drive anyway. I'm going to have to wait until I can drive the bike to the do-it-yourself carwash to clean the rest of the fins. Then I'll give it a 5-10 mile drive. Any leak that may still exist should show up and be easy to pinpoint exactly where it is. Hoping for more luck but we'll see ...

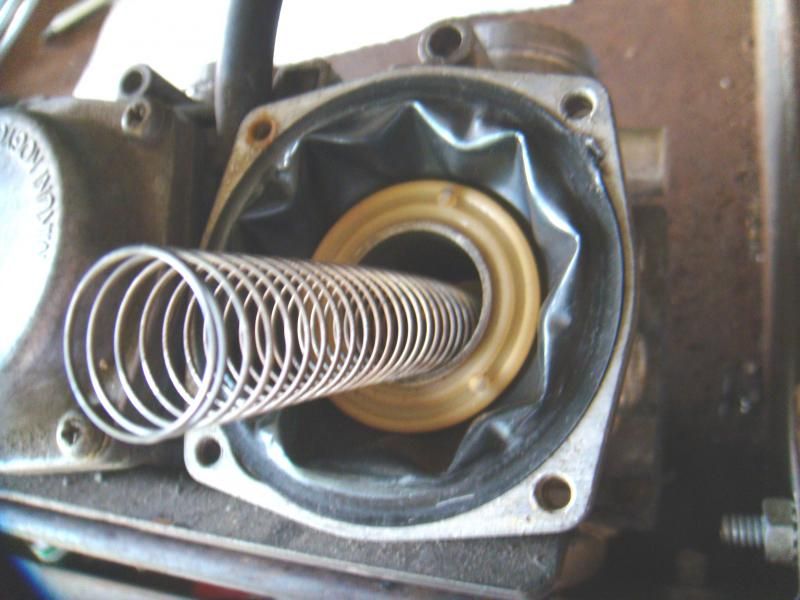
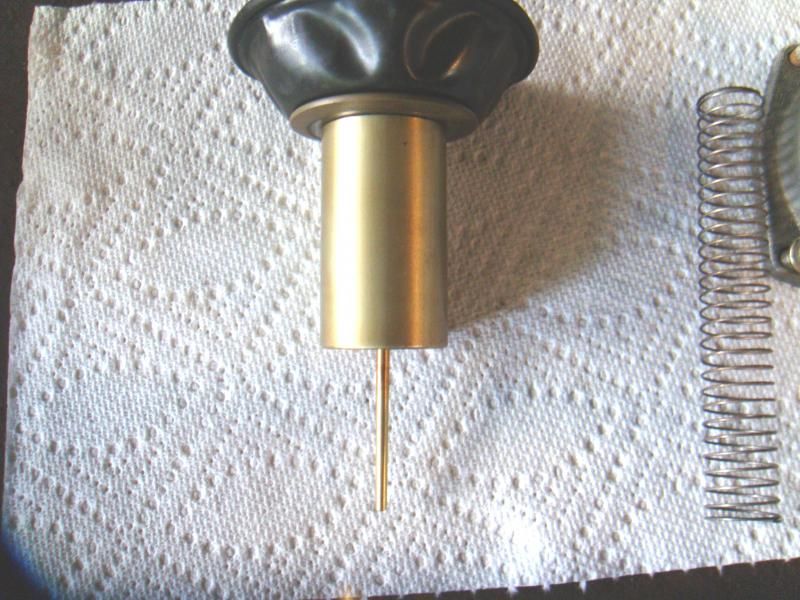
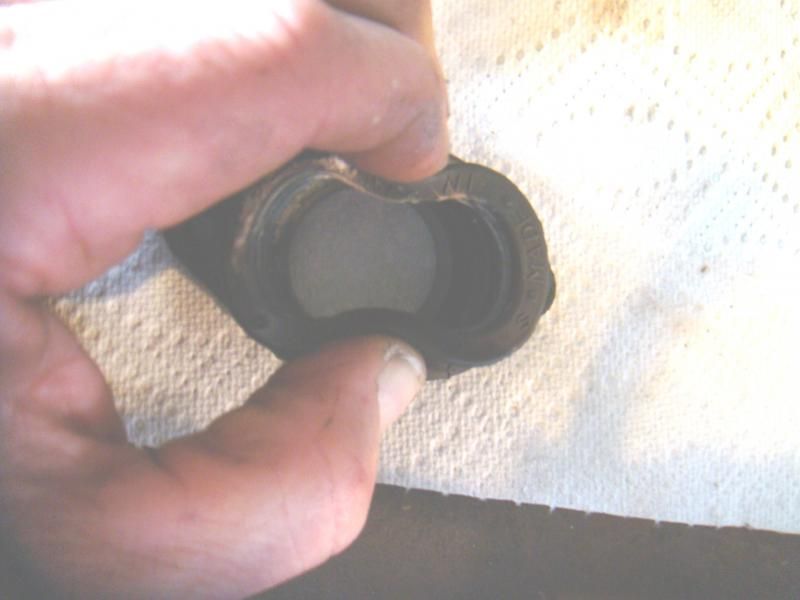
          Next it was time to look inside the carbs. I took the top off of one and discovered what appears to me to be a new(ish) slide and needle. I'm fairly certain this part does not have almost 30,00 miles on it and is almost 35 years old. See for yourself :


          One of the reasons why I wanted to take a carb apart was to see what setting everything is at now. For now, I'll have to skip checking if the needle is in the stock location or not. My trusty Owatonna Tool Co. circlip pliers fell short by about 1/8" :


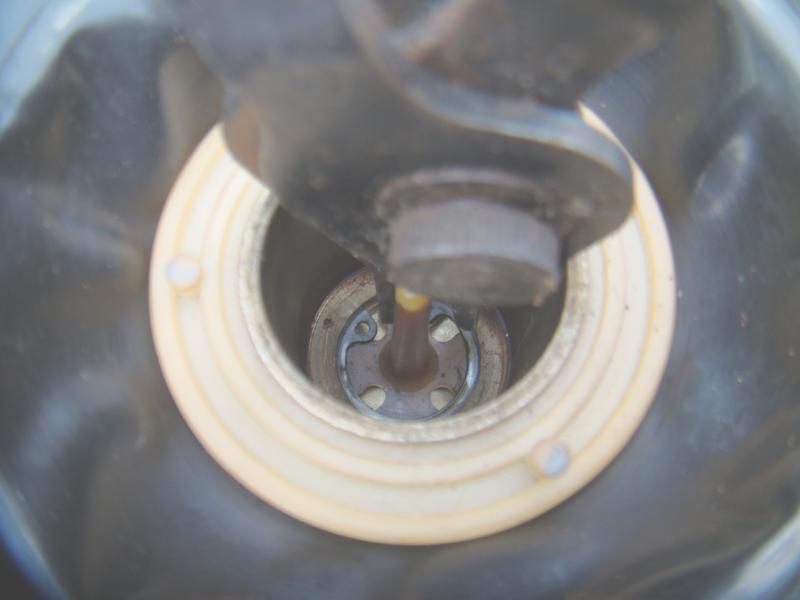
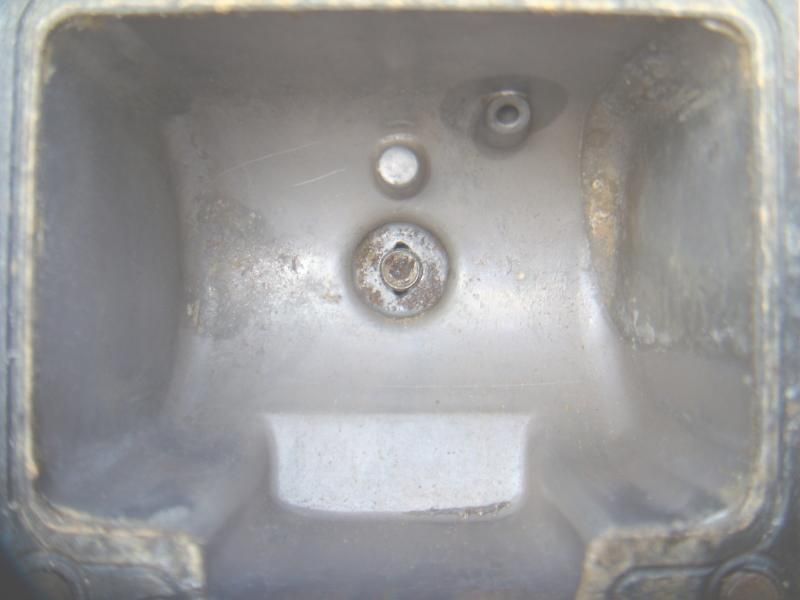
          Next I removed the float bowl. It was about how I expected it to look inside considering how well the engine seems to run. Like I've been saying I feel like I got really lucky when I bought this 850. This is the BEFORE (cleaning it) photograph :


          The AFTER shot would look exactly the same since I did nothing to clean it. I'm not even going to look inside any of the other carbs. Maybe I'll have to sometime soon after I start riding but I don't think so.

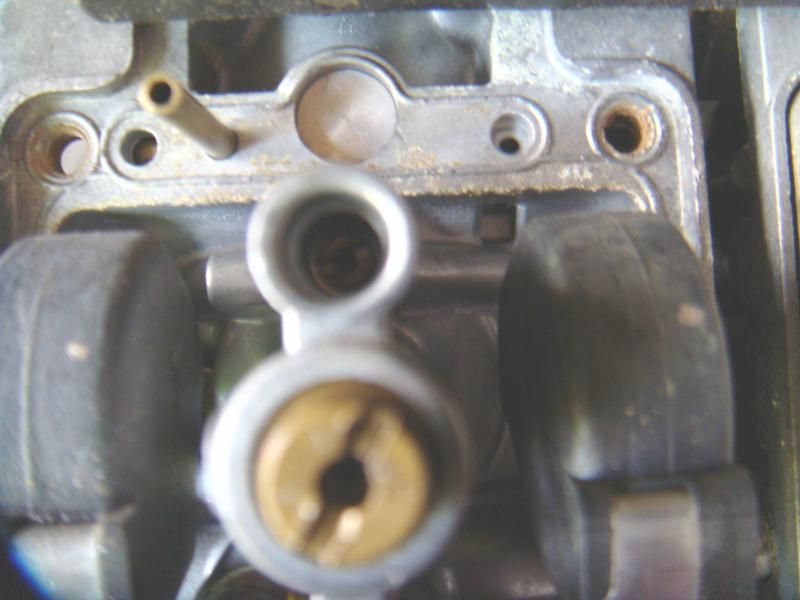
          Turned the carb upside down and had a look at the float too. All good, all clean enough for me. I'm not out to rebuild these at this time. I just want to ride the bike and to me, this carb looks like it will provide good service for quite a while. Even the small aluminum piece (near the top of this photo) that announced itself by falling out unexpectedly is not stuck in place from old gummed up gasoline. In fact, I can find no trace of old gasoline residue anywhere. Apparently this bike was put away properly (no gasoline in it, dry) or the entire story about how it sat for five years is not 100% of the tale :


          I took out some jets and checked to see what if they are stock or not. With the 4 into 1 exhaust it's been said here that I may need to rejet. Apparently the carbs have not been fine tuned for the exhaust but I'll wait to see how it runs on the open road for a few days before doing any demon tweaks. I have to admit, I'm old and basically want to enjoy good fuel economy, reliability and low maintenance, at a moderate pace. I'm not looking to do any barnstorming runs on this bike. Easy parking at my commute destination is another reason I bought a motorcycle. I just happened upon buying a Suzuki 850GS out of numerous other "basket cases" I looked at. I'm thinking this is just another example of blind luck - in this case, that I got a really good model for what I want - was sheer luck.

          Even though I have some concern that all of the carb mounts seem to be offset or the wrong size or something, do not line up to the intake ports very well, these all look like they were all new not too long ago and barely used :


          I bought the bike just over one week ago. My perhaps unrealistic goal, was to get it not just roadworthy but also reliable, within two weeks. I want to start using it right away for a 35 mile commute a couple of times a week. So far - keeping my fingers crossed - it looks like I'll make it.
          Last edited by Guest; 08-13-2014, 10:44 AM.

          Comment


            #35
            Originally posted by tirebiter View Post
            I just want to ride the bike, ...
            Good luck with your quest, but I will offer one small piece here.
            I have said it before and I'll say it again (and again, and again, I'm sure.)

            "Every shortcut you take just gives you one more opportunity to do it over."

            .
            sigpic
            mine: 2000 Honda GoldWing GL1500SE and 1980 GS850G'K' "Junior"
            hers: 1982 GS850GL - "Angel" and 1969 Suzuki T250 Scrambler
            #1 son: 1986 Yamaha Venture Royale 1300 and 1982 GS650GL "Rat Bagger"
            #2 son: 1980 GS1000G
            Family Portrait
            Siblings and Spouses
            Mom's first ride
            Want a copy of my valve adjust spreadsheet for your 2-valve per cylinder engine? Send me an e-mail request (not a PM)
            (Click on my username in the upper-left corner for e-mail info.)

            Comment


              #36
              Steve's point is there are passages inside those carbs that will clog and you'll never see them yet your bike will run poorly. It's wiser to dip the carbs for 24 hours each and get yourself to a baseline before expecting to ride it regularly
              Cowboy Up or Quit. - Run Free Lou and Rest in Peace

              1981 GS550T - My First
              1981 GS550L - My Eldest Daughter's - Now Sold
              2007 GSF1250SA Bandit - My touring bike

              Sit tall in the saddle Hold your head up high
              Keep your eyes fixed where the trail meets the sky and live like you ain't afraid to die
              and don't be scared, just enjoy your ride - Chris Ledoux, "The Ride"

              Comment


                #37
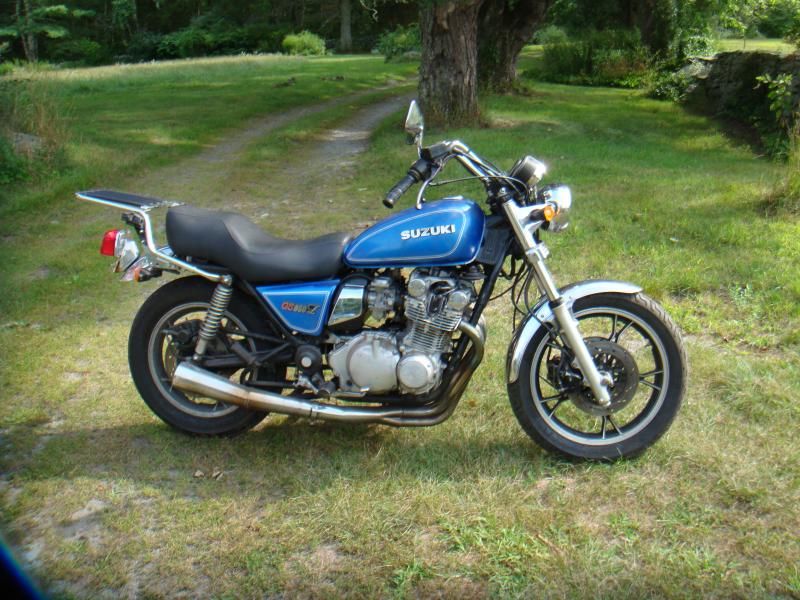
                +1 to cleaning the carbs. Carb dipped then washed in water the first time, second time I blew out all the orfices with carb cleaner and air. Works perfect It's not a bad idea to run an inline gas filter to catch any crap. Also I noticed in the pics, do you have that rubber plug that goes over the pilot jet orfice? If not you need one. Good luck! I'm dealing with my own first 850g
                Comment


                  #38
                  Fork seals

                  I skimmed through as much of this as I could on my break at work, so if I missed someone covering this, my apologies.


                  You'll likely want to drain/flush/refill the fork oil at some point but since it is late in the season you could attempt to re-seal the leaky fork seal until you can tear down and do it for good before the next full riding season. Pretty simple to get the forks to re-seal using a simple fork seal "tool" made from a thin piece of plastic. See my posts #24 and #37 here for the "sealmate" type tool.
                  Last edited by mikerophone; 08-14-2014, 11:54 AM. Reason: Added link - stupid link dialog on iPhone pushes it to the corner of the screen and forces you to zoom out and back in!
                  ----------------------------------------------------------------
                  2014 BMW F800GSA | 1981 GS850GX | 1982 GS750T (now the son-in-laws) | 1983 GS750ES | 1983 Honda V45 Magna (needs some love) | 1980 Yamaha GT80 and LB80 "Chappy" | 1973 and 1975 Honda XL250 projects

                  Comment


                    #39
                    I certainly appreciate all the good advice. I am however taking a somewhat different course and we will see if I become the laughing stock around here. I want to express my sincerest gratitude for everything all you good folks have posted for my benefit and I am certainly wiser for it in many ways. My past experience with road going machines includes no Suzuki mororcycles. I have learned a LOT about them in a very short time. I owe it ALL to this forum and in particular the GS resources website. There are several key players who have been outspoken and given me much guidance.

                    After making an air fiter cage for a stock type foam element and buttoning up most of the other loose ends I have deemed her road-worthy. Unfortunately I will not be able to get the insurance or regstration paperwork sorted out until this coming Wednesday. Hopefully an inspection sticker will happen the same day. In Massachusetts it's almost always a gamble when trying to get a title for a 35 year old machine that came in from out of state.

                    I am very happy to report that she runs a lot better with the air cleaner in place ... as expected. I never admittied to the horrible bog at anything above half throttle but I figured it was due to having no air filter element.

                    The new battery I bought was too tall also. I returned it this morning. The old battery is too tall to fit the tool tray over but it's still in there and still cranking the engine over freely, everytime I go to start it up.

                    Here are some photographs of "Little Suzy" :


                    I'm not sure what the legal aspect is for having amber rear parking" lights as well as turn signals :


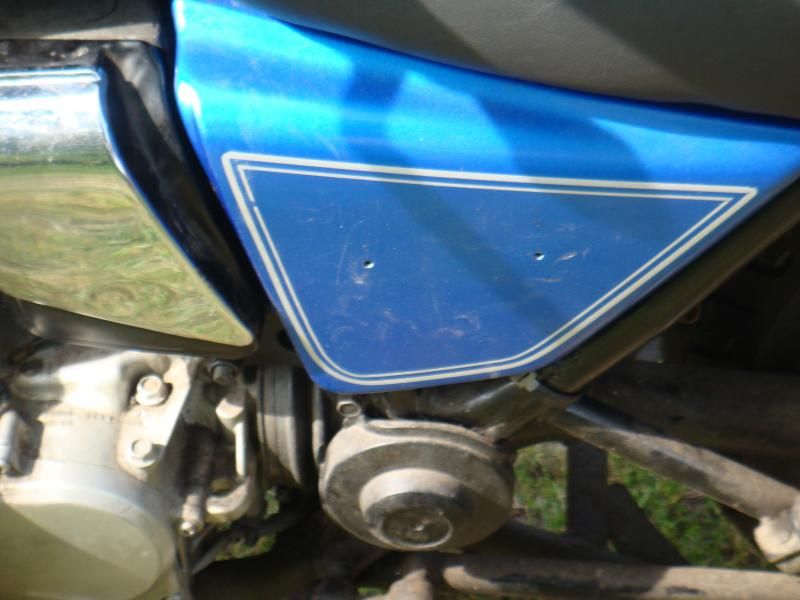
                    Little Suzy is still missing the GS850L script on one side cover :


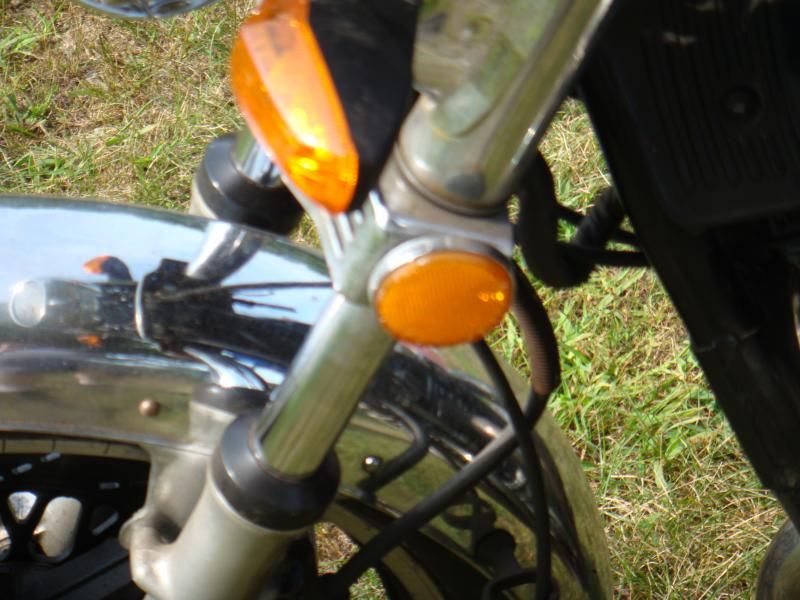
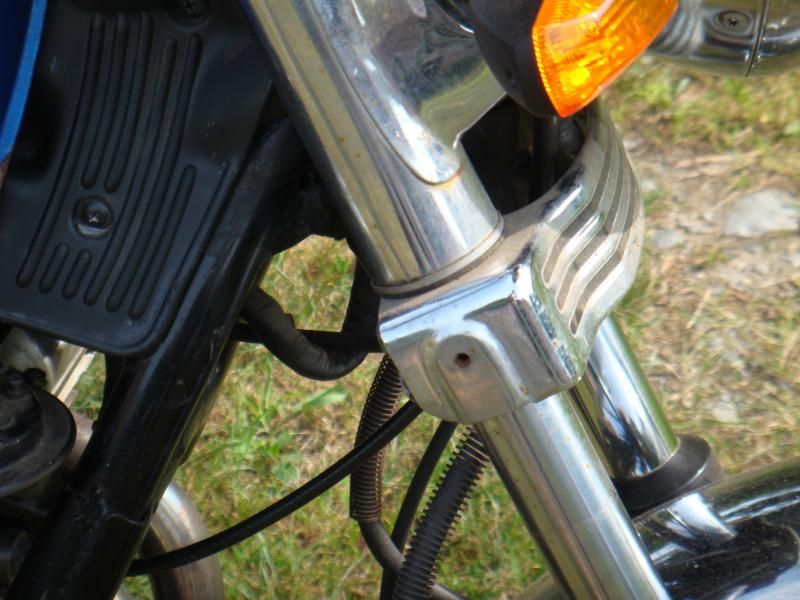
                    She is also missing one of the side reflectors up front like this one which is still there :


                    and where the reflectors is missing from :


                    Apparently the offset O-rings between the carb mounts and the intake ports are not causing a major problem with driveability. No bog, no backfiring, no hessitation at any throttle opening. I'll be monitoring the fuel economy closely for the first couple of weeks.

                    Thanks again everyone. I'll be keeping my fingers crossed that al lthe short-cutting I did won't come back to bite me for at least 4-5 months.

                    Comment


                      #40
                      It's been two weeks since I brought her home. Today, after the obligatory trip to the insurance agency and then the local and much beloved MASSDOT branch office, I brought home a newly issued license plate and registration. It was time for my first road-going test drive - right on schedule ! "Little Suzy" has now carried me for several dozen miles.

                      1st, the obvious things I noticed that are wrong :

                      I can admit fault and tell the truth and say "yes, you all told me so." She actually runs unexpetedly well though, but not 100% perfectly.

                      Although very eager to take the throttle right from an idle, I will have to do some synchronizing and very likely some idle trim, tuning. Maybe rejetting also to accomodate the 4 into 1 exhaust. For now, the carbs are staying mounted (sorry can't help myself). When fully warmed up the idle is solid at 1,000 RPM, when even hotter - after being in city traffic at stop lights etc, the idle is at about 2000. I get a small amount of "popping" from the exhaust but only sometimes and only during deceleration from above say around 4000 RPM.

                      After settling back into seeing the road go slantwise around corners and generally getting used to riding a motorcylcle again (been about 10 years away from it) I started noticing some of the other less noticeable symptoms of "she's not operating at 100% efficiency Captain".

                      2nd, the not-so-obvious (to me) things I eventually noticed that are wrong :

                      The drivetrain seems quiet enough except when I go into 3rd gear I hear a distinct high-pitched whine. Also, It's apparent that I need to replace the warped clutch discs. The shudder I can feel in the clutch handle/lever - as I slip the clutch a little to get going from a standstill - is slight but definitely there, when I can pay attention to it. Like when I am not surrounded by cars.

                      Once the engine became fully warmed up, oil heated up and thinned out, I could hear something else like a subdued knocking/clunking at idle that I did not notice before. Cannot hear it at all while moving. I'll be checking for loose nuts and bolts especially the exhaust flange mounts. I'm hoping for a slight exhaust leak but fearing a rod bearing has excessive play - or worse. Draining the engine oil will tell me a lot. Keeping my fingers crossed until then. Maybe I didn't get so lucky when I bought this bike

                      Lastly, the tach drive is not leaking anymore (GOOD) but the head gasket is definitely leaking (BAD). Apparently only in one spot, just behind the downtube from cylinder #2. I'm going to try retorquing the cylinder head nuts once it has cooled over night. I want to see if the nuts will run down the threads anymore than where they are now. If not, I guess I'll be ordering a new a head gasket.

                      I should mention also that now I see why there are so many fans of these bikes. This thing is a GREAT ride !
                      Last edited by Guest; 08-20-2014, 09:41 PM.

                      Comment


                        #41
                        Although very eager to take the throttle right from an idle, I will have to do some synchronizing and very likely some idle trim, tuning. Maybe rejetting also to accomodate the 4 into 1 exhaust. For now, the carbs are staying mounted (sorry can't help myself). When fully warmed up the idle is solid at 1,000 RPM, when even hotter - after being in city traffic at stop lights etc, the idle is at about 2000. I get a small amount of "popping" from the exhaust but only sometimes and only during deceleration from above say around 4000 RPM.
                        The hanging idle is a symptom of running lean. Mine pops on deceleration as well, I attribute it either to a few small holes in the exhaust or just the fact that it's a carbureted engine.

                        The drivetrain seems quiet enough except when I go into 3rd gear I hear a distinct high-pitched whine.
                        If it's not very loud, then it's just the shaft drive doin' it's thang.

                        Once the engine became fully warmed up, oil heated up and thinned out, I could hear something else like a subdued knocking/clunking at idle that I did not notice before. Cannot hear it at all while moving. I'll be checking for loose nuts and bolts especially the exhaust flange mounts. I'm hoping for a slight exhaust leak but fearing a rod bearing has excessive play - or worse. Draining the engine oil will tell me a lot. Keeping my fingers crossed until then. Maybe I didn't get so lucky when I bought this bike
                        If it gets any worse, you may want to check the starter clutch or clutch hub nut. These engines are pretty darn solid, I'd be surprised if it's anything to worry about. They do make a few odd but perfectly normal noises. They do not sound anything like a sewing machine when idling.
                        Charles
                        --
                        1979 Suzuki GS850G

                        Read BassCliff's GSR Greeting and Mega-Welcome!

                        Comment


                          #42
                          100 miles so far and still hanging in there. Speedo cable nut backed off from the back of the speedo. Glad it was an easy fix. Wish I could figue out a sure-fire way to keep the rubber handlebar grips from sliding off. I have to continually push them back on, while riding. Non-stock I'm sure since they seem a little too long to begin with.

                          Did the high pressure self-serve car wash thing to clean the front of the engine ... and everywhere else. Heard an interesting crackling sound when I got back home and shut off the engine. The cylinder head was dry on top everywhere. I could not see anything but heard it for about a minute. Water boiling under or around the starter motor maybe ?

                          Retorqued the cylinder head nuts. One of the center front ones backed off with less than 15 ft/lbs torque !!! Another one took about 20. the rest seemed ok if not dry and had the bolt-in-aluminum "STICKtion" when they snapped loose. Everything felt like it torqued up ok. The 6mm upside down bolt at the center front turned with an estimated (by hand) less than 4 ft/lbs. One of the side ones was almost as loose.

                          Discovered the cam cover screws were hand tight as were the ignition pickup cover screws. Apparently I did not use my trusty JIS driver on them or forgot to tighten them properly when I had the covers off. Maybe that was some of the knocking sound I've heard.

                          I'll rack up some more miles tomorrow and see if the oil leak from the head gasket has stopped ... or got worse as a result of my tampering.

                          Backfiring when slowing down from highway speeds is excessive !!! Exhaust pipe is not grey near the outlet, by any means. VERY black and sooty. Calculated about 40 MPG combined highway and country backroads, driving conservatively. I'm thinking leaner mainjets are in order. Maybe as small as 135 from the stock 150 I saw in the one carb I took the float bowl off of.

                          I will be looking into everything I can find on these carbs next. I need to understand the theory behind them. I have experience with constant depression carbs, as they are called when used on British automobiles. Depression equals vacuum in Brit-speak for those who may not know that little tidbit. But I have no experience with carbs that use a vacuum operated piston/metering needle and individual idle circuits and main circuits. A visit to the carb tech forum on this website will be forthcoming and at least a question or two for those who have gone before me, in the next few days.
                          Last edited by Guest; 08-22-2014, 11:29 PM.

                          Comment


                            #43
                            Which side grip is sliding off? Using hairspray or grip glue will help with that
                            Cowboy Up or Quit. - Run Free Lou and Rest in Peace

                            1981 GS550T - My First
                            1981 GS550L - My Eldest Daughter's - Now Sold
                            2007 GSF1250SA Bandit - My touring bike

                            Sit tall in the saddle Hold your head up high
                            Keep your eyes fixed where the trail meets the sky and live like you ain't afraid to die
                            and don't be scared, just enjoy your ride - Chris Ledoux, "The Ride"

                            Comment


                              #44
                              Both sides cowboyup3371. I tired spray weatherstip adhesive and the handgrips still slip but not as badly. Never heard of grip glue. I will look for some and try that.

                              Meanwhile There does not seem to be any more oil leaking from the front of the engine ! I did not smell any hot oil either after getting of the highway and sitting at a stop light. Either I had not cleaned off all the oil previously and the high pressure spray from the self-serve car wash got the remaining oily residue or I was fortunate enough that by retorquing the cylinder head fasteners, I managed to stop the oil from leaking.

                              I had previously checked the pilot jet adjusting screw setting and they were backed out close to 3 1/2 turns except for #2 was at about 2 1/4 turns and # 1 was out about 3 turns from seated. Once the engine warmed up on my ride today, I pulled over, parked and tried setting each pilot screw to 2 turns out from seated. # 2 carb screw is a bugger to get to with a hot engine and the tank in place. The choke linkage and vent hose are both in the way. NOTE TO SELF : Get tiny thin handled screwdriver for adjusting carb pilot jet screws.

                              The engine responded well as far as taking the slightest amount of throttle opening. It was as if I had spent time synchronizing the carbs It seems the carbs had been synchronized and the screws had been adjusted unevenly after the fact.

                              Downside is the backfiring has become unbelievable upon closed throttle deceleration only. It is most severe when coming down from about 4,000 RPM or higher. Not too bad by the time the RPMS get down to 3,000 but still, unacceptably annoying as well as being very bad for the exhaust system.

                              I'm still looking for an explanation of the theory behind all the systems inside the Mikuni CV carbs. I found the pilot system explanation and adjustment procedure on this site. I thought I had run across something else out there on the Web that encompassed theory of the entire Mikuni CV carb and it's inner workings. I'll keep looking.

                              Comment


                                #45
                                Originally posted by eil View Post
                                The best feeler gauges to use are metric ones:


                                Because they start at 0.02 mm and go in 0.01 mm increments up to 0.09 mm. The non-metric feelers that I have seen rarely have a useful range of sizes for doing GS valve clearance checks.

                                Unfortunately, these metric feelers are rarely available locally. The best place to get them is eBay. If memory serves, under $10 for ones that ship from the U.S. or under $5 for the same ones that ship from China but will take 2-3 weeks to arrive.
                                Those are nice. Where did you get them?
                                sigpic Too old, too many bikes, too many cars, too many things

                                Comment

                                Working...
                                X