Announcement

Collapse
No announcement yet.

Joe G's 1100 project

Collapse
X
 
  • Filter
  • Time
  • Show
Clear All
new posts

    #16
    Although the GS1000G is arguably the best all-around shaft driven G model, the 1100G is the cream of the crop. (I have 3 if you count the GK)
    The seat on the 1000 is a little better but the 1100 seat can be modified to be similar. The extra stroke of the 1100 engine adds enough torque to notice a difference.
    Besides, the 1100G has nicer rims and fuel tank design.

    Comment


      #17
      Thank you! I am excited for this bike. My last bike was a 2001 Triumph Sprint, which was really top heavy and really long, and difficult for my to handle well. It had more than enough power at normal riding RPM but I was never able to find a smooth sweet spot for accelerating from a stop in city driving. The 1100g has both of those things.

      I would like to see the difference in seats - the seat is one thing I have been wondering what to do with.

      I had an '82 650GL, it was a great first bike. I thought I was going to get an L when I joined this site a few weeks ago. However, I got to see Steve's stable and compare, and was immediately hooked on the G. The 1000 or 1100 seemed like a no brainer since it's the same size as an 850 and technically a few lbs lighter. I find that it is very versatile in terms of riding position - you can load it up with baggage, windscreen, floor boards if you want.. or you can set it up for a more forward/aggressive position (which is my plan - slightly lower bars, possibly move the pegs slightly aft...). It has the power to do both well, and I was happy to learn it doesn't have the 'step function' power band of the 850 (just personal preference). It has great low end power for riding around town, plenty of top end power to cause trouble, and seems to be happy anywhere in between. Of course, when I get it all tuned up I might be in for a pleasant surprise

      My exhaust looked OK- most of the surface rust was on the header pipes and the mufflers looked good. What I didn't realize was it had been drilled out and the baffles removed. It was a clean job and looked decent but too loud for suburbia and the bike is running too lean as it is. I bought a set of gently used L pipes off another member and they installed OK - not perfect but they don't look bad and they will certainly hold me over til the rest of the repairs are done. I have been thinking a little about a mod down the road but haven't put too much thought into it yet. I was happy to see the L pipes all hooked up and working.

      Comment


        #18
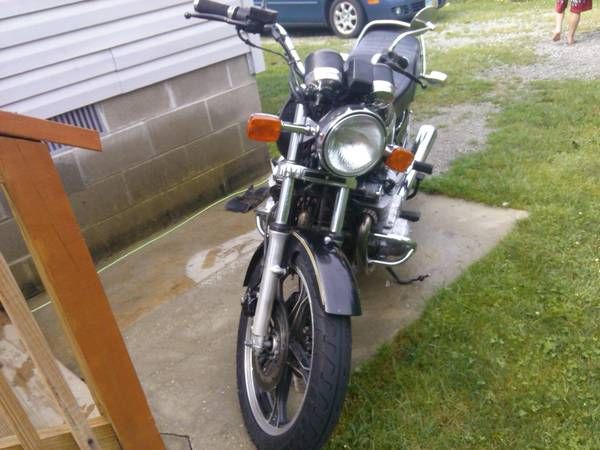
        Photo test: A few more pics from the craigslist ad. I don't know how old the pics are, the bike doesn't look that clean; there were a lot of oil leaks when I got it. My garage is not big and my trailer's blocking the door at the moment so I don't have room for fresh pics. That will change next week.


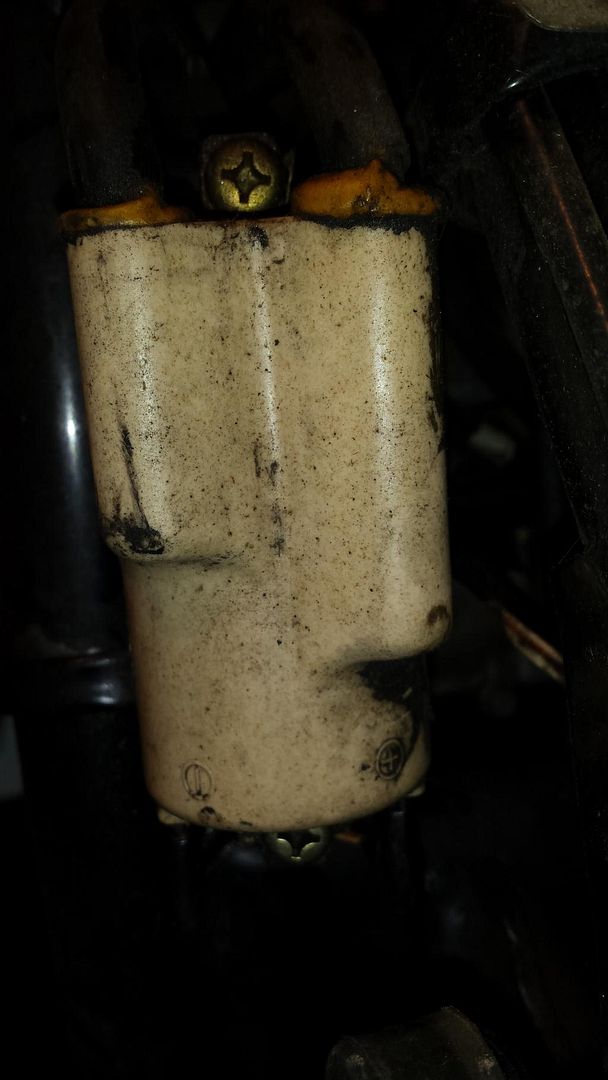
        Also a couple of pics of an ignition coil. You can see how much of an oil mess is being made under the tank. And those coils sure look their age!
        Last edited by Guest; 11-15-2014, 12:46 AM. Reason: Adding second pic

        Comment


          #19
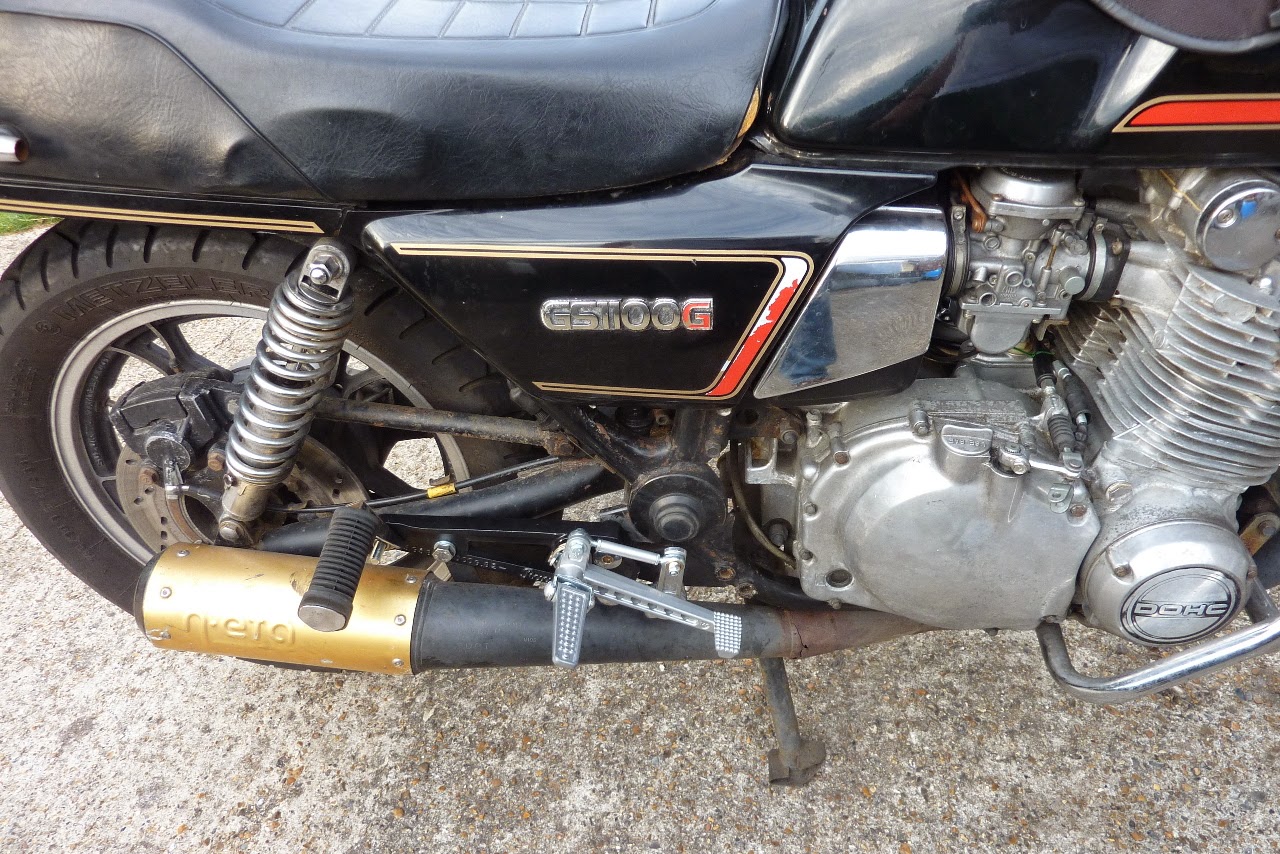
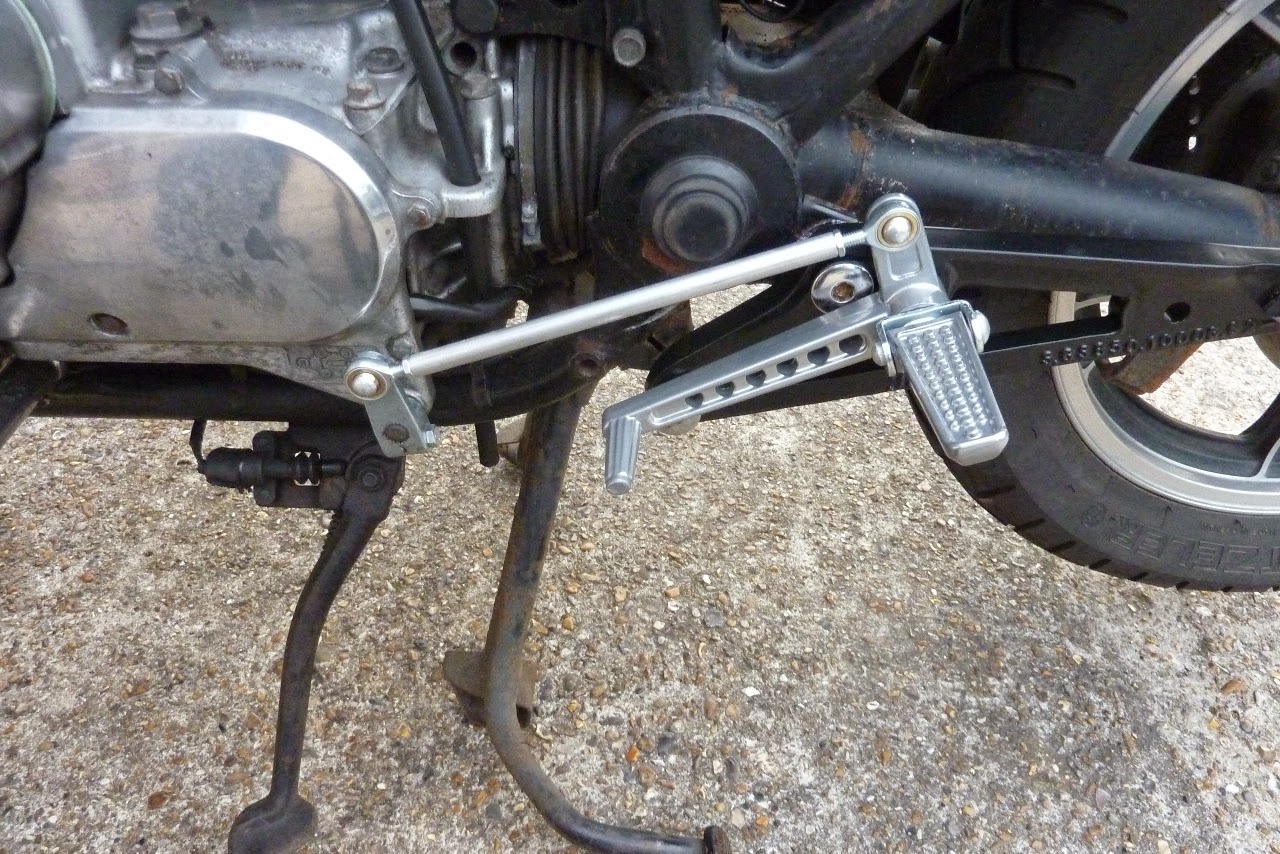
          Joe - I made the following mods to my 1100G for longer distance comfort: Long Distance GS1100G Mods and found the changed peg position to be the most helpful of all:


          These were from Raask in Sweden. Expensive and not the best quality but they were made for the bike. You might find something locally that you could adapt. Putting your legs further back allows your legs to help support your body weight rather than the usual US sitting position (cruiser style) in which the whole body weight is supported only by your butt.

          Greetings
          Richard
          sigpic
          GS1150 EF bought Jun 2015
          GS1150 ES bought Mar 2014: ES Makeover Thread AND blog: Go to the Blog
          GS1100 G (2) bought Aug 2013: Road Runner Project Thread AND blog: Go to the Blog
          GS1100 G (1) Dad bought new 1985 (in rebuild) see: Dad's GS1100 G Rebuild AND blog: Go to the Blog
          Previously owned: Suzuki GS750 EF (Canada), Suzuki GS750 (UK)(Avatar circa 1977), Yamaha XT500, Suzuki T500, Honda XL125, Garelli 50
          Join the United Kingdom (UK) Suzuki GS Facebook Group here

          Comment


            #20
            Thanks Richard, I have been looking for pics of a similar bike with rearsets.

            I need to start working on the engine gaskets and carbs. After getting the new muffler installed I ran the bike just enough to test the stators, and the new headers are already discolored. Maybe I will start taking things apart this weekend. It has been really busy at work, especially with 2 classes going on at the same time.

            I did try a little polish on my mirror stem. I am amazed at how so much rust basically just wiped off. One of the stems is a little pitted still. I also was playing with the mirror angle and it started to come loose, so I figured now is a good time to learn what holds it all together. The internals look easy enough to repair or replace. I have one dent in the back of one mirror that I want to try to pop out first. I am bad with the 'before' pics, but I will try. Although I don't know what that's worth since apparently my photos are vanishing...

            Does anyone have a good link for a homemade lift or stand that works well with the GS bikes? I am thinking I'd like to have the frame on a dolly but am open to suggestions. For a longer term project a traditional hydraulic lift doesn't seem to make a lot of sense.
            Last edited by Guest; 11-15-2014, 12:49 AM.

            Comment


              #21
              I am realizing I need to get better at taking 'before' pics!

              The major work: carbs removed, disassembled and soaked, and reinstalled, valves adjusted, and carbs synchronized. I utilized one of the advertised services in the Classifieds section which turned out to be an amazing experience

              The bike still pops at high RPM on the stand. Between that, having had 3 of 4 header pipes change color, and just my general curiosity, I performed a late night investigation of the ignition coils. I got nothing across the boots for nos. 1 and 4, and with the boots removed and wires cut back 1/4" I only got 11.x kOhms as opposed to the 29.9 kOhms across 2 and 3. I am open to thoughts or suggestions. Considering these coils and wires are 32 years old it seems like I should just change them out, but maybe I'm a little hesitant since I haven't had the bike running/riding right yet.

              Anyway...
              I played around a little with Meguiar's Ultimate Black and am amazed at the results. This was really just a prelim test to see how well it worked, but most things that got a first coat don't need much more. The top of the headlight bucket was really bad and needed 4+ coats, so still working that but everything looks so much newer and nicer. We will see how long it lasts...

              I found some melting wires/connectors behind the headlight (a bare hot wire, plus the loop for stator/RR circuit) and repaired them with stock style connectors and pins from Z1, and just did a basic cleaning off= the wiring and contacts. I still need to re-route some wires and cables.

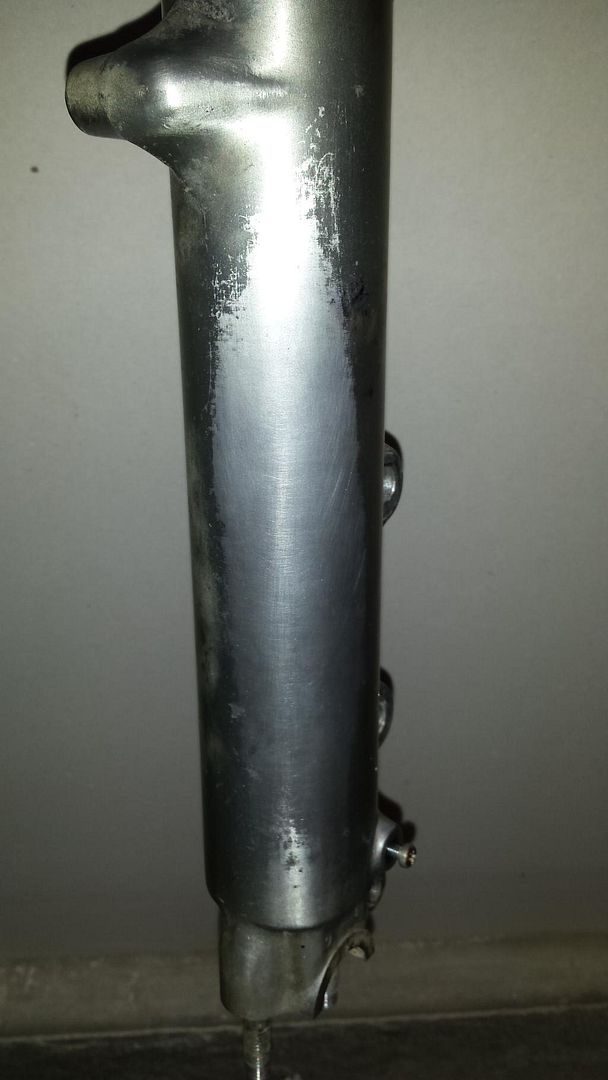
              I played with a Scotchbrite pad on one of the forks and am pretty happy with the results. The green pad is enough to scrub away the yellowing and peeling clearcoat, but is not overly abrasive. A few quick oriented swipes puts a nice machine-like satin finish on them. I just did a small spot so there is plenty to do before taking pics.

              I ordered Sonic springs and new fork seals, so one of the next projects is a fork overhaul. I need to remove and re-bend the bracket for the gauges and straighten out the front fender.

              I'll get some pics posted in a day or two, but nothing is really complete at the moment.
              Last edited by Guest; 12-08-2014, 05:31 PM.

              Comment


                #22
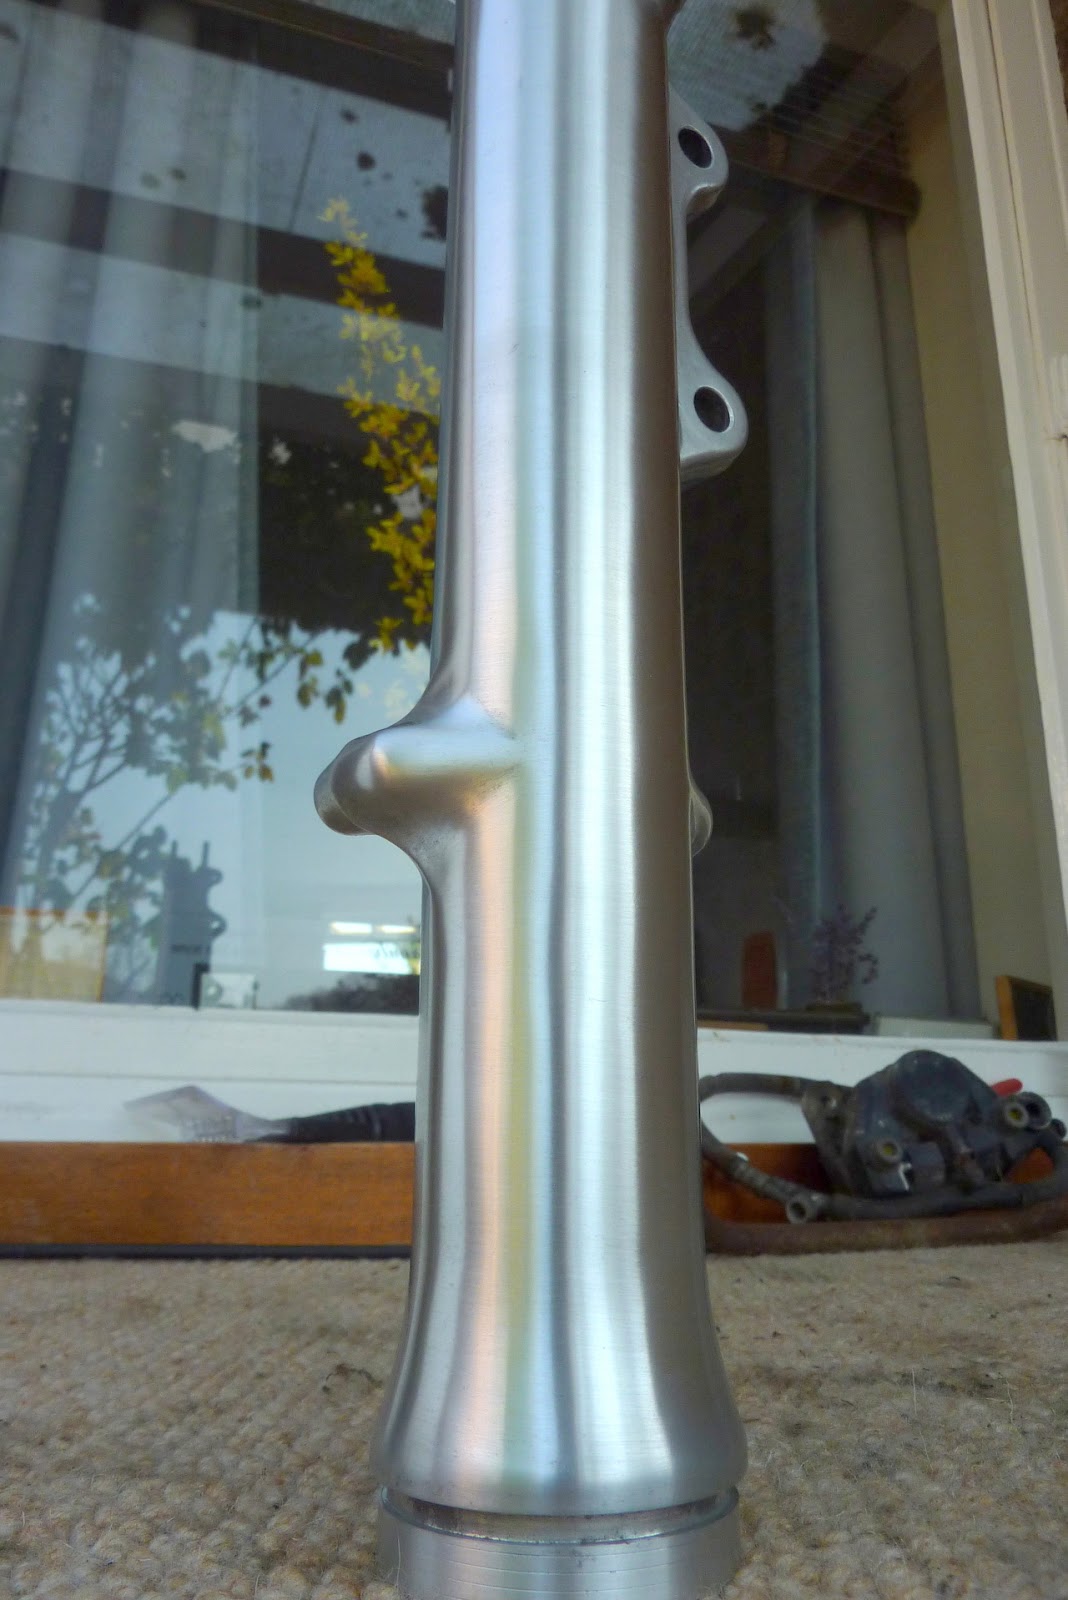
                Scotchbrite is the way to go for those fork lowers. I was able to go from this:


                with a lot of elbow grease but you are better off stripping the varnish first:


                eventually it will look like this (keep doing the scotchbrite horizontally):


                When they are in this state they are very susceptible to being marked; even by fingers and they will retain any grease and dull over time. My solution was some 2 K clear laquer.

                I don't know anything about coils so I am following your progress on this. Make sure you put in all the extra ground loops from rectifier to battery and from battery holder (where the black and white wire is attached) back to the battery terminal.

                Did you get a vacuum gauge to do the sync? Makes a huge difference.

                This is what mine sounded like before synching. It could also be valve adjustment if it is only happening on one cylinder:


                Greetings
                Richard
                sigpic
                GS1150 EF bought Jun 2015
                GS1150 ES bought Mar 2014: ES Makeover Thread AND blog: Go to the Blog
                GS1100 G (2) bought Aug 2013: Road Runner Project Thread AND blog: Go to the Blog
                GS1100 G (1) Dad bought new 1985 (in rebuild) see: Dad's GS1100 G Rebuild AND blog: Go to the Blog
                Previously owned: Suzuki GS750 EF (Canada), Suzuki GS750 (UK)(Avatar circa 1977), Yamaha XT500, Suzuki T500, Honda XL125, Garelli 50
                Join the United Kingdom (UK) Suzuki GS Facebook Group here

                Comment


                  #23
                  Originally posted by Joe Garfield View Post
                  The major work: carbs removed, disassembled and soaked, and reinstalled, valves adjusted, and carbs synchronized. I utilized one of the advertised services in the Classifieds section and got a lot more than I bargained for. Which is the biggest understatement of 2014.
                  If that is a complaint, I can see that the 'bargain' is adjusted.


                  Originally posted by londonboards View Post
                  Did you get a vacuum gauge to do the sync? Makes a huge difference.
                  Yep, genuine mercury 'sticks' were used.

                  .
                  sigpic
                  mine: 2000 Honda GoldWing GL1500SE and 1980 GS850G'K' "Junior"
                  hers: 1982 GS850GL - "Angel" and 1969 Suzuki T250 Scrambler
                  #1 son: 1986 Yamaha Venture Royale 1300 and 1982 GS650GL "Rat Bagger"
                  #2 son: 1980 GS1000G
                  Family Portrait
                  Siblings and Spouses
                  Mom's first ride
                  Want a copy of my valve adjust spreadsheet for your 2-valve per cylinder engine? Send me an e-mail request (not a PM)
                  (Click on my username in the upper-left corner for e-mail info.)

                  Comment


                    #24
                    Originally posted by Steve View Post
                    If that is a complaint, I can see that the 'bargain' is adjusted.
                    .
                    Oops, wrong expression! Fixed it

                    Comment


                      #25
                      Originally posted by londonboards View Post
                      Scotchbrite is the way to go for those fork lowers.

                      When they are in this state they are very susceptible to being marked; even by fingers and they will retain any grease and dull over time. My solution was some 2 K clear laquer.

                      I don't know anything about coils so I am following your progress on this. Make sure you put in all the extra ground loops from rectifier to battery and from battery holder (where the black and white wire is attached) back to the battery terminal.

                      Greetings
                      Thanks, your forks look beautiful! I think I ran across one of your posts before and remember the thing about a final coat of some sorts. I don't know what I'll use yet, maybe wax, maybe clear coat.

                      I have a thread in the electrical section for the coils - there is some good feedback there. I know one of the plug caps is bad and am thinking the heat may have gotten to one of the coils. I will update when I get it figured out and have some pics of some progress.

                      Comment


                        #26
                        Well the excitement continues:

                        The front wheel is not straight, off to the right by quite a bit (which was constant as I rotated the wheel around). My initial thought is that the top clamp is twisted but I won't know for sure until I get to removing that. The speedometer is totally smashed and was held together with electrical tape, and the mounting bracket for the gauges is FUBARR (recognition and repair).

                        I don't see any indication of a bent frame, and none of the forks just yet. The forks legs are on different angles - the right fork does not reach as far forward which is causing the wheel to be angled to the right. It seems to be constant with the top clamp being twisted (in the direction of someone pulling the left fork out/up). The front fender was pretty banged up so I couldn't really see the wheel misalignment until it came off.

                        I was excited when I went to buy this bike, and also inexperienced and alone in the dark and rain. I don't have any regrets or anything, mostly thanks to all the help available from this forum, although if I had known any better I'd have paid less for the bike and not spend so much money on stupid stuff like shiny bolts and fresh rubber pads, at least until the bike is safe and running right.

                        But really, no worries, just more stuff to fix Hopefully I will have enough time and money to get it done before the beginning of riding season. Which I think I will.
                        Last edited by Guest; 12-09-2014, 01:54 AM.

                        Comment


                          #27
                          I made a small amount of progress on the front end and also took some pics.

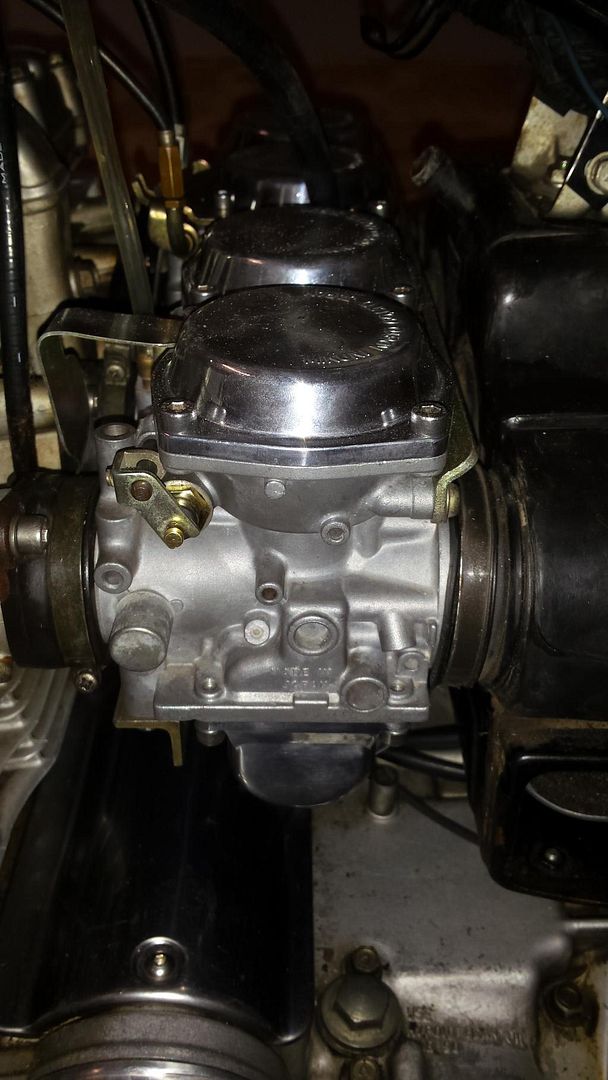
                          First, the carbs have been overhauled and reinstalled. This is largely due to the work of Steve. Fortunately or unfortunately Steve must have a lot of trip hazards in his shop. I don't know how many times he tripped into the polishing wheel but there are shiny things in places one might not expect

                          After the carbs the next project is the forks. I got new bars and want to do some brake work so a complete removal of the front end seemed appropriate. It all went quickly and smoothly barring the roller bearings and races which I won't tackle until I know what my plans are for the steering stem.

                          I learned the steering stem (lower) is the bent culprit, despite no visible indication of any damage. The steering head is fine - I checked both independently with the forks and confirmed with a bench test. I have line of site to a replacement, and also a some spare parts for the smashed speedometer. Between the speedo, bent steering stem, and likely the replacement forks that are on this bike, I hope whatever accident it was wasn't a loss of life :/

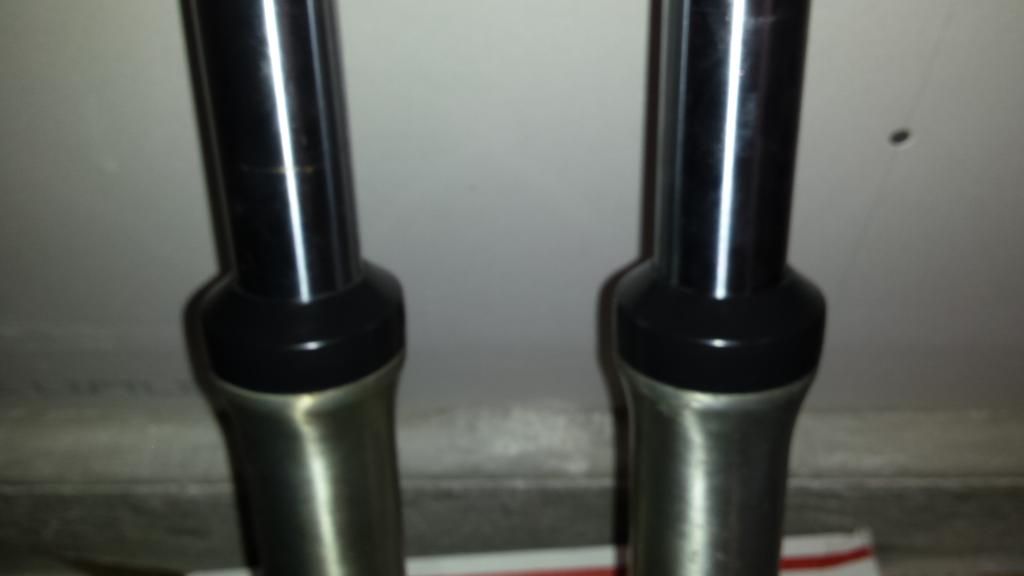
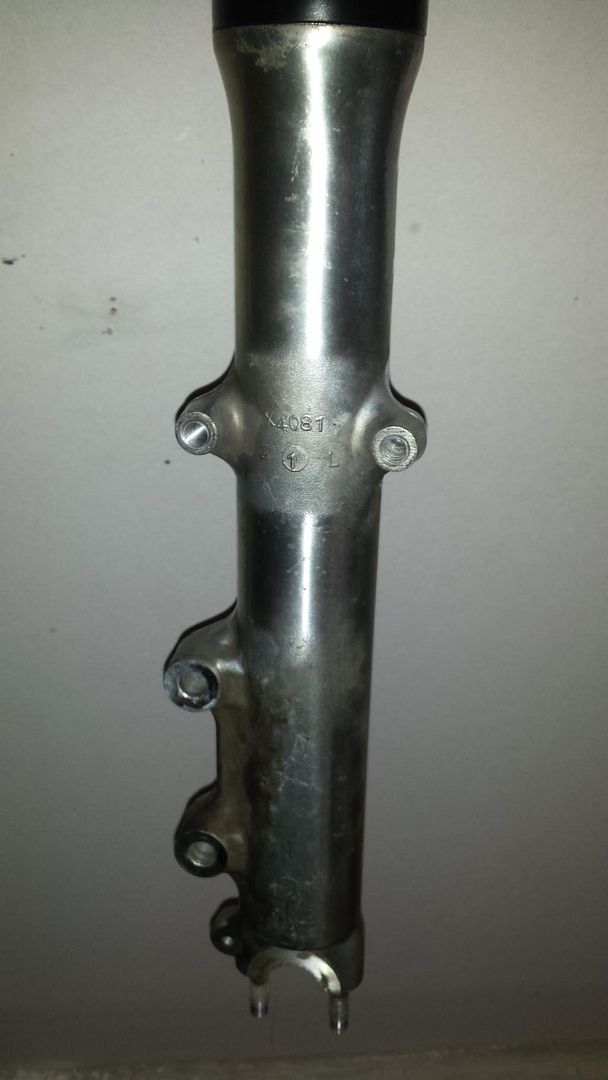
                          Some good news: the dust boots on the forks look relatively new, and since there hasn't been any sign of fork seal leakage I believe the forks were serviced when they were installed on this bike after the wreck. I think I'm going to leave them alone for now - I did buy new seals but realized I really don't need to completely overhaul everything right this minute . That being said, they will get cleaned well, new springs, etc.

                          Londonboards was spot-on with the raw aluminum finish. The forks looked great (the spot I cleaned) for a few days but between my oily hands and the aluminum oxidation, the look is fading. I'll have to figure out what to use for a top coat pretty soon.

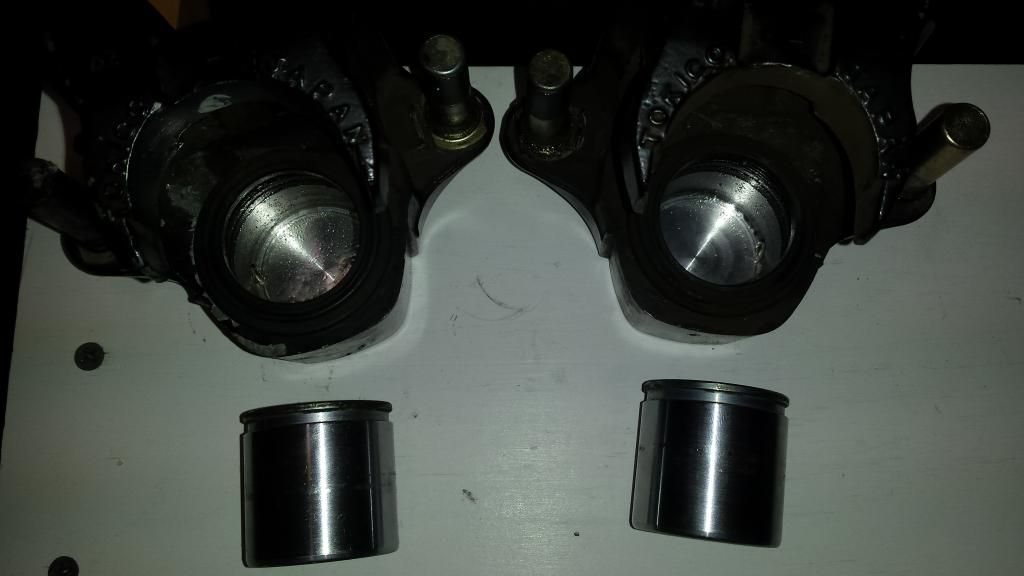
                          Also good news: the front calipers are in good shape. A touch of surface rust on one piston but I think it will be no problem removing it, maybe with a little vinegar and elbow grease (although I will double check the material of the piston and see if its compatible with the acids in vinegar). The boots are all in decent shape, the only thing that I need is one spring and one guide pad. I'm still debating what to do for the hoses; I would like to replace them - some days I want rubber and some days stainless braided, yet other days I think I should just keep the stock ones. I know what they say about old hoses, but, they seem pretty decent.

                          I need to learn about cleaning brakes. My initial plan was a complete tear down and soak, and likely a paint job afterward. But being that things are in as good of shape as they are, I don't know if I want to pull the main seals and risk damaging them, however I imagine the cleaner isn't the best thing for the rubber. So a little research is needed before I get started on that.

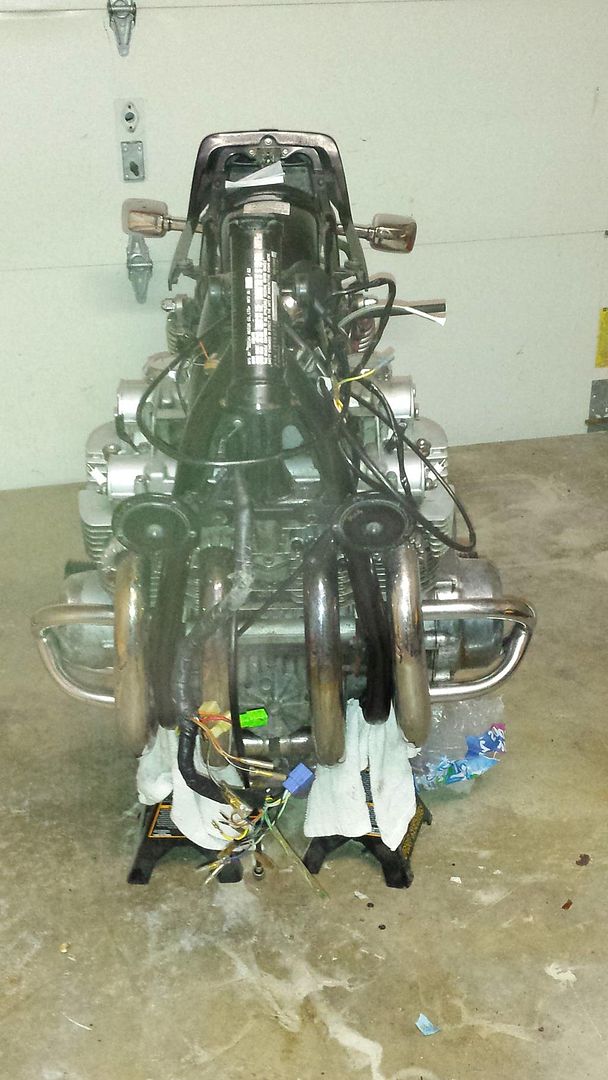
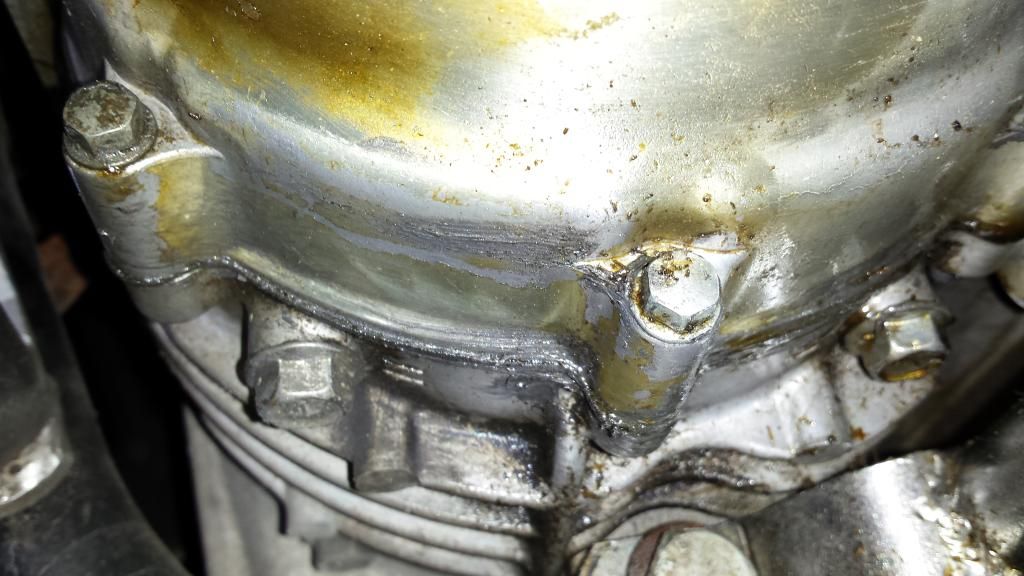
                          The other thing I have to work on is a new stator cover gasket. The PO hacked in a new stator but made an RTV mess of the gasket (also the secondary drive oil). I got a new gasket from Z1 and would like to get that fixed, so I can drain and re-fill the oil with the right amount (overfilled likely due to the PO's oil troubles). Of course, pulling that cover means removing the engine guard which means supporting the engine, so that is likely a post-Christmas repair.

                          Here are some pics:


                          Last edited by Guest; 12-14-2014, 05:10 AM.

                          Comment


                            #28
                            Here is a preview of what the forks looked like, and what might happen with a scotch bright pad. I hit this fork a second time with a 'no scratch' pad, but of course it left some scratches. On my first pass I was good about the direction I was working in and it looked really good. I will fix it. And, the front calipers are below.


                            Last edited by Guest; 12-14-2014, 04:55 AM.

                            Comment


                              #29
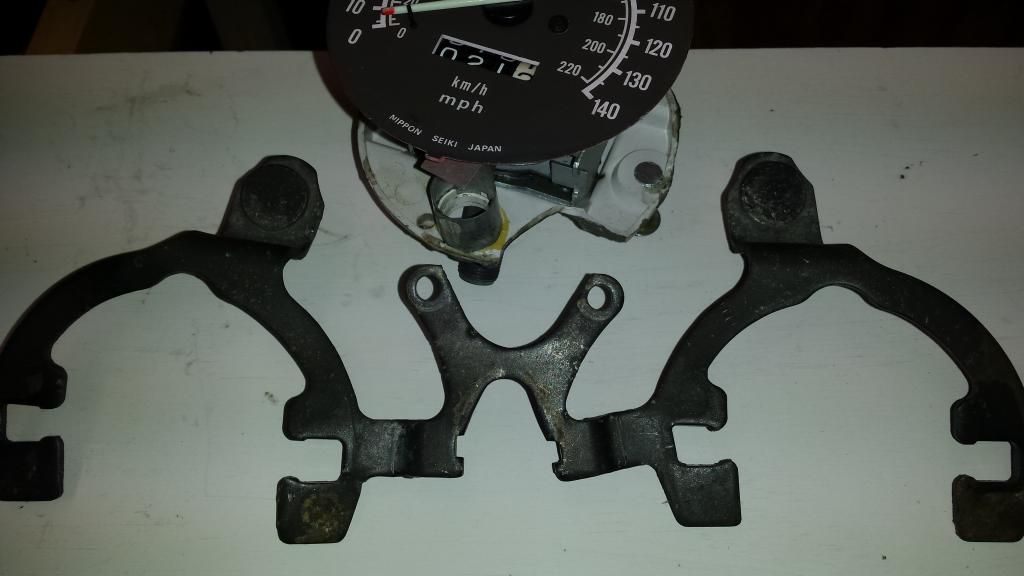
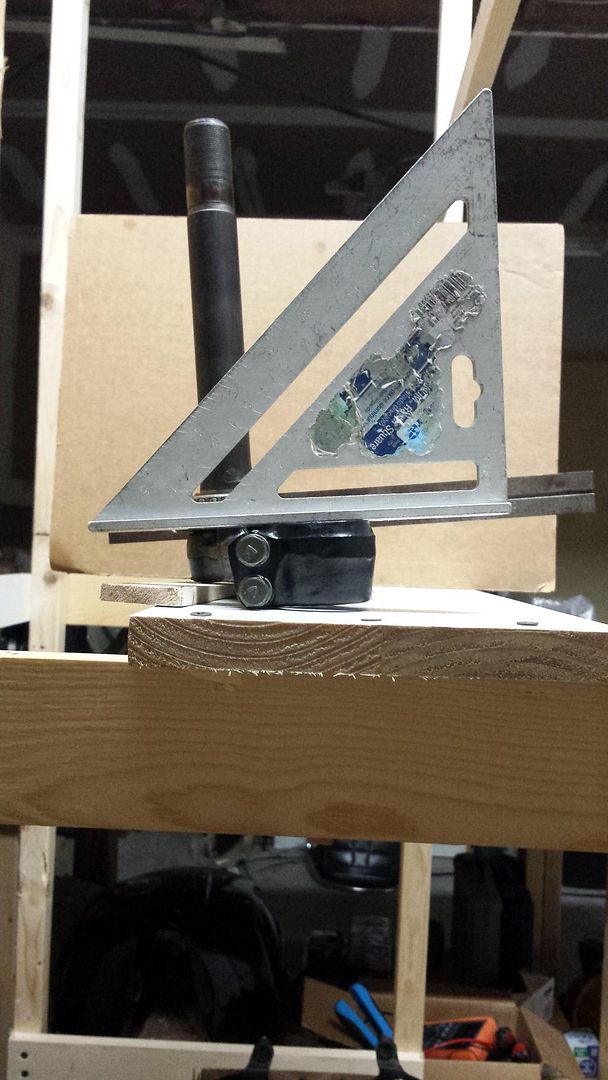
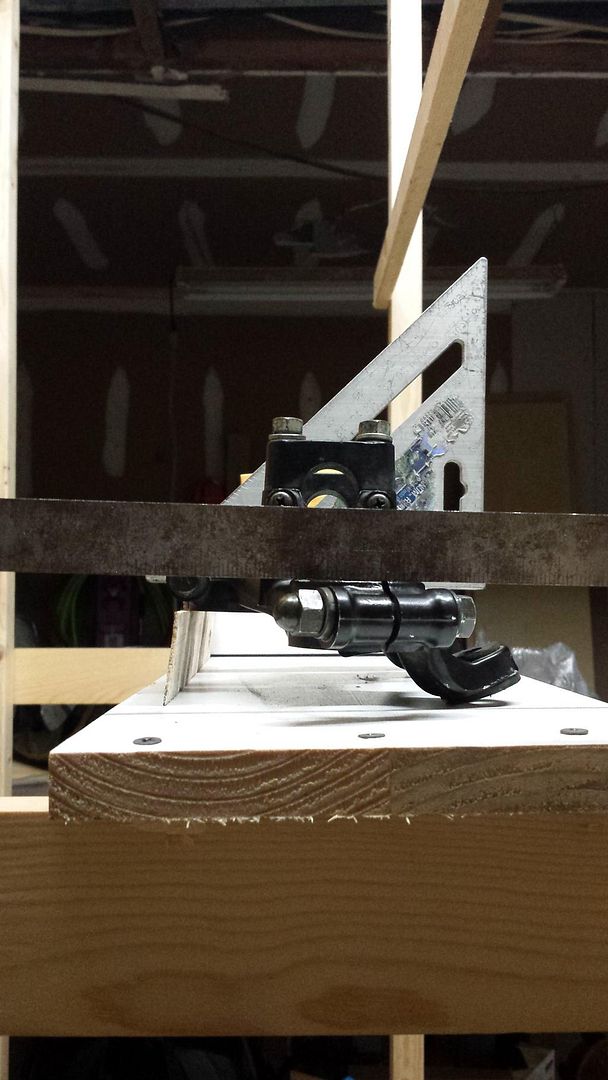
                              Here are the beat up front end parts. The speedo face looks great so hopefully I will get a new housing and bracket and all will be well. This bracket is sad. Below is my bench test of the steering stem. I have straight edges mounted on the fork braces. You can see that the straight edges are on different planes in the picture of the lower stem. The two planes are very close on the upper stem. I believe I will be getting a whole 'new' steering stem from the same member with the speedo gauge and I am excited about all that


                              Last edited by Guest; 12-14-2014, 05:00 AM.

                              Comment


                                #30
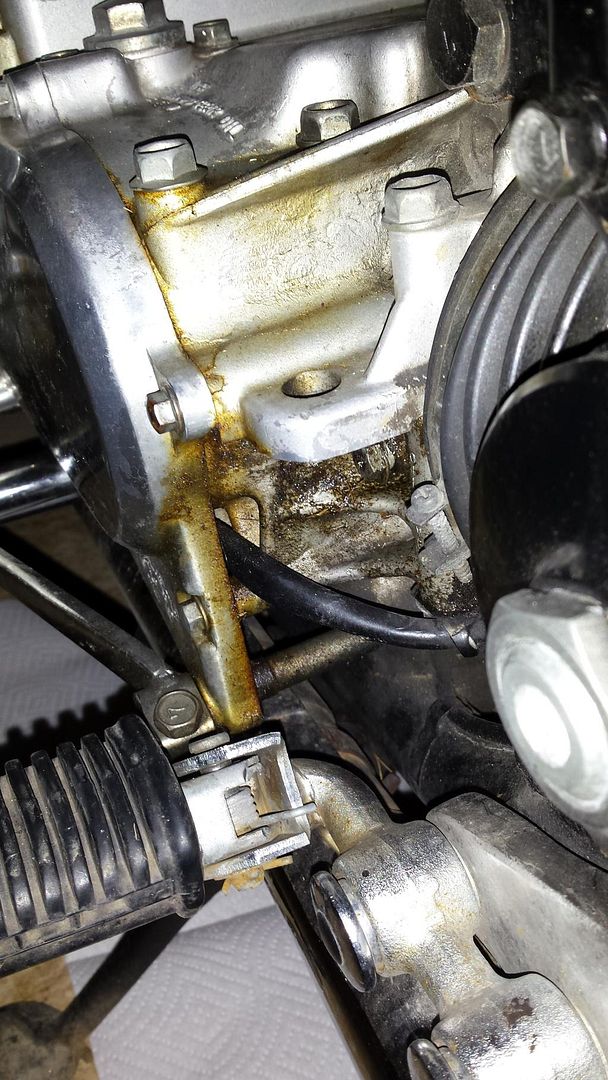
                                And finally for today: shots of the oil mess. In addition to the engine cases, the RTV tube I mean tach seal was leaking all over everything. After my first real ride on this bike I came home with oil everywhere and the whole bike smoking. I thought I was in for a disappointment, but that one little seal seems to have fixed a lot. You can see the mess it made of the ignition coils. Which, by the way I tested out and got significant differences between the coils and found bad plug caps. A GSR member was kind enough to send me a replacement set of coils, and I bought some new caps which I may hang on to for the moment.


                                Last edited by Guest; 12-14-2014, 05:04 AM.

                                Comment

                                Working...
                                X