.png "Powered by vBulletin")
Hey Everybody, I'm glad to have come across this forum since recently buying my 1979 GS750L. I find forums to be one of the best sources for collective knowledge on a any specific subject. I hope to glean what I can from the members here and hopefully contribute some knowledge or creativity here as well.
To introduce myself a bit, I am a product designer and recently started working in the motorcycle industry but mostly with Harley aftermarket parts. I design new accessories and help give guidance to evolving products as well.
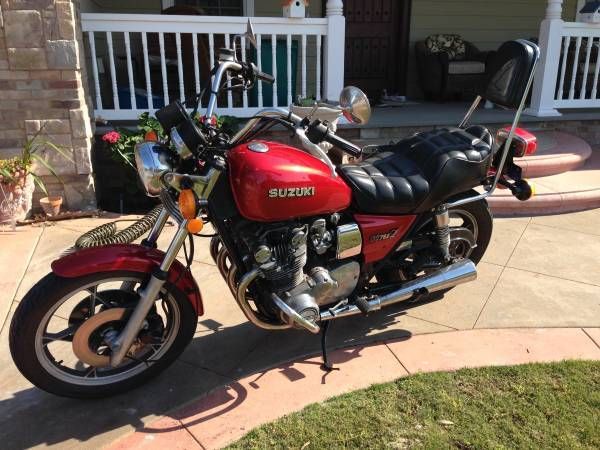
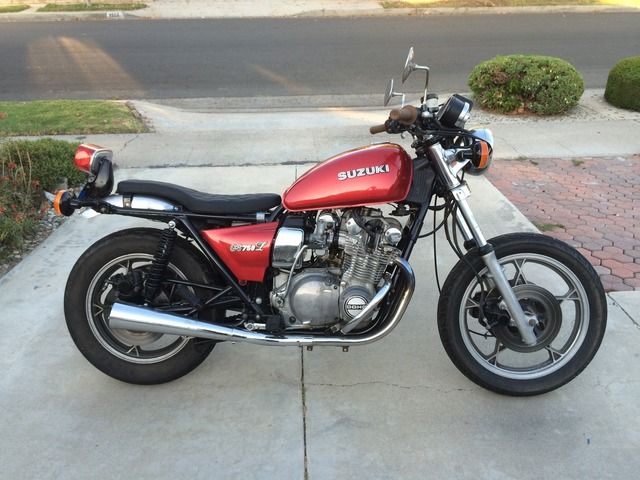
Ok so on to the bike and build. The bike as previously stated is a 1979 GS750L and had mid 20,000 miles on it when I bought it, or at least that is what the stock speedo reads. It was kept in pretty good stock condition. Here is the picture as it was when i bought it.
I am not a super fan of the big sissy bar attempt a a cruiser chopper that suzuki made on this bike. I will be building this bike to be a more sporty but practical build, as i will be using it for occasional work transportation and to ride to local shows and occasionally on weekends for fun.
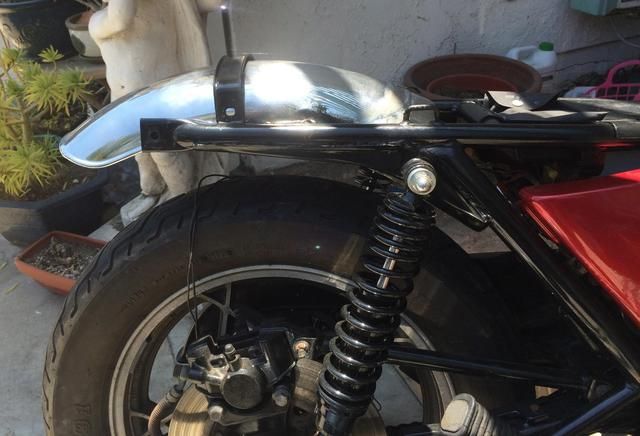
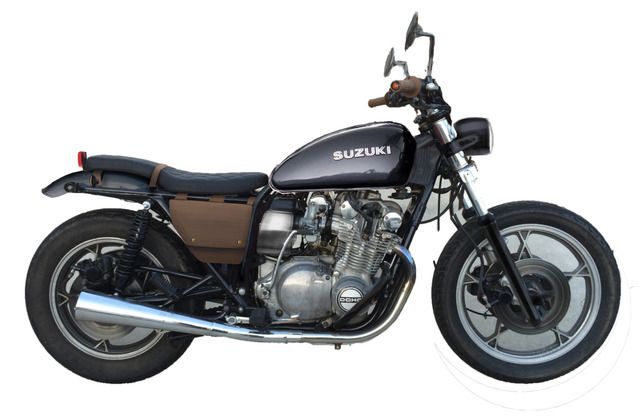
First this was to get a better par of bars that didn't make me feel as much like a parachute. I also removed the sissy bar. Performance wise I have installed a pair of Progressive suspension 412 shocks with 13"springs to keep the stock height and reinvigorate the rear suspension.
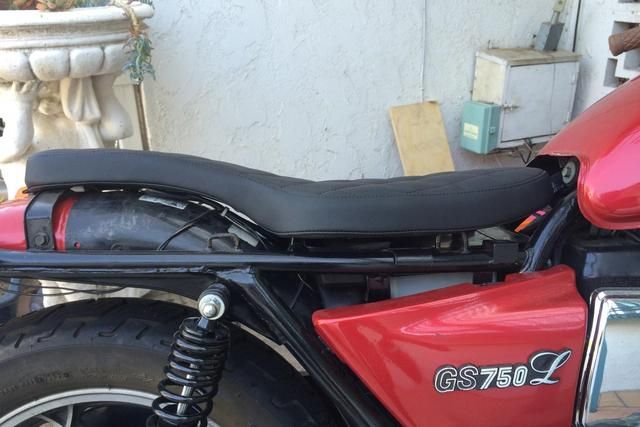
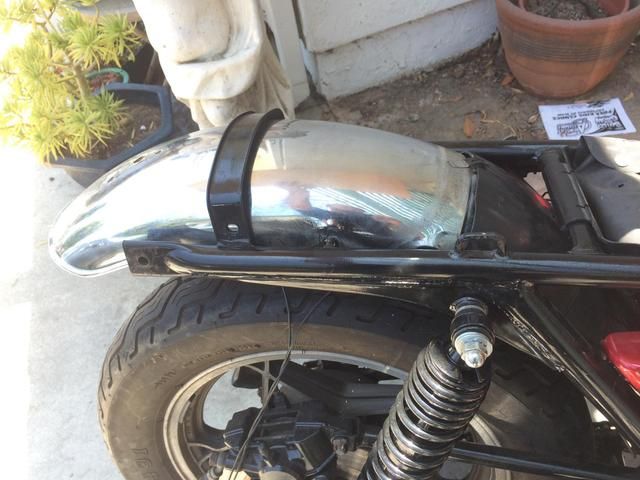
I am a bit on the vertically challanged side at 5' 5" and wanted a lower seat height. Rather than do any major chopping I found that a early sportster seat fits up to the 750L frame nicely. I got a Burly Brand Brat seat 2 up version. The only modification required was to grind of the front stock seat mounting hook, fab a quick tab for the seat to hook into and drill o single hole in the rear fender for a bolt to mount the seat.
Because the rear fender is split at the peak with the plastic inner fender the plastic was now exposed. I wanted to shorten up the rear a bit anyway so I experimented with relocating the stock fender. I was basically able to move it forward using the stock locating pins from the inner fender with the fenders rear monting hols and drilled new monting holes at the rear strut location in the fender moving it forward a good 8-10 inches almost entirely filling the exposed plastic area with the metal fender. I trimmed the inner fender with some tin snips so it would still be able to be used and overlap the metal fender properly.
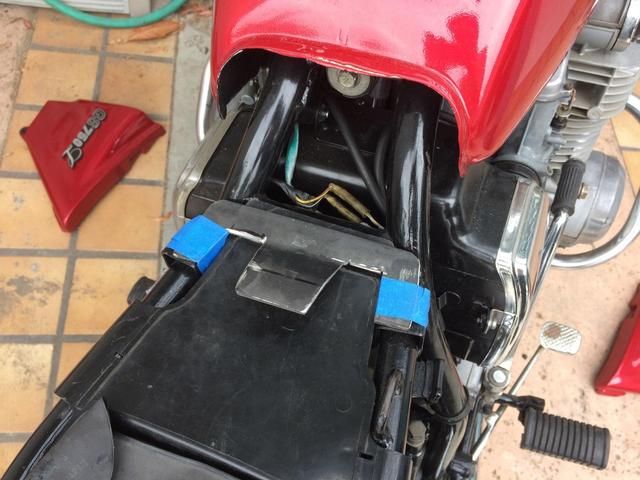
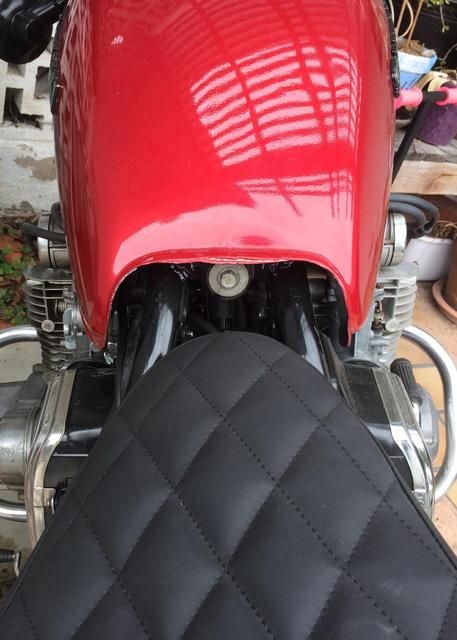
but with a thinner seat now a void is open under the tank
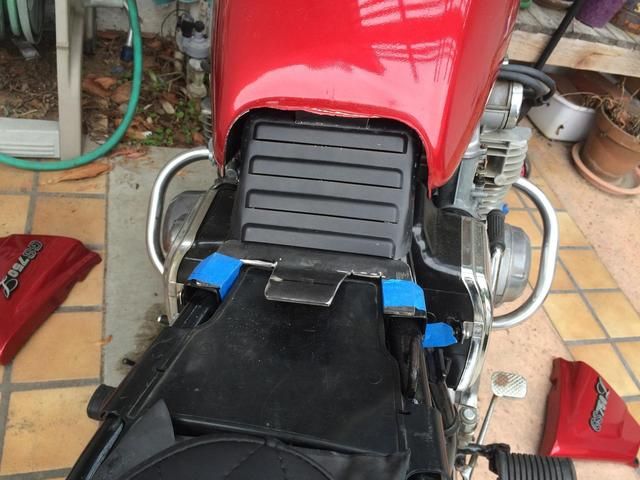
I found an empty computer housing some one had put on the curb that had some cool metal panels with louvers. I was able to cut it with tin snips and shape it to sit in the void and clean it up a bit with some style. When I repaint the tank I will fix up that nasty edge a bit.
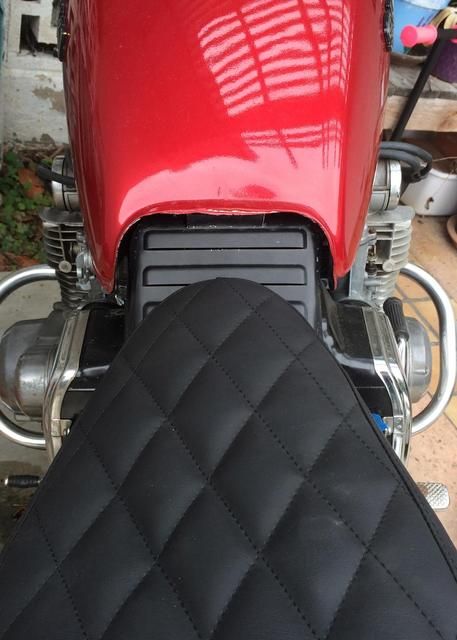
Here is how it sits now.
This is my rough plan for moving forward with the build.
I will be making some practical mods like custom bag and I will be replacing lighting with sleeker brighter options. I will most likely lower the front suspensions couple inches when I replace the fork springs and rebuild the old spungy forks. <br> <br> Beyond cosmetics, The carbs need syncing and tuning a bit. The PO rebuilt them but didnt have a tool to properly sync them. But the bike is running decently after a little air screw adjustments. There is a leak in the valve cover gasket and I have the replacement part and the repair on my to do list. I hope some of you like the build and I welcome feedback. I'm sure I will be asking for help at some point in the build / life of this bike.
To introduce myself a bit, I am a product designer and recently started working in the motorcycle industry but mostly with Harley aftermarket parts. I design new accessories and help give guidance to evolving products as well.
Ok so on to the bike and build. The bike as previously stated is a 1979 GS750L and had mid 20,000 miles on it when I bought it, or at least that is what the stock speedo reads. It was kept in pretty good stock condition. Here is the picture as it was when i bought it.

I am not a super fan of the big sissy bar attempt a a cruiser chopper that suzuki made on this bike. I will be building this bike to be a more sporty but practical build, as i will be using it for occasional work transportation and to ride to local shows and occasionally on weekends for fun.
First this was to get a better par of bars that didn't make me feel as much like a parachute. I also removed the sissy bar. Performance wise I have installed a pair of Progressive suspension 412 shocks with 13"springs to keep the stock height and reinvigorate the rear suspension.
I am a bit on the vertically challanged side at 5' 5" and wanted a lower seat height. Rather than do any major chopping I found that a early sportster seat fits up to the 750L frame nicely. I got a Burly Brand Brat seat 2 up version. The only modification required was to grind of the front stock seat mounting hook, fab a quick tab for the seat to hook into and drill o single hole in the rear fender for a bolt to mount the seat.


Because the rear fender is split at the peak with the plastic inner fender the plastic was now exposed. I wanted to shorten up the rear a bit anyway so I experimented with relocating the stock fender. I was basically able to move it forward using the stock locating pins from the inner fender with the fenders rear monting hols and drilled new monting holes at the rear strut location in the fender moving it forward a good 8-10 inches almost entirely filling the exposed plastic area with the metal fender. I trimmed the inner fender with some tin snips so it would still be able to be used and overlap the metal fender properly.


but with a thinner seat now a void is open under the tank

I found an empty computer housing some one had put on the curb that had some cool metal panels with louvers. I was able to cut it with tin snips and shape it to sit in the void and clean it up a bit with some style. When I repaint the tank I will fix up that nasty edge a bit.


Here is how it sits now.

This is my rough plan for moving forward with the build.

I will be making some practical mods like custom bag and I will be replacing lighting with sleeker brighter options. I will most likely lower the front suspensions couple inches when I replace the fork springs and rebuild the old spungy forks. <br> <br> Beyond cosmetics, The carbs need syncing and tuning a bit. The PO rebuilt them but didnt have a tool to properly sync them. But the bike is running decently after a little air screw adjustments. There is a leak in the valve cover gasket and I have the replacement part and the repair on my to do list. I hope some of you like the build and I welcome feedback. I'm sure I will be asking for help at some point in the build / life of this bike.


Comment