-
Excellent work on the fairing, Pete. All your efforts will be rewarded once you get it in primer and see how nicely the contours have turned out. High-build primer will do wonders when you block sand it out. I only see one small low spot on the lower left side of the headlight that I'm sure you're also aware of. It's coming along great. Pat yourself on the back, my friend. -
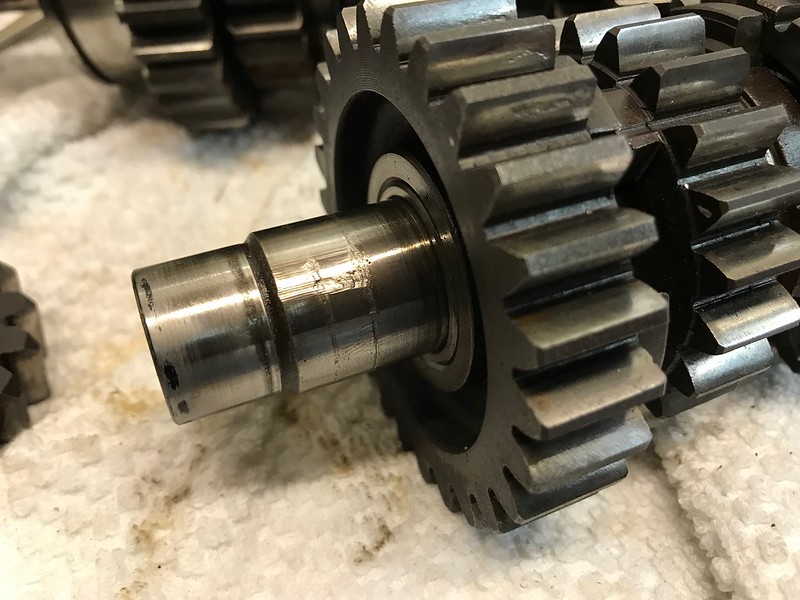
Got an answer on 2nd gear... re-use is ok, and definitely needs welding. I'll get onto that in the new year. A mate has had his welded on by someone who took extreme care not to overheat the shaft or gear and did an excellent job, so I'll stick with him as tried and true for a good result. I just need to chamfer the outside edge of the gear (around the internal diameter) so there's somewhere for the weld to sit without interfering with the bearing.
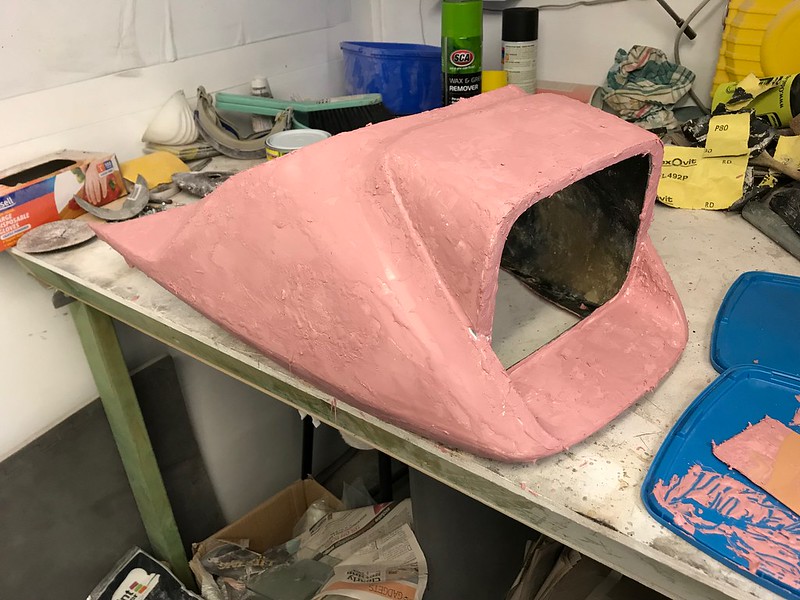
Persevering slowly with the cowl, I'm a bit over sanding and am definitely regretting the putty... so much extra work to do as a result. It's not too far off being done at least. I'd most definitely have moved on to something else if I skipped the putty in favour of high build primer!
 Untitled by starpoint73, on Flickr
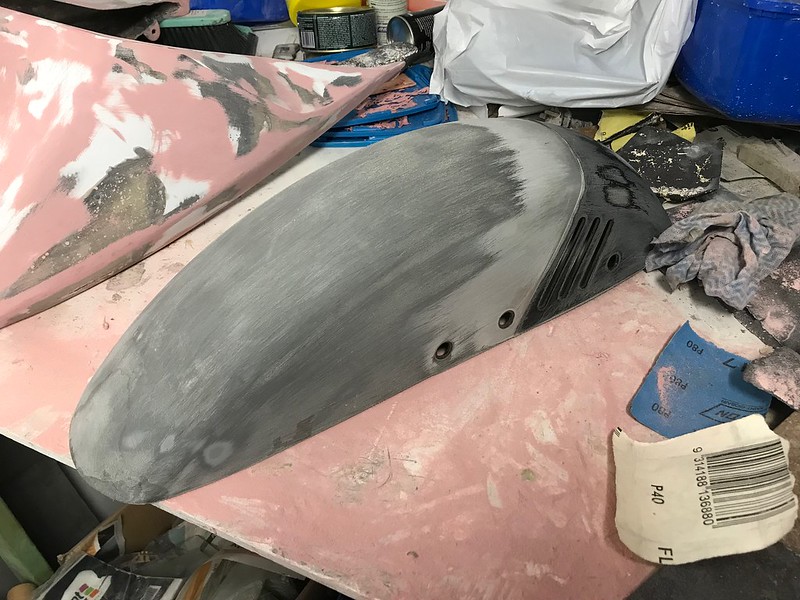
I got a good start on the front mudguard as well, the paint is coming off much easier than the cowl.
 Untitled by starpoint73, on Flickr
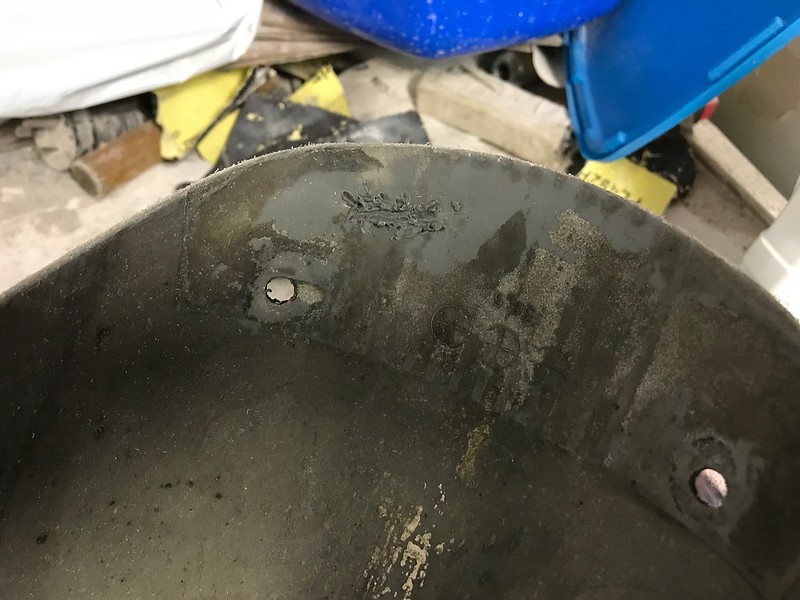
I did have one little crack at the rear I've welded up just using a soldering iron to stop it tearing any further. It's not visible at all from the outside.
 Untitled by starpoint73, on Flickr
Leave a comment:
-
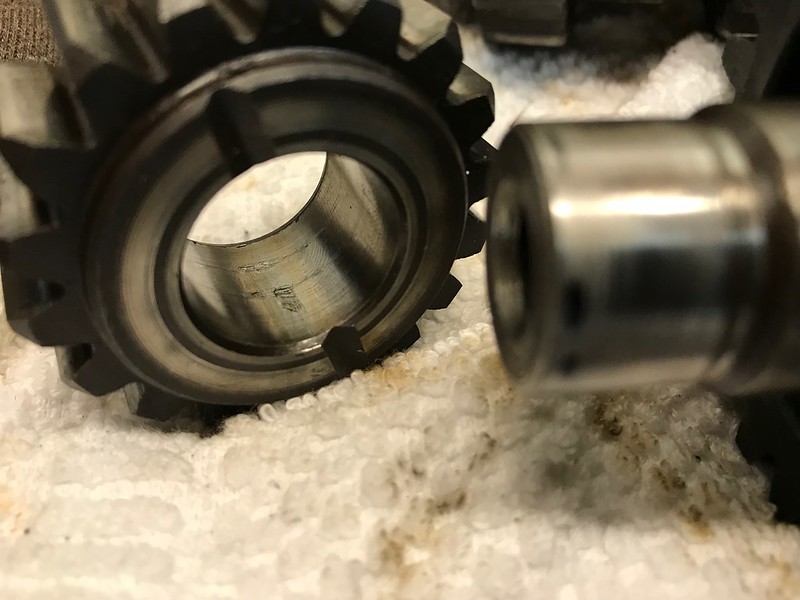
A mate popped around yesterday to drop off the drive shaft with the removed 2nd gear after we didn't quite get there Friday night (photos of his natty 3 bolt gear puller to come).
It looks like it may have spun on the shaft and partially welded itself in place, so what's the thoughts on re-using this 2nd gear and shaft? Is it safe to do so if it gets welded?
This is the "better" gearbox I picked up, so all the gears are good except 5th. I can always press 2nd off the original gearbox to compare, but it's 1st gear didn't seem as good as this one.
 Untitled by starpoint73, on Flickr
 Untitled by starpoint73, on Flickr
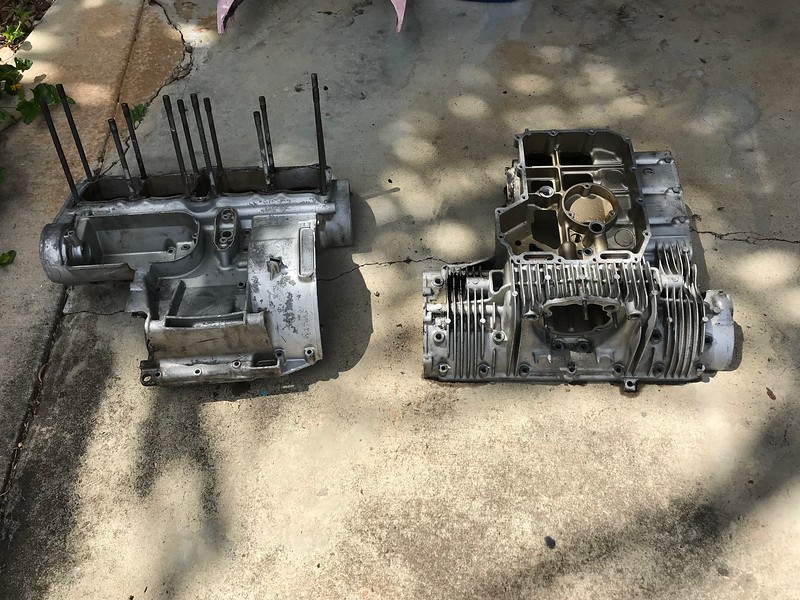
I also degreased and pressure washed the crankcases so I can start preparing them for paint.
 Untitled by starpoint73, on Flickr
Leave a comment:
-
Cheers guys! I dunno about BOTM, I just wanna get it finished for the moment, I'll be happy if she's just all neat and tidy and the way I want her
Daryl, I got you now. The two part filler I used is closer to bondo for sure, but I'm not sure what the hardener is off the top of my head. I've heard of micro balloons before at least
In that case I'll stick with the current plan for the cowl, finish this sanding, then wait to do the high build primer.
Hopefully I can move on to other paint prep real soon then, I have the front mudguard, four side panels, and tail piece to prep yet, and of course the tank once I can purchase it. The side panels will just need paint, but I need to check the mudguard and tail piece properly to see if there's any spots that need some attention.Leave a comment:
-
 Guest repliedMine too!!! Always look forward to seeing updates from Pete and this cool build.Originally posted by Fjbj40 View Post
Leave a comment:
-
This bike better end up as bike of the month when its finished, or so help me...Leave a comment:
-
I see now, your blade putty is what I know as glazing putty. Used mostly, from my experience, for filling pin holes, small stone chips in paint, etc. I have a tube of it that must be close to 20 years old as I hardly use it. The high build primer will fill pin holes. Basically you are doing multiple steps to achieve what the high build will do.
Once I was introduced to the high build there was no turning back. It seriously speeds up the process for final paint work.
Bondo is a polyester based filler which requires MEKP paste to harden it. It cures quickly, is easily sculpted and adheres very well to metal or Fiberglass. If I am working with plastic body panels or a special piece of Fiberglass body I use a 5:1 epoxy and add micro balloons for filling, it has superior bonding qualities over polyester.
You are doing a fine job all the same! Keep it up, this is still my favourite thread on GSR
cheers,
DarylLeave a comment:
-
Not at all Larry, I appreciate any and all advice when it comes to bodywork and painting. I've only done it the one time previously on the 450, so while I might have something vaguely resembling a clue this time, I'm still nowhere near experienced nor knowledgeable on the topic. I at least know some mistakes not to repeat
Right now it's quite rough due to the putty, but where I've started getting stuck in with the sanding again it's coming out nice and smooth and I can't feel any obvious lumps and bumps that shouldn't be there. I'm relying on the guide coat when I get to that point to tell me what my hands don't tell me.
As for the products, might be easier to give you links to the products.
This is the body filler I used, seemed to be the best option for the little bits I needed and to make sure it was flexible enough for use on fibreglass:

And this is the blade putty. It's a single part putty, and I know it works well on fibreglass under 2K primer and paint as this is what I used on the 450's tail piece and it's been over 6 years now with no issues:
Incidentally, to clarify Daryl's comment on bondo... typically over here we call body filler bog... we do use the term bondo but I though it related to filler also rather than putty but I could be wrong.Leave a comment:
-
Sounds like you have a plan and things in hand, Pete. Forgive me if I go a bit overboard on advice. It can probably sound a bit snooty at times. I wish I could run my hands over it..that would quell some of my fears. When you say "blade putty"..is that the same as plastic filler? Is it a softer medium..? I only ask because 80 grit has never worked for me except to sand out 36 grit scratches after the filler has been shaped.Leave a comment:
-
Cheers for the input guys! I thought some more about it yesterday and last night and the spray putty is definitely off the list.
I kept at it last night and realised a couple of things.
Firstly, the top of the headlight area is actually slightly concave, but I've been trying to sand it flat, so that will be much easier to deal with now I understand that.
Secondly, as far as the putty goes it's actually doing what its designed for really well, which is filling in all those little divets in the fibreglass patches and other tiny spots like that where the body filler and fibreglass slurry were too coarse to fill.
The putty's proving nice and easy to sand Larry, using 80 grit wet and dry is making it a nice easy job thankfully.
So, I'll get this sanding finished, then will leave it until I get the paint in January/February, then I'll mix the 2K primer in high build and use that with a guide coat to finish this off (multiple times if necessary). I don't think I'll need the extra epoxy primer if I do it this way.Leave a comment:
-
You've got to fill and sand it a couple times probably, Pete. I hope you're using 36 grit, or at least 40 grit at this stage, because, again, you need it to cut quickly and cleanly. 80 grit at this stage just won't do it. You'll find a few low spots for sure. The trick is determining whether you're battling a high spot that will fool you into thinking it's surrounded by a low spot that you fill, sand, fill, sand..argh. Sometimes you have to go deeper into the fiberglass again to get that high spot down. Something else to make it a bit easier, is to not wait so long to sand the filler. It gets rock hard after a couple of days. Apply it, and then just as it's kicking off, take your 36 to it and rough sand it to shape..before..it hardens. It will gum up your sand paper but have a wire brush on hand to clean it off as it fills up and continue. You can literally sculpt it easily that way, then finish sand it once it dries. I'd follow this stage up with a good high-build primer as mentioned above from Daryl. You'll be amazed at how well it will fill low spots. Use a guide coat as you have planned over the primer. Block sand, prime, repeat. Spray putty, in my opinion, is a waste of time and money. You'll get to a point where the fillers are so thick it may cause problems down the road. That fairing doesn't look to have that many discrepancies to warrant that amount of filler.Last edited by nvr2old; 12-12-2017, 01:32 PM.Leave a comment:
-
You would be better off with a 2 part high build epoxy primer. It shrinks a lot less than acrylic, it builds quickly, dries quickly and sands easily. It is also unaffected by the products you will be putting over, unlike acrylic.
That pink putty, commonly called bondo here, just adds weight IMOP. Because you can't get it perfectly even, unless your experienced, it usually ends up with high and low spots, which you are experiencing right now.
DarylLeave a comment:
-
I'm beginning to think I should give this a quick sand, then wait until the weekend and go with the spray putty after all. The blade putty has been applied way too uneven, some spots are way too thick and others are too thin.
I'm revealing high spots that I really don't think are that high, I think it's just the application of the putty.
Only catch is the spray putty is acrylic, any idea if it'll be safe to put two pack primer and paint over the top? Google gives me conflicting answers, but that's more about two pack over acrylic primer which I won't be doing.
 Untitled by starpoint73, on Flickr
Leave a comment:
-
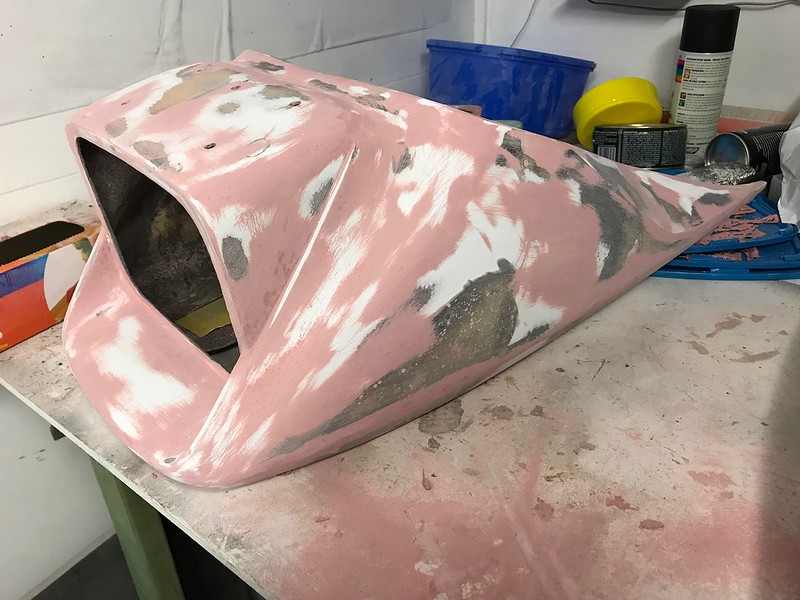
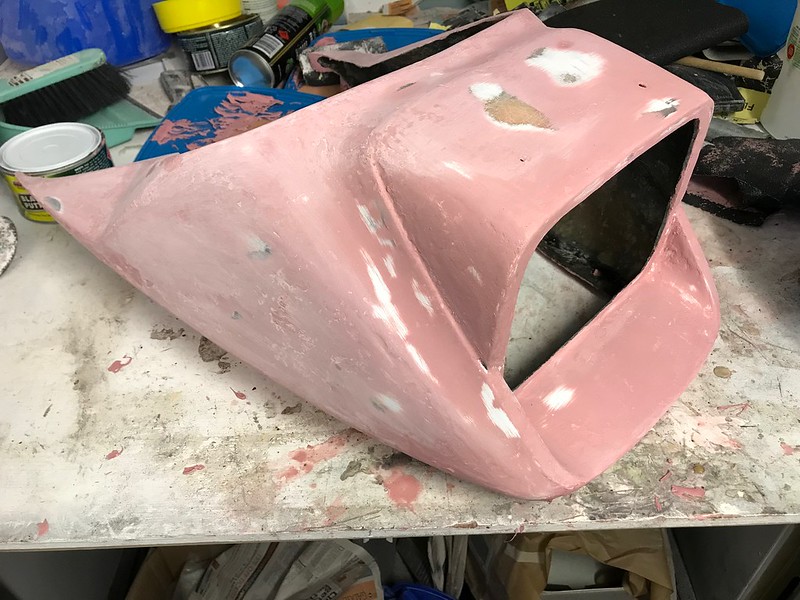
Pretty in pink? Well, pink but a little ugly...
 Untitled by starpoint73, on Flickr
I really should've gone the spray putty but I thought I'd be doing this at night so I stuck with the blade putty, but that's just not real good for large areas. And of course I ended up doing it during the day...
Anyway, all on and ready to sand, but there are some little spots I'll have to touch up with some more putty yet.
Also, the broken cam chain guide holder post in the lower crankcase should be repaired now.
Ducked down to a mate's the other night to get it drilled and tapped so I can just use a longer screw, then high strength loctite on the broken post to hold it in place. I put some grease on the screw so it wouldn't get loctited in there and fingers crossed it should be good to go.
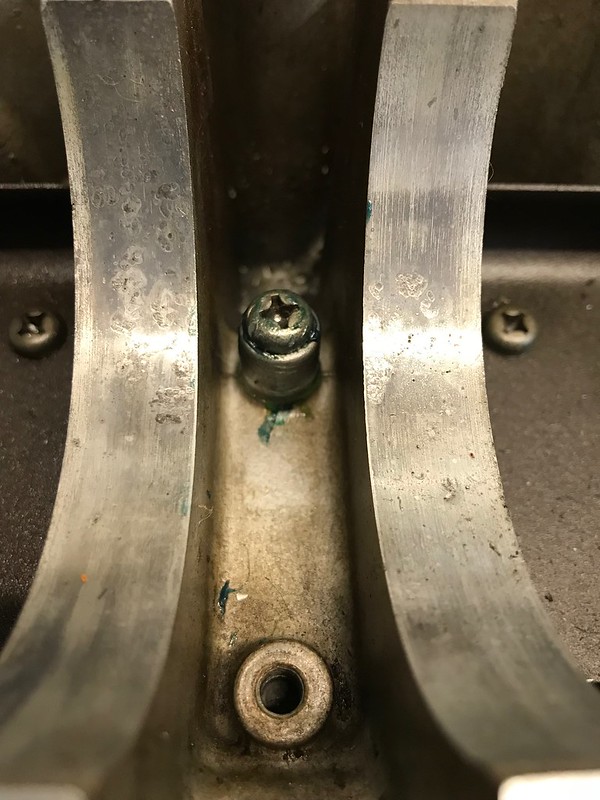 Untitled by starpoint73, on Flickr
Leave a comment:
-
Oh and fuel cap and keys! That's a bargain! Although that's $US so it's probably about 4x as much as the genuine...
I ducked down to a mate's the other night and we drilled and tapped the lower crankcase to repair the broken cam chain guide holder post, and last night I got blade putty on the bottom of the cowl.
No pic's of either at this point but I plan on getting the rest of the blade putty done today and should finish up the post repair, will post pic's tomorrow.Leave a comment:
.png "Powered by vBulletin")
Required reading for all forum users!!!
Welcome!
Register to access the full functionality of the GSResources forum. Until you register and activate your account you will not have full forum access, nor will you be able to post or reply to messages.A note to new registrants...
All new forum registrations must be activated via email before you have full access to the forum.A Special Note about Email accounts!
DO NOT USE sbcglobal.net, att.net, bellsouth.net or email.com email addresses when registering for the forum! Email that our system sends out to these email servers is treated as SPAM and you will never receive your activation email, or any other email that our system may send out. Use an email address from gmail.com or some other email server.A note to old forum members...
I receive numerous requests from people who can no longer log in because their accounts were deleted. As mentioned in the forum FAQ, user accounts are deleted if you haven't logged in for the past 6 months. If you can't log in, then create a new forum account. If you don't get an error message, then check your email account for an activation message. If you get a message stating that the email address is already in use, then your account still exists so follow the instructions in the forum FAQ for resetting your password.Have you forgotten your password or have a new email address? Then read the forum FAQ for details on how to reset it.
Any email requests for "can't log in anymore" problems or "lost my password" problems will be deleted. Read the forum FAQ and follow the instructions there - that's what we have one for...
New users should be sure to read the FAQ as well as the posts in the Announcements forum. This will answer many of the questions you may have about how this forum works.
Before posting questions in the forums be sure to use the forum search function!!! Odds are your question has already been asked and answered before. And when posting, please make sure that you post to the correct forum.
Finally, be sure to check out BassCliff's website here. He has useful information that can't be found on this site. His welcome page containing useful GS information can be found here. Be sure to check it out!
If you are a returning visitor to the forum and can't log in using your old forum name and password, chances are your account is deleted. Just create a new forum account and you should be all set.
Leave a comment: