Announcement
Collapse
No announcement yet.
Weasel's 1978 GS750 cafe racer project
Collapse
X
-
 Weasel
 -
 Weasel
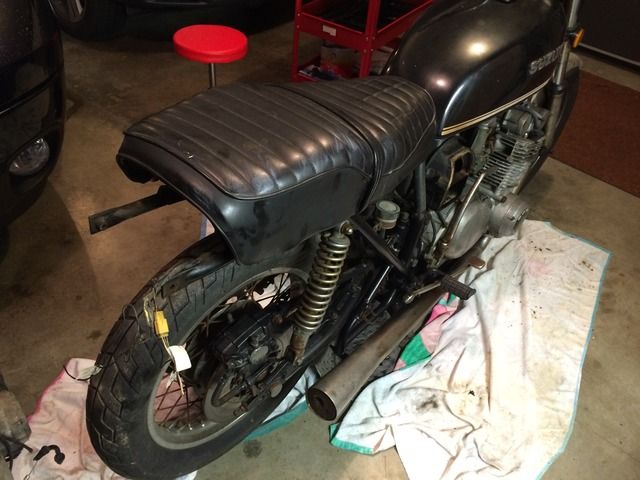
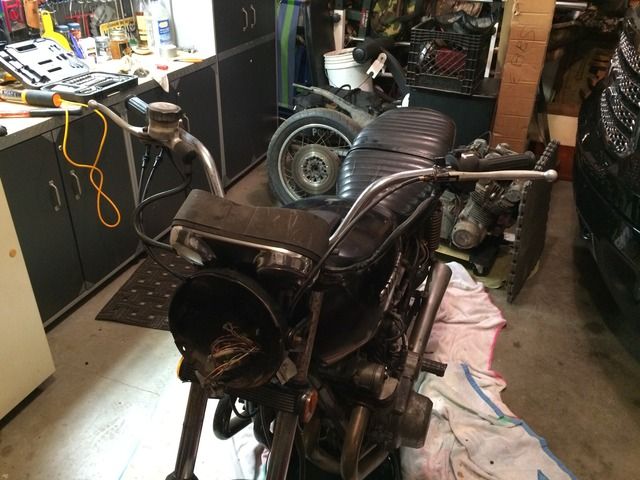
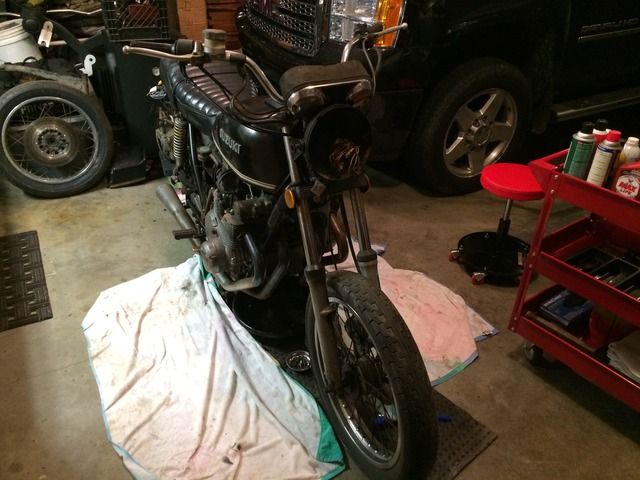
Waiting on the carb o-rings and gaskets. I won't be keeping the stock fenders, turn signals & mirrors so the racer is already losing weight. With the wiring opened up, no time like the present to sort out the electrical.
Comment
-
Get some good Deoxit electrical contact cleaner & spray all connectors (especislly the big multi wire plastic ones) & reinstall with silicone dielectric grease. Kill switch and ignition switch internals as well. ESPECIALLY those 2. Google search this forum "Deoxit site:www.thegsresources.com" (works far better than the ubb forum search engine) for the specific grade of Deoxit most highly recommended, the common one isn't nearly as good'77 GS750 920cc heavily modded
'97 Kawasaki KDX220R rugged terrain ripper!
'99 Kawasaki KDX220R rebuild in progress
'79 GS425 stock
PROJECTS:
'77 Suzuki PE250 woods racer
'77 GS550 740cc major mods
'77 GS400 489cc racer build
'76 Rickman CR1000 GS1000/1100
'78 GS1000C/1100
Comment
-
 Weasel
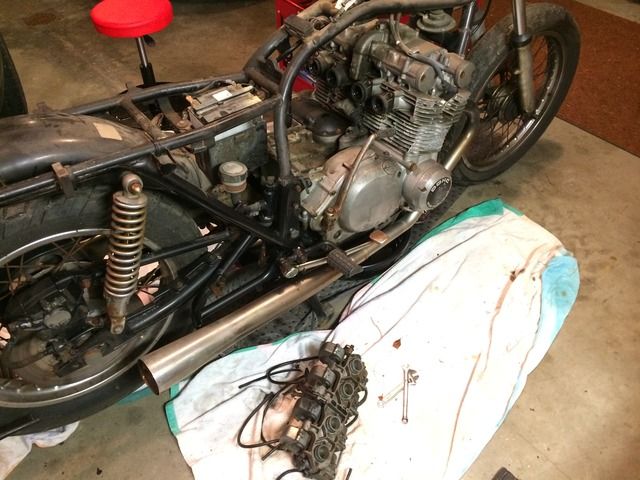
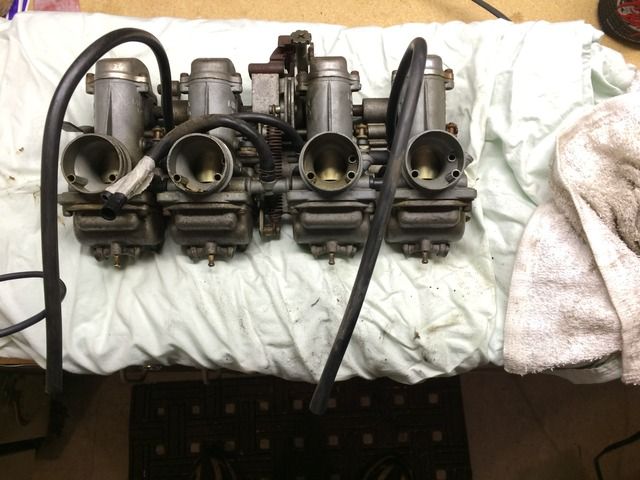
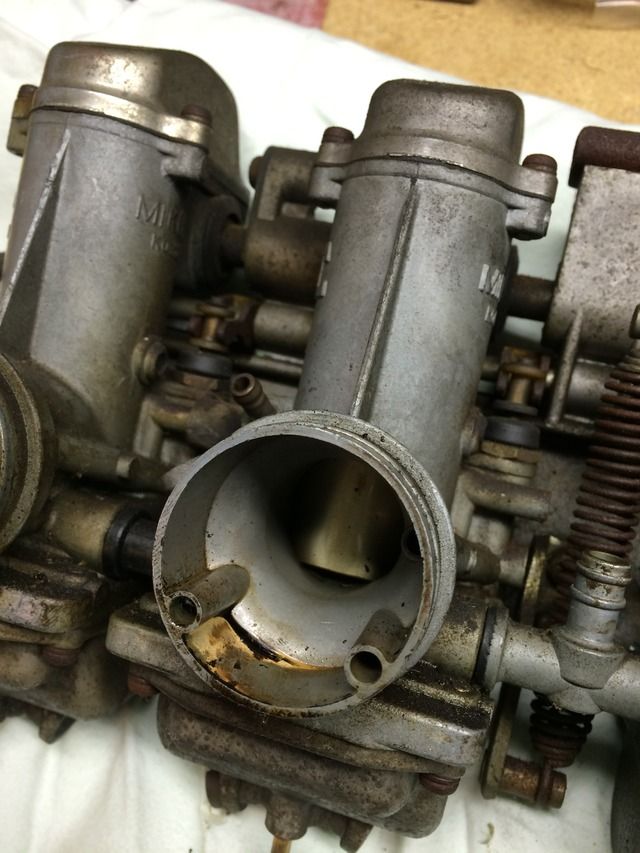
Thanks Chuck, I'll give that a look. I pulled the carbs to clean & prep them for the o-ring & gasket job. Pretty much as expected, gummy varnish to spare.
Comment
-
Eewwwwwwww... better soak those real good, maybe twice for 4-6 hrs with aerosol carb cleaner & 100 psi air gun flushes after each dip. Blow through every passage real good, especially the pilot air and Main air jet openings between the carb inlet & main jet area in bowl, pilot jet area, & THE TINY PINHOLE THAT THE PILOT FUEL SCREW NEEDLE TIP PROTRUDES INTO IN THE VENTURI ON THE HEAD SIDE OF THE CARB... also be aware that you are only to only very gently bottom out the pilot fuel screws, or else the tiny needle point tip will break off in the carb body. make sure this has not happened in the past! if the screws are tightened down and snugly, the brass and the car body will get slightly enlarged or grooved.
if the screws still have paint over them as sort of a thread locker, soak in carb cleaner aerosol to break the paint, and then tighten them until gently bottoms, counting how much of a turn it gets til bottomed. Should be 7/8ths or so, some models 3/4 ish.
FYI you have the rubber coated fuel tee and couplers, I'd recommend getting the aluminum z1 tees for the replaceable o rings. Yours are 37 years old, how much longer will the rubber coating last and still seal???'77 GS750 920cc heavily modded
'97 Kawasaki KDX220R rugged terrain ripper!
'99 Kawasaki KDX220R rebuild in progress
'79 GS425 stock
PROJECTS:
'77 Suzuki PE250 woods racer
'77 GS550 740cc major mods
'77 GS400 489cc racer build
'76 Rickman CR1000 GS1000/1100
'78 GS1000C/1100
Comment
-
Rinse out the carb chem dip with water very thoroughly before using the aerosol can cleaner. This is what the Berryman instructions say at least.'77 GS750 920cc heavily modded
'97 Kawasaki KDX220R rugged terrain ripper!
'99 Kawasaki KDX220R rebuild in progress
'79 GS425 stock
PROJECTS:
'77 Suzuki PE250 woods racer
'77 GS550 740cc major mods
'77 GS400 489cc racer build
'76 Rickman CR1000 GS1000/1100
'78 GS1000C/1100
Comment
-
 Weasel
Ok break this down in detail for me. I saw the factory set screws with the paint over them. Obviously those need cleaned but they need to be reset to same position so I should count the turns until they bottom. What do you mean by 7/8ths or so, or some models 3/4ish? What happens if one carb already had paint removed and I have no idea if it's in the right position?Originally posted by Chuck78 View Postif the screws still have paint over them as sort of a thread locker, soak in carb cleaner aerosol to break the paint, and then tighten them until gently bottoms, counting how much of a turn it gets til bottomed. Should be 7/8ths or so, some models 3/4 ish.
Comment
-
 Weasel
Disregard, I had some time to search through the site and found the explanation in detail. Looking forward to some time off over the holiday to make some more progress. Carb gaskets arrived, hope my new o-rings come today or tomorrow.
Comment
-
 Weasel
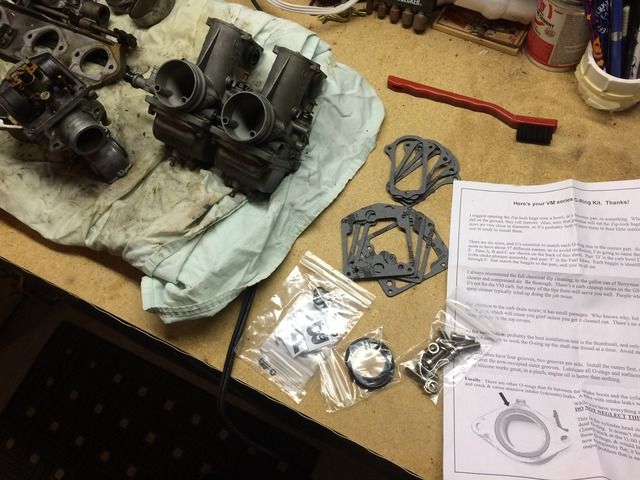
Just checked the mailbox and the o-rings have arrived. Looks like I ought to have these carbs rebuilt over Thanksgiving weekend and hopefully back on the bike and getting them tuned.
Comment
-
 Dirty Deeds
 -
Be wary of those rubber coated permanent o-ring fuel couplers and tee... if they aren't a nice tight fit after you clean out the gunk from the fuel rail inlets on the carbs, buy those z1 tees and couplers that take the replaceable o-rings like some versions came with stock...
Z1 Enterprises specializes in quality Motorcycle parts for Honda, Kawasaki, Suzuki and Yamaha Classic Japanese motorcycles from the 1970's and 1980's.
Z1 Enterprises specializes in quality Motorcycle parts for Honda, Kawasaki, Suzuki and Yamaha Classic Japanese motorcycles from the 1970's and 1980's.
'77 GS750 920cc heavily modded
'97 Kawasaki KDX220R rugged terrain ripper!
'99 Kawasaki KDX220R rebuild in progress
'79 GS425 stock
PROJECTS:
'77 Suzuki PE250 woods racer
'77 GS550 740cc major mods
'77 GS400 489cc racer build
'76 Rickman CR1000 GS1000/1100
'78 GS1000C/1100
Comment
-
 Weasel
The couplers & tee were very tight and seem to be serviceable. I wanted to order new ones and other items from Z1 but they're not currently accepting orders, I was too impatient to wait until they resume taking orders in December. I will try to find the couplers from another source.Last edited by Guest; 11-25-2015, 12:16 AM.
Comment
-
Good brake combo from the guys on the ZRX forum. Kawasaki EX500 1/2 inch bore size master cylinder,steel braided lines,salty monk update with EBC HH Brake Pads. I love killer brakes. I have cleaned up fork tubes with red scotchbrite padsOriginally posted by Chuck78 View PostIf fork tubes are toast, any rust at all on fork seal area, just shop for straight leg (non-leading axle) gs850/1000 37mm forks & GS1100E aluminum triples - the models for straight leg forks, they have much more offset in the triples, leading axle models have very little offset and look like a big rectangular block (the lower triple). Cant go wrong with that setup, fresh oem or Allballs seals, racetech gold valve emulators, and racetech straight rate springs with 10wt or 15wt oil to tune the rebound. Tarozzi fork brace down the road for stiffer cornering &reduction in stiction.
Oh, & of course AllBalls conversion needle roller bearings will be needed, so it's a mandatory upgrade from loose bslls, better by far. & GS1000/850 axle & spacers may be needed. Pretty easy swap, really. Dual rotors will bolt up to your hub, just a plastic cover over the unused side currently, hides the unused rotor holes from the elements.
A single disc gs1000 fork will work also, but you'll want to do the salty monk brackets for a 310mm cbr rotor for sure, as the stock single 295mm old style big single piston setup is barely enough to stop it if ridden aggressively. 310mm with 2 piston tokico sliding calipers with 3x longer pads will make it sufficient. Dual 296mm cbr rotors and tokico ninja calipers will have far less fade and work much better on twisty hilly roads where you are braking hard and frequently, & on long downhills, the duals really shine.Last edited by limeex2; 11-26-2015, 03:54 PM.Current Rides: 82 GS1100E, 00 Triumph 955 Speed Triple:twistedevil:, 03 Kawasaki ZRX1200, 01 Honda GL1800, '15 Kawasaki 1000 Versys
Past Rides: 72 Honda SL-125, Kawasaki KE-175, 77 GS750 with total yosh stage 1 kit, 79 GS1000s, 80 GS1000S, 82 GS750e,82 GS1000S, 84 VF500f, 86 FZR600, 95 Triumph Sprint 900,96 Triumph Sprint, 97 Triumph Sprint, 01 Kawasaki ZRX1200, 07 Triumph Tiger 1050, 01 Yam YFZ250F
Work in progress: 78 GS1000, unknown year GS1100ES
Comment
-
Lots of good info in this thread, tagging along for the ride, as I have a 78 GS750 that I'll be playing with someday.----------------------------------------------------------------
2014 BMW F800GSA | 1981 GS850GX | 1982 GS750T (now the son-in-laws) | 1983 GS750ES | 1983 Honda V45 Magna (needs some love) | 1980 Yamaha GT80 and LB80 "Chappy" | 1973 and 1975 Honda XL250 projects
Comment
-
Nice thread!
Right from the get-go, the important priorities are discussed... The advice is great and the build begins.
Thanks for all the points...makes me wonder why I still have the stock R/R on my bike.
EdLast edited by GSXR7ED; 11-25-2015, 10:55 AM.GS750TZ V&H/4-1, Progressive Shocks, Rebuilt MC/braided line, Tarozzi Stabilizer[Seq#2312]
GS750TZ Parts Bike [Seq#6036]
GSX-R750Y (Sold)
my opinion shouldn't be taken as gospel or in any way that would lead you to believe otherwise (30Sep2021)
Comment
.png)


Comment