Announcement

Collapse
No announcement yet.

1981 gs750 (gs750e) Retro Racer project

Collapse
X
 
  • Filter
  • Time
  • Show
Clear All
new posts

    So far, I'm using the stock GSX-R triples. They are 30mm offset, about the same as the stock GS triples. That means I'm getting about 2cm less offset than stock, as the GS-fork is leading axle. I don't think I will make it a priority right away, but if anyone has information on stock triples from another bike that fixes this problem I can start looking for a set. I've browsed through the tables in other forums, and didn't find anything, so if there really is an available solution (except expensive aftermarket parts) it would be a hidden gem.

    If the steering is too sluggish, and/or if the front tire gets too close to the exhaust under fork compression, I think I will put adjustable triples on my to-do list for the winter.
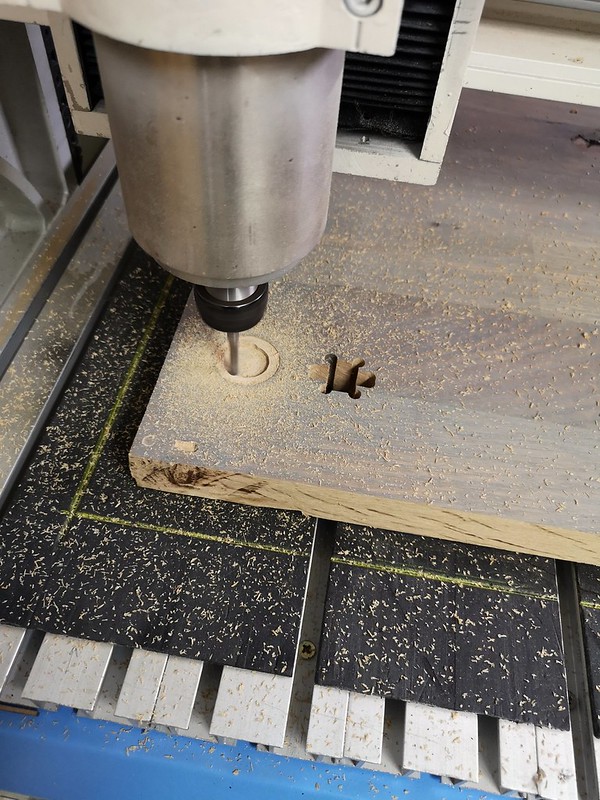
    I hope the cnc-router is working by then and I have a lot of large pieces of glued oak (kitchen countertops) that I get for free from a local store. They are awesome for doing cheap cnc prototyping.


    Here's a prototype I made for the GS-fork that I didn't mill in aluminum as I decided to go for the USD fork instead.


    Does anyone have either drawings (CAD) or pictures of suitable adjustable upper and lower triples?

    Comment


      About to give the rotors and calipers a fresh coat of paint (the calipers aren't finished yet):


      Comment


        Painted the calipers with caliper (spray)paint. Very difficult to get an even surface, and i don't think that paint will take sanding very well. I have an anodizing-kit that I bought some years ago, that I haven't gotten around to try out. I think I'll strip these for paint as a winter project and anodize them black instead. For now, I'll live with the bad finish. I guess this kind of paint is more for protection than looks..


        I also gave the "Ducati Monster Aluminium Performance Fender" (I think that's the original name) a couple of coats of aluminum base and BMW sapphire black.


        I'll try it on and decide whether I want to keep it black. The finish looks awful without sanding and painted at too low temperature, so I'll throw in a picture of the same paint on the old forks:


        The fender is originally mounted like this:


        But I've drilled the rivets and will make something like this:

        Comment


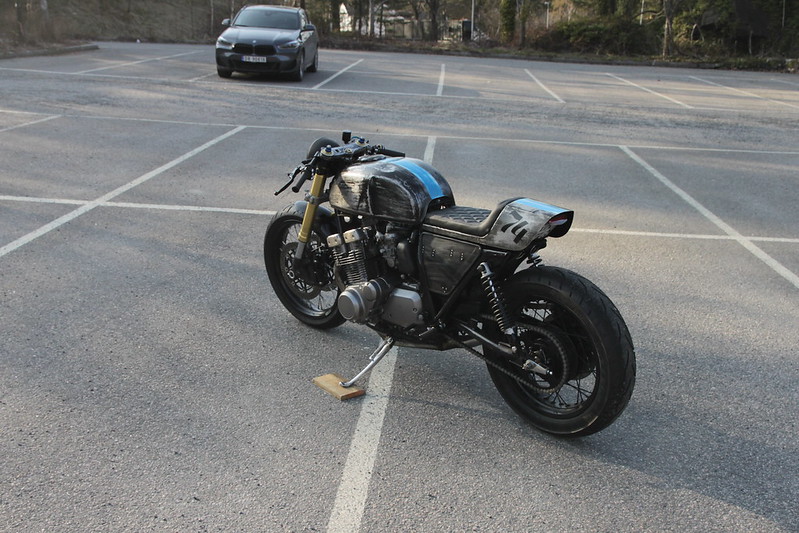
          Rolled the bike out to take some photos. This is definitely the look I'm going for What's left is (afaik); redo wires and cables, brake lines and pads up front, change rear brake reservoir and brakelines, speedosensor at rear disc, make the left footpeg on the lathe, make new support-rod for rear caliper, mount Motogadget Mini and gear-indicator in the triple, make gear lever plus connection rod, make brakcet for license plate and rear brake light, mount front indicators and some other minor stuff.. The list was longer than i thought..


          Comment


            I measured the trail. Don't know how accurate you can measure it, but I think it's pretty close. I make it out to be 114mm, and I'm pretty sure stock is 107mm. 7mm longer, and I don't think that will be a problem for now. If I don't like it, I'll make new triples with 20mm more offset. That won't be until winter though

            Comment


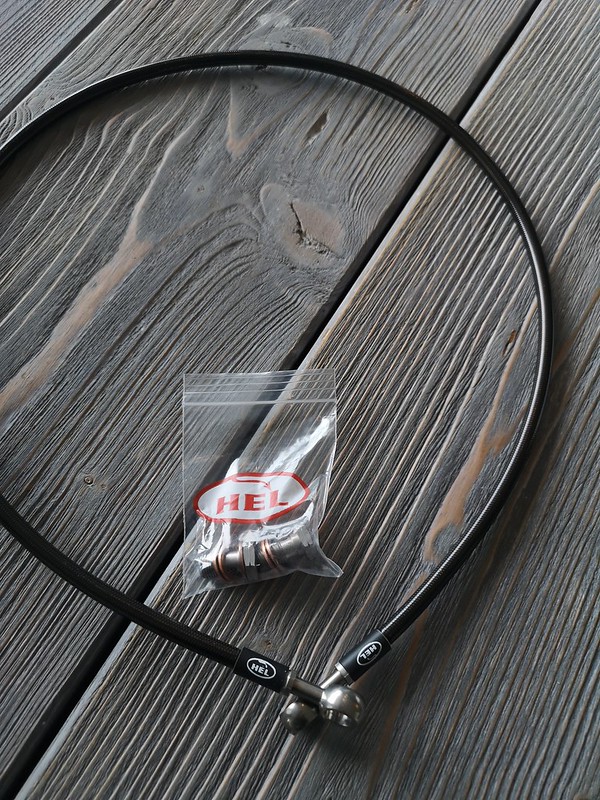
              Not much happening.. but I got some stuff in the mail; A HEL brake line for the rear (they were on sale for some models) and an original (I hope, it says "made in Japan" on the sleeve) clutch cable. The clutch is extremely hard to pull, and I don't want to search for other faults before I've eliminated the cable as the source.


              Comment


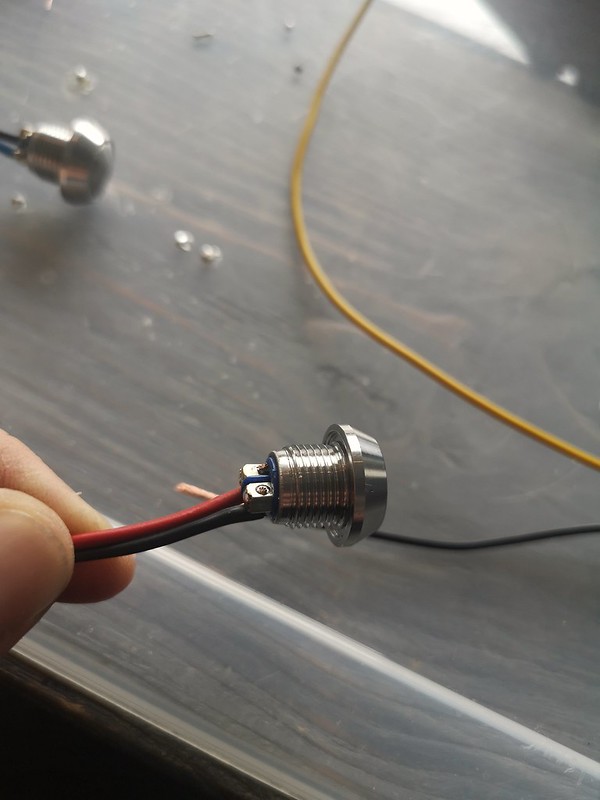
                Started to do the wiring for the controls. I'm drilling a hole in the clip-on tubes for the wires (from inside the controls) and I'm running the wires inside nylon sleeves for protection and looks. I wont bother with Weather Pack connections as the connections will be inside the headlight.
                I've removed the screws from the switch-terminals and soldered on wires to make sure they don't vibrate loose. I'm aware of the opinions on soldering from earlier discussions, but my opinion is that a few soldered points aren't any problems.


                Comment


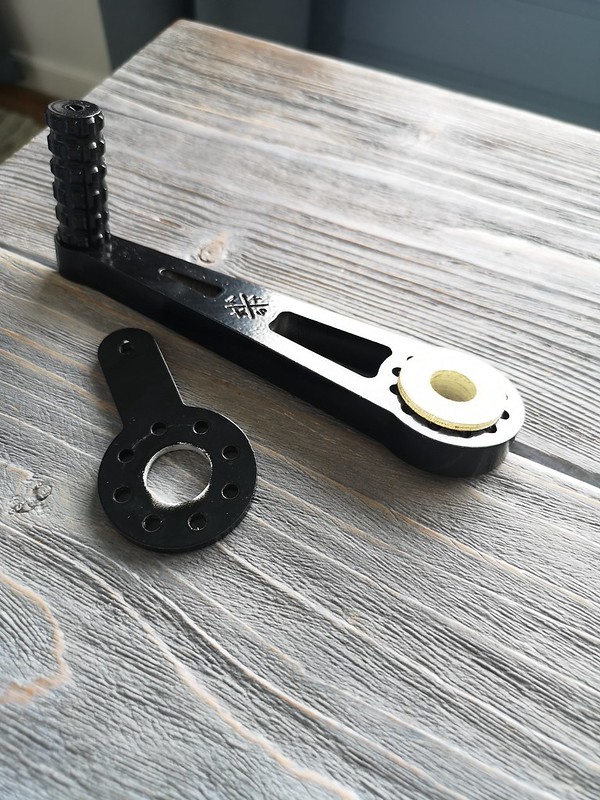
                  The last couple of days I've been testing a few designs for the control-housings. I pretty confident they are in their final iteration now. Today I designed and printed the headlight brackets. They're attached to the fork-legs by stainless exhaustclamps.


                  Comment


                    The front is slowly coming together again. I'm not using Weather Pack connectors here as it's much easier to put the clip-ons together if the connectors fit through the clamps and the connectors will be located up under the tank so waterproofing isn't as important. I think the result looks pretty clean


                    This is a 6mm hole. I bored it up to 8mm after i took the photo so I could extend the nylon sleeve inside the housing. That makes for two extra layers of abrasion-protection; the nylon woven sleeve and the heat shrink sleeve


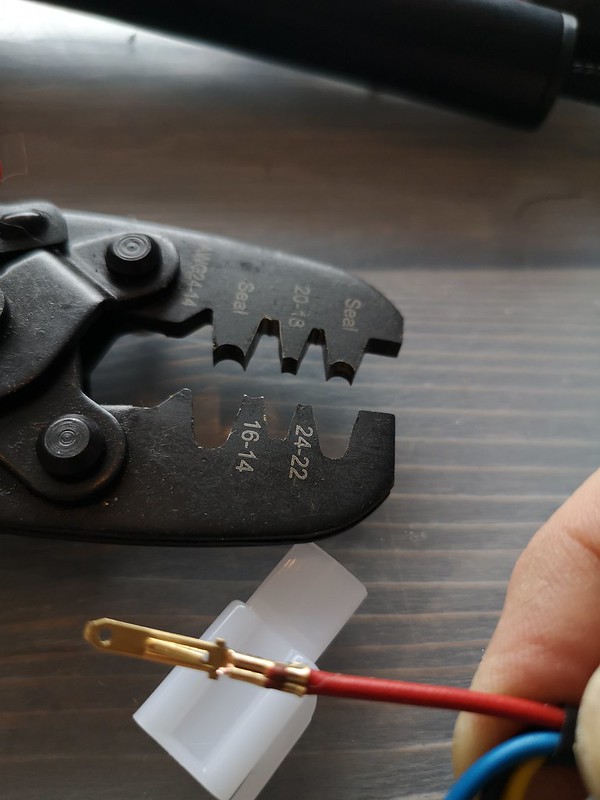
                    The tool is the same one i use for the Wather Packs. People who use a lot of WP connectors will most likely have a more expensive tool that doesn't require one step pr crimp. I have the less expensive one. It takes longer to use, but is more versatile i guess.


                    And here's the result:

                    Comment


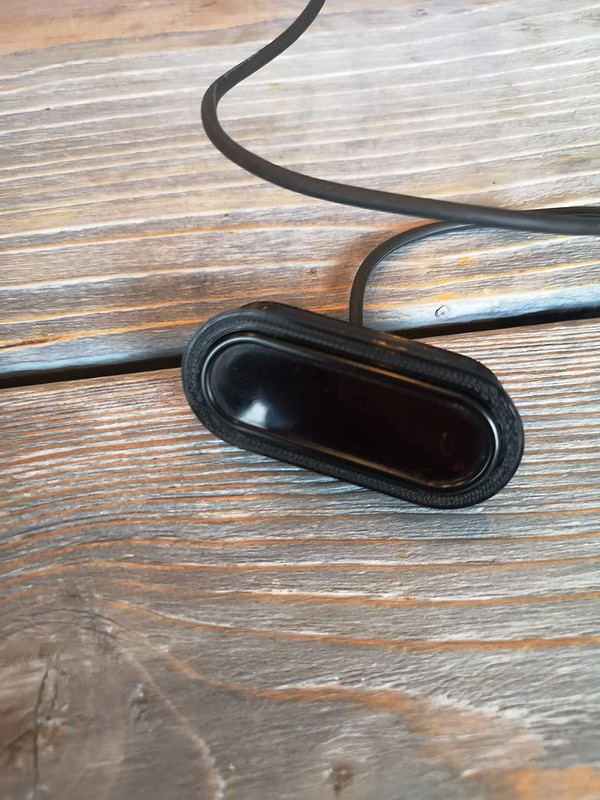
                      I made a housing for the Motogadget Mini. I'll glue this into the triple so I won't have to glue the Mini directly.


                      3D printing doesn't give a perfect surface. When the CNC-router is finished, I'll probably go back and recreate these parts in aluminum. Meanwhile it's a cheap and easy way to prototype and test parts

                      Comment


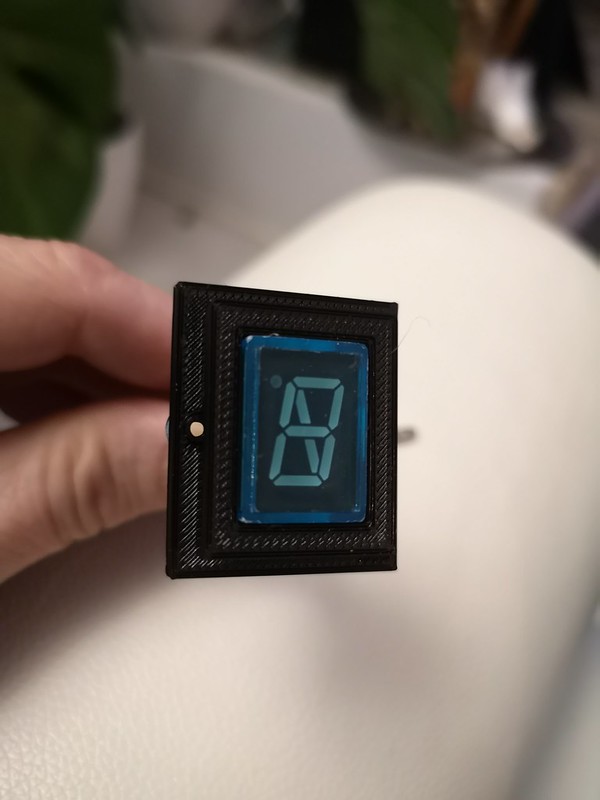
                        And I made one for the gear-indicator:


                        I think that's the last part I need to print for a while. There's some wiring left and connecting the front brakes, and then the front conversion is done. Then the bike will be rideable again Still need to make a proper mount for the registration plate, finish the rear brake and left side rear set before I can take it for a longer spin. Then, there's the right hand side cover and proper mounts for the rear sets. I should stop reminding myself of how much work I'm putting into this.. but it's a great hobby

                        Comment


                          Another 3D-printed part finished. This one is a bracket for making the rear light level when mounted on a surface that sits at a 45 degree angle:


                          Comment


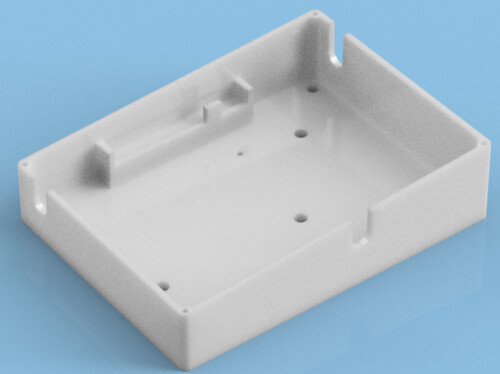
                            As I'm redoing parts of the electrical system, I will also replace this:


                            with this:


                            It takes 15 hours to print, so I hope the measurements are right

                            Comment


                              And for those of you that thinks this has become a 3D-printing thread, I'll soon be doing the linkage for the gearshifter and the front brakes.


                              In that regard, I have a question about steel reinforced braided hoses. The set I ordered earlier are for the original fork. Those are too long for the GSX-R fork with clip-ons. They are long enough that I can run one of them from the master down to the right caliper and the other one from the right caliper, over the fender and down to the left caliper. They're not long enough to ron two separate lines from the master.
                              The problem is that the banjos aren't properly lined up for this. Is it possible to rotate the banjos without ruining the brake lines?

                              Comment


                                Originally posted by LarsKroghStea View Post
                                And for those of you that thinks this has become a 3D-printing thread, I'll soon be doing the linkage for the gearshifter and the front brakes.


                                In that regard, I have a question about steel reinforced braided hoses. The set I ordered earlier are for the original fork. Those are too long for the GSX-R fork with clip-ons. They are long enough that I can run one of them from the master down to the right caliper and the other one from the right caliper, over the fender and down to the left caliper. They're not long enough to ron two separate lines from the master.
                                The problem is that the banjos aren't properly lined up for this. Is it possible to rotate the banjos without ruining the brake lines?
                                Hi Lars,
                                Normally you can rotate the banjos as you can see below on the probrake hoses.
                                Braided brake lines for your SUZUKI GS 1000 S (GS1000) 1979-1981 fron, 79,95 € (probrake.de)
                                I use the end of a drill bit and a pair of pliers to delicately turn the banjos.
                                Last edited by John Kat; 06-02-2021, 03:07 AM.
                                sigpicJohn Kat
                                My bikes: CB 77, GS 1000 ST Cafe Racer with GSXR 1052 engine, GS 1000 ST, XR 41 Replica with GS 1085 engine,
                                GS 1100 SZ Katana with GS 1135 EFF engine, KTM Superduke 1290 R 2020

                                Comment

                                Working...
                                X