Announcement

Collapse
No announcement yet.

1983 GS650E Steampunk Scrambler build

Collapse
X
 
  • Filter
  • Time
  • Show
Clear All
new posts

    #16
    Attached Files
    :cool:GSRick
    No God, no peace. Know God, know peace.

    Eric Bang RIP 9/5/2018
    Have some bikes ready for us when we meet up.

    Comment


      #17
      Originally posted by tkent02 View Post
      Yep, and a decent one is very hard to find. Been looking for about ten years, it's not happening.
      How decent?

      :cool:GSRick
      No God, no peace. Know God, know peace.

      Eric Bang RIP 9/5/2018
      Have some bikes ready for us when we meet up.

      Comment


        #18
        My design on the bike is going to be primarily as a scrambler with steampunk accents such as colour and accessories. The frame is going to be powdercoated in a Penny Vein Hammertone. Tank, calipers, engine side covers and valve cover are going to be Sublime Twist Green. All hardware and carbs are going to be anodized copper and the wheels will be powder coated candy copper. Pipe will be wrapped in a titanium coloured exhaust wrap with a black stubby can on the end. I'm looking at having custom gauge faces made up on a 3D printer to get the industrial style and image I'm after. This is my starting point and a few things may change here and there as I go.

        I cranked the motor over last night to make sure it wasn't seized. Thankfully, she turned nice and easily. Got the engine out of the bike and now I can get ready to start prepping the frame.

        Check out the colours at emeraldcoatings.com
        Last edited by Guest; 02-05-2016, 07:57 AM.

        Comment


          #19
          Jeez Rick, could you have picked uglier examples?! You aren't helping my case here...

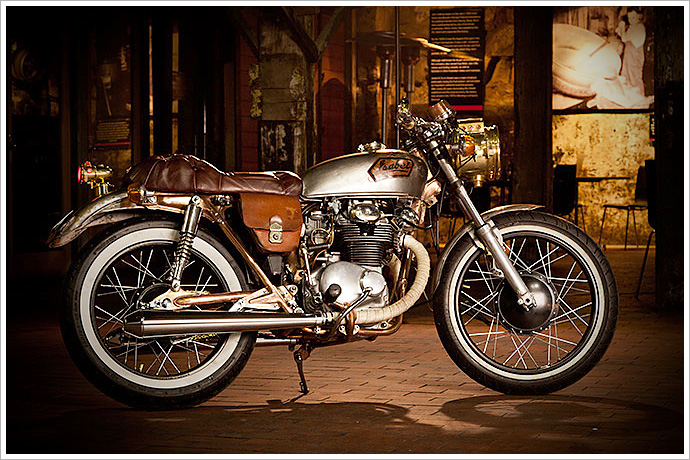
          I think this is a nice and tastefully done steampunk bike that is still a functional motorcycle.


          Ahhh, steampunk! How I love thee. Let me count the ways. Lighter-than-air warships. Wind-up robots that make cool whirring sounds. Weaponised steam locomotives. Vast subterranean cities built by…


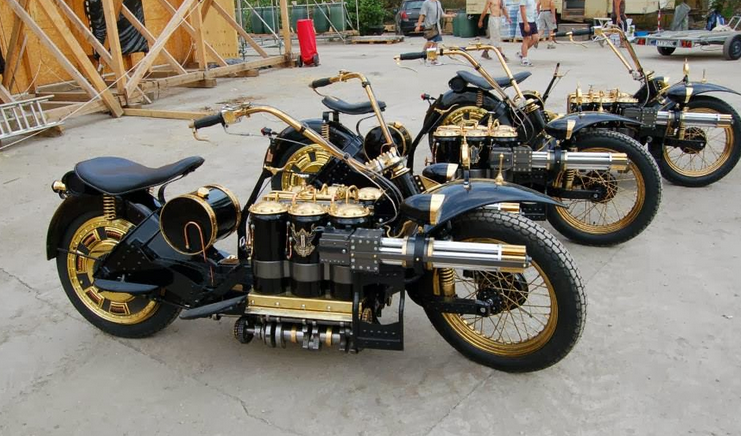
          Another example that take the steampunk theme a bit further than the Honda does, but still looks better than those abominations of motorcycles below...


          PICTURES...PICTURES...PICTURES Of your first place trophy that is...:D


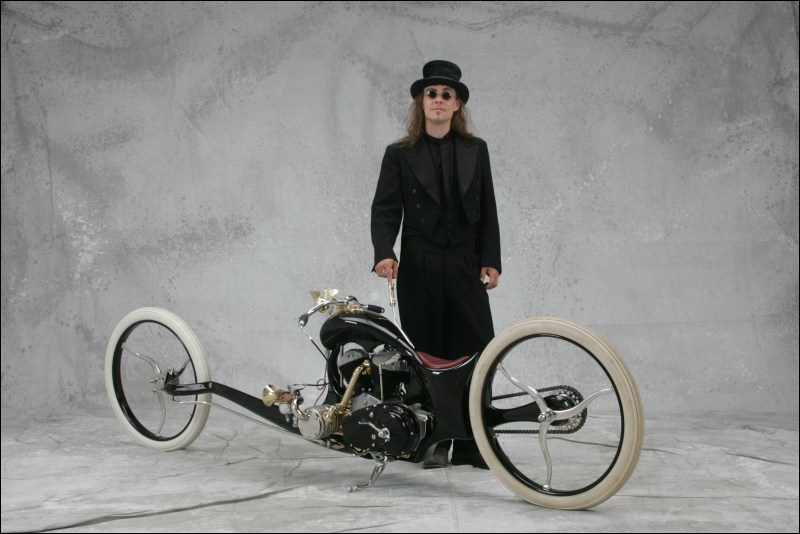
          Another example of a steampunk themed build. Needs rear shocks, but it does LOOK good.


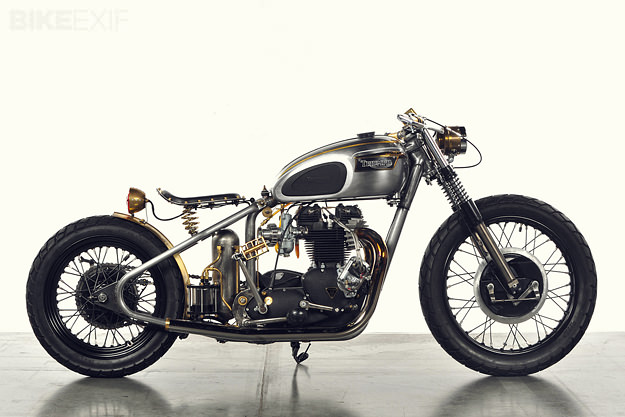
          It’s always interesting to see the bikes that well-known builders create for themselves. This Triumph T120 Bonneville is the personal ride of Tony Prust; it’s a more ‘traditional’ look than many Analog motorcycles, with a side order of steampunk too. “El Matador” was a labor of love for Prust for two years. It’s an elegant…

          Comment


            #20
            Thanks Tim Tom, that's definately more the approach I'm after. BTW does anyone have a good resource for bushings and grommets? I've found pretty much all the ones that are on my bike are done. While I have everything apart I may as well redo them as well.

            Comment


              #21
              That would work if it were local and priced right. I've mostly given upon it and built my own. The 550/765 is almost complete, just lacking carburetors.
              Anybody got a set of BS32 for the 550 or the 650 ( G, E, or GL ) laying around?
              http://img.photobucket.com/albums/v5...tatesMap-1.jpg

              Life is too short to ride an L.

              Comment


                #22
                Originally posted by RogerL View Post
                Thanks Tim Tom, that's definately more the approach I'm after. BTW does anyone have a good resource for bushings and grommets? I've found pretty much all the ones that are on my bike are done. While I have everything apart I may as well redo them as well.
                Bike Bandit should have them. You can enter in your model, and browse the parts fiche to find the parts you need. Parts Shark might also sell them. And of course Z1 Enterprises.

                Comment


                  #23
                  So, I finally got a bit more time to start opening up the engine to have a look at what I was working with. Have a look at this and tell me what you think. Stator looks reasonably clean.
                  20160217_142228.jpg
                  Last edited by Guest; 02-17-2016, 03:42 PM.

                  Comment


                    #24
                    Got some more time to get at the engine. Compression tested as 0,65,65,45. Didn't have the tools for a leak down test and figuring the age and stored condition of the bike I figure I may as well pull the head and rebuild it. This way I know exactly what I've got going on. From the initial look of things I think I can get away with a hone, new rings and redoing the valves. Also gives me the chance to get the head all nice and clean for paint.
                    Uploaded some more pics if you want to check them out.

                    Store your photos and videos online with secure storage from Photobucket. Available on iOS, Android and desktop. Securely backup your memories and sign up today!

                    Comment


                      #25
                      Did you check the valve clearances?

                      Oh, I see you've pulled it apart - nevermind.
                      Current:
                      Z1300A5 Locomotive (swapped my Intruder for it), GS450 Cafe Project (might never finish it....), XT500 Commuter (I know - it's a Yamaha :eek:)

                      Past:
                      VL1500 Intruder (swapped for Z1300), ZX9R Streetfighter (lets face it - too fast....), 1984 GSX750EF, 1984 GSX1100EF (AKA GS1150)
                      And a bunch of other crap Yamahas....

                      Comment


                        #26
                        Well, I've managed to get a bit more time to plug away on this. A bunch of parts have come in, just waiting on my new seat so I can measure and cut the frame accordingly. Got all the old head studs removed, one was a real pain and required a bit of extra love from an A/O torch, but she eventually came out. That was followed by a nice bath and wash. definitely takes a while to wash off 34 years of grime build up.
                        Head and jugs are currently in at the machine shop. Getting the valves cleaned up and making sure there's no distortion. Cylinders 1 & 2 were run lean, causing a white discoloration to the valves. Based on the corrosion around the head gasket on #1 & #2 cylinders, I'm guessing it led to a HG failure. Regardless, head is getting put back into spec. Jugs are getting a .5mil overbore and new pistons and I've opted to replace the cam chain while I'm in there.
                        Can anyone chime in on re-jetting the carbs? I'm planning on running pod filters with (most likely) a MAC 4 into 1 exhaust. Based off those addons, the Dynojet kit recommends I go with the 160 jets, however I believe that I read somewhere on here that the 155 may be the appropriate one to go with. I've never re-jetted a carb before so I'm open to any experienced commentary.
                        I've added a few more pics to my photobucket gallery. feel free to check them out. Hoping to get started on the frame, duckbill fenders and electronics tray in the next few weeks while I'm waiting for the machine shop to finish up. Then hopefully everything will be off to the powdercoaters by the start of May.

                        Store your photos and videos online with secure storage from Photobucket. Available on iOS, Android and desktop. Securely backup your memories and sign up today!


                        Oh...BTW, if there is an Admin out there who can change the title of this thread to 1982 (instead of 1983) I'd appreciate it. Can't seem to edit the title.
                        Last edited by Guest; 04-06-2016, 01:03 AM. Reason: added link to photos

                        Comment


                          #27
                          Don't worry about the title, the admin can't change it. You would have to delete the thread and restart it
                          The DJ Stage 3 kit (the one you will need) comes with full instructions.....they will suggest which ones to start with. They give you 3 sizes so you can go up or down from there.
                          Sounds like you are going all out. Engine rebuild, powdercoat, and what will be a ton of add on styling parts.
                          Well it sounds like you are giving it the full go!
                          Should be a very interesting project.

                          Comment


                            #28
                            Was the oil drain plug JB welded completely blocked? Lol
                            That's what the picture looks like.
                            Also that wood screw in the carb intake boot.....you will be buying new boots anyways so it's not a problem.

                            Comment


                              #29
                              This is one of those bucket list projects for me, so I'm defiantly trying my best to make it the best I can.

                              That wood screw killed me. Lol
                              I already bought all new boots. Originals were chewed.
                              I think the original plug was just jb welded over. I'm going to see if I can secure a new pan. My brother has two more 650's in his garage. One to ride and one for parts.

                              Can anyone advise on a good high flow aftermarket header pipe, if such a thing exists, or am I fabbing one from scratch?

                              Comment


                                #30
                                Originally posted by RogerL View Post
                                My brother has two more 650's in his garage. One to ride and one for parts.
                                Does he want to sell the cylinder head?
                                http://img.photobucket.com/albums/v5...tatesMap-1.jpg

                                Life is too short to ride an L.

                                Comment

                                Working...
                                X