Announcement

Collapse
No announcement yet.

1978 GS750 Brat/? Build

Collapse
X
 
  • Filter
  • Time
  • Show
Clear All
new posts

    1978 GS750 Brat/? Build

    Hello All.
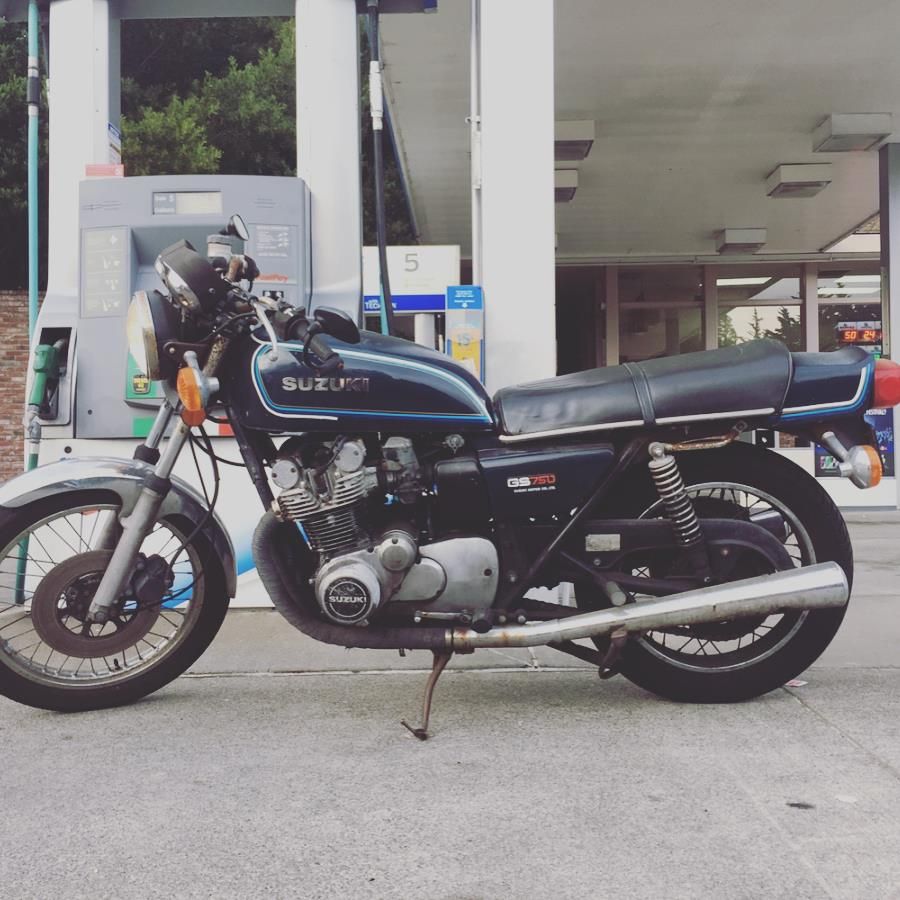
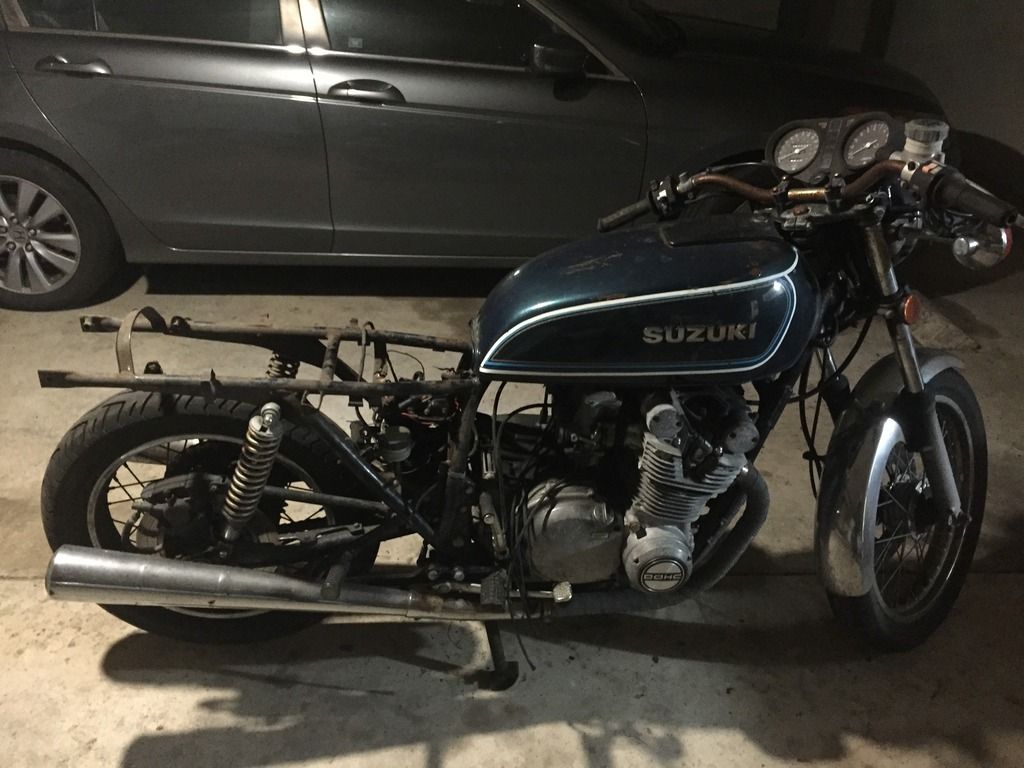
    Thought I would start my build log in here and ask a couple questions. I picked up a 1978 GS750 from a friend who never rode it. It sat outside in the San Francisco fog for who knows how long so it has a ton of oxidation, rusting, ect ect. My plans are basically clean it up as best I can, get it running as best I can and minimize as much I can. If anyone needs parts that I won't be using be sure to let me know.
    The bike is running but pretty rough, the throttle sticks and needs to be rolled back by hand, def an air leak somewhere, oil all over the place. Gotta trace these things down. My plan of attack is below:

    Check compression-if all is well proceed, if not look into fixing.
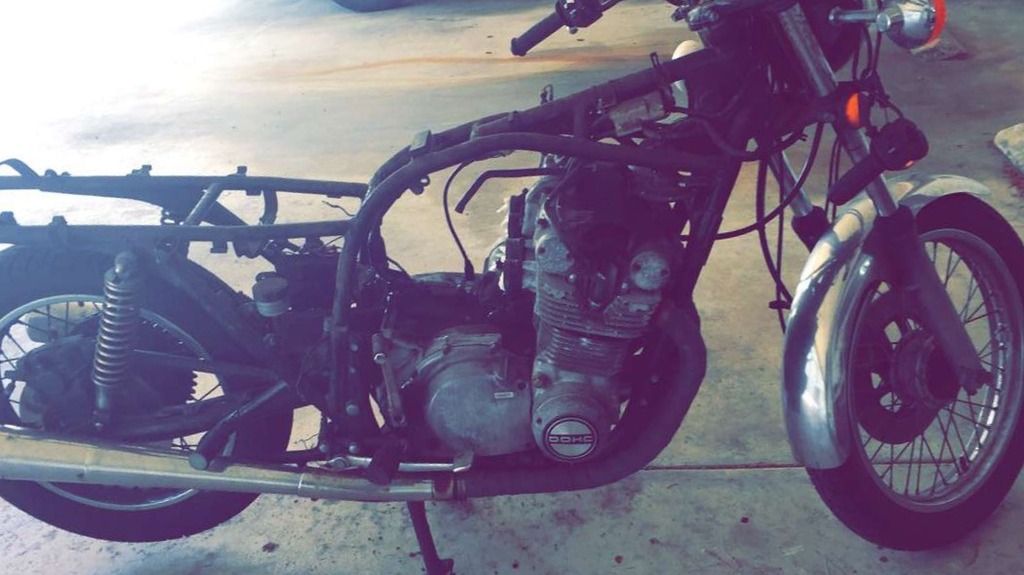
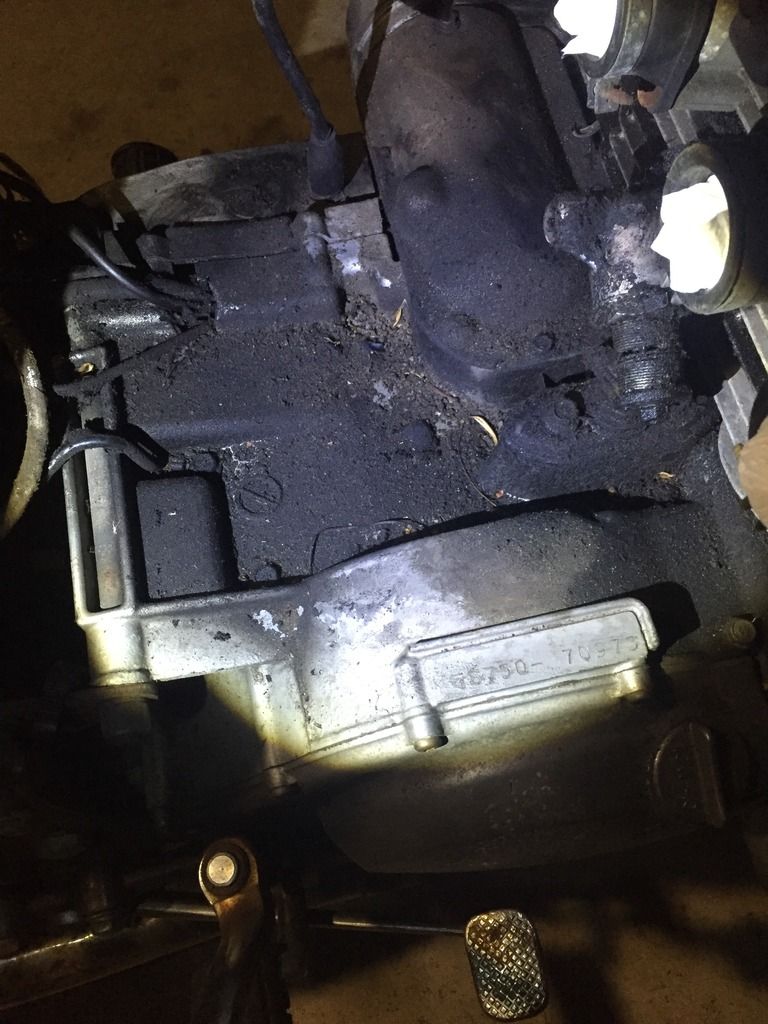
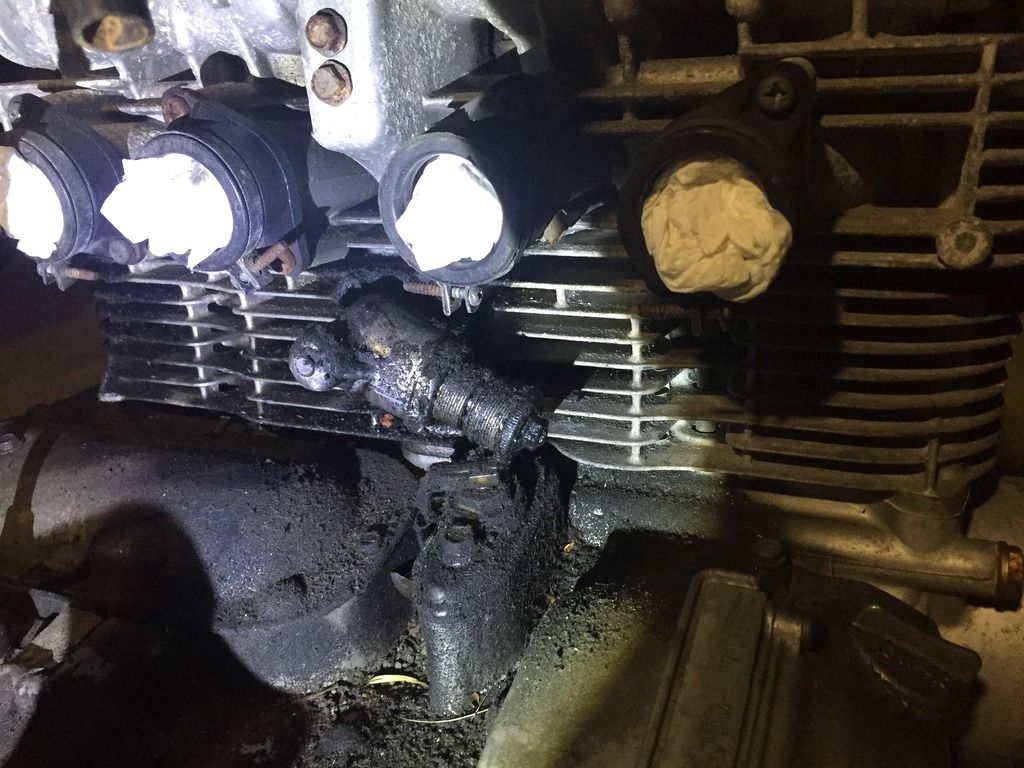
    Clean engine case, I have a couple areas of junk/oil. One I believe is the CCT. (see pics below) will need to reseal that guy for sure. The other is the front of the engine below the exhaust pipes, I have this is just coming from the tach hole. The PO didn't have anything in there for awhile. Hoping it's not a cam cover gasket or something worse (thoughts?)

    After I solve those minor problems it's onto the improvements:
    break carbs completely down, replace o rings, gaskets, ect.
    Valve adjustment, new valve cover gasket.
    Inspect/replace carb intake boots. I read somewhere that my model may not have o-rings behind them? (thoughts?) they are hard as heck to get off so haven't investigate that yet.
    Inspect/replace/seal air box, might also get an aftermarket air filter if it doesn't require me to change the jets (not pods! just the filter in the stock air box)
    Replace exhaust gaskets and inspect exhaust for any leaks.
    Tank seems pretty clean but will most likely rebuild the fuel petcock.
    New fuel line and filter
    New fluids all around:
    Oil, Oil Filter, Brake Fluid, clean/lube chain, Fork oil, new spark plugs, inspect wires/caps.

    That should get her into a great running state and then hopefully these mods will follow someday:
    New stator
    New R/R
    Dyna Electronic Ignition
    Dyna/ect coils and plugs
    Possibly a motogadget M unit or something along those lines. I want to redo all the wiring and make it super simple.
    Upgrade suspension all around
    New headlight and blinkers
    Bars, Grips, Controls, Ect. Trying to keep it super basic up front.

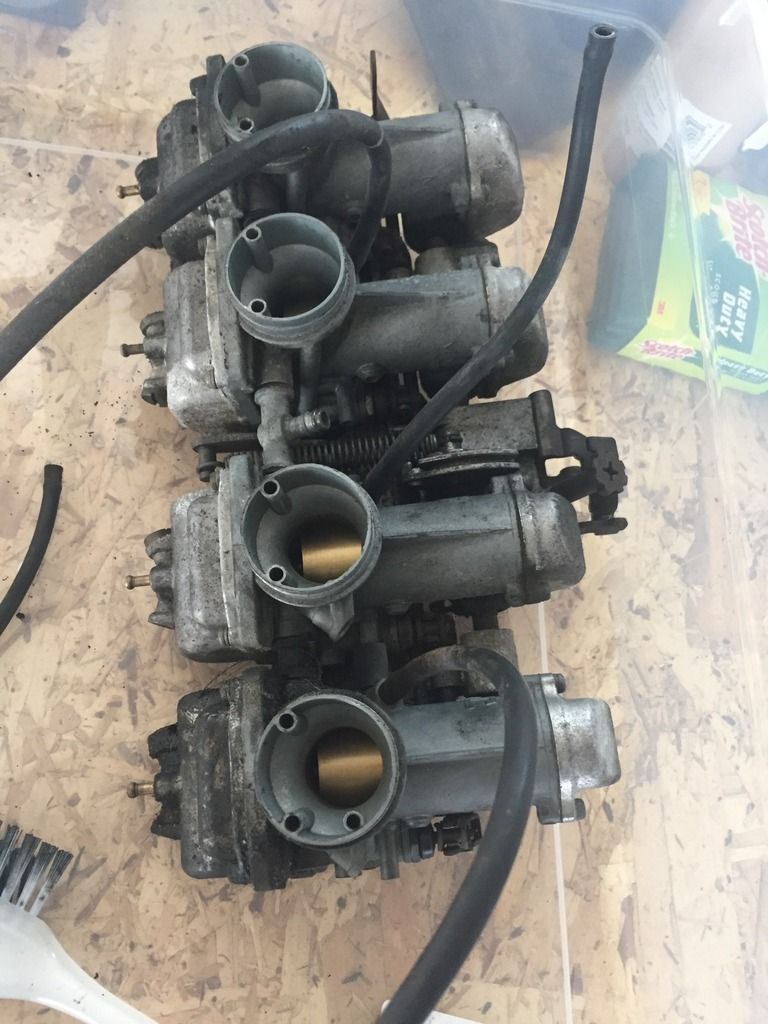
    Pics below! Can anyone help me identify exactly which carbs I have? I will be ordering o-rings soon. CV or VM Carbs?
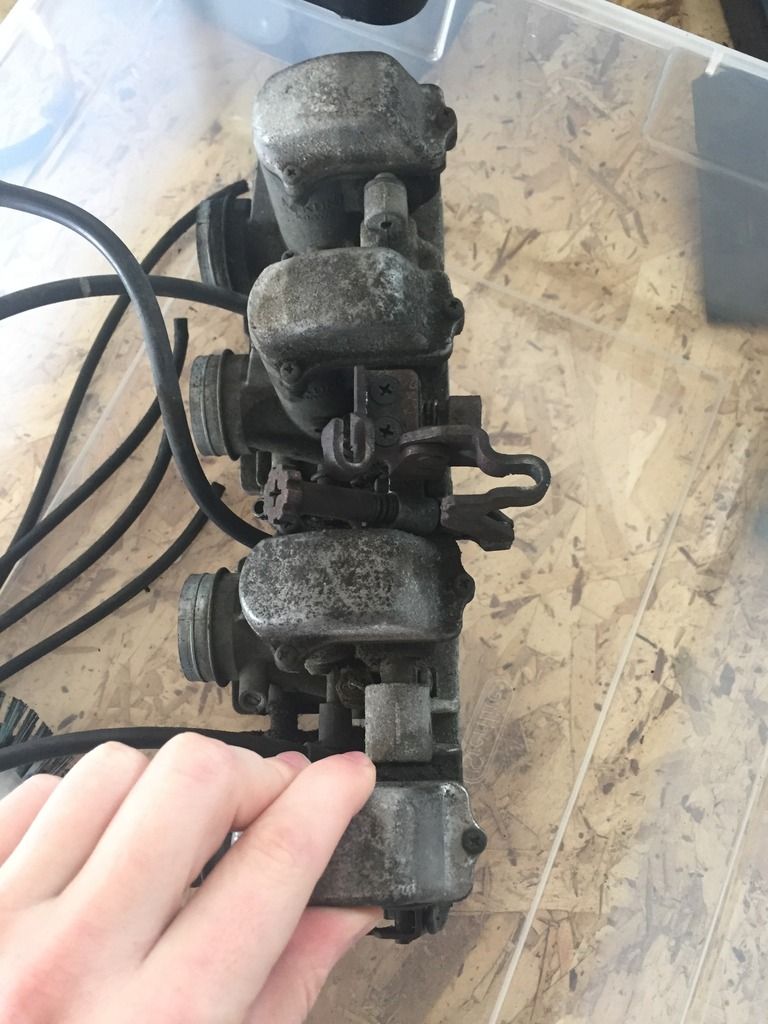
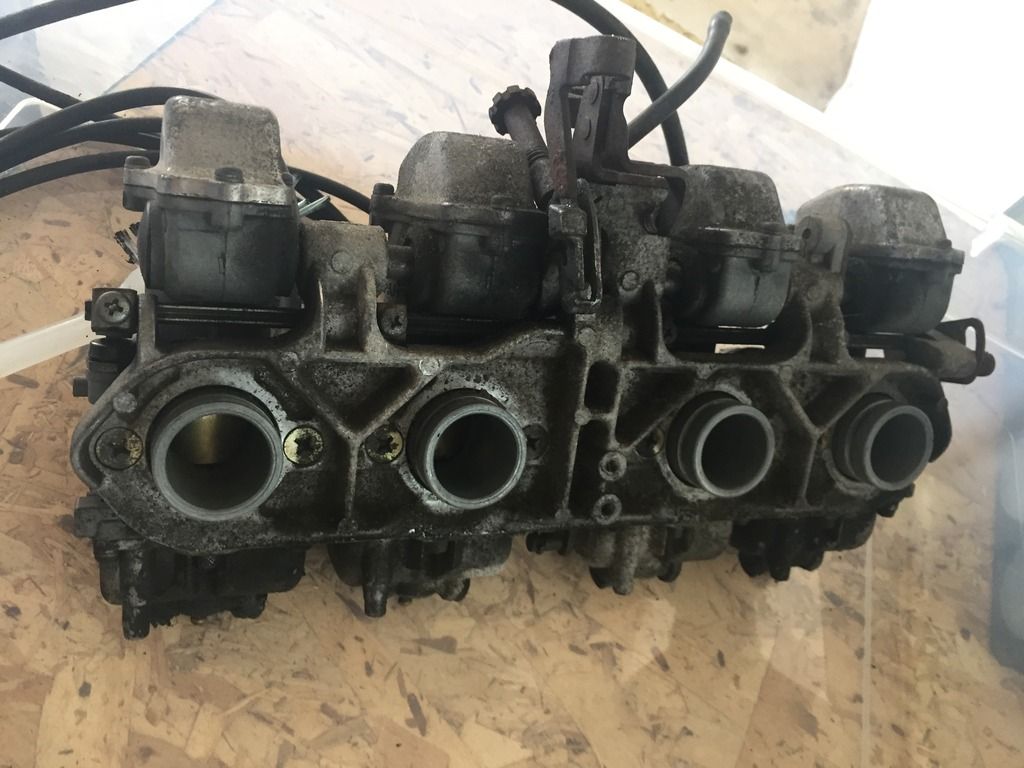
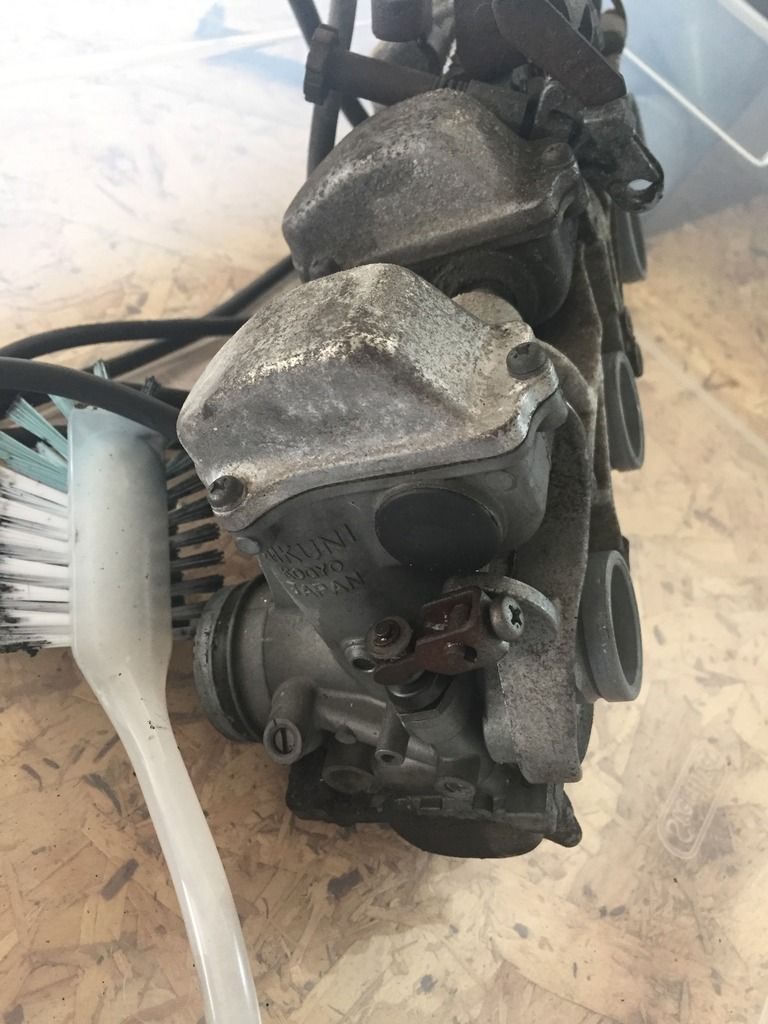
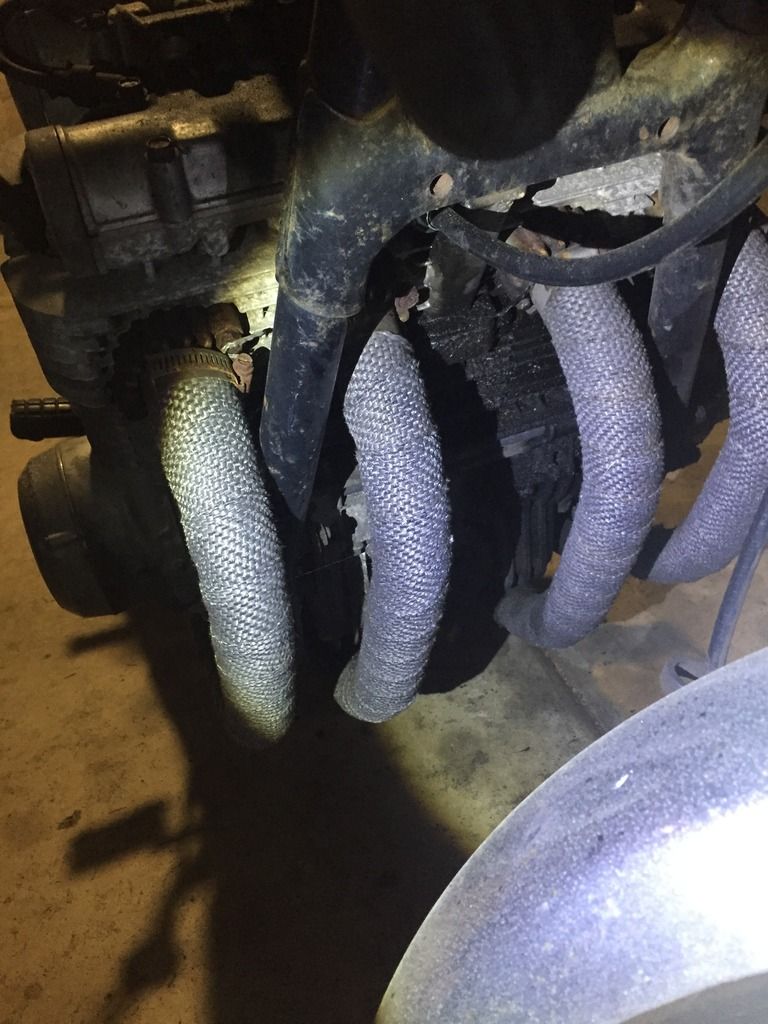


    #2
    Vm carbs, good luck with your build.
    I build Pipers

    https://farm5.staticflickr.com/4842/...b592dc4d_m.jpg

    Comment


      #3
      You can get a service manual here. There is also a carb cleaning tutorial that you might find handy. http://members.dslextreme.com/users/bikecliff/
      78GS 750E

      Comment


        #4
        Got both! Thanks!

        Comment


          #5
          Subscribed!

          Boy, that bike needs alot of TLC!!!


          Ed
          GS750TZ V&H/4-1, Progressive Shocks, Rebuilt MC/braided line, Tarozzi Stabilizer[Seq#2312]
          GS750TZ Parts Bike [Seq#6036]
          GSX-R750Y (Sold)

          my opinion shouldn't be taken as gospel or in any way that would lead you to believe otherwise (30Sep2021)

          Comment


            #6
            If you don't already have one, invest in a good impact screwdriver, you re going to need it!

            I would have cracked the degreaser to it first, makes working on it a whole lot cleaner, and reduces dirt falling into places when you disassemble.

            Better whack the penetrant to the exhaust for multiple days before attempting removal.

            Best of luck....
            1978 Gs1085 compliments of Popy Yosh, Bandit 1200 wheels and front end, VM33 Smoothbores, Yosh exhaust, braced frame, ported polished head :cool:
            1983 Gs1100ESD, rebuild finished! Body paintwork happening winter 2017:D

            I would rather trust my bike to a technician that reads the service manual than some backyardigan that THINKS HE KNOWS how to fix things.

            Comment


              #7
              Small update:
              Parts ordering has been done....for now of course.
              Things I got:
              New fuel tank cap seal
              petcock rebuild kit
              new fuel line
              new fuel filter
              O ring kit for VM carbs from cycle o rings
              new stainless steel screws for the carbs top and bottom
              new float bowl gaskets
              new top cap carb gaskets
              viton o rings for the carb boot intakes
              stainless steel screws for the carb boot intakes
              new exhaust gaskets

              Can't remember if I got these or not but I think I'll need new bolts for the exhaust mounts. Anyone know where to find those in a nice stainless steel allen head?

              Comment


                #8
                Tank is cleaned of any rust, I rebuild the petcock but must have done something wrong cuz it ain't working right. Going to just throw a manual valve in there for now till I work on it more. New tank cap seal.
                Rebuilt the carbs, they are still dirty on the outside but ill deal with that later.
                Got all but cylinder 2 of the carb boots done, replaced the o rings and screws. I cannot for the life of me get the number 2 one off. Suggestions? Screws are well stuck. Hard to get the impact in there, used socket extensions as well.
                Going to leave the exhaust alone as the bolts are SUPER rusted and i'll prob end up breaking them all.
                Did a valve clearance check and looks pretty bad. See below.

                My current issue is removing the old valve cover gasket. It is a pain in the butt. It is literally fused to the head. I have to scrape it off bit by bit and am also dropping small fragments into the head. I need a solution, someone? I put goo gone over it, didn't seem to help break it down. I've heard of using a plastic putty scrapper, doubt that'll work. Using a razor blade right now at 90 degrees, trying my best not to f up the soft aluminum. Suggestions?!

                I measured .03mm on all the valves as the smallest gauge I had was .04mm. Thoughts?
                Valves:
                exhaust
                4: .03 2.75mm shim
                3: .03 2.80mm shim
                2: .03 2.80mm shim
                1: .03 2.70mm shim

                Intake:
                4: .03 2.80mm shim
                3: .03 2.90mm shim
                2: .03 2.75mm shim
                1: .03 2.80mm shim

                My rough idea:
                Current shims in the bike
                1) 2.90-replace with 2.85mm (order/trade 1)
                4) 2.80-replace with 2.75mm (order/trade 2)
                2) 2.75-replace with 2.70mm (order/trade 1)
                1) 2.70-replace with 2.65mm (order/trade 1)

                This will drop everything .05mm give or take, plus the .03mm that I'm guessing is currently on the bike will give me around .08mm of clearance all around best case, worse case .05mm (hopefully not)
                Last edited by Guest; 05-15-2017, 10:03 PM.

                Comment


                  #9
                  Originally posted by clubfed11 View Post
                  I measured .03mm on all the valves as the smallest gauge I had was .04mm. Thoughts?

                  How did you measure .03 if your smallest gauge is larger than that? That reading tells you that all of your clearances are <.04mm so are likely also less than .03mm. Do the buckets spin freely? If not then there is NO clearance.

                  To get a proper reading for valves that are too tight you need to use a shim that is several sizes smaller so you can at least get a shim in there. You can probably get away with using your 2.70 shim to do this with some of the valves that currently have larger shims but for the your #1 Exhaust you'll probably need to get a smaller shim to get a good reading.

                  I have a 2.40 shim to use whenever I'm in that situation. Also you probably already know this but don't spin the engine if any buckets don't have shims in em.
                  Last edited by sam000lee; 05-17-2017, 09:23 AM.
                  1980/1981 GS450 - GS500 Cylinder + Piston Swap - "De-L'ed", custom seat, CB350 bits, 18" rear, etc.
                  1977 GS550
                  1977 GS750 - Cross country trip thread

                  Comment


                    #10
                    Motion Pro - High quality cables, tools and controls for motorcycles, ATVs, snowmobiles and personal watercraft.
                    sigpicSome of the totally committed probably should be.
                    '58 + '63 Vespa 150's' (London, GB/RI, US)
                    '67 X6 T20 ('67 Long Beach, Ca.- misty-eyed)
                    '71 Kaw. A1-ugh ('71 SF, CA- worked @ Kaw dlr)
                    '66 Yam. YL1('72 SF-commuter beater)
                    '73 Kaw. S2A-2Xugh ('73 SF-still parts slave)
                    '78 GS 750C ('77 SF-old faithful-killed by son)
                    '81 KZ 750E ('81 SF-back to Kaw. dlr)
                    '81 GS 650G ('08 back to NE&ME- (project)
                    '82 GS '82 (2) GS650GZ, L, Middlebury, G current

                    Comment


                      #11
                      Thanks for that gasket scraper tool!
                      -The buckets spin freely. Let's say all the valves have .01, so regardless i'll need to put a smaller shim in all of them. If I'm dropping .05mm to all of them then I'll at least be at .05mm-.08mm which is in spec. Once I have the new shims I'll make sure all clearances are good. The guide I was following had the same thing happen, the smallest tool he had was .04mm so he assumed his clearances were .03mm or less.

                      Comment


                        #12
                        okay guys I got all that crappy old gasket off finally! Def one of the more annoying things I've had to do on a bike. However there is pieces of it all over the place and in near the buckets. Best way to remove? Compressed air maybe? Shop vac? How bad is it if I miss a small piece? Will it destroy the engine? Any recommendations for prepping to install the new gasket? I heard some WD-40 on it?
                        I'll be moving onto fluid changes next and new bars, should be ready to fire her back up soon, make sure all is well and slowly start working on cosmetic stuff.

                        Comment


                          #13
                          Ive got this exact bike (in burgundy)...great thread. Ill be following along

                          Comment


                            #14
                            Can anyone recommend how to make sure most of the gasket crap is clear of the valves? I'll prob just take some compressed air to it and clean up the mess going slowly one by one. New shims finally arrived and new bars

                            Comment


                              #15
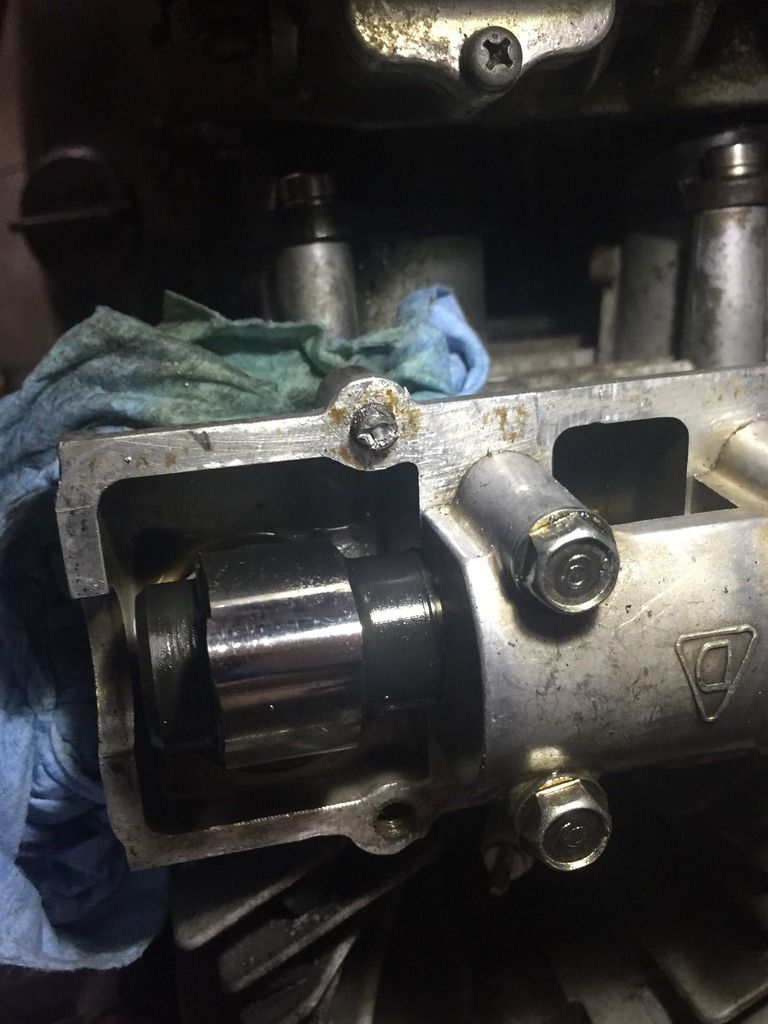
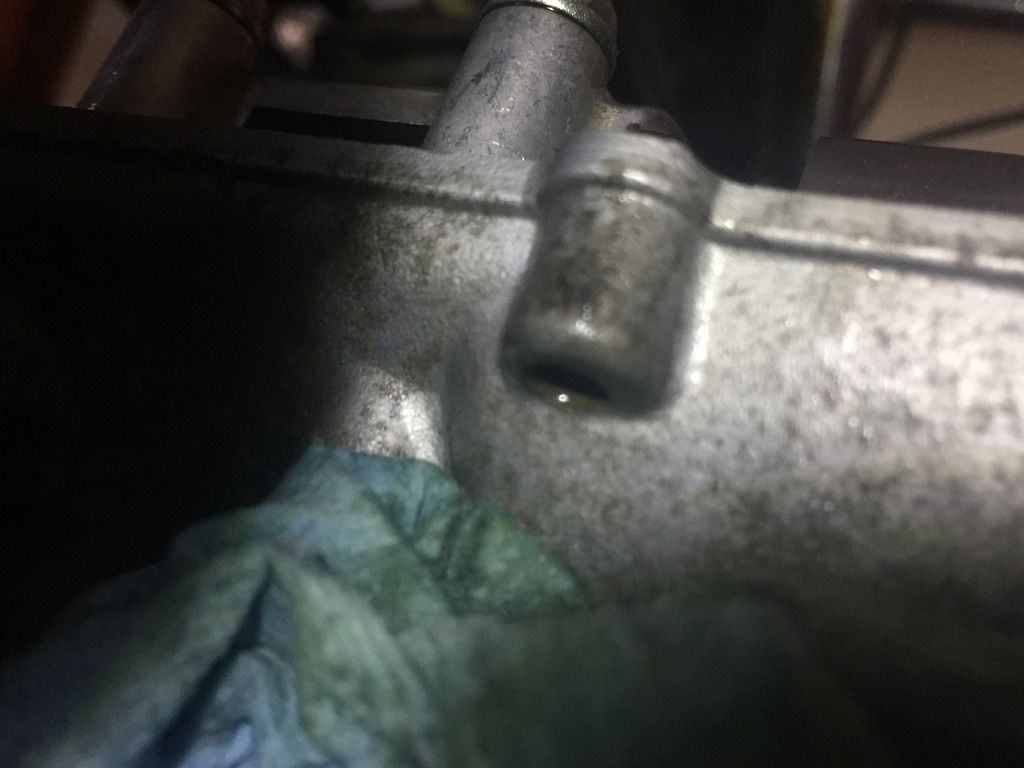
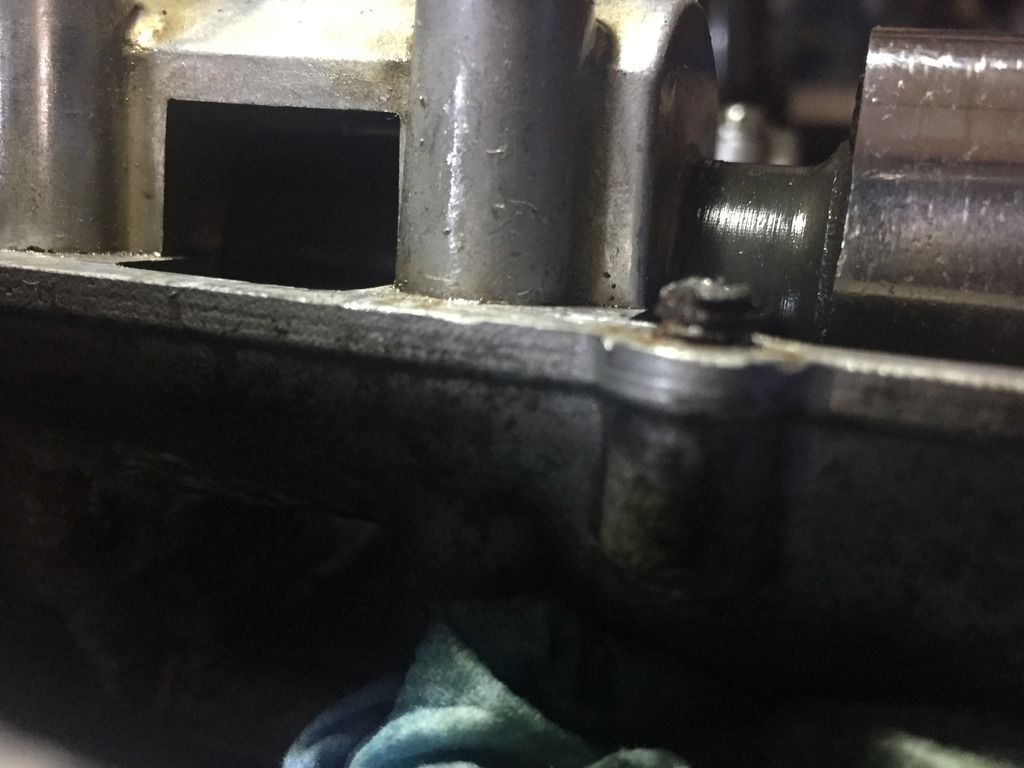
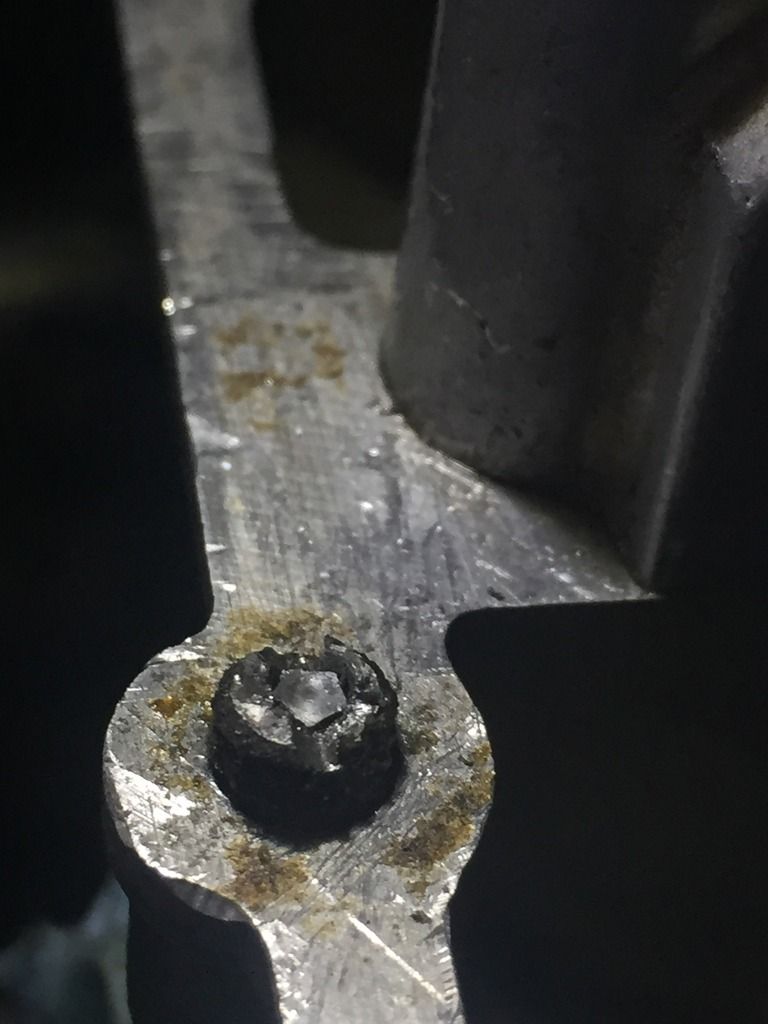
                              Well. Problem. One bolt on the valve cover snapped off. I tried to extract it and now the extractor snapped off in the bolt. I don't mind the bolt missing but I put the bike back together and got it running and it leaks a lot of oil from that area. What do you guys recommend I do here? I haven't dealt with this sort of thing before so need advice. Please see the pics.


                              Comment

                              Working...
                              X