.png "Powered by vBulletin")
Originally posted by TeamDar
View Post
-
Well I got a few frame modifications done. I wasn't happy with how the tank looked like it was going uphill. Ideally I wanted a straight line across the bottom of the tank and into the seat. This required me to have to cut off the existing tank mounts(front and back) and relocate them lower on the frame. At least the front ones were lowered on the frame. The rear mount was actually raised to get the look I wanted.
Original location of the fuel tank

After modifications

I actually cut off the little buttons where the front of the tank sits and then welded those to a piece of 1/8" bar stock. I then tacked the bar stock to the frame until I was happy where the tank was sitting.

I also cut off the rear tank support and welded it at a height that would level out with my seat.

Leave a comment:
-
I received the new seat today from Tuffside. Now I can get busy on the frame modifications. Stay tuned!
I'm also looking at these rearsets(http://www.fastfromthepast.com/19-0028) from From the Past. It says they are for a '77-'79 GS550. Does anyone know if these would fit a 1981? What is the difference between the foot peg positionS on a '79 and '81?
 Last edited by JohnnyL; 12-03-2019, 12:53 PM.
Leave a comment:
-
I hope that you are not rotating the engine without a shim in the vacant bucket? The edges of that cam lobe look a little rough...Leave a comment:
-
Originally posted by JohnnyL View Post
Give me a holler. I have shims galore, it's cold here, and I'm bored.
And if you somehow need more shims, Cycle Recycle II downtown has them for $5.
On zero clearance valves, you just have to go down a couple of sizes and see what you've got. Fortunately, you don't have to yank the dang camshafts every time.Leave a comment:
-
Awesome. Get the spreadsheet from Steve if you don’t already have it. It’ll clarify what sims you need to replace with what. Just have to punch in the numbers you reported above.Leave a comment:
-
Now it was on to installing the new/old cams. I say new because the old one was damaged from the lose shim. I had to purchase used cams from eBay. This process is pretty straight forward. Install the exhaust cam first. With cylinders 1 and 4 at TDC, place the exhaust cam into the chain with the 2 and arrow pointing up. Count 20 pins over from where the 2 is and install the intake cam in with the 3 and arrow pointing towards the 20th pin.

Install the bearing caps and torque to 8 ft lbs.
Then install the cam chain tensioner.
Now I was ready to check valve clearance. Here is where things are a mess.
#1 intake is .0015 2.55 shim
#2 intake is missing a shim
#3 intake has no clearance 2.65 shim
#4 intake is .003 2.6 shim
#1 Exhaust is .005 2.6 shim
#2 Exhaust has no clearance 2.6 shim
#3 Exhaust has no clearance 2.65 shim
#4 Exhaust has no clearance 2.6 shim
Do I buy and entire shim kit for $180 and start over???Leave a comment:
-
Well crap! I forgot all about putting the cylinder head on. Obviously I got it on but I forgot to tell you how. I didn't take any pictures of the process so I'll just let you know that I replaced all of the piston rings with new rings, honed the cylinder walls, oiled the cylinders and rings. Installing the pistons onto the rods was pretty straight forward. I didn't need to use any clamps or anything. With a little oil and hand force, the gudgeons went right in. Being extremely careful not to drop the circlips into the case, they went in relatively easy too. Lowering the jugs onto the pistons went really well. No ring compressor was necessary. The jugs have a nice bevel into the bottom of them that make inserting the pistons pretty simple. A small screw driver to poke the ring in while pushing down on the jugs comes in handy here. Pretty much home sweet home from here.
Today I was able to get the valves lapped and installed. Using some Permatex Valve Grinding Compound, some fuel tubing, a screw and a drill, this was relatively painless. I brushed just a little bit of compound on the seating surface of the valve. I then oiled the valve shaft and inserted it into the guide. On the top side of the engine, I put a short piece of fuel hose over the end of the valve stem. On the other end of the hose, I put a 1/4-20 stud. From here, I put my drill on the stud that's inserted into the hose. On low speed, I ran the drill. You can here the grinding tone. Running the drill backwards and forwards, applying pressure and not, you can here it start to smooth out. Pictures below are before and after and the drill process described.
Before valve grinding


After valve grinding


Process

After that, I cleaned all the valves in parts cleaner to get off any remaining compound. I also cleaned the heads well with some paint thinner. I put in new valve seals and I then oiled the stems and re-inserted them into the guides paying close attention to which one went where. Using a valve compressor, I installed all the springs and their keepers. All springs were within spec.


All the buckets and shims were installed at this point. I also installed a new bucket where the old one had been damaged.


Leave a comment:
-
Thanks for the compliments fellas! Now let me backtrack a little bit as to what was done to get to this point.
I cooked the engine pieces in the oven at 200 degrees for one hour.(Yes! My wife is pretty awesome for allowing me use the oven for this.) I am very impressed with how durable the Harley Davidson paint is after baking. I did a pretty good job of masking all the mating surfaces but nonetheless, I still had to go back and clean some of them up with a razor blade on edge.

After all the pieces had cooked, I was ready to mate the case halves together again. After cleaning the crank shaft and transmission gears in parts cleaner, I thoroughly blew them off with air and lubed all of the bearings with assembly lube. I fitted new seals on the crank and the transmission. I then fitted the crank and transmission into the top half of the case.

Once again, I checked the mating surfaces and then cleaned them off with paint thinner. Using Threebond 1184, I applied a very thin layer of liquid gasket to the bottom case. Using my finger, I smeared the threebond evenly across the surfaces.

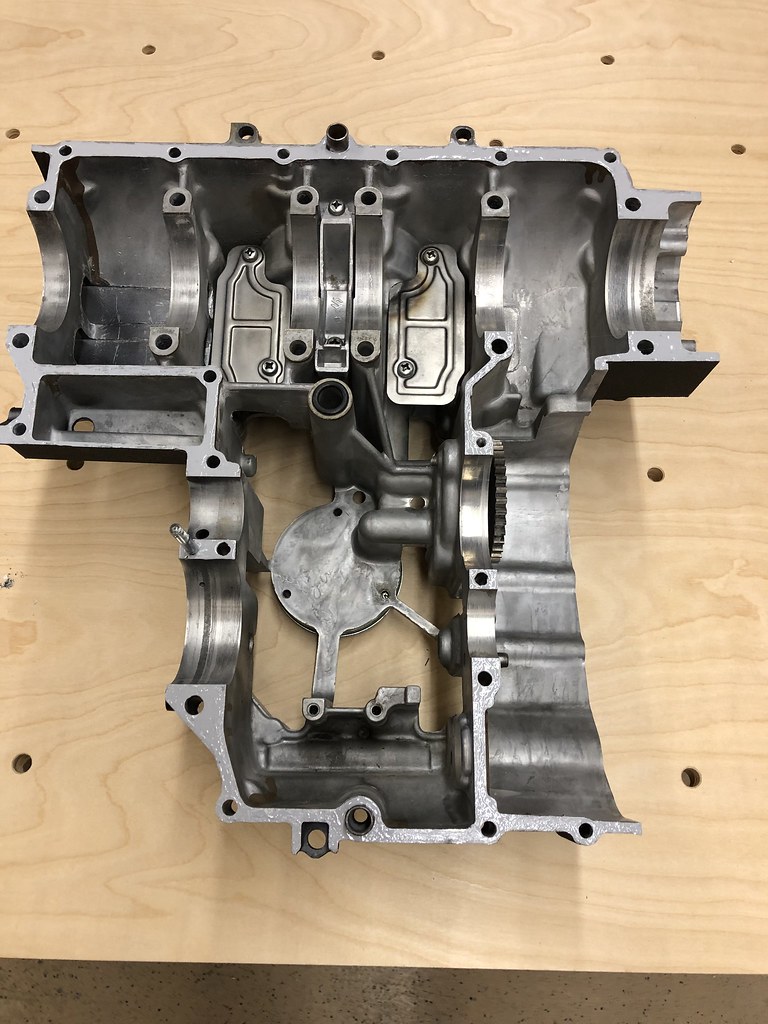
After running over all the bolts with a brass wire wheel on my bench grinder, I put them in their appropriate places. I had made a bolt diagram with a piece of cardboard when I took the case apart. All the 8mm crankcase bolts were tightened to 14.5 ft lbs and the 6mm bolts were tightened to 7.2 ft lbs. All were tightened according to the order stamped on the case. Thanks Suzuki!


Next was the new gasket for the oil pan and bolting on the oil pan.


Next I installed the clutch bearings and basket. All clutch plates and springs were well within spec so I decided to reuse them.

A new gasket was fitted for the clutch cover, points cover, generator cover and new stainless steel bolts were installed.(Bye Bye gis screws!) A note about the stainless steel bolts. It is recommended to install these with anti-cease on the threads and DO NOT tighten these to Suzuki specs. 8mm stainless bolts get tightened to 10.7 ft lbs, 6mm bolts get tightened to 4.4 ft. lbs.

That brings us to where I am today.Leave a comment:
-
Looks good!
BTW, there is a product called S100 Engine Brightener that works really well on that Harley paint. It will bring it back to a bright black once it starts to fade. I use it once a year on my Harley and it makes the engine look like it just came off the showroom floor!Leave a comment:
-
Nice!
I used PJ1 to paint my GS850's engine, and it's held up pretty well. Never thought to look around in the Harley world for engine paint.Leave a comment:
-
That is a really nice look. I hope the paint will last for years to come.
Good job on your part.Leave a comment:
-
I'm about to run out to see Ford vs. Ferrari. I'll come back and post the progress of how I got to where I am at right now. The motor is almost done. I need to go back and lap the valves and install the cams. But I just couldn't wait to see what it was going to look like complete. I'm pretty happy with how it turned out! Enjoy the pics!


Leave a comment:
-
Project update:
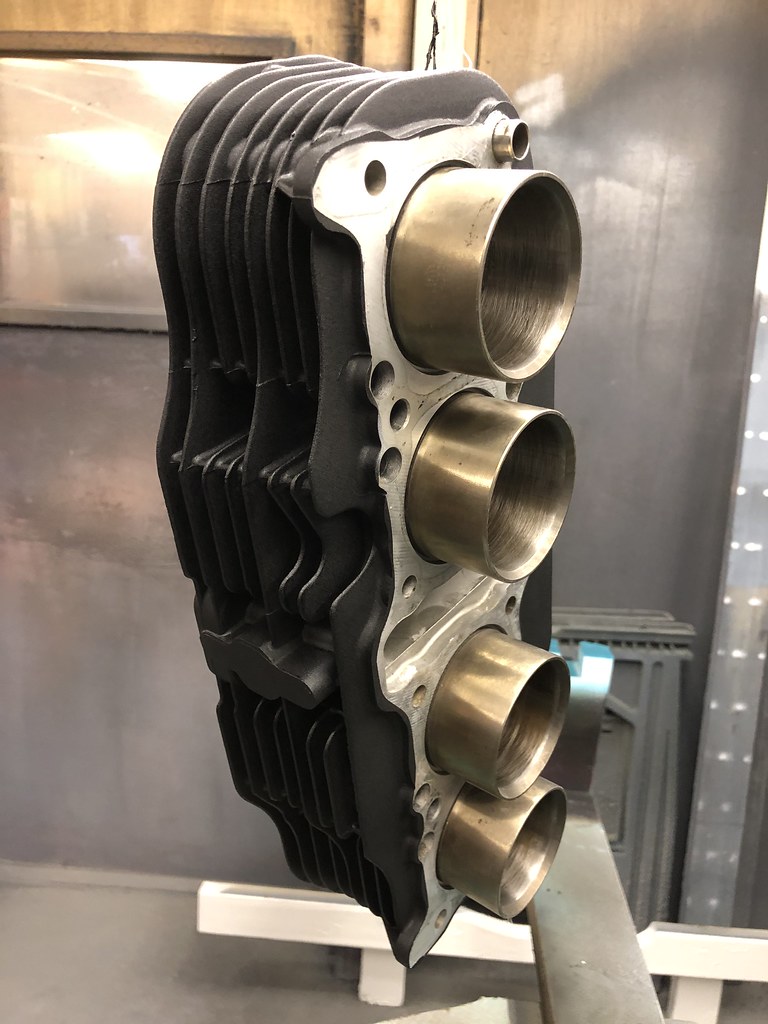
I was waiting on paint from Harley Davidson. I purchased their texture black but they were out. It took a week and a half to get it in. I received it yesterday and painted the engine this morning. I couldn't be happier with how it turned out. It was extremely easy to spray. Very forgiving. I will be putting the pieces in a 200 degree oven for an hour to bake the finish. Then it's on to re-assembly of the engine!


Leave a comment:
Leave a comment: