.png "Powered by vBulletin")
Wow!
It's crazy what is found underneath all the outward appearance. Thanks for starting this thread.
Ed
-
Looks like you are looking for a replacement cam. Good luck and welcome to the forum.Leave a comment:
-
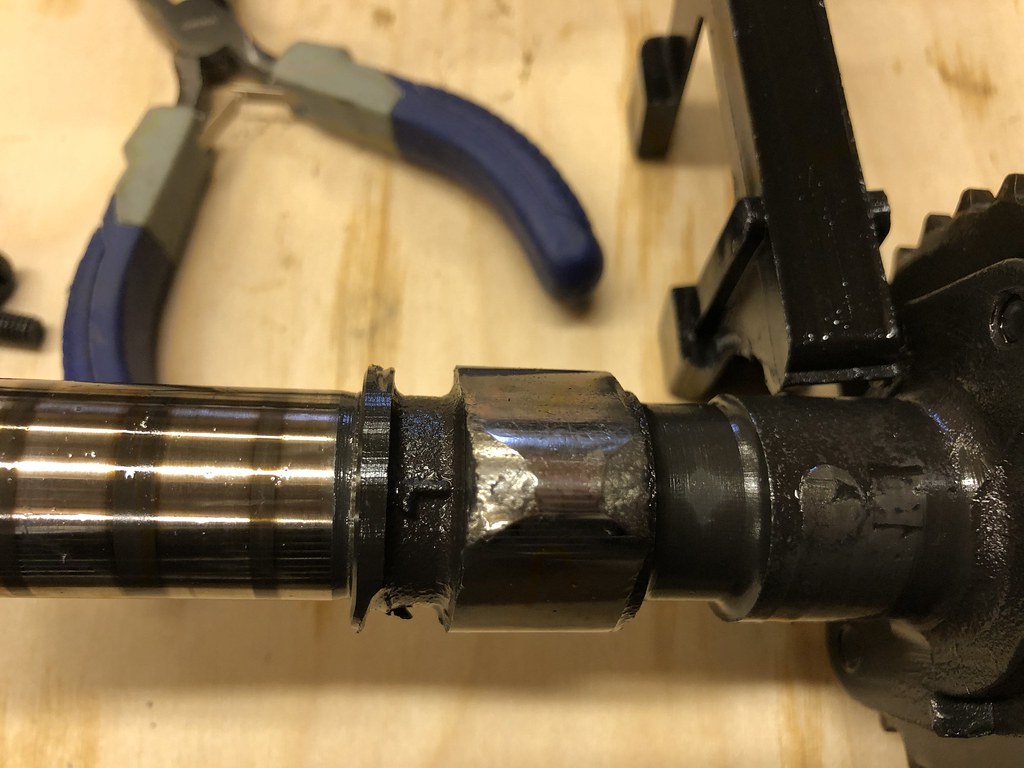
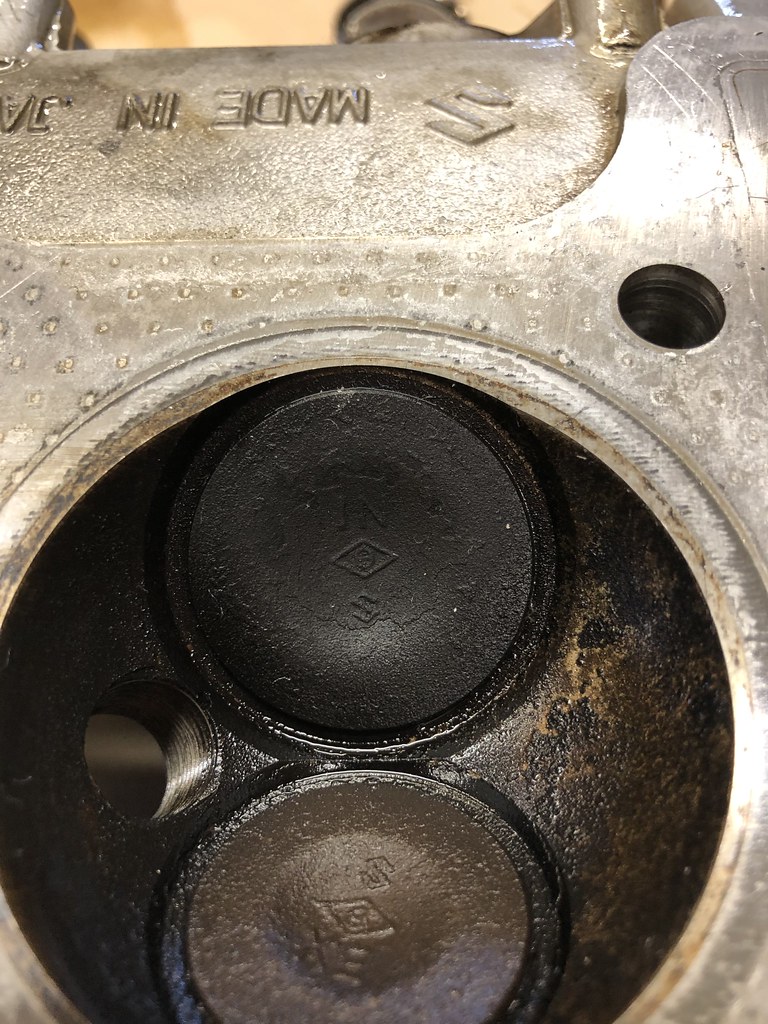
Well I found what at least one of those chunks of metal was. The intake valve on cylinder two was missing a shim. At some point, the shim got loose, broke and made it's way into the case. I don't see any scoring on the piston wall. However, there was damage on the cylinder head where the piece was banging around(see Photo) and damage to the cam lobe(see photo). I don't see any damage to the valve though.
Damage to the cylinder head

Missing shim

Damage to cam lobe
Valve looks good so far
Leave a comment:
-
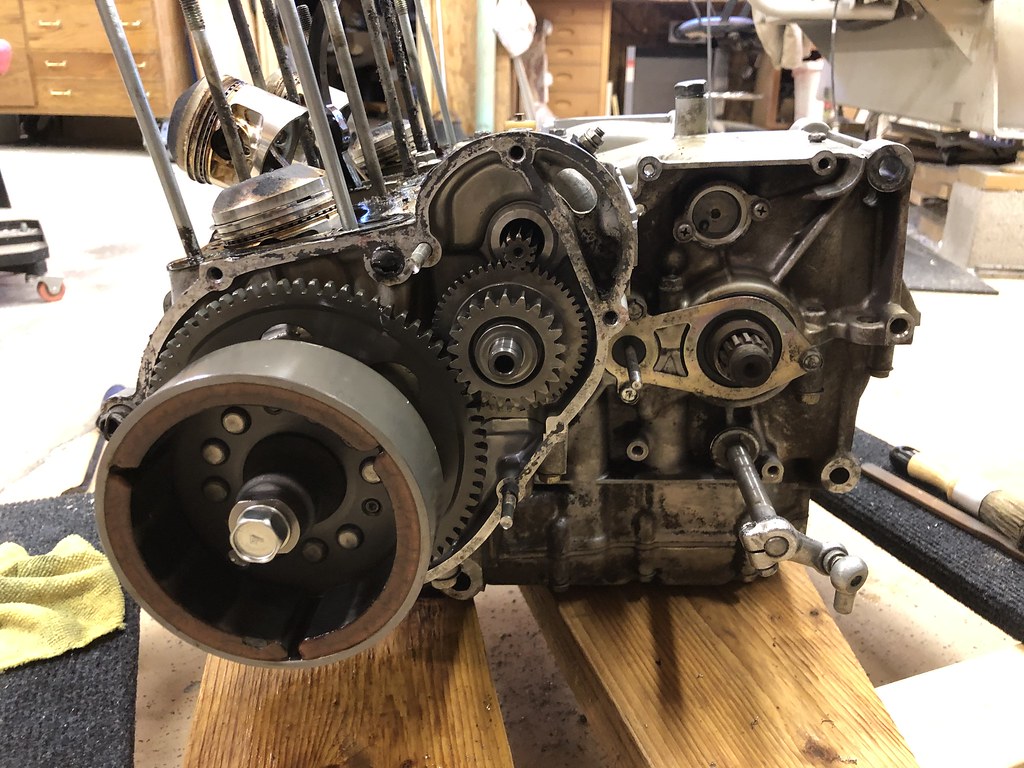
Managed to get the engine degreased and most of the engine torn down today. Discovered some bolts that had been replaced with the wrong ones, a lot of gunk in the oil pan along with some chunks of metal. Not sure what they're from.
Degreased

Cams

Top end

Pistons

Clutch side

Stator side
Oil screen (Yuck!)

Oil Pan (Yuck! ....again)

Metal chunks in oil pan?

Leave a comment:
-
So I have a question. This is supposed to be a 1981 GS550L but PartsFish shows the tank as a different tank. On a 1981, the tank bolts down with one bolt through the tang coming off the backside of the tank. My tank bolts through a hole like on a 1979 tank. Does this look like maybe it's been modified at some point?


Leave a comment:
-
Oh man! Thank you! I couldn’t figure out how to do that! I’ll edit my posts tomorrow when I’m on a computer.Leave a comment:
-
 Untitled by John Lethen, on Flickr
Johnny,
In FLickr, when getting the Share Link, click on the "BBCode" to get a link that looks like this
[ u r l =https://flic.kr/p/2hKqoYj][ i m g]https://live.staticflickr.com/65535/49061770122_e0f76af095_c.jpg[/ i m g][/ u r l][url=https://flic.kr/p/2hKqoYj]Untitled[ url] by [ url=https://www.flickr.com/photos/185493136@N07/]John Lethen[ / url], on Flickr
I added spaces so can see the code (and it not show up as the picture image).
You can also delete some of it so only have the IMG stuff, looks like this
[ i m g]https : //live.staticflickr.com/65535/49061770122_e0f76af095_c.jpg[/ i m g]
then displays the picture image only with out the other links.
Last edited by Redman; 11-13-2019, 06:20 PM.Leave a comment:
-
JohnnyL's 1980 GS550L Cafe Build
I've decided to document my cafe build. Feel free to comment. I know I will have questions so please feel free to chime in.
Let me get you caught up to where I am today. I purchased a 1981 GS550L from a guy for $100. He was at least the second owner. I'm still unclear on who did what to the bike but it is somewhat already chopped up. At least the wiring is. The seat is gone and the original handlebars are gone amongst other things. I want to do this properly over the winter and take my time doing it. My plan is to get the bike running, which when I purchased it, it did not. Upon looking at the bike closer, I realized that at some point, the coil wires had been spliced(poorly) and the spark plug boots had been replaced. When removing one of the wires from the spark plug, the boot came right off of the wire. So new coils and boots were on my "to order" list. The bike did turn over but would not run. Could be the coils, coil wiring or the boots. While ordering new coils and boots, I decided to remove the carbs and give them a good cleaning. I first started by completely disassembling them. I then soda blasted them and then proceeded to give them a good soak in carb cleaner and then cleaning each part thoroughly with a brush and carb cleaner. One of the carbs' air adjustment screw had been driven in so far and the head stripped that it couldn't be removed without drilling and then using an easy out. I then reassembled the carbs with new o-rings and gaskets and checked float height. My new coils arrived so I installed those as well as the new spark plug boots. Last night I installed the cleaned carbs and tried firing it up. I pushed the starter button but there was nothing. No click, no bang. I must be missing a ground somewhere. After a phone call with Bwringer, I realized that the body of the solenoid needed to be grounded. So this morning at 6am, I came out to the shop and grounded the solenoid. Click! Bang! Boom! It's alive! It doesn't run well but hey...it runs! https://youtu.be/HX0SuVsqeFI Next step is to read stator papers again and check the stator and reg/rec on the bike.
Here is the bike when I purchased it.

Carbs off the bike.

Before and after soda blasting.

Removing stuck air screw.

Rebuilding carbs.

Next steps are:
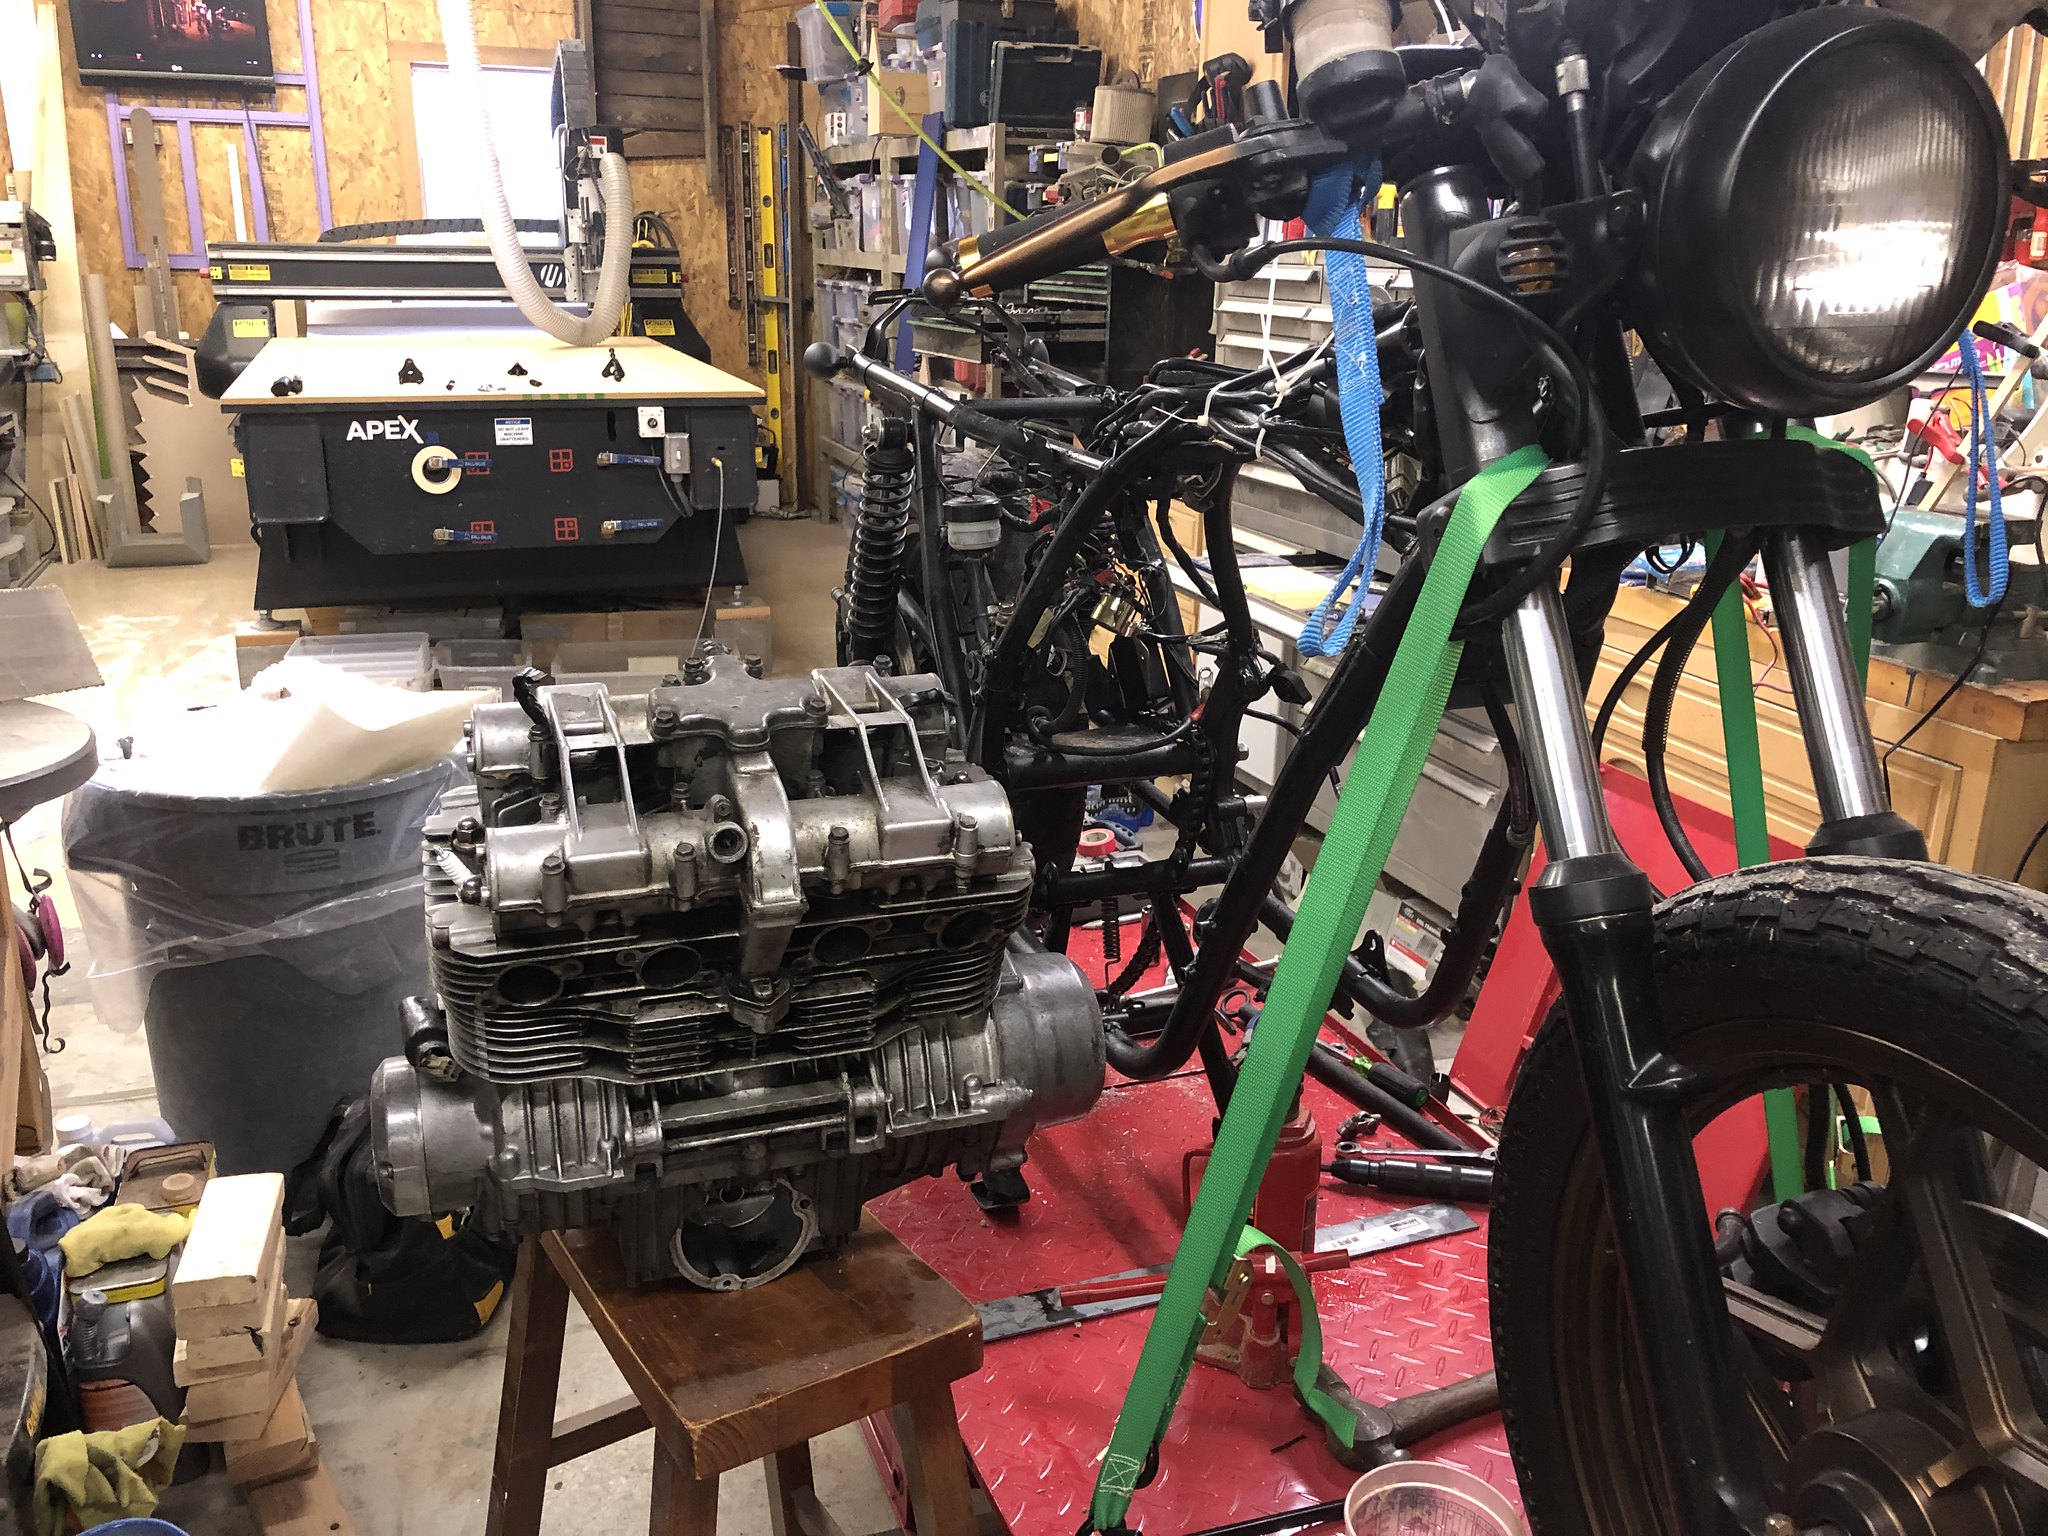
1. Pull the motor
2. Disassemble the top end
3. Clean the engine thoroughly
4. Paint part of the engine
5. Polish part of the engine
6. Replace seals, gaskets and piston rings.
7. Reassemble engine and check valves.
8. Cut frame and weld in seat hoop
9. Remove unnecessary flanges etc.
10. Sandblast frame
11. Send frame and wheels to powder coat.
12. Shorten front fork springs
13. Reassemble bike with new steering bearings
14. Figure out what to do with exhaust.
15. Replace gauge cluster with single all-in-one gauge
16. Lower front end
17. Install clip-on handlebars and new grips
18. Install new shorty brake/clutch levers
18. New headlight and blinkers
19. New chain
20. Rebuild brakes
21. Install new braided brake lines
I'm sure this list will have many more additions but for now that's all I can think of. I will make sure to post my progress as I go.Last edited by JohnnyL; 12-06-2019, 05:59 PM.


Leave a comment: