Announcement

Collapse
No announcement yet.

1980 GS1000ET back from the dead.....I hope.

Collapse
X
 
  • Filter
  • Time
  • Show
Clear All
new posts

    #16
    Remove the head and you stand a better than 50/50 chance of disturbing the base gasket and lower o-rings(at the oil feed studs) enough to leak on reassembly. That's when you kick yourself and have to do it over again and properly this time.
    Bear in mind the ancient o-rings are hard and brittle and are only sealing out of habit right now. I'm amazed your base gasket isn't leaking already, as it's a common fault.
    Regarding the rings - Cruzinimage.
    ---- Dave

    Only a dog knows why a motorcyclist sticks his head out of a car window

    Comment


      #17
      Day 3 of the tank saga. Its taking a lot longer than I thought to clean just a little bit of rust inside the tank.

      The Evapo-rust has gone black. When I 'washed' the tank out with water it flash rusted as I was removing the water. That was a big shocker. So had to seal the tank up again and start all over again. Second time around I washed it out with petrol. NO flash rust.

      Sadly I can feel rust still inside the tank by the fuel gauge hole. Looks like I might have to go to stronger stuff or try this stuff my cousin suggested.

      POR15 Small Fuel Car Tank Repair Kit Sealer - Frost Restoration Products

      I'm not a fan of using acid based stuff for this as I want to save the paint on the outside of the tank.

      Any other suggestions before I post the tank away for a guy in the VJMC to sort it out (and about £200.)

      Comment


        #18
        Originally posted by Grimly View Post
        Remove the head and you stand a better than 50/50 chance of disturbing the base gasket and lower o-rings(at the oil feed studs) enough to leak on reassembly. That's when you kick yourself and have to do it over again and properly this time.
        Bear in mind the ancient o-rings are hard and brittle and are only sealing out of habit right now. I'm amazed your base gasket isn't leaking already, as it's a common fault.
        Regarding the rings - Cruzinimage.
        Cheers.

        I think I have a 1100 base gasket but no '0' rings. The other issue is the ring cost. I will check you link.

        Comment


          #19
          Not a lot to report today, had a lazy day with my feet up.

          Will try and do more tomorrow if my right ankle is better.

          Comment


            #20
            Well had a slow day so far today.

            Checked the rear brake calliper as it was sticking on the rear when wheeling the bike around to work on it. All seemed fine and when you pushed the brake pedal you could feel the pads move forward and back. Not a lot of corrosion in there and as the pads are new the pistons are well back in the calliper so I will leave them alone. The brake fluid was well nearly as brown as the fuel was so I changed the fluid and that seemed to make a difference straight away.

            So it was carbs out time.

            No no no.

            I set up the reserve tank and thought why not. A bit of Aspen 4 fuel (its what I have in the garage for the mower) into the bottle and give it a shot.

            Choke on, ignition on and give it a push.......


            WOOOOOOOO HOOOOOOOOOOOO

            She fires right up on all 4 cylinders after being sat for over 10 years. OK, like a bag of spanners but she runs! Didn't like the idea of idling but she fired up on choke and sat at 2,000 rpm happily.

            I had fuel dripping from the supply tubes on 3-4, I guess the O rings have failed there.

            The carbs will have to come out but its not as bad as it could have been.

            I'm stoked and pumped right now. More excitement to get them carbs out and sort plus getting the tank sorted out to.

            The new fuel tap repair kit came today along with a few other small parts that I need. Just waiting for the carb kit to arrive from the supplier (from here) and then a few float bowl gaskets and I think we should be good to go.

            Now If I can find a Junior Mad to help bleed the front brakes with new fluids things might be looking up!

            Comment


              #21
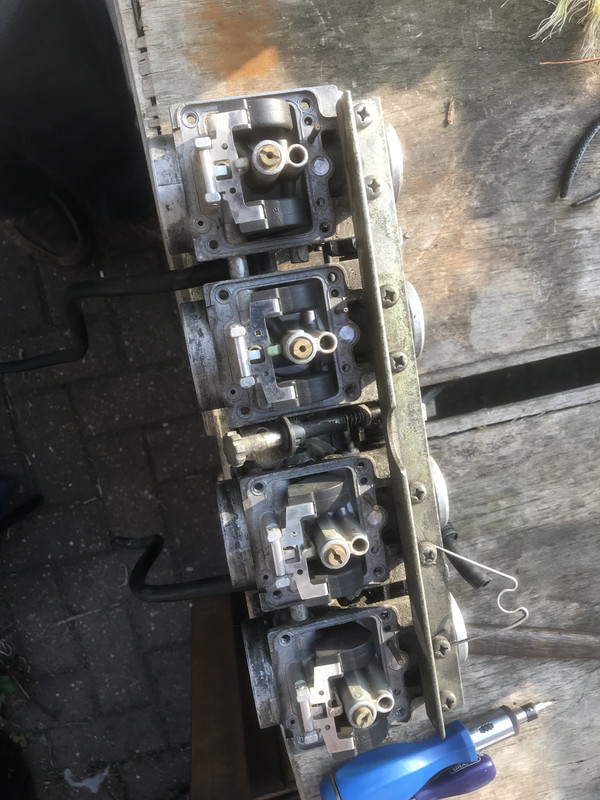
              Well the carbs are out and sitting on the bench.

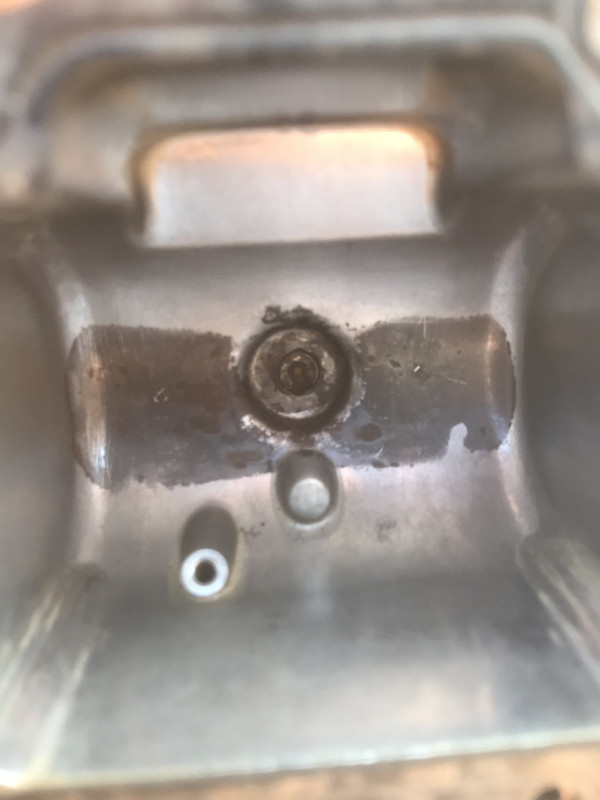
              1,2,3,4 bodies don't look in any trouble whats so ever. They are clean and good inside.


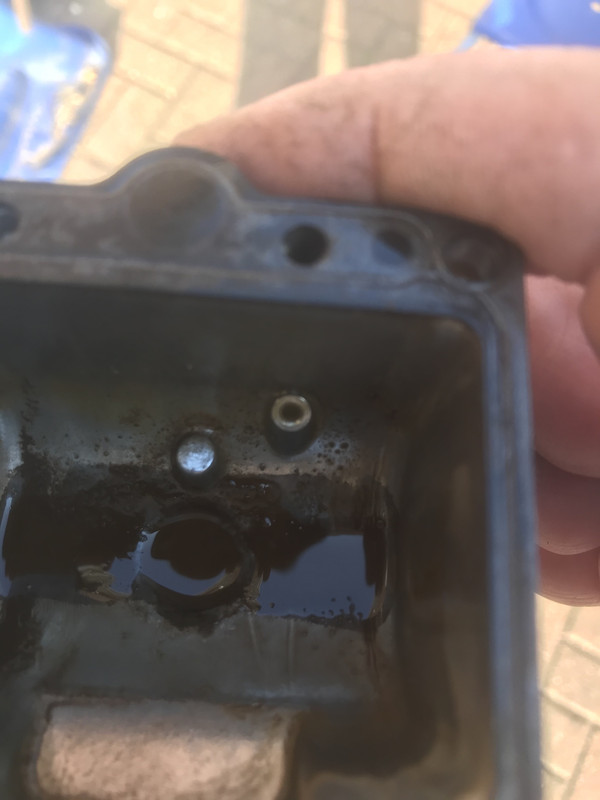
              NO 4 float bowl wasnt great.


              A little soak in fuel and a polishing cloth and its taken the rust and dirt out.


              Sadly the float pins wont budge.


              Mine are shaped with a large head one side and no head the other. I tried pushing them out, pliers and a drift and small hammer but no luck. I'm not going to chance my arm here and shear a post off.

              Had the carbs upside down and blew into the feed line. I can hear air escaping via the feed tubes but I have to lift each of the floats to get anything out so the needles are seating correctly which is nice after all that time.

              So I am a bit stumped now. How much force to get those pins out without breaking the legs off. Another job for tomorrow.
              Last edited by Suzuki Mad; 04-27-2020, 02:18 PM.

              Comment


                #22
                Wish I could find the old forum and the carb rebuild pages. 'You tube' sucks for people doing CV carbs. Used to have a link but lost it with the PC change and the new forum.

                Comment


                  #23
                  Here you go: http://gsarchive.bwringer.com/mtsac/...d_Tutorial.pdf

                  Ed shows you in here how to use a socket to support the lower post while you tap the pin through the upper post.
                  1980 GS550ET

                  Comment


                    #24
                    Originally posted by steveb922 View Post
                    Here you go: http://gsarchive.bwringer.com/mtsac/...d_Tutorial.pdf

                    Ed shows you in here how to use a socket to support the lower post while you tap the pin through the upper post.
                    Thank you steveb922.

                    Comment


                      #25
                      Been having bad weather here so cant get enough space in the garage to work on the GS. Its a bit cramped.


                      A few parts on order to sort the tank and a screwdriver to get the pilot jets out.

                      Will post again when I have got some progress to report.

                      Comment


                        #26
                        Busy day today here at Mad towers.

                        A small white envelope dropped through my door (thank you Mr Barr) and two boxes arrived. Inside one was Bilt Hamber Atom Mac and in the other was 2 Kgs of Bilt Hamber DEOX-C.

                        Out with the tank, kettles on and get the hot tap working and away I went. Sealed up the tank with two metal patches screwed into the fuel tap hole and the fuel level gauge hole with the old OEM seal and some inner tube. In went the hot water and 1KG of liquid to the very brim of the tank. I started at 12pm, so just before lunch.

                        Popped out every hour or so to check and watch the inside of the tank go from rust colour to shiney silver once again.

                        5pm I tipped the solution out into a tub to save. Then washed the tank out with fresh water a couple of times to get the rest of the solution out and to neutralize it. Then added the Atom Mac into the tank, swilled it around and the tank was then sealed. poured that out into another container.

                        All I can say is the results were impressive. Through the fuel gauge hole I can see clean metal that was less than 10 hours ago nasty looking rust.

                        I had tried Evapo-rust first. It never touched the rust on the side of the tank even after 24 hours.

                        So If you are stuck then give it a shot.

                        All I need now is the screwdriver to get the pilot jets out and I can get into the carbs.....

                        Comment


                          #27
                          Try boiling the carbs before trying to remove the pilot jets. Or, a heat gun. Be sure your screwdriver is an exact fit. Grind one down if necessary
                          1978 GS 1000 (since new)
                          1979 GS 1000 (The Fridge, superbike replica project)
                          1978 GS 1000 (parts)
                          1981 GS 850 (anyone want a project?)
                          1981 GPZ 550 (backroad screamer)
                          1970 450 Mk IIID (THUMP!)
                          2007 DRz 400S
                          1999 ATK 490ES
                          1994 DR 350SES

                          Comment


                            #28
                            Originally posted by Big T View Post
                            Try boiling the carbs before trying to remove the pilot jets. Or, a heat gun. Be sure your screwdriver is an exact fit. Grind one down if necessary
                            Never heard of boiling carbs before. In water or another solution?

                            Comment


                              #29
                              Tank back together. Fuel gauge sender unit back in with new seal, outer cover with drain catcher, refurbished fuel tap with inner workings and exterior seal and the fuel cap back on.

                              Still waiting on the screwdriver to get at those pilot jets. Maybe tomorrow it will arrive and I can see how good or bad a fit it will be.

                              I'm wondering about how to clean the exterior of the carbs before working on them. I don't have an ultrasonic cleaner so they are not going to go into a warm carb dip all apart. I'I figure that out tomorrow.

                              Comment


                                #30
                                Well done. Good job so far.

                                I'm CT2 Kent, if you want to borrow an Ultrasonic.

                                I boiled my carb bodies with some lemon juice and they came up quite good. Eventually got them vapour blasted for a really nice finish.


                                Be very sure the aperture in the float bowl is clear to allow fuel into the choke chamber and up the little brass pipe.


                                More details here:


                                Greetings

                                Richard (Admin on the UK GS Owners Facebook Group)
                                Last edited by londonboards; 05-03-2020, 09:02 AM.
                                Richard
                                sigpic
                                GS1150 EF bought Jun 2015
                                GS1150 ES bought Mar 2014: ES Makeover Thread AND blog: Go to the Blog
                                GS1100 G (2) bought Aug 2013: Road Runner Project Thread AND blog: Go to the Blog
                                GS1100 G (1) Dad bought new 1985 (in rebuild) see: Dad's GS1100 G Rebuild AND blog: Go to the Blog
                                Previously owned: Suzuki GS750 EF (Canada), Suzuki GS750 (UK)(Avatar circa 1977), Yamaha XT500, Suzuki T500, Honda XL125, Garelli 50
                                Join the United Kingdom (UK) Suzuki GS Facebook Group here

                                Comment

                                Working...
                                X