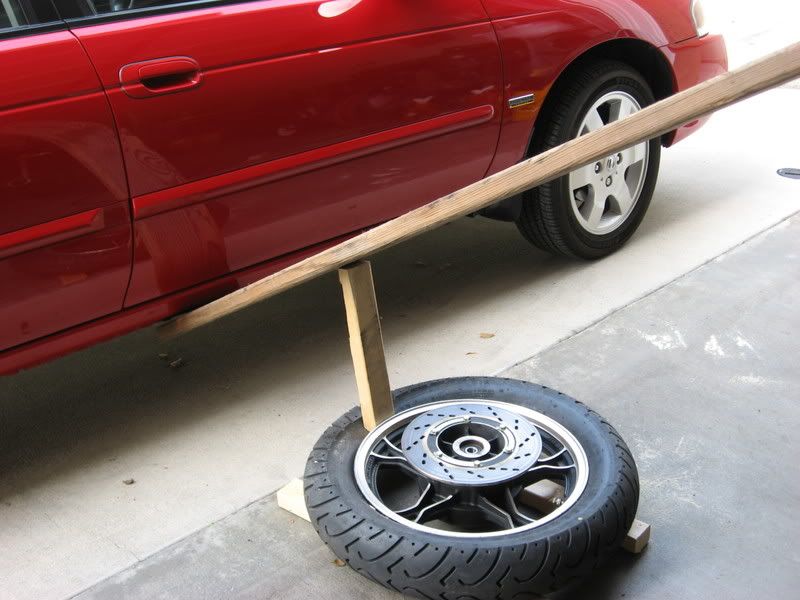
Here's the list of items, laying around the garage and kitchen, included in the picture. Nothing to assemble and much quicker, very little effort other than holding the block in place while positioning your 2x4", and a lot easier than using clamps for breaking the beads:
- 3 gallon chlorine bucket saved from pool supplies (5 gal buckets are too tall and tip easier), has to be a sturdy bucket not a flimsy cleaning bucket)
- two 6" bicycle tire irons and a flat spanner wrench (if a third pry bar or holder bar needed ....no sharp edges, valve stem tool for removal of tire valve
-1 foot sturdy metal tube for leverage on the tire iron, mine was from an old bicycle seat neck
-5 foot length of 2x4", 2 pieces of 6 or 9" length 2x3" for breaking the bead, leveraged against the frame of the underside of a vehicle and pressing down, make sure it's on the frame and not the body panel otherwise your effort to save $20-30 for tire changes goes into body work!!! NOTE: when breaking the bead, rotate the tire and press down at 12 , 3, 6, and 9 o'clock positions
-two approx 1 foot sections of 4x4" for when flipping the tire onto so you don't damage the brake disc, small piece of 1/4 or 1/8" plywood to keep the rim off the pavement and marring it up too
-Murphy's oil soap from the kitchen, 1 or 2" foam brush for applicator, old yogurt or cheese container from the recycle bin, a capful of soap to a quart of warm water is sufficient
-very fine sandpaper to clean off the bead surface of the rim before mounting the new tire, small 1" square peice of sturdier flexible plastic as a rim protector when positioning the tire iron, mine was a scrap piece of socket packaging
Everything is in the pic...hope this helps someone in their backyard remedies!!!...see bwringer's post for a homemade tire balancing setup. All this is gleaned from other posts with a little fine tuning.

.png)


Comment