.png "Powered by vBulletin")
Photos now added Basscliff and other aggregators are welcome to copy this information with credit. I welcome any feedback or corrections, as I am not an electronics expert.
This is the second time I have seen this problem and done this repair with good results. (on two different starters!)
Symptom:
Starter either feels extremely weak or has stopped spinning entirely. Sucks current and feels like a dead battery even though you know it's good.
Cause:
Magnets broke off case inside starter.
Starter removal:
Similar but varies depending on your bike. This will almost always require removing the carbs. The bike for this project was an 82 GS650GL. In this case, pulling the carbs is done by loosening all the boot clamps & intermediate airbox, and pulling back as far as possible to free the carbs in the front first by tilting up, then the back by tilting down. TIP: on CV's usually the accelerator cable bracket can be removed before trying to slide the carbs out. This makes life much easier. Note only remove the bracket, not the accelerator cable itself. This comes off after the carbs are partway out. On re-installation, remember to put the accelerator cable back on before you slide the carbs in or you will never get it back on. Slide the carbs out, release the cable. Now we can actually get to the starter.
2-3 bolts hold the cover on, then there should be two bolts on the back of the starter and the not holding on the power wire. Be careful freeing the power wire. Hold on to the wire so the post doesn't spin. this doesn't always happen, but does sometimes. If it does, you could spin the tower enough to rip the wire it is attached to.
That's it, just pull it out. Nothing more to it.
Starter disassembly:
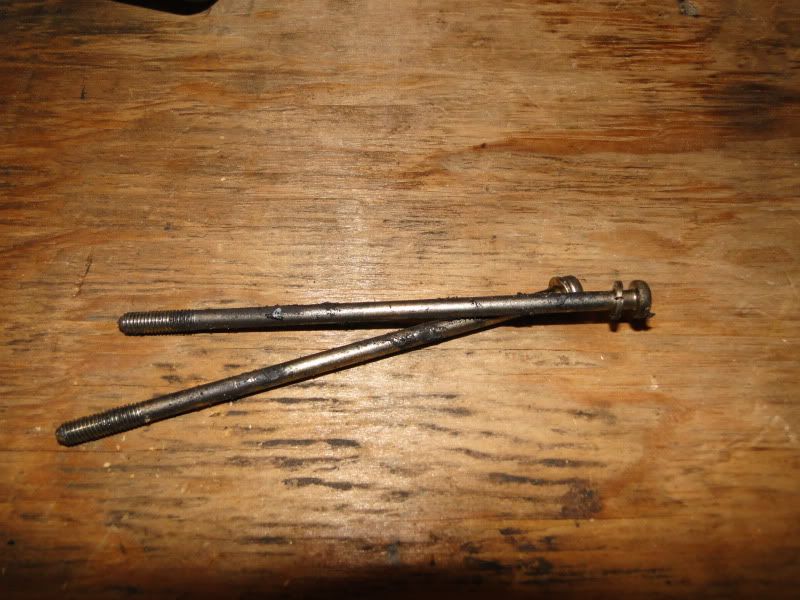
Remove the two long screws.
Carefully pull apart the starter, and you will get:
Front cover(shown still attached to body)
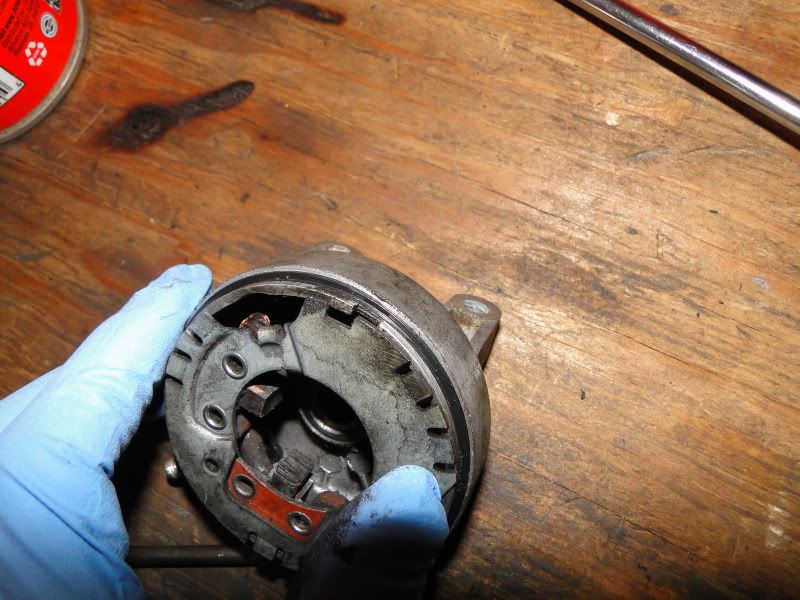
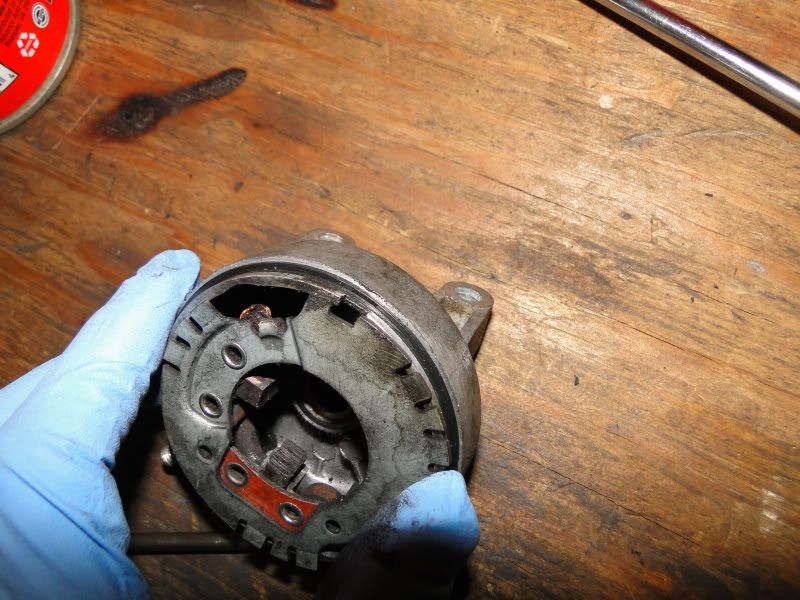
Back cover with brush assembly attached (try to keep close to the position it came off at)
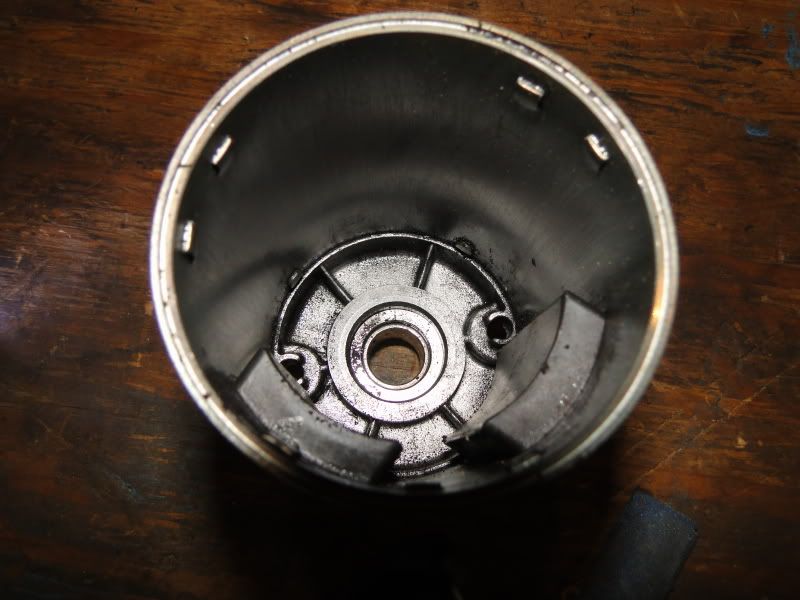
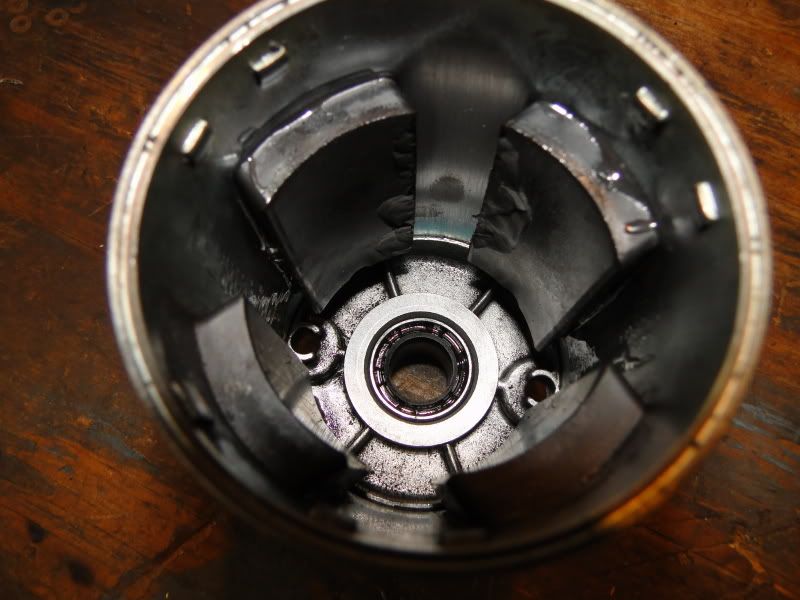
Body w/ magnets

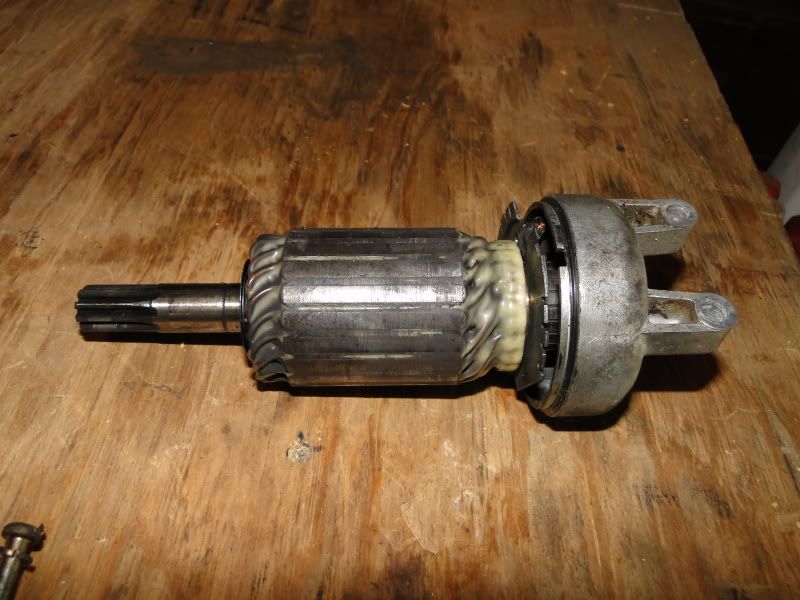
Armature w/shims (try to keep track of which went where, or leave on the armature).
Cleanup:
Make sure you have plenty of meat left on the brushes. If not, will need some new ones. cleanup any burrs and lightly sand the surface. Do the same to the commutator (where the brushes touch) and the armature surface (What passes by the magnets).
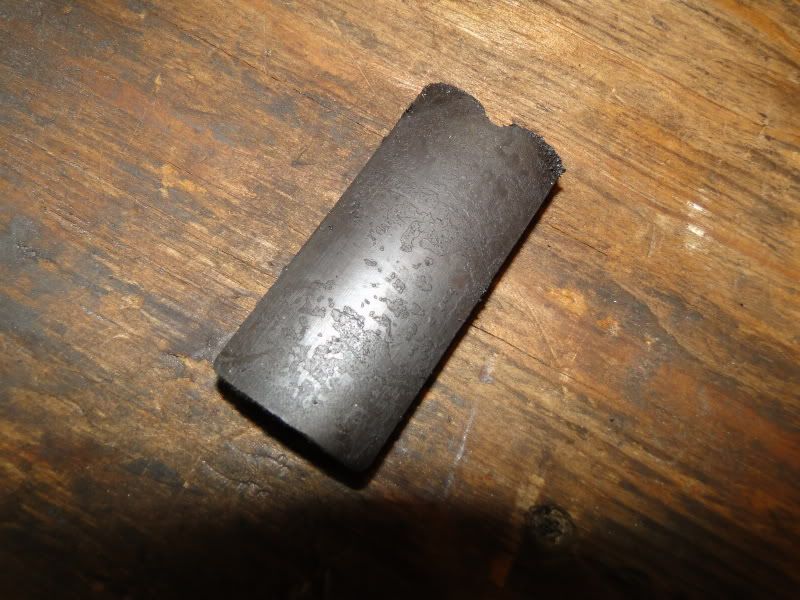
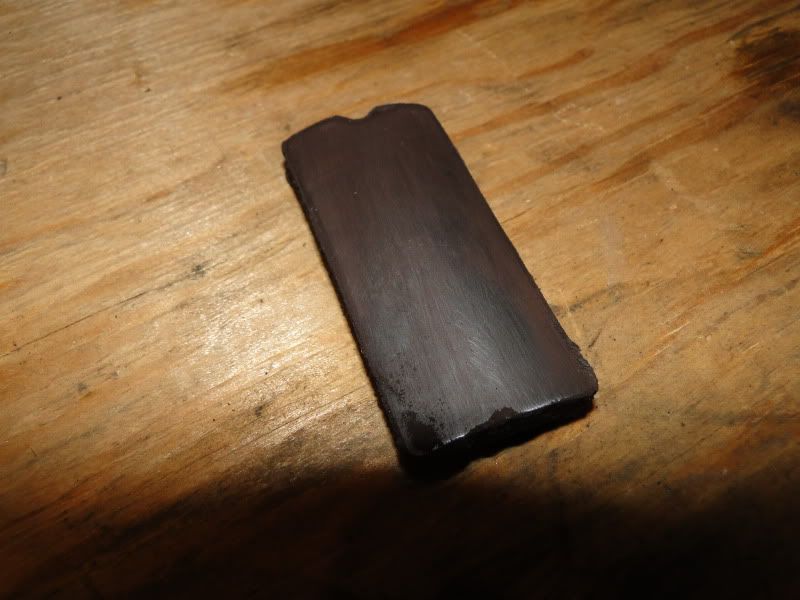
If your failure was like mine (30 year old epoxy broke down and the magnets slipped into each other), then you have some cleanup to do. Pull out the loose magnets and try to blow off/wipe off all the little magnet bits that went everywhere. The magnet will still work fine even with a serious chip in it.
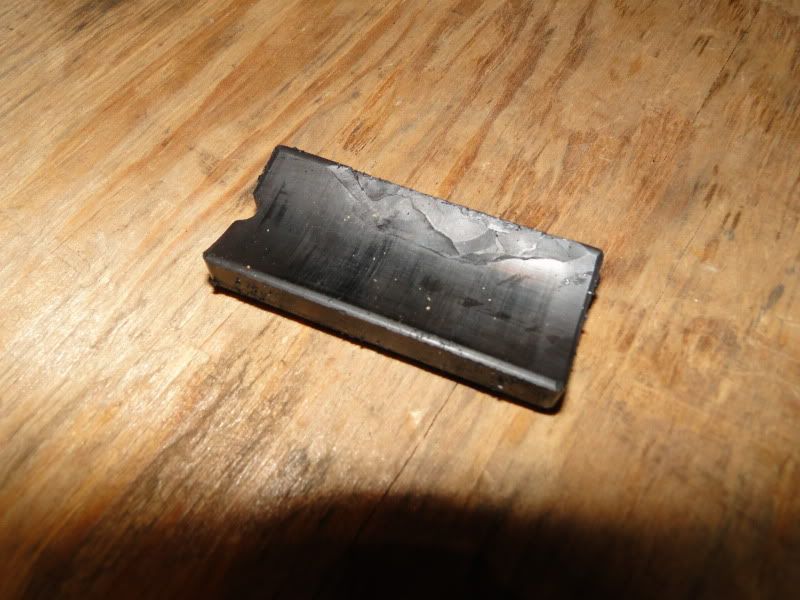
Sand all old epoxy off the back of the magnet and the inside of the body. Clean with a solvent, repeat, repeat, until you are 100% sure there is no grease to compromise your repair.
If you lost more than one magnet, or are redoing the epoxy on all for good measure, you will have to keep track of which magnet went where. LEAVE ONE IN so you can do the other three without getting confused. There are two types of magnets, N-S and S-N. Around the circle, it goes A, B, A,B. Magnets of the same type will spoon each other but won't look each other in the eye. Magnets of the opposite type won't spoon, but will go back to back or face to face.
In other words, if a magnet spoons another magnet, they should be opposite in the body. If it won't spoon, they should be 90 degrees apart.
The one in the photo needs to go opposite the one it is touching, since it is the same type.
CONTINUED BELOW:
This is the second time I have seen this problem and done this repair with good results. (on two different starters!)
Symptom:
Starter either feels extremely weak or has stopped spinning entirely. Sucks current and feels like a dead battery even though you know it's good.
Cause:
Magnets broke off case inside starter.
Starter removal:
Similar but varies depending on your bike. This will almost always require removing the carbs. The bike for this project was an 82 GS650GL. In this case, pulling the carbs is done by loosening all the boot clamps & intermediate airbox, and pulling back as far as possible to free the carbs in the front first by tilting up, then the back by tilting down. TIP: on CV's usually the accelerator cable bracket can be removed before trying to slide the carbs out. This makes life much easier. Note only remove the bracket, not the accelerator cable itself. This comes off after the carbs are partway out. On re-installation, remember to put the accelerator cable back on before you slide the carbs in or you will never get it back on. Slide the carbs out, release the cable. Now we can actually get to the starter.
2-3 bolts hold the cover on, then there should be two bolts on the back of the starter and the not holding on the power wire. Be careful freeing the power wire. Hold on to the wire so the post doesn't spin. this doesn't always happen, but does sometimes. If it does, you could spin the tower enough to rip the wire it is attached to.
That's it, just pull it out. Nothing more to it.
Starter disassembly:
Remove the two long screws.
Carefully pull apart the starter, and you will get:
Front cover(shown still attached to body)
Back cover with brush assembly attached (try to keep close to the position it came off at)
Body w/ magnets
Armature w/shims (try to keep track of which went where, or leave on the armature).
Cleanup:
Make sure you have plenty of meat left on the brushes. If not, will need some new ones. cleanup any burrs and lightly sand the surface. Do the same to the commutator (where the brushes touch) and the armature surface (What passes by the magnets).
If your failure was like mine (30 year old epoxy broke down and the magnets slipped into each other), then you have some cleanup to do. Pull out the loose magnets and try to blow off/wipe off all the little magnet bits that went everywhere. The magnet will still work fine even with a serious chip in it.
Sand all old epoxy off the back of the magnet and the inside of the body. Clean with a solvent, repeat, repeat, until you are 100% sure there is no grease to compromise your repair.
If you lost more than one magnet, or are redoing the epoxy on all for good measure, you will have to keep track of which magnet went where. LEAVE ONE IN so you can do the other three without getting confused. There are two types of magnets, N-S and S-N. Around the circle, it goes A, B, A,B. Magnets of the same type will spoon each other but won't look each other in the eye. Magnets of the opposite type won't spoon, but will go back to back or face to face.
In other words, if a magnet spoons another magnet, they should be opposite in the body. If it won't spoon, they should be 90 degrees apart.
The one in the photo needs to go opposite the one it is touching, since it is the same type.
CONTINUED BELOW:

Comment