Announcement

Collapse
No announcement yet.

POR-15 Fuel Tank Repair Kit - Lessons Learned and Proper Application

Collapse
X
 
  • Filter
  • Time
  • Show
Clear All
new posts

    POR-15 Fuel Tank Repair Kit - Lessons Learned and Proper Application

    I've read a bunch of posts on this forum about restoring and sealing rusty gas tanks. A few different manufacturers products were discussed and pros and cons listed. I restore vintage Japanese bikes for a hobby, so I've done well over a dozen gas tanks so far. At this point my favorite restoration kit is the POR-15 Motorcycle Fuel Tank Repair Kit.

    FIRST THING: None of these kits will work properly unless you follow the instruction for use exactly. Don't skip steps and don't rush through any of the steps. If you do, you will have wasted your time and your tank will not be properly sealed.

    NOTE 1: If you have a tank that was previously sealed but the old sealant is failing, you will need the POR-15 Motorcycle Fuel Tank STRIP and Repair Kit, which also contains a stripper to remove the old failing sealant first.

    NOTE 2: A very easy way to plug large round openings in the tank is to use Oatley Test Plugs. They are available in various sizes in the plumbing section of Home Depot or Lowe's.

    OK, here are my personal instructions for success with the POR-15 Motorcycle Fuel Tank Repair Kit:

    The very first thing to do is to determine just how extensive your tank rust is. If there are just a few spots throughout the tank that are rusted (usually at the bottom) then the POR-15 kit's second step (Metal Prep solution) will be sufficient to remove the rust. However, if you have a tank that is almost all rusty inside, then you have to de-rust that tank with something else before starting with the POR-15 kit. This kit, and most others as well, do not have enough rust remover to deal with an entire tank full of rust.

    The best and most safe rust remover I've used is "EvapoRust". Not caustic and you can safely pour it down the drain when its used up. It can be re-used until it's very dark in color, almost black, which means it can't take any more rust. Not all auto parts stores carry it. O'Reilly's is the only one around here that carries the gallon jugs of it. It's expensive, so buying it by the quart is not the way to go. A gallon costs over $20.00. But it's worth it. The stuff is amazing. I usually buy enough to fill half the tank. I pour the two gallons or so in the tank and let it sit in various positions for at least several hours at a time. Back down- front down - bottom down - left side down - right side down - top down. So that means you'll have the stuff in there for probably two whole days. This will get rid of the 99% of the rust.

    Don't rinse the EvapoRust out of the tank with water until you're ready to start with the POR-15, otherwise the tank will quickly flash-rust. Once rinsed out with lots of plain water, you are ready to start with the POR-15 Kit.

    The POR-15 kit actually comes with pretty good instructions, but I will expand upon those and hopefully my experience using the kit will help others.

    The first stage is the Cleaner/Degreaser (used to be called "Marine Clean" in the older kits). This is mixed with a quart of warm water and then goes in the tank and gets sloshed around manually for 20 minutes and then rinsed out with water. Cleaner/Degreaser removes the gum and varnish deposits from the old fuel that was in the tank.

    The second stage is the Metal Prep. This is the POR-15 rust remover. It also prepares the metal for sealing by making it acidic. This goes in the tank and gets sloshed around manually for 20 minutes. After the sloshing, you have to let the tank sit in various positions again for about 15 to 20 minutes each to let it act on each inside surface of the tank to remove any remaining rust. POR-15 instructions say to not let it in the tank longer than 2 hours total. Remember that this is only a quart of stuff that you put in a 3 to 5 gallon gas tank, depending on model. So it needs to be positioned so that the stuff contacts each surface inside the tank for 15 to 20 minutes. Then you have to rinse that stuff out with WARM water, not cold water from a hose. It has to be rinsed SEVERAL times to be sure to get all of the Metal Prep solution out.

    Now the most important step that can screw the whole thing up if not done right. The tank must now be COMPLETELY DRIED before the Sealer is poured in. There are going to be spots in the tank that hold water but you've got to spend the time to get it bone dry inside. The recommended way to dry it is to open all of the plugged holes in the tank and use a hair dryer or a hot air gun to blow hot air into the gas tank filler hole. If you decide to use a hot air gun, be careful, you can melt the paint right off your tank if you're not careful. Best to use a hair drier for this. Also, I've learned to do these tank restorations outdoors on a hot sunny day. The hot sun is a great help in this drying process. In between sessions of blowing hot air into the tank with a hair dryer I let the gas tank bake in the sun for 10 to 15 minutes at a time. TIP: If after about a half an hour, between the hair dryer and baking in the sun, your tank is so hot that you can't pick it up with your bare hands for more than a few seconds, you can be pretty sure that it is bone dry inside. That's how I measure success when drying. If it's not bone dry and you pour in the tank sealant, it's not gonna stick to the metal and you get to star all over! (You don't want that because this sealant is nasty, like liquid metal, and doesn't clean up well at all.)

    NOTE: Once the tank is completely dry, you'll notice that flash-rust (a light reddish-brown surface color on the metal) will have already started to form inside the tank. Don't fret, that's normal and there's nothing you can do about it. The Tank Sealer will adhere to and seal the tank with the flash-rust on it. Just don't wait for very long after the tank is dry to start the Fuel Tank Sealer process.

    Last stage is the Fuel Tank Sealer. You want to start this as soon as the tank is completely dry because flash-rust will start forming. As mentioned this is like liquid metal and it's nasty to get off of stuff, like your fingers and your gas tank! Wear some rubber gloves. If you get it on your tank and don't wipe it off immediately you're in trouble. If you get any on your fingers, get it off or else you'll be getting it on everything that you touch. It's best to cover at least the top of your tank about 6" to 8" around the filler hole with something. I use painters tape. It holds good enough to keep out the goop, but not so tight that it may pull the paint off of a very old tank. Don't use duct tape on the painted surfaces of your tank! I've had duct tape pull paint off of an old tank before! Use an old funnel to pour the sealer into your tank. If you miss and pour some on the tank, you're gonna be mad. Use an old funnel that you can throw out when you're done, or make a funnel out of paper like I do, then just throw that out. Now seal up the filler hole and do the SLOW ROLL. You have to slowly roll the tank into all possible positions to get the sealer to cover the entire inside of the tank. SLOW roll is the operative phrase. The stuff is thick like molasses so if you roll too fast it can't keep up. Roll nice and slow. I usually roll for about 10 to 15 minutes total.

    Last important step is to get any remaining sealer drained out of the tank. If you have any excess, it will pool in the tank usually down low, and that's a bad thing. It can refuse to harden and may block fuel flow. You can usually get it to drain out of the fuel petcock hole. That usually works. Sometimes you just can't get it all out of the fuel petcock hole but you can still see some pooling through the gas tank filler hole if you tip the tank in the right direction. A time or two I had to use some small pieces of paper towels (about 4" x 4") inserted into the tank with a long-neck parts grabber to soak up some of the excess that wouldn't drain out of the fuel petcock hole. If you do this, be sure to use heavy duty shop paper towels, not the wimpy white ones from your kitchen. Those might rip and then you'll be fishing pieces of paper out of your tank. Also be careful not to get any sealer on your tank when you pull the paper towels out of the filler hole. Have something ready to drop the sealer coated paper towels into when you take them out. Like I said the stuff is nasty to clean up once its on something.

    Be sure to rinse the sealant off of your Oatley test plug(s) as soon as you remove them from the tank or you'll never be able to reuse it. Also, don't be tempted to rinse sealant off of anything in a sink in your house! This stuff dries hard like metal and you don't want it in your house drains. Mama won't be happy! Do all your rinsing outside with a hose.

    Now the tank has to cure for at least 4 days before you can put fuel in it. Don't short change the curing time. 4 days minimum! Setting it somewhere in direct sunlight helps the curing process. All plugged holes should be open for curing.

    So... those are my lessons learned and tips from doing several tanks with the POR-15 Kit. Hope that helps others get their tanks cleaned and sealed properly.

    POR-15 Kit and Tank.jpg
    Last edited by Guest; 11-15-2018, 11:33 AM.

    #2
    Thanks for the detailed description and tips, Wingman.
    It has been years but i was successful with the first 2 tanks i did with Por-15 but in the third tank the liner peeled after a week. Assumed i had not let it cure long enough.
    The only question i have is about the damage that Step 1 cleaner/degreaser and Step 2 metal prep can do to the paint if spilled?

    I took great care not to get ANY of the kit on the paint.
    2@ \'78 GS1000

    Comment


      #3
      Nice writeup! We have had a bunch of threads about tank repair but nothing with that much information all in one post!

      If I might add a few comments...based on restoring a number of tanks myself...


      1) If there is an old liner in the tank that will have to be removed first. A variety of chemicals can be tried, from acetone to MEK and finally paint stripper, depending on the chemical composition of the original liner. Some media in the tank, such as sharp edged uncoated aquarium rocks, will help scrub the metal and release the liner. Some people use drywall screws and the like but those don't touch all the tank surfaces like the smaller aquarium rocks. They are easier to remove though.

      2) Varnish stripping needs to be the done before derusting. That's because the derusting sauce won't be able to get to the metal if it's covered in varnish.

      3) Use an inspection mirror and flashlight to look all around inside the tank to verify progress during each step. Don't assume that one step is complete just because you look down into the filler opening and see all the rust is gone for example. Be sure to look all through the tank.

      4) The Por-15 rust dissolver chemical is phosphoric acid, which is a great product. You can cut this stuff with water and it will work fine, just a little slower. A quart will do the complete tank but you need to shake the tank to keep the metal wet for a few hours. I wouldn't worry if you go past two hours just don't leave it for days. if you want to get done fast you can buy a gallon of phosphoric acid from Home Depot, sold as Kleenstrip Etch and Prep, for about $16. Throw this into your tank and rotate it through various positions and the tank will be rust within that two hours for sure.

      5) After rinsing out the phosphate sauce some isopropyl alcohol in the tank will speed drying. A hair drier aimed at the opening, while the other various tank openings such as the petcock and fuel gauge sensor are removed, will allow air to flow through the tank and dry it completely in less than an hour.

      6) Caswell's epoxy sealer is excellent stuff and super thick. I think this is a superior material if your tank has weak metal. Por-15 is excellent as well but it's a paint and much thinner.

      7) When coating, keep the material moving inside the tank for about 30 mins and then open the petcock opening and remove most of the excess. Once the stream stops flowing plug the petcock hole back up and start rotating the tank some more. You can watch through the tank opening while a puddle of sealer continues to move. If you pay attention to where the material is flowing you can get an extra coat or two down inside the tank just from the excess material that's still flowing. The ideal situation is to keep this puddle flowing and laying down extra layers until it kicks off and stops flowing. I think this is one of the critical elements that assures a good thick layer of sealer is layed down.

      Good fun
      Last edited by Nessism; 11-17-2018, 12:44 PM.
      Ed

      To measure is to know.

      Mikuni O-ring Kits For Sale...https://www.thegsresources.com/_foru...ts#post1703182

      Top Newbie Mistakes thread...http://www.thegsresources.com/_forum...d.php?t=171846

      Carb rebuild tutorial...https://gsarchive.bwringer.com/mtsac...d_Tutorial.pdf

      KZ750E Rebuild Thread...http://www.thegsresources.com/_forum...0-Resurrection

      Comment


        #4
        Originally posted by steve murdoch View Post
        Thanks for the detailed description and tips, Wingman...

        The only question i have is about the damage that Step 1 cleaner/degreaser and Step 2 metal prep can do to the paint if spilled?
        If you spill any of the cleaner/degreaser or metal prep on the tank paint, it's not a big deal. It's not nasty like paint remover or paint thinner. Just wipe it off as soon as possible after you spill some and you'll be fine.

        It's the sealer that is nasty to get off of stuff. If you spill any on the paint it won't eat the paint, but it's hard to clean off, so get it off immediately. That's why it's best to put some painter's tape over an area around the top of the fuel filler hole like I showed in my picture.

        Comment


          #5
          Originally posted by Nessism View Post
          Nice writeup! We have had a bunch of threads about tank repair but nothing with that much information all in one post!

          If I might add a few comments...based on restoring a number of tanks myself...

          5) After rinsing out the phosphate sauce some isopropyl alcohol in the tank will speed drying. A hair drier aimed at the opening, while the other various tank openings such as the petcock and fuel gauge sensor are removed, will dry the tank completely in less than an hour.

          7) When coating, keep the material moving inside the tank for about 30 mins and then open the petcock opening and remove most of the excess. Once the stream stops flowing plug the petcock hole back up and start rotating the tank some more. You can watch through the tank opening while a puddle of sealer continues to move. If you pay attention to where the material is flowing you can get an extra coat or two down inside the tank just from the excess material that's still flowing. The ideal situation is to keep this puddle flowing and laying down extra layers until it kicks off and stops flowing. I think this is one of the critical elements that assures a good thick layer of sealer is layed down.

          Good fun
          These 2 pieces of advice that Ed gave me a while back made all the difference, using isopropyl alcohol after the fresh water rinse almost eliminated the flash rust, I also used an air compressor to expel some of the excess water before using the heat gun.

          After draining the excess product and then taking my time rotating the tank and not getting distracted while the POR 15 sets up, I got really good coverage over the frame hump, so it looks almost factory original when you remove the fuel cap to take a peek.

          Thanks for the great write up.

          David.
          2018 Honda Africa Twin AS
          2013 DR 650 Grey, sold 1981 GS 650E Silver,

          1980 GS1000ST Blue & White, X2

          2012 DL650 Vstrom Foxy Orange, in storage
          1981 CT110 X2 "Postie Bikes" Gone to a New Home.
          2002 BMW 1150 GS Blue & White - Sold
          1975 BMW R90/6 Black - Sold 1984 GS1150EF Sold
          1982 BMW R100 Africa trip, Stolen - Recovered- Sold
          1977-1980 Suzuki GS550, GS1000E, GS1000S GSX750, GSX1100,s
          Hondas ST90, CR125 CB175 , CB350 CB750, NSU Quickly, Yamaha RD's 350/400,

          Comment


            #6
            Super helpful info here. Thanks WingMan71! And thanks Salty_Monk for the link to this thread.


            Originally posted by Nessism View Post
            .................................................. ..
            6) Caswell's epoxy sealer is excellent stuff and super thick. I think this is a superior material if your tank has weak metal. Por-15 is excellent as well but it's a paint and much thinner.
            .................................................. ...........
            In light of this, maybe the Caswell's is the way I should go. I don't see any rust but for some reason the bottom of the tank just sprang a tiny slow dripping leak.

            On the other hand, since it is cold and I don't want to wait all winter to do this, sloshing cold molasses does not sound productive. If Por15 is more like paint will it still seal up pinholes?
            Roger

            Us states ridden (2024_10_06 18_48_44 UTC).png

            Comment


              #7
              Great write up. The only thing I can add is about the frame hump David mentioned. You can't see it once you tape up the fuel opening and unlike the other surfaces which will have the sealer flow onto them as you rotate the tank, the hump doesn't get coated all that well sometimes. Just make sure when you pour the sealer into the tank you do it through the fuel opening as mentioned and not through the fuel sending unit hole so you can see it coat the hump as you pour. Don't ask how I know. LOL. With the kit they say to use the whole can so I just left the lid off it to get an idea of how long it takes to dry. 4 days is probably enough time but leave it longer if you don't need to use the tank just to be safe. I did mine before a vacation so it dried for about 3 weeks while I was away ....probably extreme overkill. Also to avoid puddling, when I was sure the tank was coated I just laid it upside down on the top of tank for a few minutes and then slowing rotated it towards the side with the petcock then pulled the tape off the hole a let the excess drain while the tank cured. I also put short 6mm? grub screws into the petcock bolt holes to keep them from getting plugged with sealer and to keep the tape flush and smooth.
              '84 GS750EF (Oct 2015 BOM) '79 GS1000N (June 2007 BOM) My Flickr site http://www.flickr.com/photos/soates50/
              https://farm5.staticflickr.com/4306/35860327946_08fdd555ac_z.jpg

              Comment


                #8
                Originally posted by Burque73 View Post
                Super helpful info here. Thanks WingMan71! And thanks Salty_Monk for the link to this thread.

                In light of this, maybe the Caswell's is the way I should go. I don't see any rust but for some reason the bottom of the tank just sprang a tiny slow dripping leak.

                On the other hand, since it is cold and I don't want to wait all winter to do this, sloshing cold molasses does not sound productive. If Por15 is more like paint will it still seal up pinholes?
                The POR-15 sealant is pretty thick, thicker than most paints, and it will seal small pinholes.

                But, my experience with many tanks has shown better results sealing pinholes with a "hit-it-from-both-sides" approach.

                I use a Permatex Fuel Tank Repair kit for sealing pinholes from the outside of the tank first. Then, when that's completely dry, I do the POR-15 kit on the tank.

                The Permatex Fuel Tank Repair is a stick of sealant that is the consistency of thick plumber's putty. You pinch a piece off of the stick and squeeze some onto and through the pinholes from the outside of the tank and let it harden. If you want, once cured, you can sand it smooth before you touch up the paint.

                The stuff can even be applied to fuel wet metal to seal pinholes with gas still in the tank! Did that once in an on-the-road emergency and it worked.

                I'll attach a picture so you can go buy the stuff if you want.

                Permatex Fuel Tank Repair.jpg

                Comment


                  #9
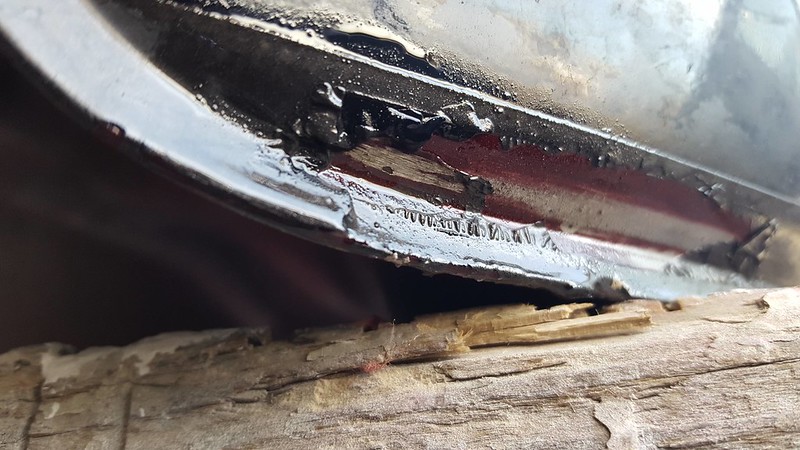
                  Cool! Thanks for the info on Permatex. I'll definitely use it first. Looks like the PO filled a few spots with something, then repainted a strip around the bottom of the tank, which is blistering up from the gas. I'm afraid more holes may open if the whole thing isn't lined. It's a pity since there isn't any rust. Maybe just weak spots in the steel? The factory paint didn't blister, just the repair coat. The pic looks worse than it actually is.

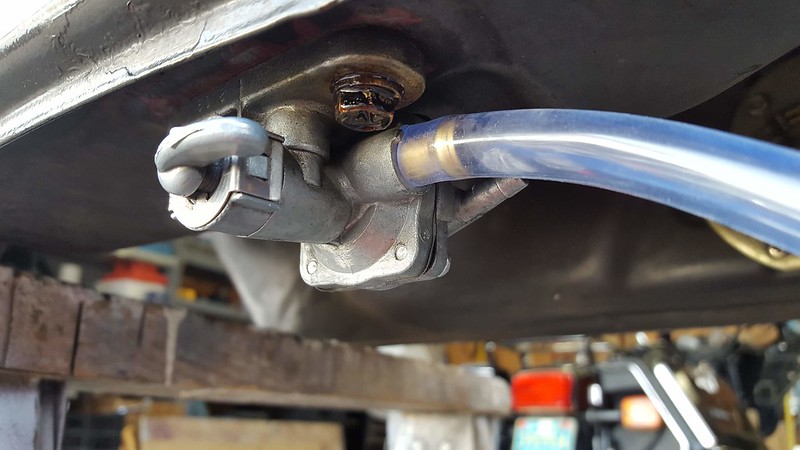
                  The petcock bolts are pretty wet too, never noticed that before. At least the valve itself doesn't appear to be leaking. I can't drain the last tiny bit of gas out until the petcock or sending unit is removed. Must be a real bear to get the excess sealer out!

                  Roger

                  Us states ridden (2024_10_06 18_48_44 UTC).png

                  Comment


                    #10
                    Leaks around the bottom seam often occur because there was water in the gas. Good chance the metal in the vicinity of the leak is rusted too and when you derust the tank more holes are likely to open up (don't ask me how I know this!)
                    Ed

                    To measure is to know.

                    Mikuni O-ring Kits For Sale...https://www.thegsresources.com/_foru...ts#post1703182

                    Top Newbie Mistakes thread...http://www.thegsresources.com/_forum...d.php?t=171846

                    Carb rebuild tutorial...https://gsarchive.bwringer.com/mtsac...d_Tutorial.pdf

                    KZ750E Rebuild Thread...http://www.thegsresources.com/_forum...0-Resurrection

                    Comment


                      #11
                      Yes. Don't leave the etch in the tank for a long, long time. I ruined a gorgeous Katana tank that way. Ate through at some of the welded seams. And burned several pinholes around the bottom seam.
                      A new Katana tank ran me $600 bucks, plus decals. And I still need to get it painted, cause it doesn't match.
                      The Three Horsemen
                      '85 GS1150ES (Current Income Eater)
                      '83 GS1100ES
                      ‘77 XLCR

                      "Never ride faster than you can see. Besides, it's all in the reflexes."
                      Porkchop Express

                      Comment


                        #12
                        Timely thread, thanks for such a detailed post. I will be sealing and painting one tank, and painting only on another. My question is: How do you properly seal the new paint on the tank from fuel and fuel fumes that come out of the gas tank? In other words, how can one seal the edge of the paint under the gas cap so fuel doesnt get under the new paint. Also, has anyone found a good source for gas cap rubber seals? At one point I had seen a huge selection for aircraft applications but my searching skills are pretty basic.

                        I used Metal Rescue rust remover on the inside of one tank so far. From what I could see it had mostly light surface rust. Used 3 gallons and moved it around like you mentioned. Drained it out through the petcock and through a coffee filter and will be able to re-use it on 2 more tanks. I experienced zero flash rust after rinsing with water and the tank literally looks brand new inside. These new tank sealers are really nice and work as advertised. When I worked in the dealership, all we had was Kreem and the stuff was so hard to get right we couldn't gaurentee any work done with it. Please don't ever use Kreem
                        Current Rides: 82 GS1100E, 00 Triumph 955 Speed Triple:twistedevil:, 03 Kawasaki ZRX1200, 01 Honda GL1800, '15 Kawasaki 1000 Versys
                        Past Rides: 72 Honda SL-125, Kawasaki KE-175, 77 GS750 with total yosh stage 1 kit, 79 GS1000s, 80 GS1000S, 82 GS750e,82 GS1000S, 84 VF500f, 86 FZR600, 95 Triumph Sprint 900,96 Triumph Sprint, 97 Triumph Sprint, 01 Kawasaki ZRX1200, 07 Triumph Tiger 1050, 01 Yam YFZ250F
                        Work in progress: 78 GS1000, unknown year GS1100ES

                        Comment


                          #13
                          Limeex2, to answer your question about sealing the edge of the paint around the cap, some have used a bead of JB weld with great success.

                          BTW that Metal Rescue is a great product, I've used it on chrome parts and it worked very well, but have not used it on a tank yet.

                          David.
                          Last edited by Kiwi Canuck; 11-18-2018, 03:06 PM.
                          2018 Honda Africa Twin AS
                          2013 DR 650 Grey, sold 1981 GS 650E Silver,

                          1980 GS1000ST Blue & White, X2

                          2012 DL650 Vstrom Foxy Orange, in storage
                          1981 CT110 X2 "Postie Bikes" Gone to a New Home.
                          2002 BMW 1150 GS Blue & White - Sold
                          1975 BMW R90/6 Black - Sold 1984 GS1150EF Sold
                          1982 BMW R100 Africa trip, Stolen - Recovered- Sold
                          1977-1980 Suzuki GS550, GS1000E, GS1000S GSX750, GSX1100,s
                          Hondas ST90, CR125 CB175 , CB350 CB750, NSU Quickly, Yamaha RD's 350/400,

                          Comment


                            #14
                            how can one seal the edge of the paint under the gas cap so fuel doesnt get under the new paint.
                            Epoxy. One of the members here has had good success with jbweld(an easy to use epoxy) thinned a tiny bit...I think with acetone .... I'm sorry I can't find his posts...maybe someone else can recall? so you'd have to test it.
                            Myself, I use spar-varnish (it's a polyurethane these days, by the way) It seems pretty good. I haven't had it fail in a spill yet . It can be polished too 'though it never quite comes up to laquers.

                            Comment


                              #15
                              If you have pinholes and no hope for the outside paint then go ahead and slather on some JB Weld or similar. No worry about it looking ugly since you can sand it off after sealing. You just need to make the tank fluid tight so the phosphate sauce can do it's job. And if you use Caswell's sealer you won't have to worry about thin metal because it's killer killer thick and will reinforce the metal. In fact, you really should cut the sealer before application to the max allowable (instructions on can.) They say you can use half a can and that may be true, but it's just so thick and it flows so poorly that I recommend you to use the full can or at least 3/4 otherwise you may not get complete coverage. It's really critical to use that mirror and look around in the tank to make sure you get all areas of the hump and at the top surface of the tank, such as around the filler opening. I fixed one tank that was just filled with pinholes and it sealed nicely. After the caswell's it was a few pounds heavier too!
                              Last edited by Nessism; 11-18-2018, 06:08 PM.
                              Ed

                              To measure is to know.

                              Mikuni O-ring Kits For Sale...https://www.thegsresources.com/_foru...ts#post1703182

                              Top Newbie Mistakes thread...http://www.thegsresources.com/_forum...d.php?t=171846

                              Carb rebuild tutorial...https://gsarchive.bwringer.com/mtsac...d_Tutorial.pdf

                              KZ750E Rebuild Thread...http://www.thegsresources.com/_forum...0-Resurrection

                              Comment

                              Working...
                              X