Announcement

Collapse
No announcement yet.

Drilling rotors

Collapse
X
 
  • Filter
  • Time
  • Show
Clear All
new posts

    Drilling rotors

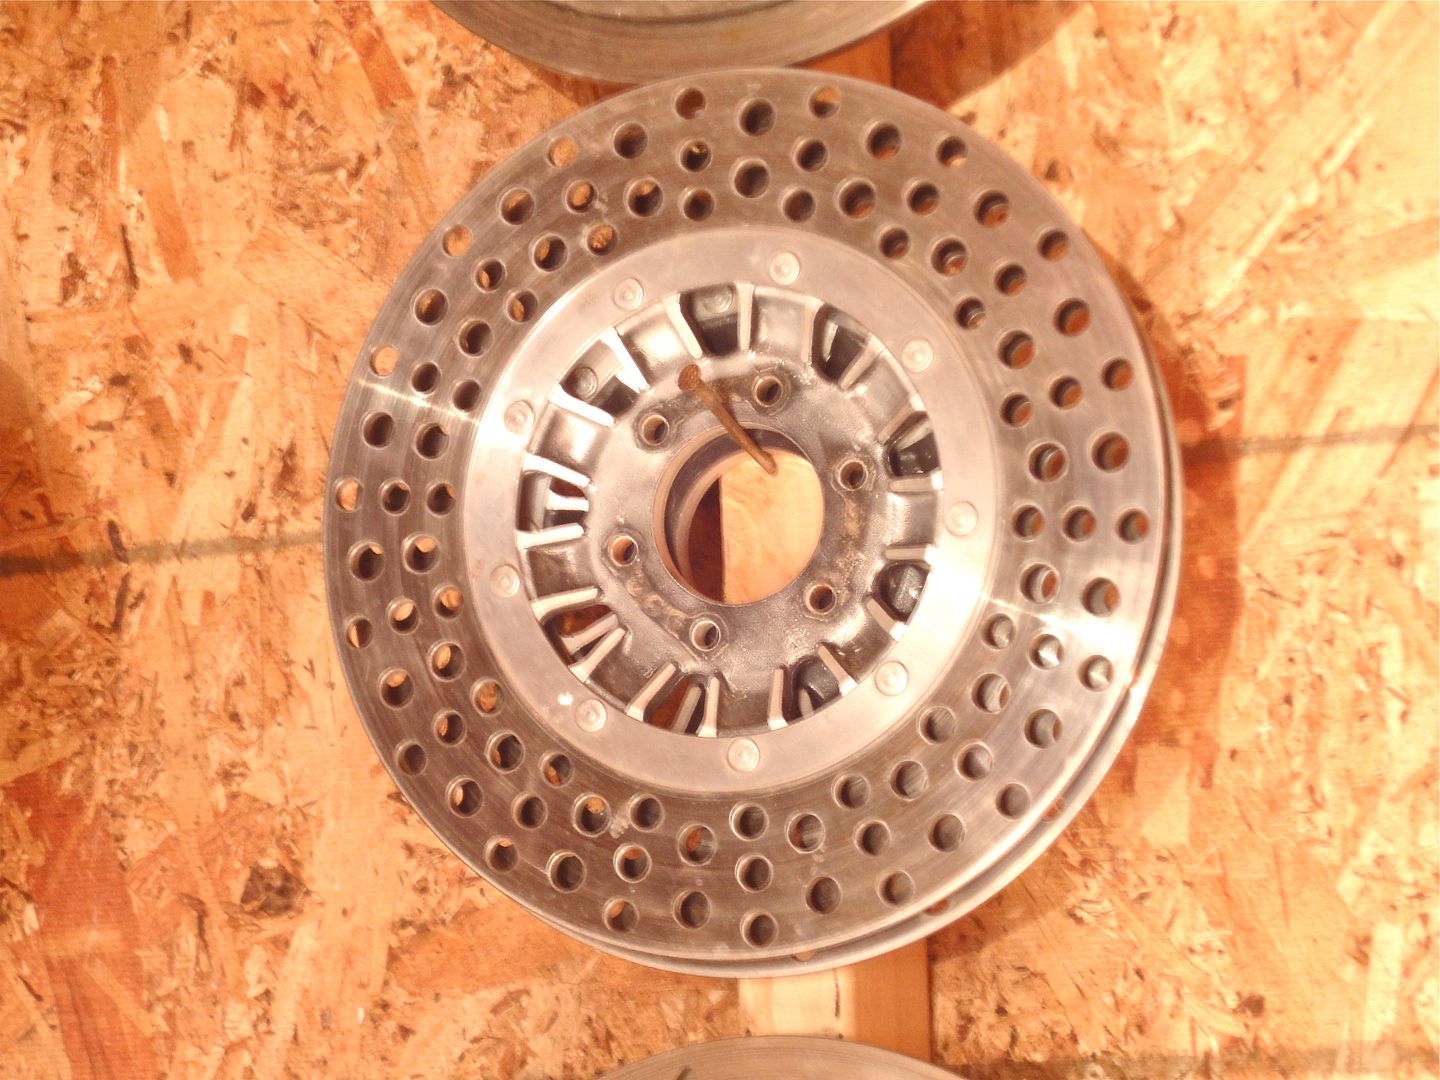
    A long dry autumn has pushed to the back of the pile of jobs to do ,the need to drill rotors to hopefully reduce wet fade.
    On the 150km ride home tonight was suddenly shocked (though fully expecting it)at just how bad and absolute the loss of braking was.
    Funny how that 3-4+ seconds can seem like minutes waiting for the brakes to dry at 100km/h though give the bike its due has only 300km on pads which were only just starting to have some bite.
    Has anyone reading this have any info on the required chamfering of the drillings, such as angle of countersink,few bigger holes vs lots of smaller holes? have not had an opportunity to closely inspect more modern rotors but suspect chamfer is shallower than std. 90 degree countersink.Have a selection of bearing balls to lightly hammer in the holes to compress the hole edge to hopefully suppress the formation of cracks
    Favouring 5 smaller holes laid out on an shallow involute curve with inner hole centred on each of 6 disc spokes .
    Won,t be able to get to drill them till next weekend so with a few probably wet miles to do this week i'm gonna file/hacksaw some grooves in the pads so disc rotation helps fling the water out from disc to see if that helps.Works really well on drum brake shoes quartering the drying time on my trusty old Triumph so can't hurt to try it on the new ungrooved pads.
    Any advice is welcome and thanks in advance.cheers

    #2
    No need to counter sink the holes, just deburr them properly and you will have no problems with cracking.
    Not too sure about the ball bearing thing, I would steer clear of hammering on them.

    Comment


      #3
      I have drilled hundreds of rotors. It is important to make sure that the holes "overlap" each other, or the pads will leave ridges in the rotor. No special drills are needed, just centerpunch the pattern carefully, and use a center drill to start all of the holes. My album shows a set of gs850 rotors that I drilled. I can supply a pattern that you can cut out, place on your rotor, and center punch the holes. If interested, pm me.

      Comment


        #4
        I do have this pair of rotors that came off of my '79 Cooley from when it was raced back in the day.


        I am not afraid to ship to New Zealand.
        PM if interested.

        Eric

        Comment


          #5
          Originally posted by fnkvn View Post
          I have drilled hundreds of rotors. It is important to make sure that the holes "overlap" each other, or the pads will leave ridges in the rotor. No special drills are needed, just centerpunch the pattern carefully, and use a center drill to start all of the holes. My album shows a set of gs850 rotors that I drilled. I can supply a pattern that you can cut out, place on your rotor, and center punch the holes. If interested, pm me.
          I'd be interested in a couple of those patterns. I have a crap ton of rotors, and a drill press might be a fun project.

          Comment


            #6
            I think it would be a lot easier to buy a used set of slotted rotors off of ebay. I just got a replacement pair of them for about $20 shipped. (got lucky)

            Comment


              #7
              Here's a set I drilled from my old 850G:


              I can mail a pattern to anyone who sends me a self addressed stamped envelope. PM me if interested.
              Last edited by Guest; 04-30-2012, 09:45 AM. Reason: added notes.

              Comment


                #8
                I also have done a ton of them and I found some are easier to do than others. GS disks, for some reason, seem harder than those from Yamaha or Honda so take longer to cut.

                I have used standard drill bits but I find using an "end mill" (milling machine bit) to cut better. Use lots of oil and set your drill to the slowest speed. I also find using a small C clamp to hold the work to the table saves a lot of skipping and chattering.

                As mentioned, there is no need for fancy chamfering or peening the holes infact, a deburred 90 deg. cut is preferred for keeping the pads clean and true. Just be sure, as also mentioned, to stagger the holes. Any pattern will do so you can get creative. Lay it out on a piece of paper and use the pattern to centerpunch on to the disk. Make the punch marks well defined to stop the drill bit from skidding when first introduced.

                The first disk will take time to do but with practice you will find economies of motion and speed will go up.

                Good luck now show us what you can do.

                Cheers,
                spyug

                Comment


                  #9
                  Although your main intent seems to be for water shedding, you might be interested to know that drilling the disks will also help when it is dry. The inner surface of the holes increases the surface area of the disk that is available for cooling, so the disks will run cooler and last longer.
                  I ride many bikes.
                  Some are even Suzukis. :D

                  Comment

                  Working...
                  X