Excited to finally be getting some nice suspension mods. I recently disconnected by anti-dive and got steel braided lines and now I've put in Sonic Springs and Race Tech Emulators. The job is not buttoned up yet but here's what I've done so far.
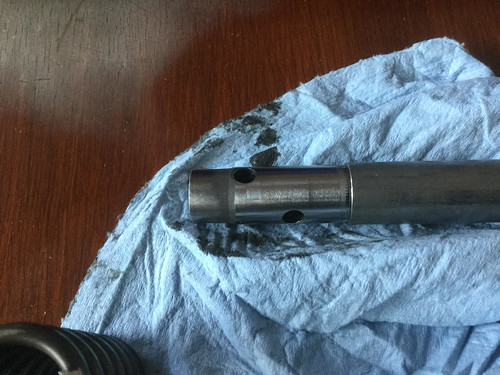
Here is the bottom of the stock damper:
 Stock damper by Gary L, on Flickr
For the uninitiated, the bottoming cone (described as the “oil lock” in the parts fiche) traps the fork fluid so that it has to go through the anti-dive units to travel in and out of the damper. I marked the damper so that I could email the pic to Race Tech to make sure I was doing this step correctly. (Then he showed me where to find an example on their website).
This shows the placement of the bottoming cone and washers.
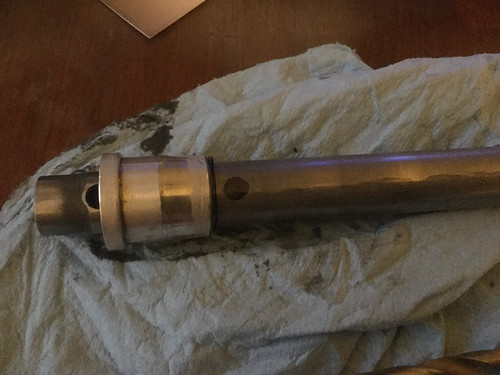 stock damper marked for first bypass hole by Gary L, on Flickr
Drilling 1/4" holes like this bypasses the anti-dive completely and allowed me to make some simple and quick anti-dive block offs that don't require a fluid passage. EDIT: MODIFYING TO INCLUDE FLUID RELIEF PASSAGE AT ANTI-DIVE IN ADDITION TO THESE BYPASS HOLES.
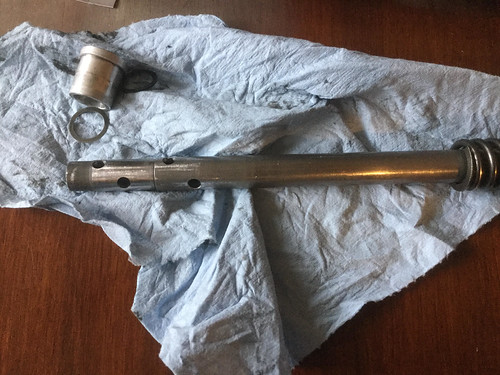 Modified damper w anti dive bypass holes by Gary L, on Flickr
ThankPlacement of top out cone and washers by Gary L, on Flickr
This is how I decided to do my anti-dive relief. Plenty of metal to remove although if you mess up it’s a bit more serious than starting with a new little piece of aluminum.
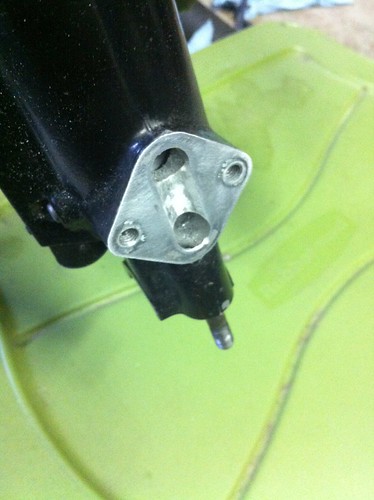 C012283C-406C-4BAF-9A7E-50B4DC5179F9 by Gary L, on Flickr
And with the forks back on the bike and my FREE block off plates! I made them from a piece of aluminum I had lying around. Not perfect but decent.
I have already measured the spacers for spring pre-load but I still have to do the fluid. I forgot to take pics of the emulators but they look just like they do on Race Techs site. I checked the pre-load and dropped them in. Here is what my block off plates look like:
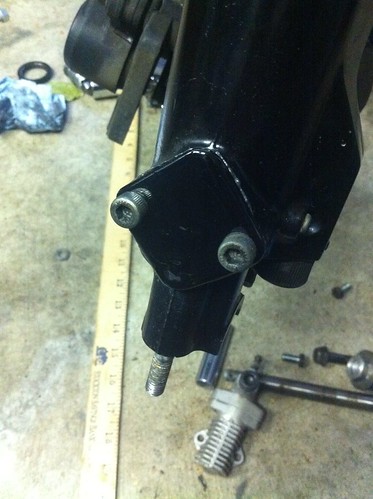 Home made anti-dive block off by Gary L, on FlickrPlacement of top out cone and washers by Gary L, on Flickr
Here is the bottom of the stock damper:
Stock damper by Gary L, on FlickrFor the uninitiated, the bottoming cone (described as the “oil lock” in the parts fiche) traps the fork fluid so that it has to go through the anti-dive units to travel in and out of the damper. I marked the damper so that I could email the pic to Race Tech to make sure I was doing this step correctly. (Then he showed me where to find an example on their website).
This shows the placement of the bottoming cone and washers.
stock damper marked for first bypass hole by Gary L, on FlickrDrilling 1/4" holes like this bypasses the anti-dive completely and allowed me to make some simple and quick anti-dive block offs that don't require a fluid passage. EDIT: MODIFYING TO INCLUDE FLUID RELIEF PASSAGE AT ANTI-DIVE IN ADDITION TO THESE BYPASS HOLES.
Modified damper w anti dive bypass holes by Gary L, on FlickrThankPlacement of top out cone and washers by Gary L, on Flickr
This is how I decided to do my anti-dive relief. Plenty of metal to remove although if you mess up it’s a bit more serious than starting with a new little piece of aluminum.
C012283C-406C-4BAF-9A7E-50B4DC5179F9 by Gary L, on FlickrAnd with the forks back on the bike and my FREE block off plates! I made them from a piece of aluminum I had lying around. Not perfect but decent.
I have already measured the spacers for spring pre-load but I still have to do the fluid. I forgot to take pics of the emulators but they look just like they do on Race Techs site. I checked the pre-load and dropped them in. Here is what my block off plates look like:
Home made anti-dive block off by Gary L, on FlickrPlacement of top out cone and washers by Gary L, on Flickr


 I misspoke. Seller states they are 1kg which I guess to be 1.0.
  .
.
Comment