• Required reading for all forum users!!!

    Welcome!
    Register to access the full functionality of the GSResources forum. Until you register and activate your account you will not have full forum access, nor will you be able to post or reply to messages.

    A note to new registrants...
    All new forum registrations must be activated via email before you have full access to the forum.

    A Special Note about Email accounts!
    DO NOT SIGN UP USING hotmail, outlook, gmx, sbcglobal, att, bellsouth or email.com. They delete our forum signup emails.

    A note to old forum members...
    I receive numerous requests from people who can no longer log in because their accounts were deleted. As mentioned in the forum FAQ, user accounts are deleted if you haven't logged in for the past 6 months. If you can't log in, then create a new forum account. If you don't get an error message, then check your email account for an activation message. If you get a message stating that the email address is already in use, then your account still exists so follow the instructions in the forum FAQ for resetting your password.

    Have you forgotten your password or have a new email address? Then read the forum FAQ for details on how to reset it.

    Any email requests for "can't log in anymore" problems or "lost my password" problems will be deleted. Read the forum FAQ and follow the instructions there - that's what we have one for...

  • Returning Visitors

    If you are a returning visitor who never received your confirmation email, then odds are your email provider is blockinig emails from our server. The only thing that can be done to get around this is you will have to try creating another forum account using an email address from another domain.

    If you are a returning visitor to the forum and can't log in using your old forum name and password but used to be able to then chances are your account is deleted. Purges of the databases are done regularly. You will have to create a new forum account and you should be all set.

1980 GS450 - First Vehicle Restoration Ever!

  • Thread starter Thread starter JRHemmen
  • Start date Start date
J

JRHemmen

Guest
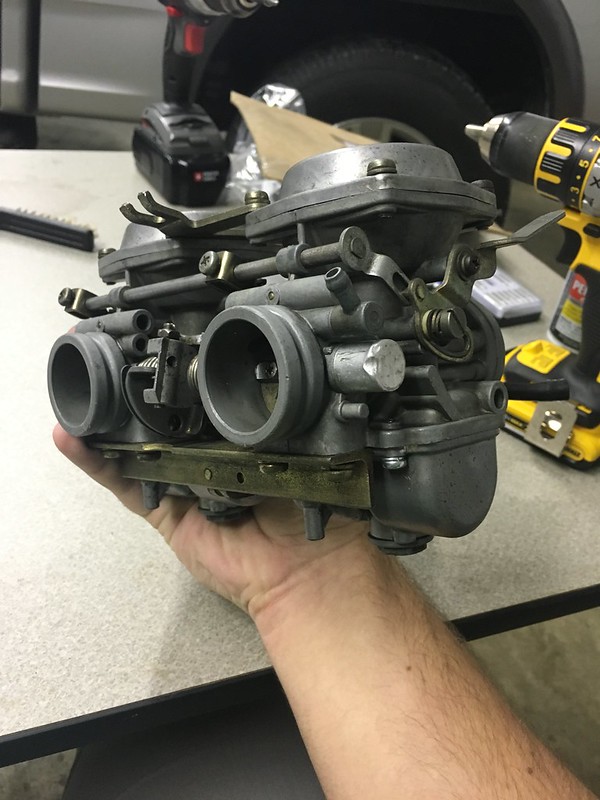
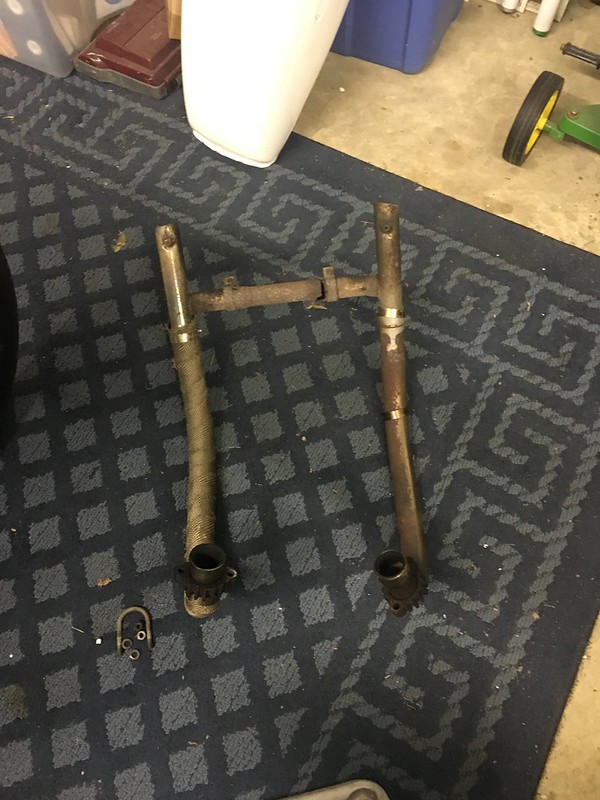
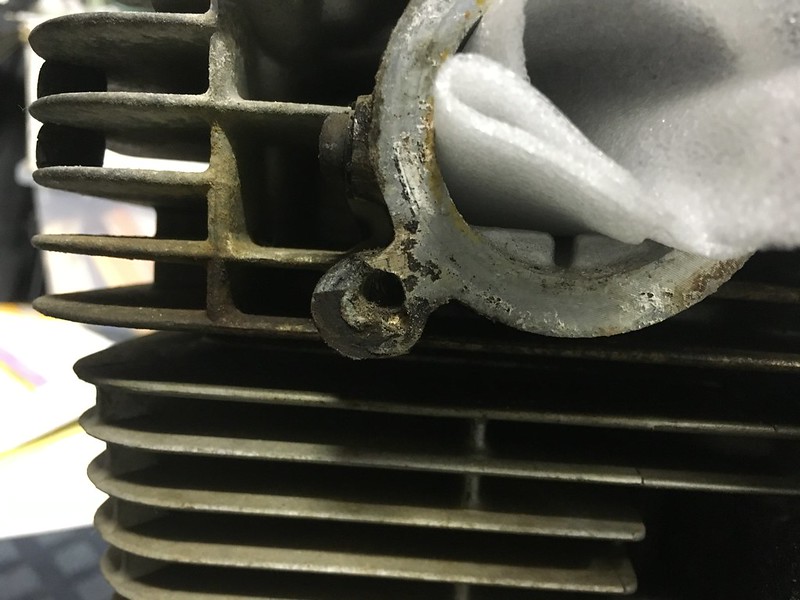
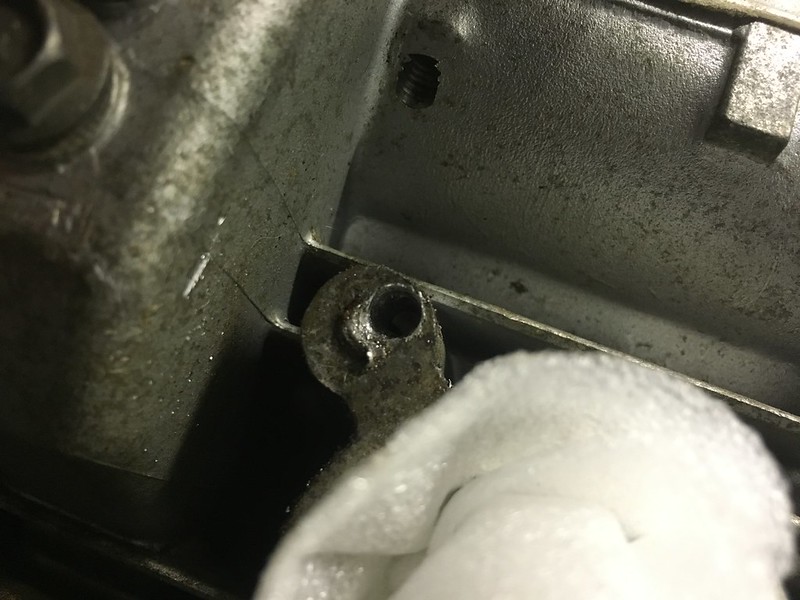
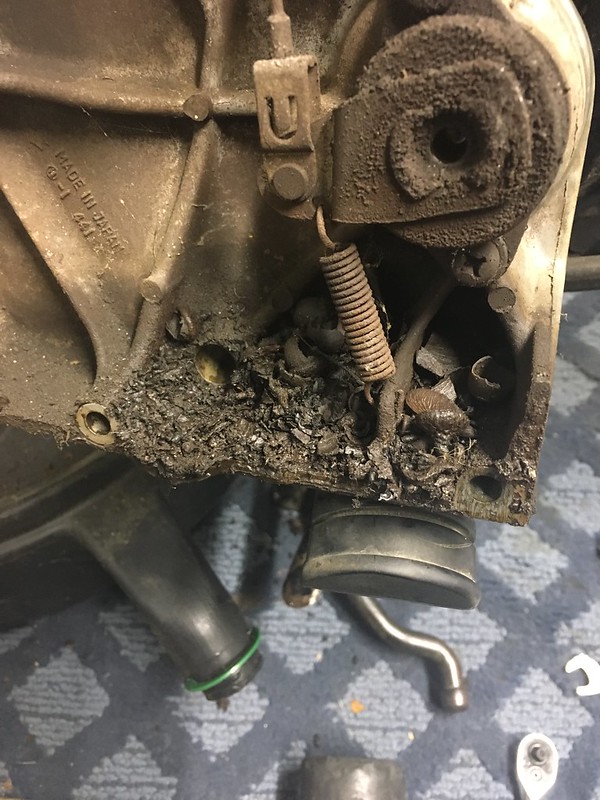
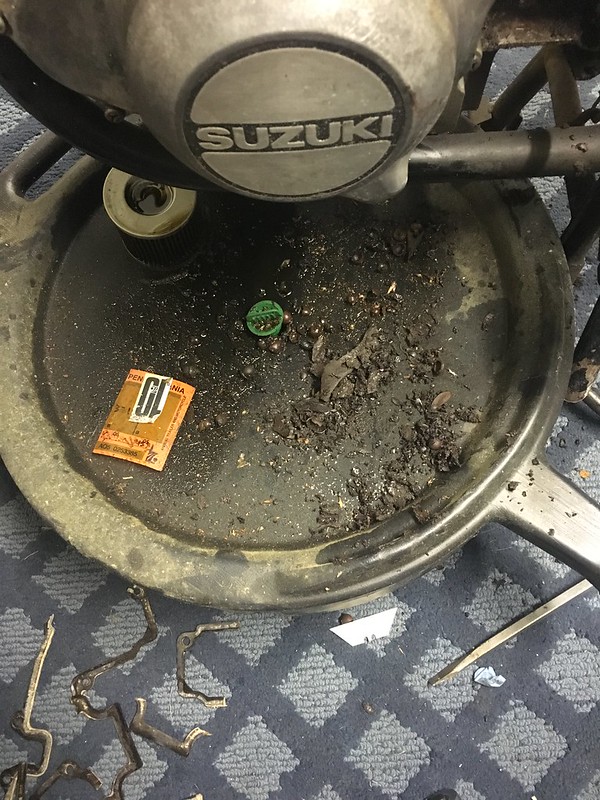
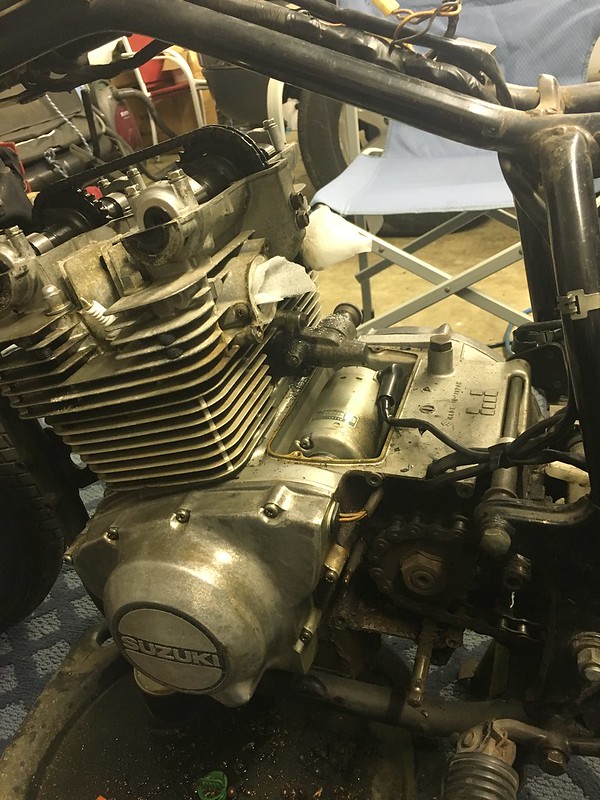
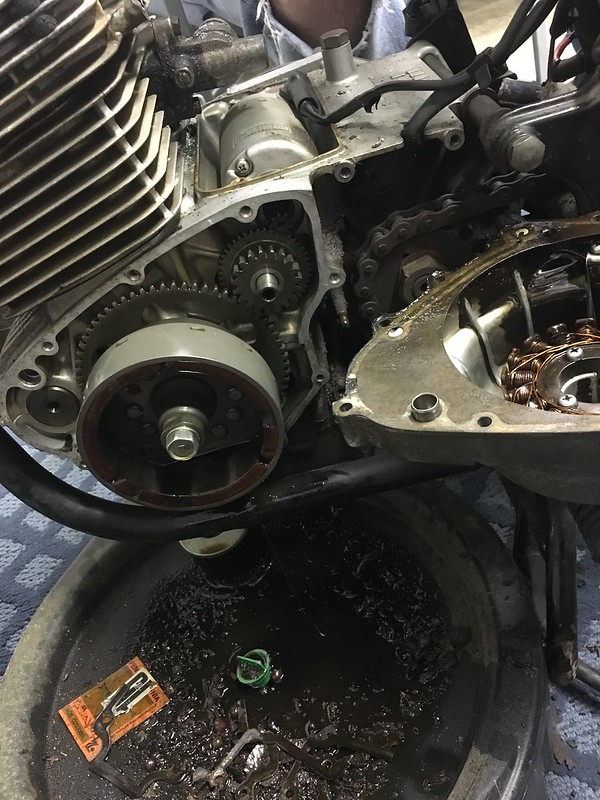
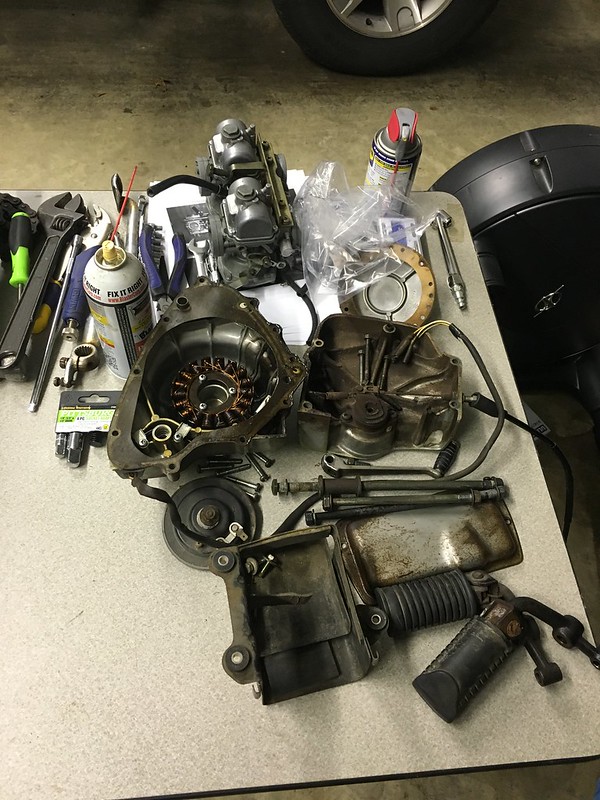
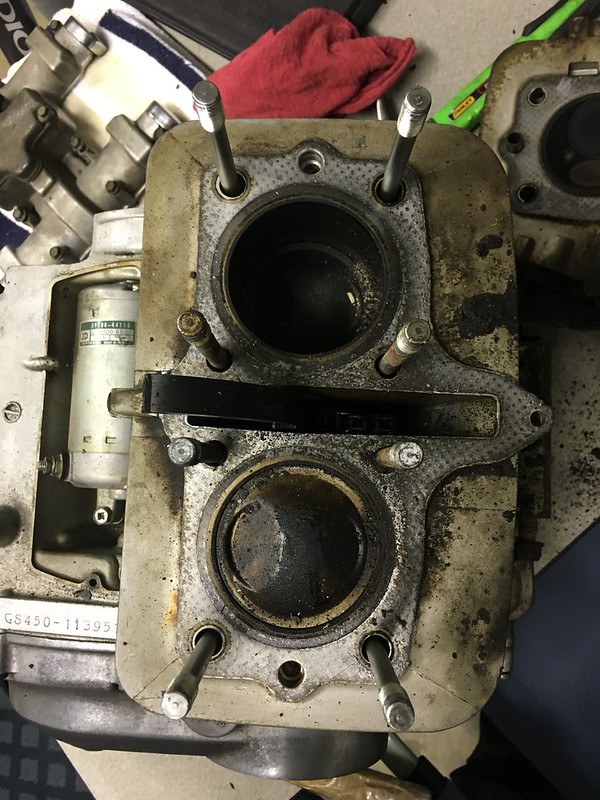
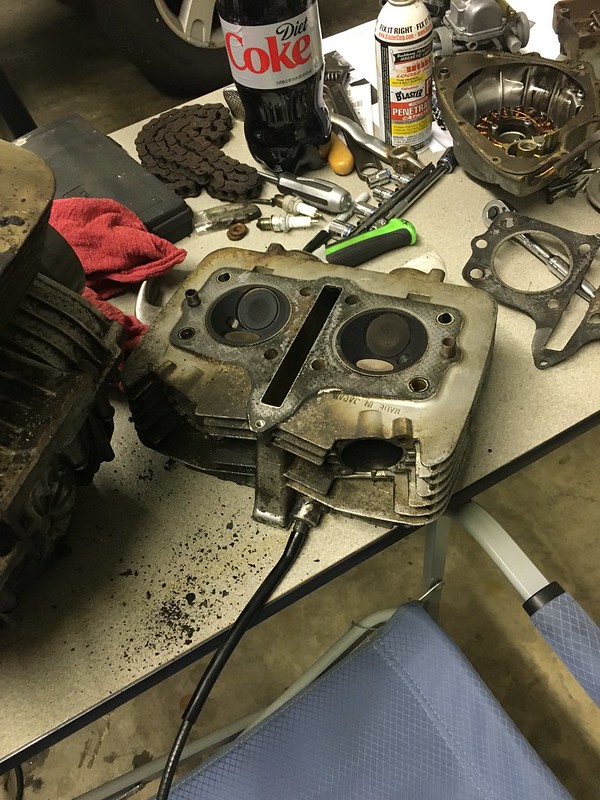
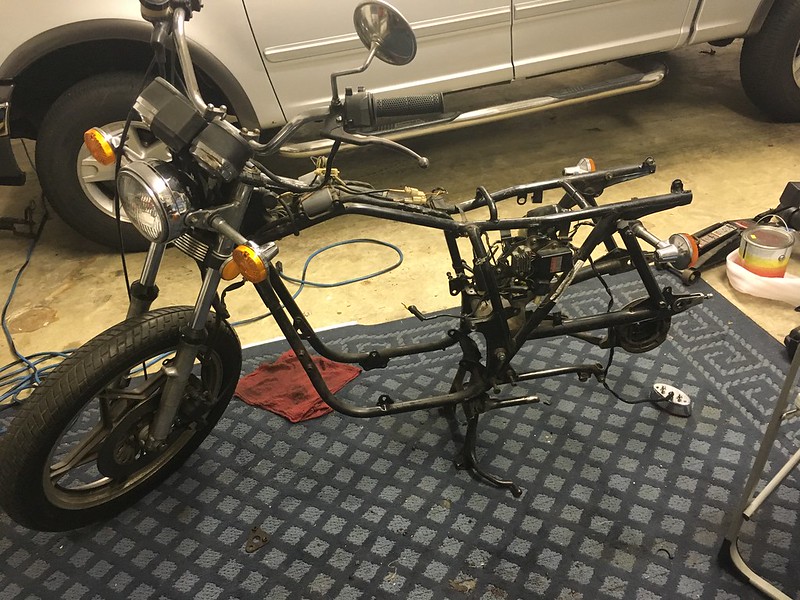
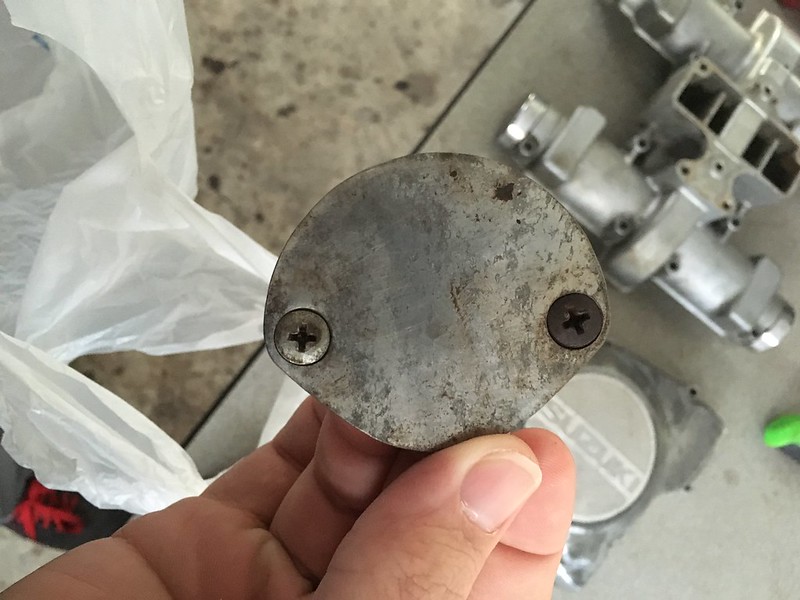
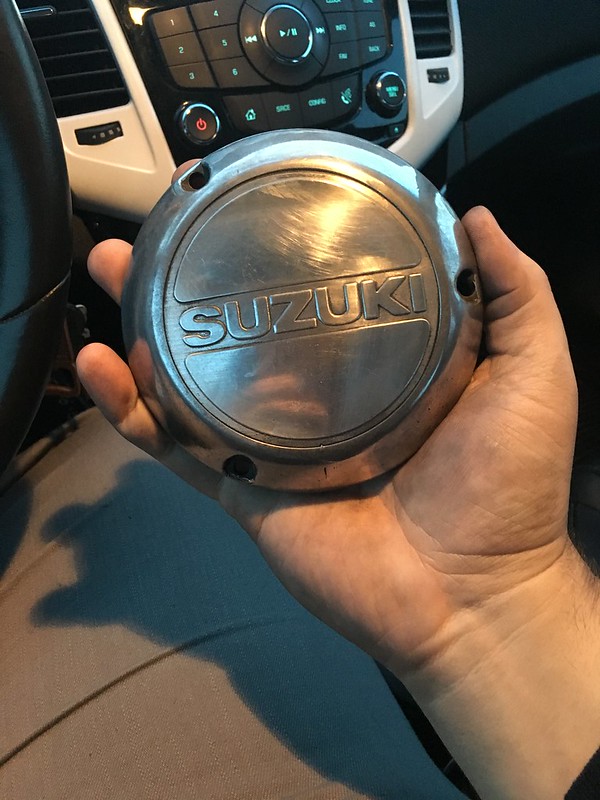
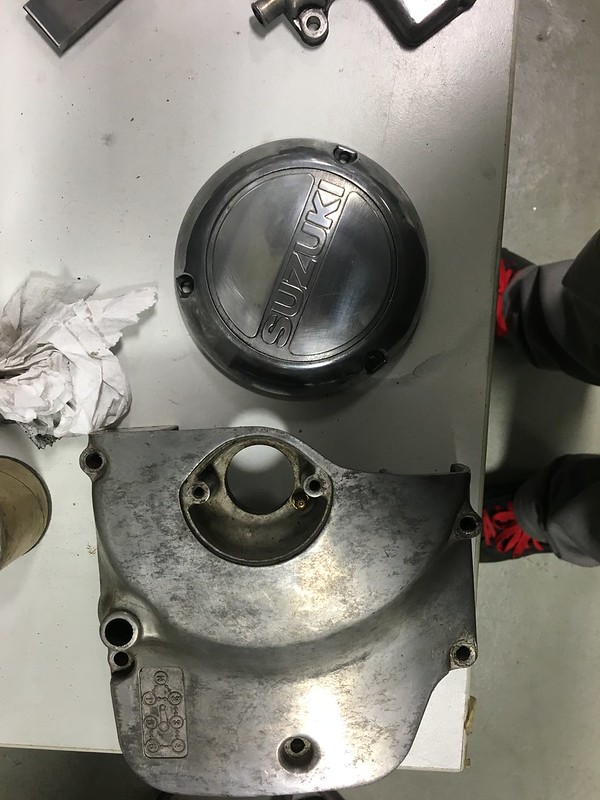
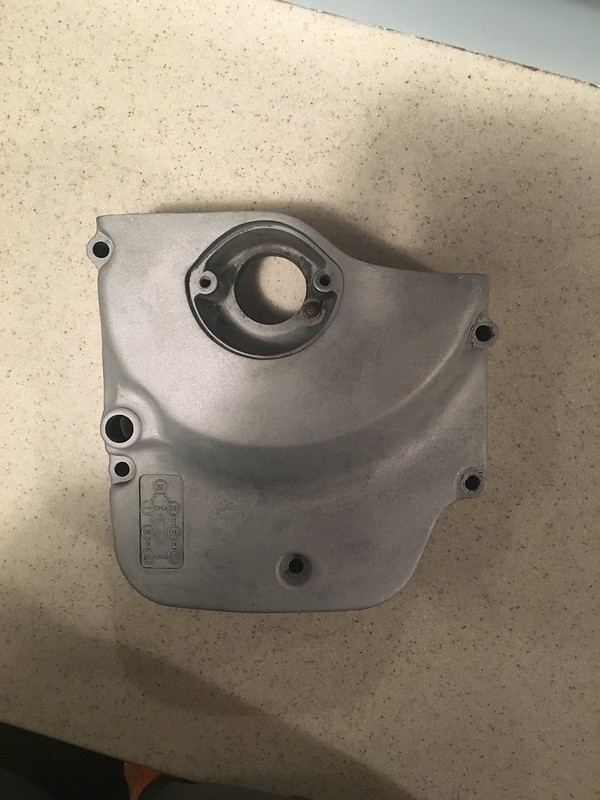
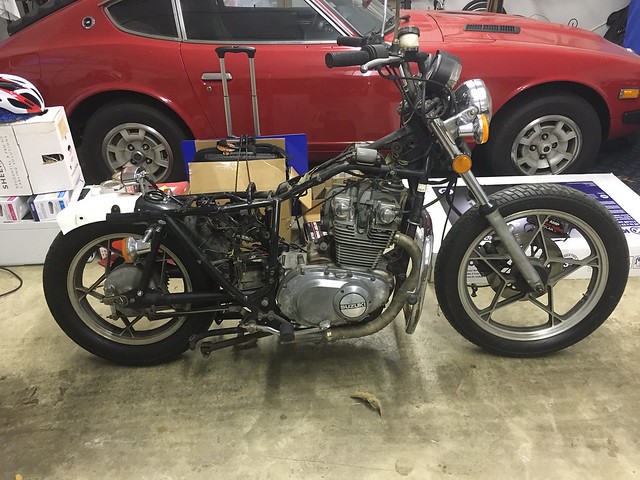
I recently purchased a 1980 GS450(L?) for a whole $200. The bike wasn't running, the carbs were off, the seat is chopped into some type of bobber wannabe creation, its not in the best shape. I have pictures under my introduction thread, but I'll move them onto here when I get home. I want to do a cafe build, I joined the community because the Acura community was an essential resource when I had a Legend that I was doing some work on. Anyway, this is my first vehicle restoration, and below is a list of what I hope to accomplish with the bike. As it sits, the carbs are off, the intake boots are removed, there are 3 broken bolts in the engine, the mufflers were chopped by the PO, and the air box was tossed by the PO as well.

To be done:

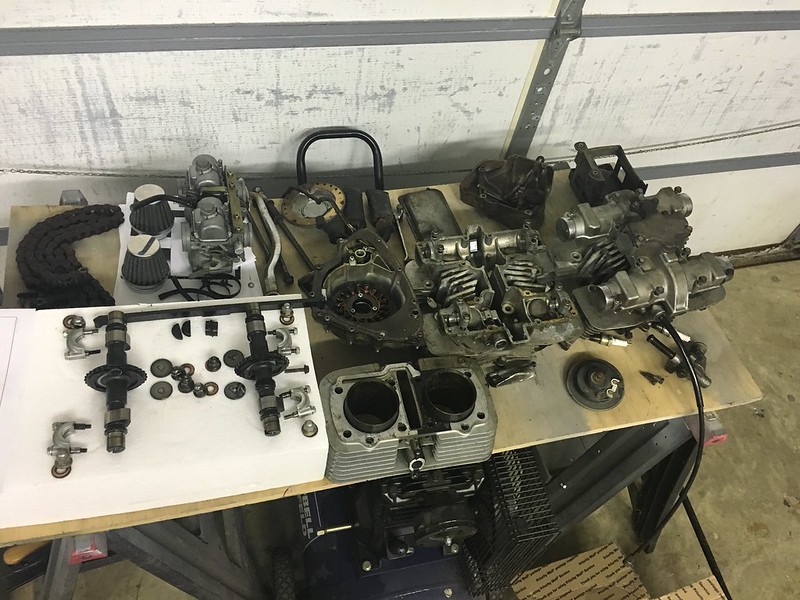
Finish cleaning carbs, reassemble with new jets (adjusted for free flowing exhaust and pod filters)
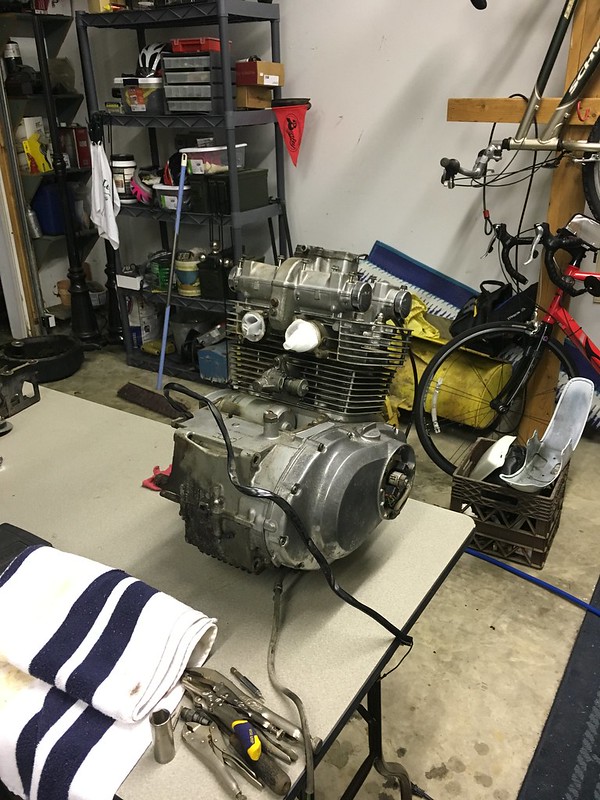
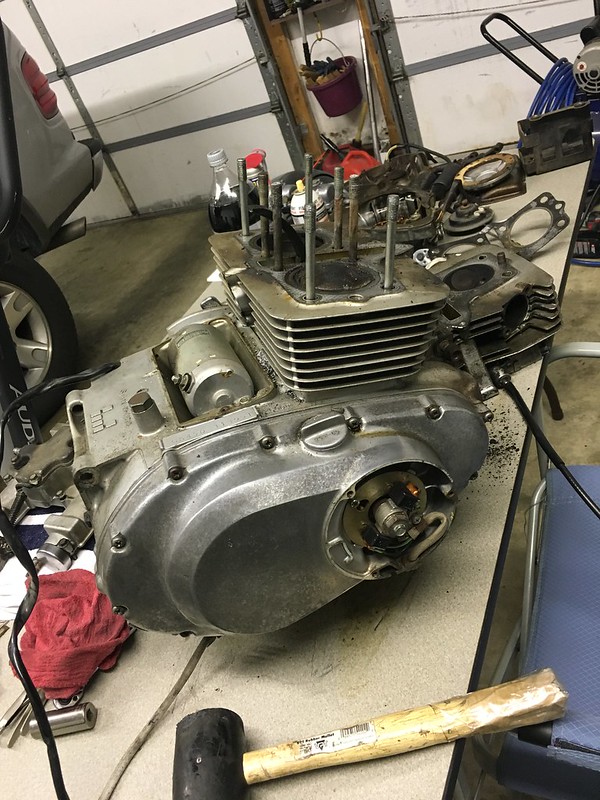
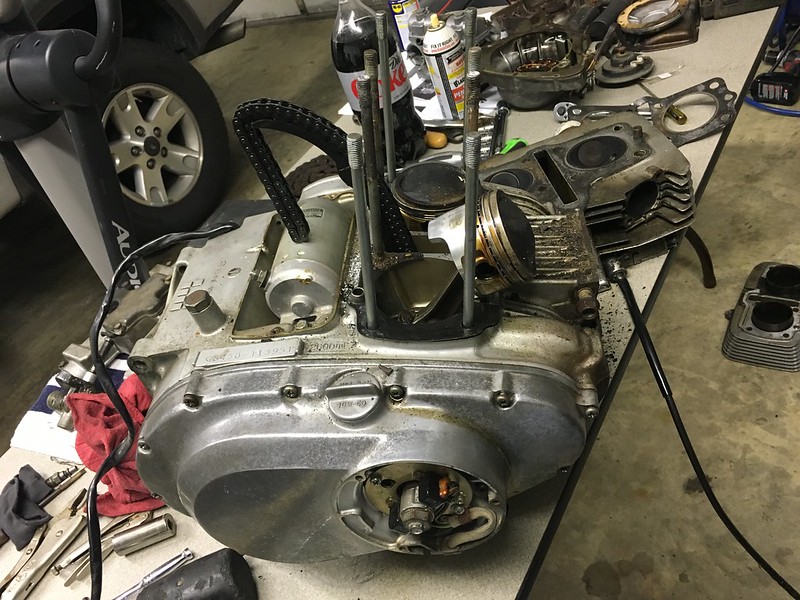
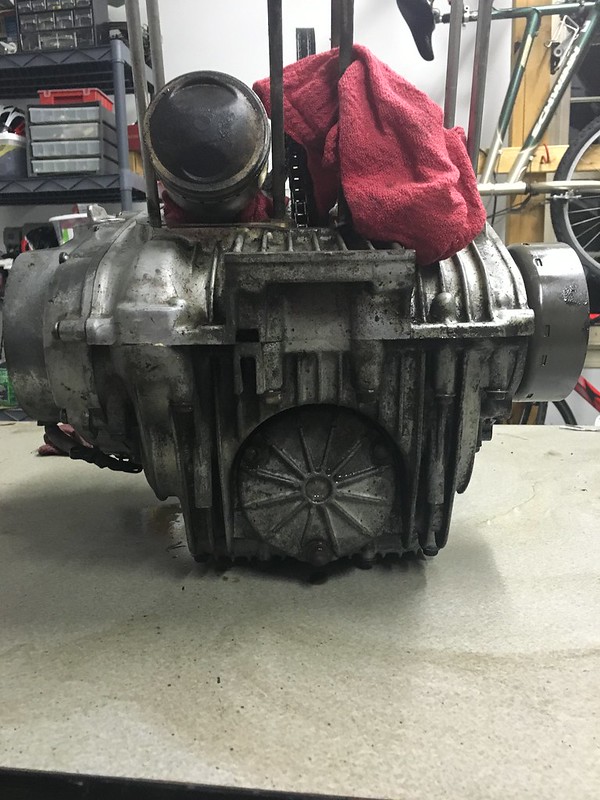
Take engine out of the frame
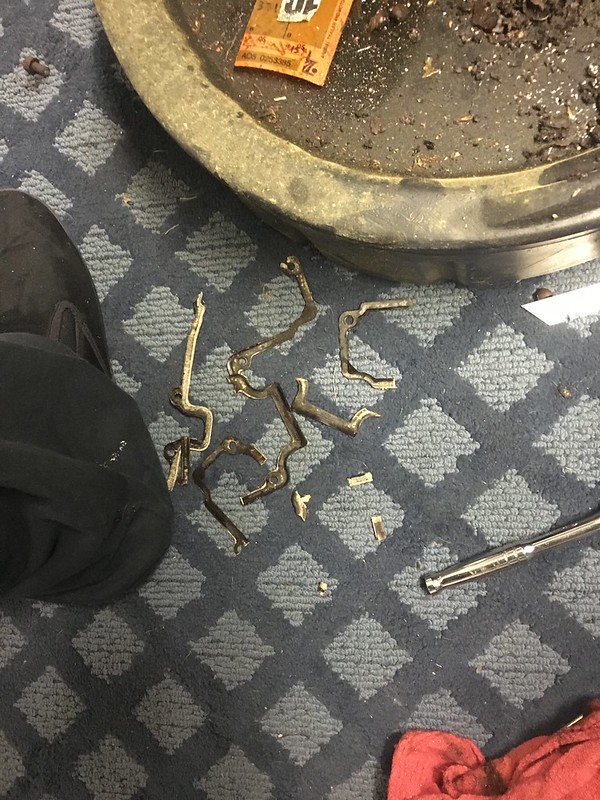
Remove broken bolts from the block
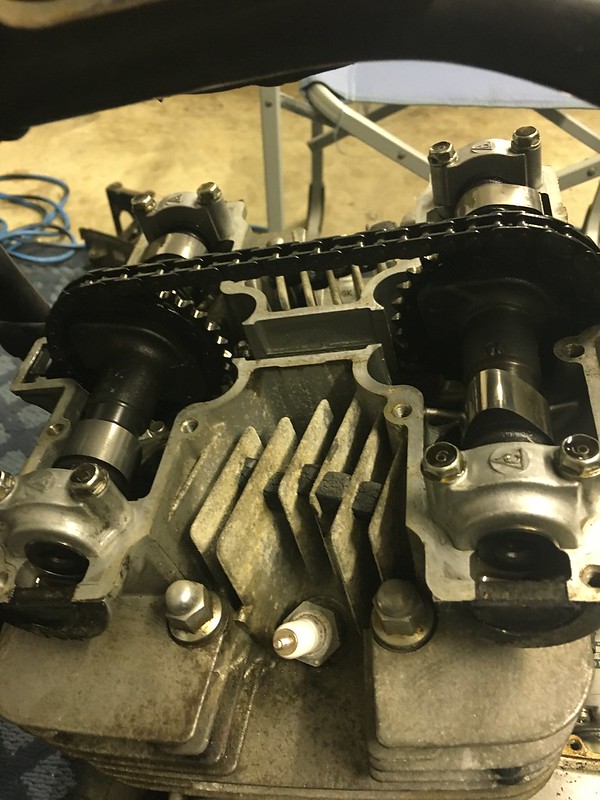
Adjust valve shims and replace gasket on valve cover
Clean outside of engine
Paint heat fins? and polish the rest of the engine
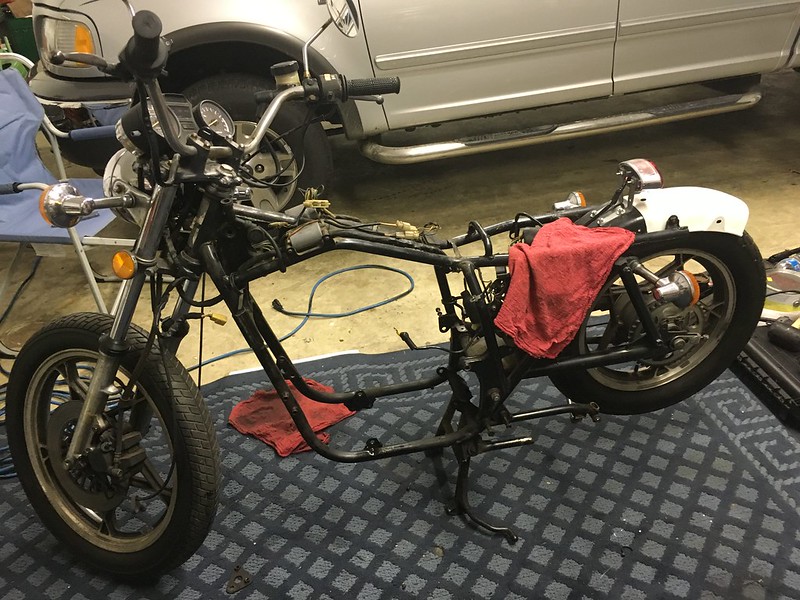
Strip everything else off the frame
Weld/affix some sort of tray to fit battery and electrical underneath cafe seat cowl
Detab frame
Have frame and wheels powder coated (thinking red for the frame, black for the wheels. Thoughts?)
Begin reassembling frame
Put engine back in the frame
Install carbs
Reinstall factory electrical system
Start the bike????
Test electrical and assess if the r/r and/or stator need replaced
Presumably install a Shindengen SH-775 r/r
Figure out a clean looking solution for the exhaust
Re-jet carb to match new exhaust
See if brakes need replaced, flush fluid, stainless brake lines
Replace ghetto hard tail with real shocks in the rear
Decide if steering bearing and fork seals need replaced
Replace front headlight, turn signals, handlebars, and gauges
Mill off handlebar bracket IF i go with clip ons
Fiberglass seat
Paint seat and gas tank, clean out inside of gas tank
Figure out how to make padding/upholstery for the seat
Reassemble
Oil change, possibly new chain, sprockets if necessary (I hope not)


I have a lot of work ahead of me, and I know I'll have a lot of questions. I'm looking forward to learning from everyone here on the forum and contributing to other projects wherever I can.


23786748762_f096a40ff4_z.jpg
 
Last edited:
Sorry for the delay in posting. I finished cleaning the carbs and reassembled them, but of course ran into another problem. In drilling out the snapped screws on the intake boots, either my father or me managed to completely miss the center when punching the screw, resulting in a nice hole in the block, instead of the screw. Is it possible to repair this in any way, or do I just tap this hole and drill a new hole in the boot to match? Its a pretty stupid mistake, I know, but I'm hoping to avoid having to purchase a new block just because of it. Where the other boot screws in the block appears to be chipped away, I'll attach a picture of that as well. I managed to get the exhaust off by removing one bolt and snapping another, and its shot.

Carbs, nice and clean.
24012617031_037d88438b_c.jpg


Nice, rusted, cracked exhaust.
24012615581_6771045c3e_c.jpg


Chipped block perhaps?
24069131726_231954067d_c.jpg


And finally, my (seriously) misplaced hole.
24069131996_35a446c8a6_c.jpg
 
Any suggestions on how to fix that hole? I can get a new head and head gasket for about $80, but I'm not sure if a repair would be cheaper. The new head would require my swapping out my cams from the old block into the new.
 
Last edited:
Welcome. Thats a long list. Personally, I would concentrate on getting the bike running first, then mod it to your tastes later.

Whats the story on the Z car?
 
Is the "seriously mis-placed hole" a stripped exhaust flange hole?
A Heli-coil repair will work if it is.

It's the top screw on the right intake boot. The problem is that I drilled away the aluminum block and not the screw. In the picture you're somewhat able to see where the steel remains. My question is if I (or someone else) would be able to drill out the rest of the screw, put in some kind of filler, and redrill and tap a hole for less than $80 (the cost of a new head and gasket). I've found some aluminum filler but it looks to be like $60 for a tube. Plus, I still have 3 broken exhaust bolts to remove, which I wouldn't have to do with a new head.
 
Whats the story on the Z car?

It's a '78 280Z black pearl edition. My father bought it brand new in '77, someone totaled it, he had it rebuilt, and now it pretty much just sits. It was black originally, but they opted for red in the rebuild so they didn't have to do all the pin striping. Everything but the air conditioning and heat works so my dad doesn't enjoy driving it in our drastic weather. I think I've had it out 4 times in the last 4 years? And one of those was to move it to our warehouse so I had room for the bike!
 
Today's update: a screw extractor broke off in one of the exhaust bolts and the local machine shop told me they don't touch motorcycle engines. Ordered a new head with all intake and exhaust bolts removed for $31 + shipping.

I realize that using extractors is on the list of things to not do, and I'm now seeing more and more horror stories of trying them, but here's my thinking. I try to extract it, it breaks? No big deal. I order a new head and gasket and don't have to worry about any screws. I extract it successfully? I take it to a machine shop and the only thing I have to deal with (and pay for) is getting the intake side fixed. I may be out one extractor, but I ruled out the possibility of having to deal with a local machine shop, which I think is what I was secretly hoping for anyway.
 
Last edited:
So I'm really, really hoping that my valves are in alright shape. The PO cut the mufflers off and didn't rejet, then said it wasn't running right. Apparently it didn't start this past season after sitting, although I doubt the valves would be the cause of failure while sitting. Anyway, I'm now looking for an exhaust solution that isn't going to break the bank. I like the idea of a 2-1 exhaust, but I'm fine with two pipes. I had ordered jets for the carbs assuming I would use his straight pipes, but after they literally fell off from rust, I'm going to have to rejet with new exhaust. After reading lots more on the forums it looks like I got bad info, because I was told to buy 137.5 mains and 40 pilots, which I did. It now looks to me like these are way too big. Are there any solutions for an inexpensive exhaust setup somebody could recommend? It'd be nice if I could just bend new pipe to fit and weld mufflers on, but I'm not sure if its that simple.

Side note, should I try to stick to this one thread or am I okay to create separate threads in their associated section? I feel like I'd get a lot more responses that way.
 
As for the exhaust, on my 850 I ended up cutting the pipes off, welding a sleeve into place and fitting 2 Mac slip on pipes onto the sleeves. You will have to go to a MC dealer and look through their catalogues to see what is available in slip on mufflers. The Mac ones were about $59 each CDN. and came with a sliding bracket and some sleeve adjusters.You will also need some graphite packing to avoid air leaks where they connect. I had to purchase adapters at Canadian Tire to adjust from the pipe to the muffler. These are easily available at any place that sells muffler parts. I also had the headers re-chromed but that is expensive. There are some threads here on spiffing up your headers by rubbing them with tinfoil or you can re-wrap them.
 
I got the valve cover and the clutch cover (name?) off tonight. I also drained the oil, although I was surprised by just how little came out, so I think theres some pooled somewhere else in the engine. The bike is on its center stand if that makes a difference. Judging by the way that valve cover gasket crumbled I wouldn't surprise if it'd never been taken off. I got my Vessel Impacta in the mail today, and it still wasn't enough to budge the screws on the crank case covers. So, my question is, is there any way to remove the engine with the crank case covers still on? I'm also hoping to save myself from having to replace both gaskets on the stator side until I'm opening it up to test the electrical. I was able to spin the nut on the right side with a 19mm wrench to confirm that the engine isn't seized, the first good news I've had on the whole bike.

Side note, is this amount of stuff inside the cover normal? Or could my bike have been home to something while it sat?

24260044865_f824d85a3e_c.jpg


24178891191_a9a081f39a_c.jpg


Whats left of a gasket.
23634627453_bb9d3c22b1_c.jpg


23965848760_10ca356956_c.jpg


Here's the bike as it sits now. I sat the valve cover back on top to keep anything from falling inside.

23634627143_7331c1fbb9_c.jpg
 
Looks like you had a rodent or something in there, along with the normal accumulation of old chain lube and general gunk.

That engine should come out easy enough. You have some electricals to disconnect, and you need to remove the drive chain. I'm not sure exactly how the engine bolts are configured, but look for two long bolts at the back, one long one at the front, and two smaller ones down low, about half way along the bottom frame tube.

If an Impacta hasn't loosened the cover bolts (and the heads aren't stripped), you'll probably want to use a full size impact driver. You might find it easier with engine still in the frame.
 
Are you using a penetrant? I use PB Blaster because it works well and I have no reason to switch, but there are many options as well as AT fluid with diesel as a diluting agent. Repeated applications (can be over the course of a few days) with the addition of heat will work wonders. Anyway, I apologize if I am insulting your intelligence, just thought I'd throw it out there. Patience is key here.

Can't wait to see it back on the road! Keep at it!

I sprayed the screws a few times with PB Blaster and it seems to have paid off. I used a full impact driver as Steve recommended and one of the screws basically turned into a cloud of metal smoke as soon as I pulled the trigger. I was able to use a vise grip to break all of them free luckily.

The engine is out!

23988525880_eae7fed017_c.jpg


23657292303_030dfe2f66_c.jpg


23916280639_3b6e53382c_c.jpg


This is the only picture of the stator I took, and while you can't see much in the picture, it looks to be in pretty good shape to me. I really hope I don't have to replace it anytime soon.

24175937732_f4c40236da_c.jpg
 
Last edited:
Quick question, would valve clearance be different in a new head? I have my new head, and have all the gaskets and everything else sitting in my basket on bikebandit, but I'm wanting to wait so I can order my valve shims with it and save a few dollars on shipping. Am I going to have to move everything into the new head, take clearances, and then take it apart again when the new gaskets arrive, or can I take clearances in my old head? I know these are cast aluminum so there can be minute differences in size.
 
Valve clearance changes as the valve seats wear over time, causing the valves to move ever closer to the cam, reducing the clearance.. The chances of clearance between your original head and the replacement being the same are likely very small.
 
Finally got the top end off! Head gasket looked good, cylinder gasket was shot.

23758902404_eebe0fb2aa_c.jpg


24304611731_305743db5b_c.jpg


24304612611_ee28dba7c3_c.jpg


24387097455_eb87941744_c.jpg


I think I need a bigger table.

The plan now is to clean the top end completely inside and out, clean the outside of the crank case, run some fluid through to flush out any particulate from the case, and reassemble. I hope to detab the frame and weld my electronics tray while the engine is out, then clean and paint the frame. Put the engine back in, probably cave and buy the MAC 2-1 exhaust, rejet, and see if it starts. If it does, I'll make my seat and take it for a ride to see how it handles. Then, replace handlebars, wheel and steering bearings, brake lines, and pads as necessary.
 
Last edited:
Not much to update as I'm still waiting for parts, but I cleaned up the engine some. You can't tell in the pictures, but it's a hell of a lot better than it was before. Hopefully getting some diesel tomorrow so I can flush out the crank case.

24427591995_697b251435_c.jpg


23800785413_f73024d831_c.jpg


23799392714_23fdaebd70_c.jpg


24427593975_a3ae5c88f6_c.jpg
 
Finally an update. I think I finally have all the parts I need (besides new jets, shims, and a 2-1 exhaust setup) to put the engine back together. I tried buffing and polishing the side covers, but it just accentuated the pitting the aluminum had developed. So what did I decide to do? Sandblast! Yes, I know aluminum is way too soft for sandblasting, but I had my pressure way down low and I think it turned out pretty nicely. I plan to paint the side covers and valve cover white, the jugs and head black, and leave the breather cover and both suzuki badges with the sandblasted look (with clearcoat over top). Here's where the covers sit right now. I'm hoping to blast the cylinders later today.

Before trying anything, the covers looked like this.
24570562511_30394d2ea1_c.jpg


After a decent amount of time, I got this piece looking far better than the rest. If they all looked like this, I probably would have never sandblasted.
24626547196_2c609de476_c.jpg


24024611734_a166a95086_c.jpg


Buffed vs. sandblasted
24570562251_e3295a55d2_c.jpg


And finally, sandblasted completely.
24626547316_2f7eed9b54_c.jpg
 
Last edited:
Back
Top