• Required reading for all forum users!!!

    Welcome!
    Register to access the full functionality of the GSResources forum. Until you register and activate your account you will not have full forum access, nor will you be able to post or reply to messages.

    A note to new registrants...
    All new forum registrations must be activated via email before you have full access to the forum.

    A Special Note about Email accounts!
    DO NOT SIGN UP USING hotmail, outlook, gmx, sbcglobal, att, bellsouth or email.com. They delete our forum signup emails.

    A note to old forum members...
    I receive numerous requests from people who can no longer log in because their accounts were deleted. As mentioned in the forum FAQ, user accounts are deleted if you haven't logged in for the past 6 months. If you can't log in, then create a new forum account. If you don't get an error message, then check your email account for an activation message. If you get a message stating that the email address is already in use, then your account still exists so follow the instructions in the forum FAQ for resetting your password.

    Have you forgotten your password or have a new email address? Then read the forum FAQ for details on how to reset it.

    Any email requests for "can't log in anymore" problems or "lost my password" problems will be deleted. Read the forum FAQ and follow the instructions there - that's what we have one for...

  • Returning Visitors

    If you are a returning visitor who never received your confirmation email, then odds are your email provider is blockinig emails from our server. The only thing that can be done to get around this is you will have to try creating another forum account using an email address from another domain.

    If you are a returning visitor to the forum and can't log in using your old forum name and password but used to be able to then chances are your account is deleted. Purges of the databases are done regularly. You will have to create a new forum account and you should be all set.

'77 GS750 rebuild... continuation

  • Thread starter Thread starter Tomly Tom
  • Start date Start date
Christmas update #2

Christmas update #2

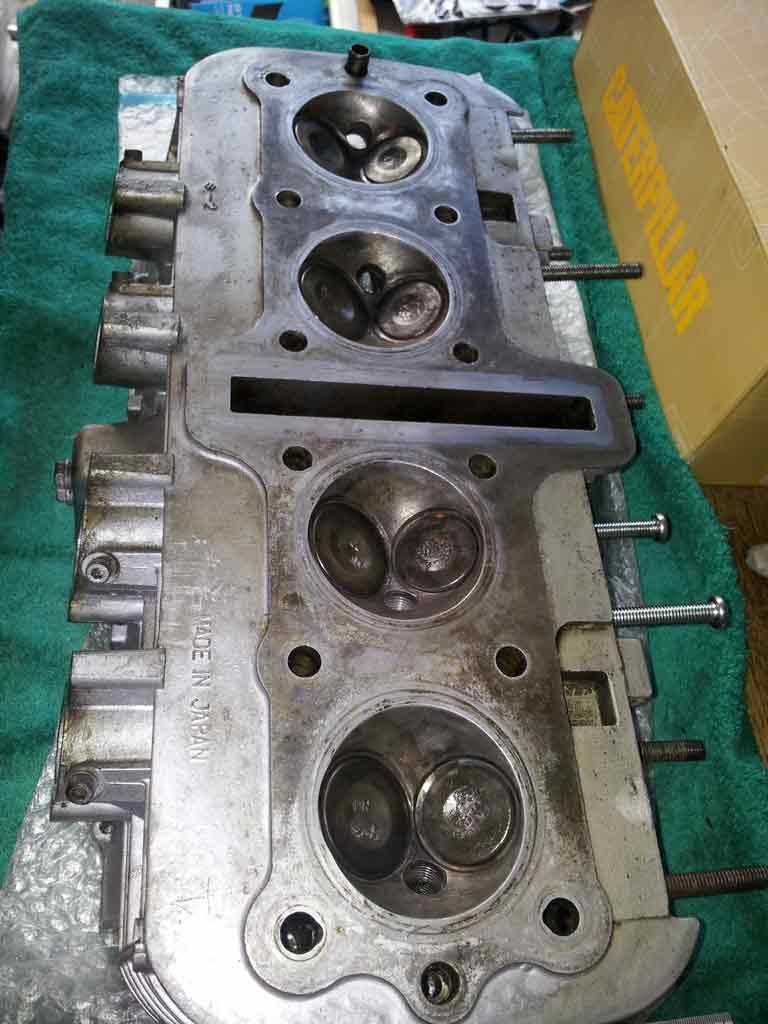
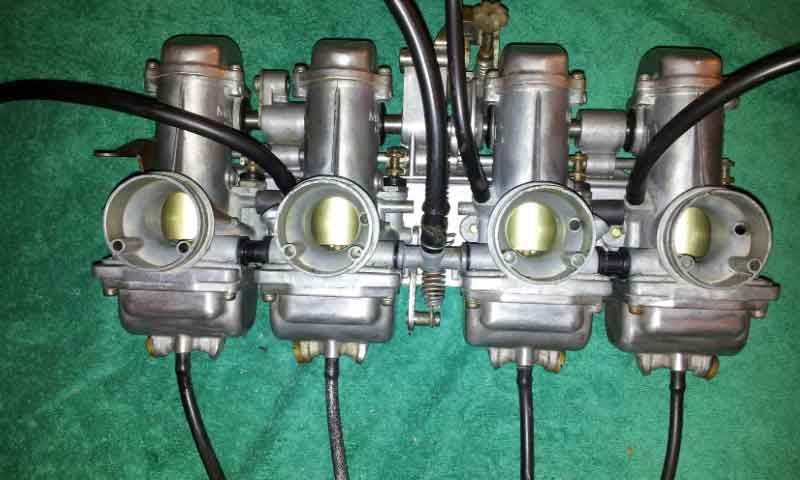
Almost up to date now - I spent all day yesterday stripping down the carbs, very carefully following instructions from Paul Musser's VM carb rebuild PDF... Except for the bit about having all the O Rings ready... They're on order and I'll strip again and finish the job when they get here, at least I got the cleaning and turn counting part done. Here's a before:-
20131227_124349_zpsc289ab33.jpg

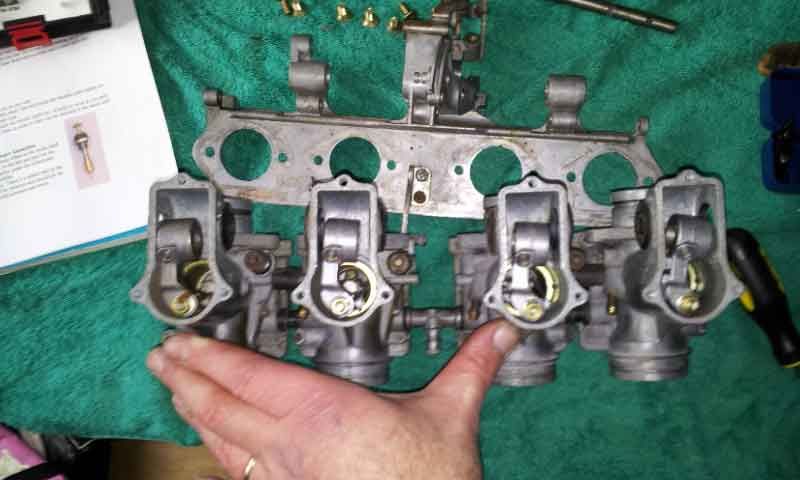
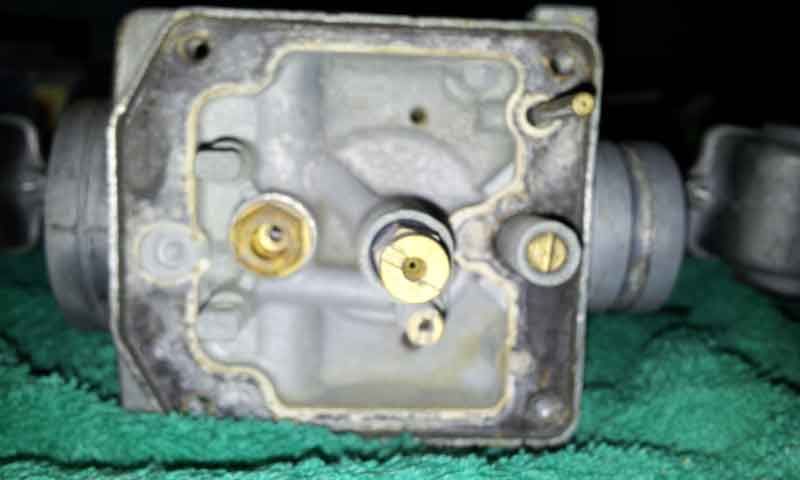
(notice the printed copy of pdf top right), and an interior shot (sorry for blur):-
20131227_130237_zps9a4023d5.jpg

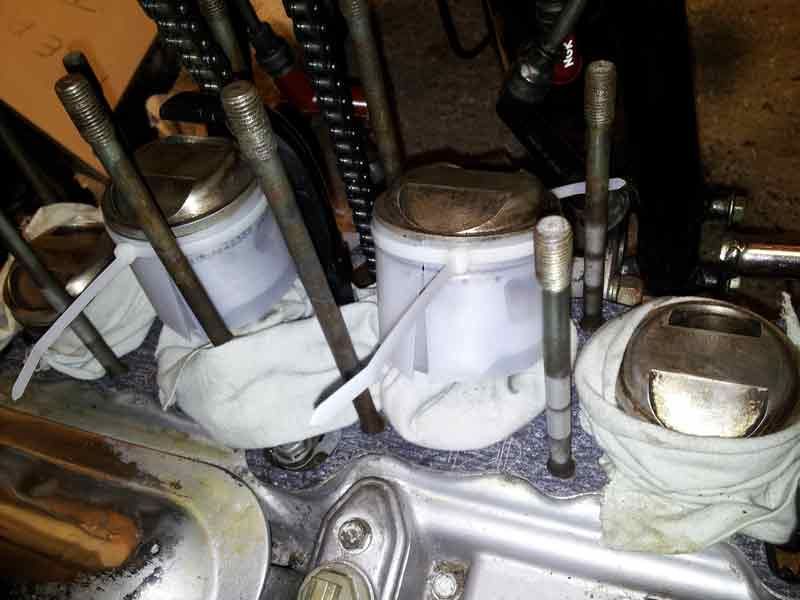
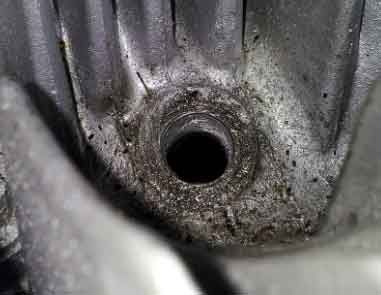
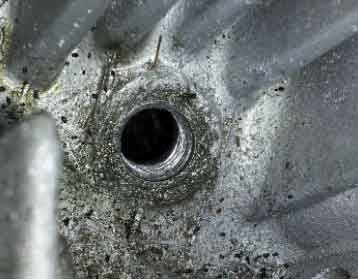
and here's the after:-
20131228_192251_zps1835a0cb.jpg

...They're not spotless - I couldn't find any suitable carb-dip in UK, so went for carb cleaner spray and scrubbing - but they're hopefully clean enough to be functional.
One thing, none of the pilot air screws started out lining up with their factory notches, so I guess some PO has messed with them. Not knowing where the factory setting would be I've returned them to the settings I found them at - I guess I'm gonna have to work my way through the tuning part when she's running again (...if...)
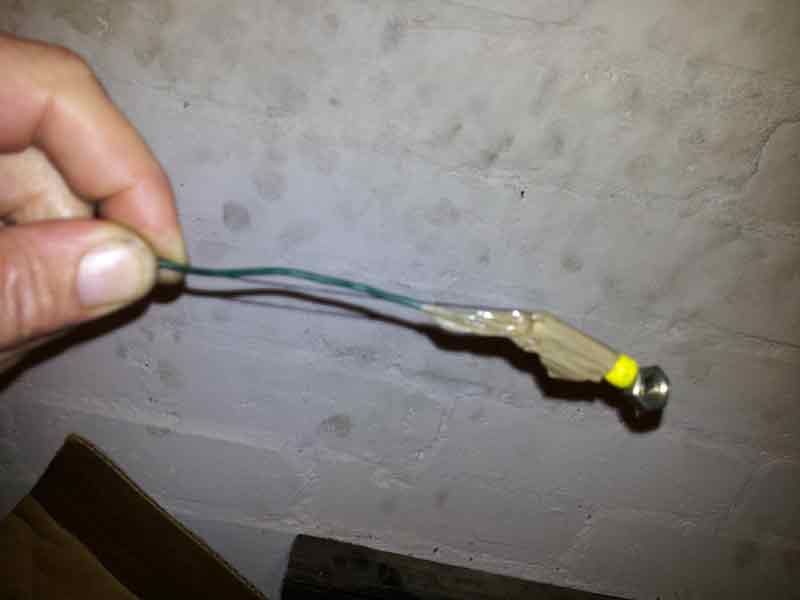
Another headache emerged during the strip down of carbs - all but one of the little choke levers (screwed onto choke shaft) have snapped. I can't find replacements anywhere, does anyone out there have any suggestions?
At the moment I think I may have to resort to fabricating something with 13 guage (coat hanger) wire or aluminium sheet (empty beer cans).
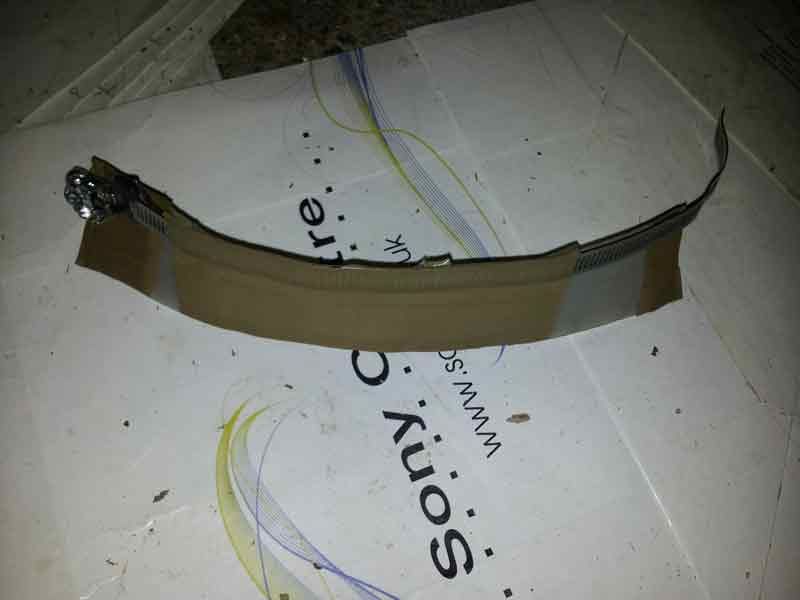
Would these
$(KGrHqNHJF!FG3p4qV(sBRuzV0Jfe!~~60_1.JPG

(from a 79 model) fit? I'm guessing so since they seem to go on VM carbs and simply be a better design. (photo is from an ended ebay item)
I guess I also have to keep my fingers crossed that the fuel connector moulded o rings remain up to the job.

Anyway, enough for now, Cheers, Merry Christmas and Happy New Year!
Tom
 
choke lever things

choke lever things

So, big shout out to uk gs nut, who's not only sourced the choke lever replacements from his private stash, but has posted them off to me quicker than most suppliers would manage. A true gentleman.

Also over Christmas I met up with a mate's Dad who it turns out has had a GS in the past. I was hoping to get to chat to him a bit more, but it was a 1st birthday party for his grandson so he was a bit tied up. However, he did bring a couple of useful items for me to borrow; a compression tester and a carb balancer (just needs new rubber tubes and their fastenings). I started to set up for compression test and realised #3 plug was not screwed in properly - tight, but not seated - badly crossed threads :(
20131228_192612_zps499eeac0.jpg


20131228_192530_zps7390bb9c.jpg

I ran the compression test on #1 #2 and #4 and got around 130psi on #2 and #4, but a very limp 90-100 on #1. Shining a torch down the plug holes all but #1 piston tops look fairly clean, but #1 is black as soot. I'm hoping that the low compression is due to build up of carbon making for a bad valve seal. Time to man up and take the heads off, clean and check everything and check/grind valves etc.
Extra tools required for this are now on the way, including a tap/helicoil kit for the plug thread.

I dropped the sump last night to get at the oil strainer (engine still in frame as service manual suggests is possible). Problem is I now have to try to get a nice clean blow on impact driver to unscrew the strainer - from underneath the bike! I think I am going to either a) leave the bloody thing where it is and just wipe down the visible side or b) lean the bike over against garage wall using my son as a cushion/support, to try and get a good angle on impact driver... Hmmm
 
sump and strainer

sump and strainer

First off, you the man Dennis, you the man. Thank you so much :)

Second, thought I'd do a quick post on activities today. I figured I had to do the sump and oil strainer thing right, so got my son to help gently lower bike almost onto it's side - he's only 14, but 6' 1" and a rugby player. Once we had it leaning on him and some regular garage crap (camping gear etc) I was able to get in underneath with the impact driver and successfully undo the strainer screws.
Half a roll of kitchen towel later and some some careful brushing of the strainer and all the sludge is gone from sump along with any signs of swarf etc on the strainer.
20131230_170536_zps9ba49944.jpg

Sorry - as usual hands were too dirty to take a before picture, but after draining oil there was still a thick layer of oil sludge stuck to the bottom of sump.

At the moment, unless I decide to put lighter clutch springs in (clutch seems very tough to me, certainly not a one finger job) I'm thinking that's the gearbox stuff done for now hopefully.
 
Carbs finished & cylinder head off

Carbs finished & cylinder head off

So a couple of weeks ago I received my o-ring set from Robert Barr in the US, along with the intake o-rings I also needed. I set about replacing them all - including the float bowl drain screws which I had previously left untouched... Bad idea - the reason I'd left them was that they were very stiff, in fact glued into place with fuel deposits, and the second one I tried sheared off at the weak spot where it has a small hole drilled through to drain. The remains of the screw were still glued tight, so the only option was to very...very carefully drill out the brass and try to leave the thread in tact. Two hours later and I was able to screw the only other drain screw I had loosened into it with o-ring in place, nice and tight. Phew. Ordered a new drain screw to replace the sheared one, and decided I would have to leave the other two glued in place and just clean around them.

Carbs are now fully rebuilt and waiting to go on. My only worry is how well the fuel connector pipes will seal as there's no way to replace the o-rings on my type.

While I was waiting for carb parts, I also made a start on the cylinder head, having noticed a slight lack of compression and knowing I needed to do a re-tap / helicoil on one of the plug threads.
Carefully following Haynes instructions, I stripped down to cam covers - all parts basically needing a clean/o-ring/gasket replace. Check out the state of the intake o-rings for example (top left)

20140108_195214_zps5459168c.jpg


The cam cover gasket was noticeable only by its absence, being sealed with some form of (now hardened) liquid gasket which would need careful removal

20140108_195239_zps662a49a5.jpg


After careful removal of cylinder head it turned out the pistons and head were not too dirty, showing signs of having been stripped and cleaned at some point by a previous owner... BUT...

20140111_132627_zps99c64c3a.jpg


This is not how a cylinder head gasket should look. Also, what you can't see is the amount of gooey liquid gasket type stuff all over it and the alloy on either side of it. Nice new head gasket bought (NOS as I was advised against aftermarket for the head gasket) and a long slow gasket scrape / head clean undertaken. After several hours of cleaning and polishing this was the best I could get.

20140111_132752_zps07b858d3.jpg


The dark areas are completely smooth to the touch and show no visible lumps or bumps in reflection, so while it's not as shiney as might be possible, I think it should be up to a good working standard.

Since then I've put the head back on and am now working on shims... but that's another story.
 
If you get in a bind on those carb bowls, I've got a couple laying around. A friend of mine tells me he purchased (recently)some of the connecting tubes from Z-1 Enterprises. Don't know how true it is. Might want to check their site and e-mail them.

cg
 
thanks Charlie

thanks Charlie

If you get in a bind on those carb bowls, I've got a couple laying around. A friend of mine tells me he purchased (recently)some of the connecting tubes from Z-1 Enterprises. Don't know how true it is. Might want to check their site and e-mail them.
Thanks very much for the offer/source suggestion Charlie. Knowing that I was hoping to test out carbs this weekend I put off replying... anyway, so far so good I think, the only leak I've found so far is a slight weep around petcock which I was half expecting and have already ordered a new rubber seal for. I guess I need to keep an eye on things for a while, but fingers crossed, for now the carbs seem to be behaving.

I'll be uploading some more pics and updating thread again (on my progress and adventures over past couple of weeks) very soon.
 
Doh! Nut dropped into crankcase, and timing chain setup

Doh! Nut dropped into crankcase, and timing chain setup

I thought I'd better be honest about this, despite my shame. A couple of weekends ago, despite having stuffed rags in all the right places through almost all of the cylinder head removal/replacement, I managed to drop a nut down the camchain slot. Doh.
You may well ask how I let this happen - briefly, here's my excuse. Having replaced the cylinder head I needed to slide the front camchain blade in, but it's long and straight, and the only path I could find for it was through the frame where the coils bolt on... So figured I'd just loosen off one of the coils to make room for the blade to slot in. Of course up to this point I'd been intending to slide the blade in so had removed rags from the camchain slot... but not replaced them while I undid the coil nut... oily fingers... oops. NOOOoooooo! not down there of all places.
Anyway. That was the point I resigned myself to taking the cylinder block off as well, and I'm kind of glad I did. The oil seals and gasket underneath were in a hideous state.
The resolution to the nut in crankcase issue is shown below - using a "Magnetix" magnet (they're really strong) taped to the end of some stiff wire. I had to use stiff wire, as anything bendy just resuted in the magnet instantly sticking to the nearest stud or whatever. It's shown here with captured nut on the end.
20140121_221612_zpsb523609d.jpg


It worked like a dream in the end, but was the end result of about four hours messing about with vacuum cleaner, tubing, other magnet related inventions and so on. Phew. But I highly recommend the magnetix method if anyone finds themselves in a similar situation.

So back to the rebuild. I replaced base gasket and oil seals having cleaned up all mating surfaces and set about replacing the barrels. At this point my problem was that I have big stumpy fingers and despite an hour or so trying couldn't seem to get the piston rings compressed enough to slide into barrels.
I had of course scoured this site for what help I could find and was on the verge of buying special tool when having read the suggestion to use hose clamps I made these:-

20140125_110950_zpsd49db786.jpg


It's basically a hose clamp with a piece of plastic milk bottle taped to the inside. My thinking was that the design of my hose clamps was not something I'd want wrapped around and scratching at the pistons. The milk bottle plastic is soft and very slippy - ideal for the job as it can be tightened round the piston enough to hold rings in place, then slides off as the barrels are lowered. I'm afraid I've only got a picture of an earlier (unsuccesful) version using cable ties, but trust me, the hose clamp method works really well with the plastic.

20140121_221422_zps31023a88.jpg


Cylinder barrel, head, camchain blades, and cams all went on smoothly this time round. Time to set up camchain timing. Here's what I understood from reading the manual:-
Line up T mark:

20140111_182240_zpsdea8dd8b.jpg


Align 1 arrow with top of cylinder head so that 2 arrow is vertical (with respect to cylinder head surface) and front of chain is tight. In this photo, it looks like front of ex cam has rolled very slightly clockwise just before pic was taken:

20140111_182427_zps462d5f59.jpg


Then count twenty pins on chain, and engage 3 arrow mark with that pin:

20140111_182504_zps617d4060.jpg


Top sprocket is then fastened and cams are clamped so that the bearing caps (A B C & D) can be safely bolded down.
If anyone sees these photos and spots that I've done something wrong or misunderstood anything, Pleeease let me know. I'm pretty sure I got it all right though, cos the engine started and managed to tick over happily enough last weekend :)

Enough for now though.
 
Back
Top