• Required reading for all forum users!!!

    Welcome!
    Register to access the full functionality of the GSResources forum. Until you register and activate your account you will not have full forum access, nor will you be able to post or reply to messages.

    A note to new registrants...
    All new forum registrations must be activated via email before you have full access to the forum.

    A Special Note about Email accounts!
    DO NOT SIGN UP USING hotmail, outlook, gmx, sbcglobal, att, bellsouth or email.com. They delete our forum signup emails.

    A note to old forum members...
    I receive numerous requests from people who can no longer log in because their accounts were deleted. As mentioned in the forum FAQ, user accounts are deleted if you haven't logged in for the past 6 months. If you can't log in, then create a new forum account. If you don't get an error message, then check your email account for an activation message. If you get a message stating that the email address is already in use, then your account still exists so follow the instructions in the forum FAQ for resetting your password.

    Have you forgotten your password or have a new email address? Then read the forum FAQ for details on how to reset it.

    Any email requests for "can't log in anymore" problems or "lost my password" problems will be deleted. Read the forum FAQ and follow the instructions there - that's what we have one for...

  • Returning Visitors

    If you are a returning visitor who never received your confirmation email, then odds are your email provider is blockinig emails from our server. The only thing that can be done to get around this is you will have to try creating another forum account using an email address from another domain.

    If you are a returning visitor to the forum and can't log in using your old forum name and password but used to be able to then chances are your account is deleted. Purges of the databases are done regularly. You will have to create a new forum account and you should be all set.

81 GS550T in Co Sprgs

cowboyup3371

Forum Guru
Past Site Supporter
So I guess getting my bike running is going to take a little more work than I originally thought so I figured I'd start this thread to talk about it. The 81 GS550T in my signature was given to me by the "wonderful" PO for a few reasons. First, his apartment complex was threatening to tow it away as they didn't want it around anymore; I don't know the whole story to that but whatever. Secondly, when I looked at the bike the first time, he didn't have a battery handy and didn't have the carbs in place as they were getting cleaned by his friend. So I agreed to come back a few days later. When I did, he found the battery and the carbs were in place but we couldn't get it to start. At that time, I noticed the choke cable was connected to the area the throttle cable should have been and the throttle cable was hanging free. After blaming it on the guy who supposedly "cleaned his carbs", he assured me it had only been sitting for four or five months and it would start up with no issues. I was already aware that I would need to replace the right handle switch and throttle handle as well as the rectifier. Due to the problems with the apartment complex, he let me take the bike with the understanding I would pay him $300 by the end of the following week. The next day, I contacted an individual highly recommended in town with the idea that I would have him fix the throttle cable and then I would proceed on to the rest. He proceeded to check out the bike and suddenly decided to check one bowl on the carbs - rust in it. So much for being cleaned. Then, this mechanic did the cold compression which I discussed in my intro. So I decided to try giving the bike back to the PO but was told to keep it and the kid signed the title over to me free and clear.

So after some hemming and hawing about how I would do this, I started on my adventure of fixing things. I replaced the right handle switch with your all's help (THANK YOU) when I had problems fitting it onto the handle bars. Fortunately, Cdnoel was kind enough to come over to my place and help show me how to clean the carbs this past Monday. The first one went well but we ran into an issue today with the second one. It seems that somehow the posts holding the float assembly are busted. Whenever and however it happened, the PO must have tried to fix it by wiring one side together but didn't do anything to the other. Cdnoel is willing to try and fix that for me so we'll see how that goes. Secondly, the two and three carbs are so corroded we highly doubt anyone actually tried to clean them. Hopefully, I'll be able to clean them up okay without damaging anything but with Cd's help I think I'll do fine.

Today, before starting on the carbs though, Cd tested my spark plug wires for me. Unfortunately, I now have to find two new boots as the old ones are toast. Hopefully, they won't be too expensive and I'll get them next week. But it's starting to make me wonder just how much the PO really knew about taking care of a bike he supposedly had since he was a kid (he was probably 20 or 21 when I met him in March). Especially since we found the chain to be fairly loose tonight and managed to loosen up the petcock the other day with some carb cleaner and WD40 (it had to be turned by a wrench).

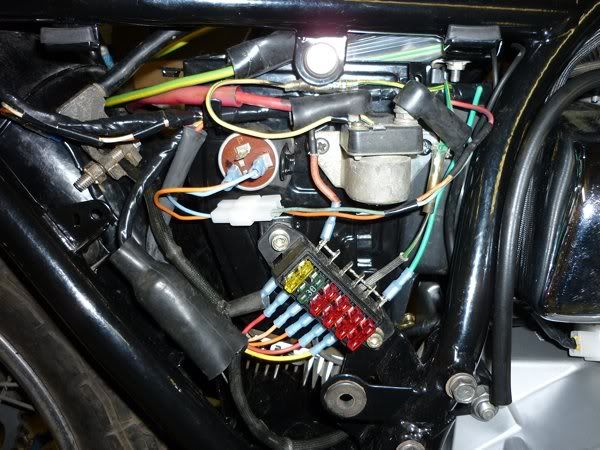
I'll post other pictures later once we get to running but I will definitely say this will be an adventure and one that I am already learning alot. I wonder what else I will find from here on and am looking forward to the challenge. However, hopefully I won't ever make the same mistakes this kid did.
 
Oh yea, forgot to say that I replaced all the spark plugs on it and the oil filter too. Unfortunately, I didn't check my ratchet that day and stripped the oil plug bolt. Luckily, Nessism suggested I get a helicoil and that worked just great. I just need to flush out any shavings that might still be in the pan and then it will have new clean lovely oil. :clap: Picking up a new air filter on Saturday too.
 
Howdy Cowboy, Well, I think we can all relate. Many of these old bikes have been neglected and abused. Good luck with getting her sorted out and back on the road. Ray
 
Cdnoel and I fixed the posts on another of my carburetors last night (actually he fixed them I just shot the pictures); you can see the pics of them in the tips and tricks section. I then put the petcock back in the tank with a new o-ring and the air filter back on the casing. I'm taking off work tomorrow to pick up some parts and hopefully we'll get the carbs back on tomorrow afternoon. Cross your fingers that it actually starts up.
 
Well, as I'm sure all of you are aware, I was able to get this bike up and running pretty well in August/September with the help of many of you. After about a dozen rides to and from work as well as a couple of rides around the area for fun, the cold weather hit and I felt it was time to start shutting it down. So, I'm working on fixing things up with the bike.

There are quite a few things I want to do. First off, the chain and sprockets are off and i'll get new ones as soon as some money frees up. Secondly, I'll be changing out my fuse block with a new one and have already worked out some details with Steve so I think I'll be okay with that. Then it's shocks and springs to order and some painting to do. I replaced the seat a couple of months ago.

Today, I decided to start on the road to repainting the bike.
So I finally started by stripping a couple of parts today. Although I read the can before starting and was told by some folks, I thought I could still open the stripper inside the house, pour it into my working can, and then go outside to do the job. Yea, right! I'll never do that again. Even with a mask on that smell was enough to knock me over . Trust me, if you ever use aircraft stripper get your butt outside ASAP!
So, I started the work around 2 or 230 when it finally reached this:

OutsideTemp12Dec10.jpg


The sad part is that thermometer isn't particularly accurate and weather.com said it was running about 4 or 5 degrees cooler. But I was able to get started using a work table I have. I first did the sprocket cover:

Sprocketcoverstripped.jpg


but not much came off of it.

sprocketcoverafterwards.jpg


Sorry I don't have a plastic scraper but I was told this one would do just as well. I am thinking though I'll get one next payday.
After that I started on the swingarm that I cleaned it up earlier last week.

swingarm.jpg


swingarmbeforestripping.jpg


After the first time through on the top side I got it looking like this:

swingarmfrontstripped.jpg


I got some more on the second time around but still not enough so I'll do a third shot later this week or next weekend.

Swingarmsecondstripping.jpg


Once that is done i'll start on the bottom side. I just hope I can do a good enough job so the painting turns out nice. Course if i mess it up I can always restrip it, right?

This is what the bike looks like right now:

Antique.jpg


I'm thinking this is the way I might want to go with this thing but it's still a thought in process.

Testbike5.jpg


Well, that's it for now. I finally have a reason to keep this thread going so I'll try to post as I can. With no garage and the weather we can get out here (winds and cold) it's a case by case basis whether I can get outside to work.

Thank you for looking.
 
Last edited:
Today the weather managed to get to 50 degrees so I took the swingarm outside to do some more stripping. Turned out pretty good.

swingarmstrippedfinal.jpg


swingarmsidestripped.jpg


swingarmrearstrippedfinal.jpg


I think I can just take what's left off by wet sanding with 400 paper. Does that sound about right with you all? Would you have any suggestions on how to clean up the welding marks? I don't know if those are factory welds or not but they kind of look nasty (pictures don't show it as well as I see them).
 
Cleaning up the welds is a slippery slope IMO.The frame on my 85 750 is a mess,spatter and bad looking welds all over.The fuss pot in me would have liked to grind and clean them all up.The realist said I'd be doing it till spring so I just painted it as it was.You are not me ,if you can do it without the need to try and make it look perfect then give it try.If you are like me it's probably better to leave well enough alone.
 
Thanks SVSooke. I'll have to see what I can do about a grinding wheel and grinder since I really don't have anything. Unless you count my Dremel tool.
 
Doing that an angle grinder would be your best bet.They are a great tool.Don't over grind though,you don't want to weaken the welds.A wire wheel on one works good to.Use mine allot.Bench grinder are good for small stuff but are limited with bigger things like swing-arms.
 
okay. I'll see what I can do then. It might have to wait awhile longer until I can pick one up as the air one I have might not work with my compressor. I'll have to give it a shot first though.
 
So I bought myself a grinder and a wire wheel for Christmas and went to do some work today. This is what the swingarm looks like now:

swingarmtopaftergrinder.jpg


Bottom:

Swingarmbottomaftergrinder.jpg


and one side:

SideofSwingarmaftergrinder.jpg


I couldn't get all of the paint off the rear of the swingarm; will that cause me issues when I repaint it? Any other suggestions since I couldn't get the cup wheel into that area?

Thanks for looking.
 
Shouldn't,there was lots of paint left on my frame.Tuned out just fine.30 + year old paint is pretty dead,I've only run into problems when I redid some stuff to quickly.
 
When I paint this thing here soon, I'd like to mark the lines on the back of the swingarm so I can see them. Can I just use whiteout or would model paint work? Nothing else would be white on the bike so I don't want to buy a large can of anything.

THanks.
 
Definately an ambitious job! Did you take the whole bike apart? Color scheme looks like it will be good too!
 
Thank you Jeff. Right now only the back end is missing off the bike. Once I can get most of it done, than I'll take the front off to do the springs.
 
Model paint would probably be the best for doing the marks on the swing arm.Could also use it to refresh the lettering on the control pods.
 
New Fuse Block

New Fuse Block

Well, since it is too cold to do much else, I started on the new fuse block I am putting in to replace the older buss style. Here's what it looks like after cutting some new 16 gauge brown wire and placing connectors on the ones I can. I did leave one end that goes to the fuse block unterminated as I didn't have enough connectors. Each of the connectors are 16ga insulated female connectors. I'm hoping I joined the wires securely enough where they double up - course I'll find that out for sure when I start the bike with them on.

Wiringfornewfuseblock.jpg


The other wires sitting to the side will go from the solenoid to the fuse block for main power, solenoid to the relay for its power, and from the R/R sense wire to the fuse block for constant 12v sensing. I'll terminate each of those as I get them on the bike so I can smartly cut them down to size.

I'm using this fuse block and this relay from www.wiringproducts.com. I wanted to go with the PC8 from www.easternbeaver.com but my finances won't allow it right now and I really want to get moving on this.

I'll post more pictures later as well as a full writeup on this portion of the project once I'm done.
 
I don't know if this is any help but in this picture of my fuse upgrade from a single fuse to multiples on my 550. You will see in the pic that I commoned the fuses together in groups by drilling the holes in the blades a little larger and soldering 15 amp wire through them. It saves having to do the double loop thing with multiple wires when connecting the groups up to the main feeds.


m_P1000143.jpg


.
 
Last edited:
Hey Scott,

Before you top coat that swingarm I suggest a coat of Por-15 sealer paint. It's the perfect stuff to use on a part like that with some remaining rust pitting down into the little recesses. You can top coat with what ever you want after the Por-15 drys, and you can even brush the stuff on since it flows out pretty well. Por-15 is having a free shipping sale right now too using code HNY11.

Keep up the good work.

Ed
 
Thank you Ed. If I'm wanting to use a black rattle can spray paint, can I just buy the black Por-15 or should I use the clear?
 
Back
Top