C
cdnoel
Guest
You'll need a file, 1/8 drill bit, 6/32 screw, hack saw, center punch, hammer, pliers with flat sides and a drill with a level bubble on the back.
Measure the exact height of the post as it shoud be.
File the post and the surface on the carburetor side flat enough for you to drill a 1/8" hole in the center.
By flat enough I mean take off as little metal as you can...just get the center flatened.
place the carburetor on a flat level surface.
Punch a locating mark in the center of the surface where the post goes.
Drill your hole atleast 3/16 or 1/4 " deep with the carburetor flat on the table and the drill bubble leveled.
Just a suggestion on the depth as you don't want to drill through the base metal into the body.
Screw in the screw and make sure you have about 3/8" or more of thread sticking up.
Cut off the head of the screw so that it is 3/8" high or atleast no higher than the shoulder of the other post.
Go slowly and deliberately on the cutting. Start by runing the saw backwards the entire length of the blade.
File the threads on the end of the stud you just made to a slight taper.
stand up the post head down on the table and punch it's center.
lay your flat sided pliers on the table and open them up enough to drop the post head down on the table.
Still holding the pliers flat on the table clamp down on the post and keep it that way.
Drill a hole 1/4" deep in the post but no deeper than it's shoulder and keep the drill level.
Screw the post down on the stud you made till it is at it's original height or as close as possible.
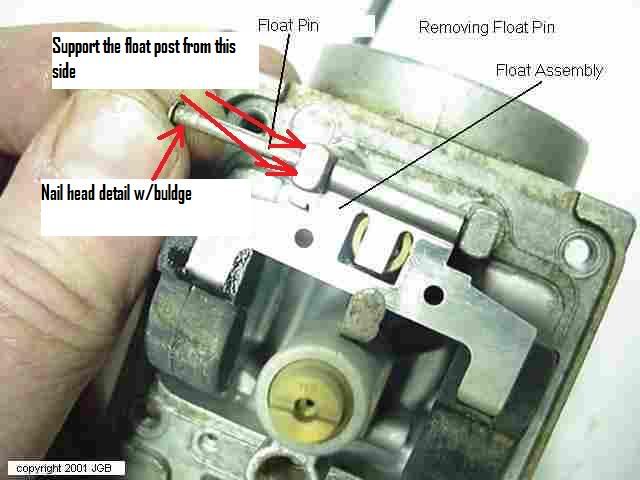
you also want the float pin to go straight through.
to accomplish this for certain put the pin in the repaired post and turn it till it points dirrectly at the other side.
Post's may have a little less room for the float between them now so you may need to modify the float.
If you file the float make sure you de-bur the hole so the pin rides smooth.
Good luck, your gonna need it.
Chris.
Measure the exact height of the post as it shoud be.
File the post and the surface on the carburetor side flat enough for you to drill a 1/8" hole in the center.
By flat enough I mean take off as little metal as you can...just get the center flatened.
place the carburetor on a flat level surface.
Punch a locating mark in the center of the surface where the post goes.
Drill your hole atleast 3/16 or 1/4 " deep with the carburetor flat on the table and the drill bubble leveled.
Just a suggestion on the depth as you don't want to drill through the base metal into the body.
Screw in the screw and make sure you have about 3/8" or more of thread sticking up.
Cut off the head of the screw so that it is 3/8" high or atleast no higher than the shoulder of the other post.
Go slowly and deliberately on the cutting. Start by runing the saw backwards the entire length of the blade.
File the threads on the end of the stud you just made to a slight taper.
stand up the post head down on the table and punch it's center.
lay your flat sided pliers on the table and open them up enough to drop the post head down on the table.
Still holding the pliers flat on the table clamp down on the post and keep it that way.
Drill a hole 1/4" deep in the post but no deeper than it's shoulder and keep the drill level.
Screw the post down on the stud you made till it is at it's original height or as close as possible.
you also want the float pin to go straight through.
to accomplish this for certain put the pin in the repaired post and turn it till it points dirrectly at the other side.
Post's may have a little less room for the float between them now so you may need to modify the float.
If you file the float make sure you de-bur the hole so the pin rides smooth.
Good luck, your gonna need it.
Chris.
Last edited:

 ray
ray")