• Required reading for all forum users!!!

    Welcome!
    Register to access the full functionality of the GSResources forum. Until you register and activate your account you will not have full forum access, nor will you be able to post or reply to messages.

    A note to new registrants...
    All new forum registrations must be activated via email before you have full access to the forum.

    A Special Note about Email accounts!
    DO NOT SIGN UP USING hotmail, outlook, gmx, sbcglobal, att, bellsouth or email.com. They delete our forum signup emails.

    A note to old forum members...
    I receive numerous requests from people who can no longer log in because their accounts were deleted. As mentioned in the forum FAQ, user accounts are deleted if you haven't logged in for the past 6 months. If you can't log in, then create a new forum account. If you don't get an error message, then check your email account for an activation message. If you get a message stating that the email address is already in use, then your account still exists so follow the instructions in the forum FAQ for resetting your password.

    Have you forgotten your password or have a new email address? Then read the forum FAQ for details on how to reset it.

    Any email requests for "can't log in anymore" problems or "lost my password" problems will be deleted. Read the forum FAQ and follow the instructions there - that's what we have one for...

  • Returning Visitors

    If you are a returning visitor who never received your confirmation email, then odds are your email provider is blockinig emails from our server. The only thing that can be done to get around this is you will have to try creating another forum account using an email address from another domain.

    If you are a returning visitor to the forum and can't log in using your old forum name and password but used to be able to then chances are your account is deleted. Purges of the databases are done regularly. You will have to create a new forum account and you should be all set.

Fuse block tutorial?

  • Thread starter Thread starter uudfourty
  • Start date Start date
U

uudfourty

Guest
Has anyone done a how-to for the forum on how to swap your glass fuse block for a new spade-style one?

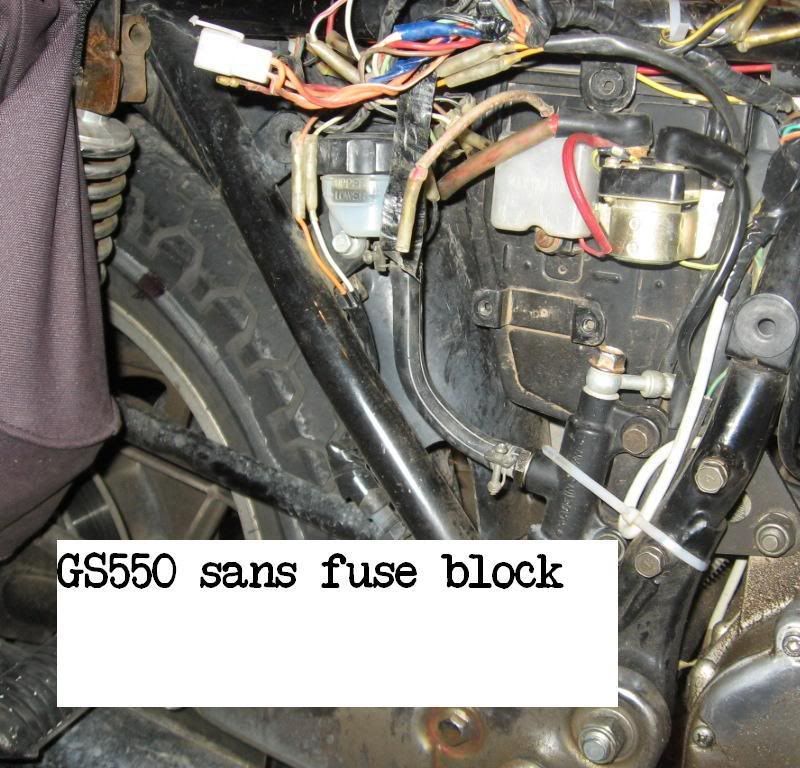
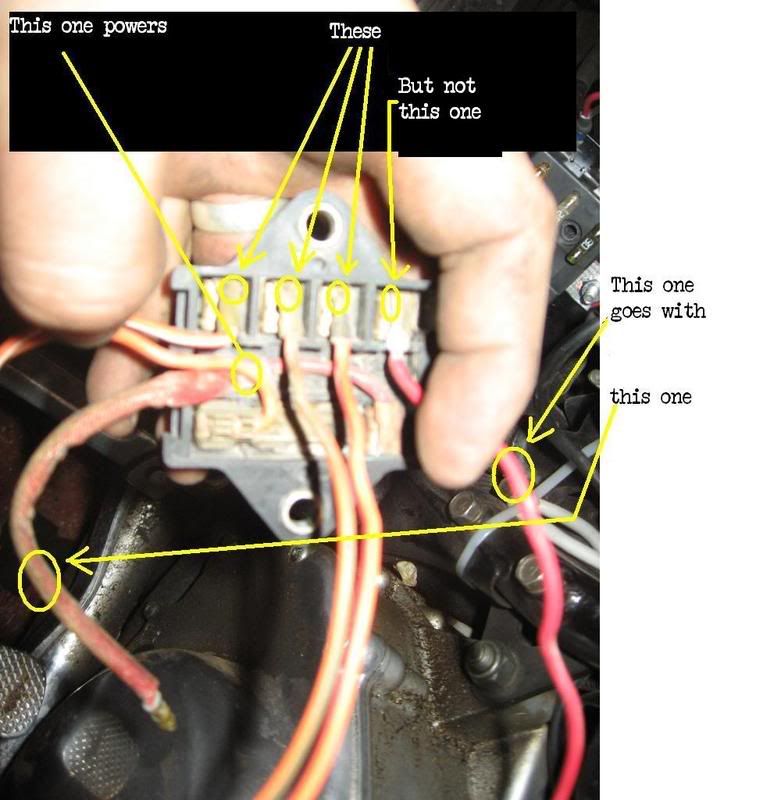
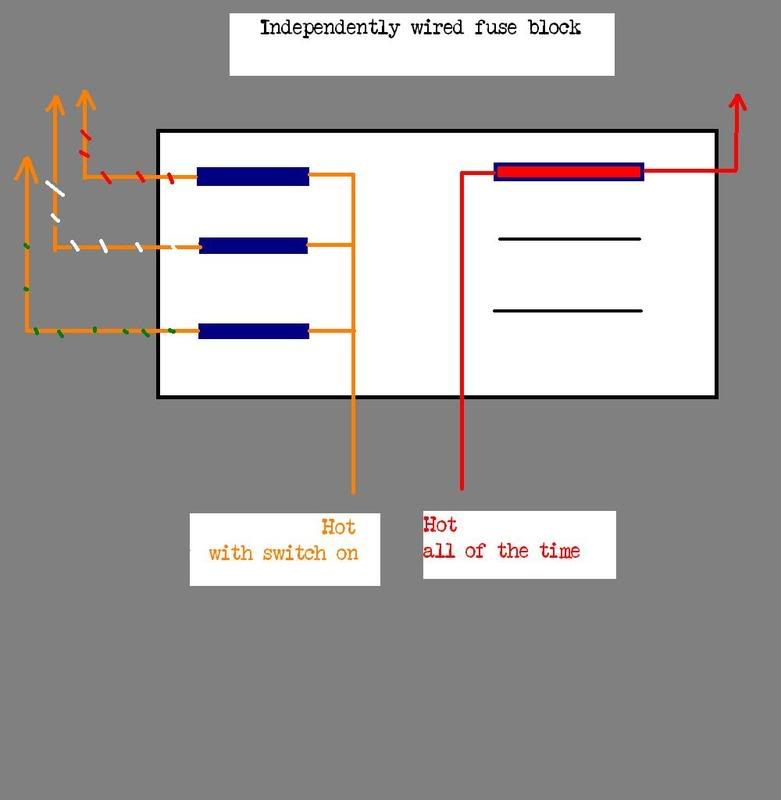
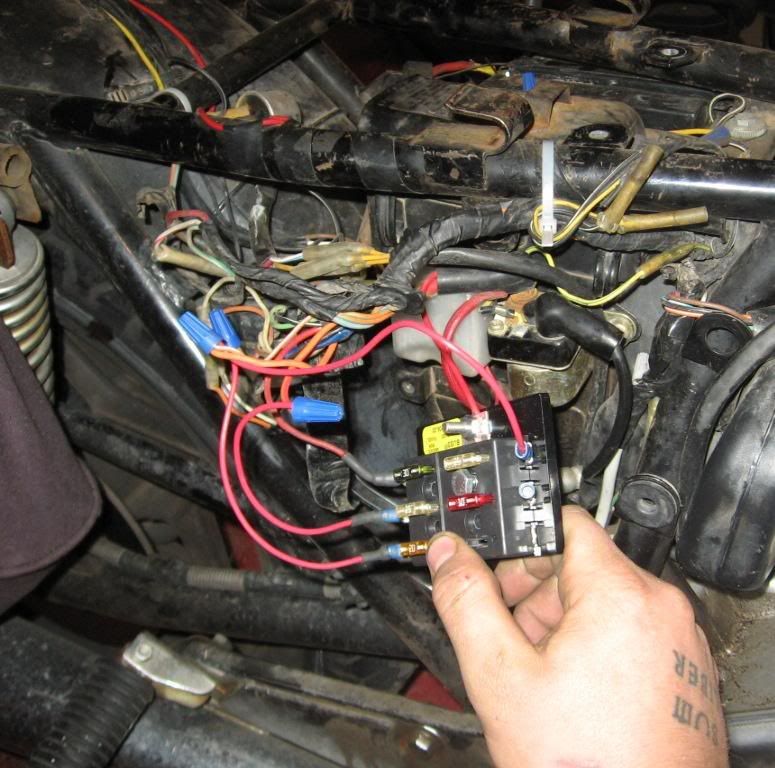
If not, I did it last night while doing the coil relay mod and took some pictures. I'd be happy to write one up for swapping the fuse block, but don't want to waste my time if someone else has already done it. I know this isn't exactly a complicated procedure, but some folks out there just feel better when they have a guide. Especially when dealing with wires.
 
Last edited:
That is a great idea

That is a great idea

There may already be one I dont ever rememebr seeing one but more "how to's" are very helpful as otherwise it requires quite a bit of (re)search to figure out the best thing to do.

It would be best to have it reviewed for comment , content and clarity then it would be more likely to have lasting value to the forum.
:-D
Posplayr
 
It would be best to have it reviewed for comment , content and clarity then it would be more likely to have lasting value to the forum.
:-D
Posplayr

Ah, of course.
I was going to put it on tips and tricks, then let the powers that be decide whether my offering is worthy.
 
No offense intended

No offense intended

I just do a lot of engineering work and "peer review" is becoming a standard part of the process for document development.

I was considering doing an electrical tutorial as well to supplement the Stator pages. I think Basscliff does a certain amount of editing before posting on his site so that might be the way to go.

Good Luck
Posplayr
 
These tutorials that guys like Mr. Bcliff and MrBwringer and others put together are Awesome and invaluable for many, especially newbies. I think they go a long long way to promoting the GS bike and even the sport in general as I'm sure the information provided can translate to other bikes. Kudos to all of them.

Kudos to you too if you can take the time to put something together and contribute it to the common good.

I recently ran across a very good article on making stainless steel brake lines on another board and if I can obtain permission I would like to add a bit to it and publish it here.

Good on ya mate, as Zooks and the boys would say.

Looking forward to your tutorial.

Cheers,
Spyug.
 
ya, i'd like to see it, i want to do this mod as well, and am not totally sure where to start.
 
Alright. I've got a literary analysis of Elizabeth Gaskell's North and South and a researched project proposal for Technical and Professional communications to get done this weekend.

Whenever I get finished with THAT crap, I'll get it put together.
 
Here she blows.

Here she blows.

I've got the whole thing in a .doc and it looks a lot better than on here. I can email it wherever it needs to go, just PM me. It's public property now.

Fuse Block Upgrade and Soldering How To:

Face it, you haven?t done enough stuff to your GS yet.

Glass fuses don?t handle shock very well, and they?re just kinda crappy. That?s why they were replaced with spade fuses in the first place: something better came along.

So why settle for less than the best (because anything less than the best is a felony) for your GS? It treats you well (sometimes) so you should return the favor and upgrade to a spade terminal fuse box.

The work was done on a 1981 GS550L. There can?t be too many differences between the models, so we?ll assume for now that if your set up it isn?t exactly like mine, it?ll be pretty close.

Parts:
A Spade Fuse Block and appropriate fuses.
Whatever flavor of terminals are necessary to hook up to your new fuse block. I used female spade terminals.
Wire
Heat Shrink Tubing is nice, but electrical tape will do.
Some crimp butt splices or a soldering iron and rosin core solder.
Spade terminals
Write nuts for testing.
Wiring diagram (just in case?)
In line fuse if your new fuse block has one common hot lead.

1) Safety First
Disconnect the battery from the bike, offer a bit of knuckle skin and Sea Foam to the GS gods as a burnt sacrifice. Pray that they bless your work.

2) Remove the offender
Take off the old block. Not a big deal. It?ll be held on with a couple of screws on the right hand side of the airbox. Unplug it from everything.
Keep in mind what goes where. It might sound hard to do, but if you keep your old glass fuse block laying right next to you, it?s not complicated at all. There is a pigtail connector with 4 orange wires (solid orange, orange/red, orange/green, orange/white) and two other red wires to concern yourself with. One red wire comes off of the starter relay, the other comes from the wire harness.
sansfuse.jpg
 
Now that you’ve got the old fuse block sitting in your lap, pop the back the back cover off:

Blocklabeled.jpg


At first glance, it might seem like all of the wires are powered by that one red wire, but that’s not the case. The two red wires run their own circuit and are independent from the orange ones.

3) Don’t forget to write.
Take a piece of paper and jot down the amperage of each fuse and its corresponding wire. For instance:
Orange/Red: 25
Orange/White: 30
Orange/ Green: 30

These numbers are for demonstration purposes only. Refer to your manual for proper amperage, as a PO might’ve installed an improper fuse.


4) Snip Snip
Now you’ll have to prepare your wires for connection to your fuse block.
You can start by getting rid of that bullet-tipped connection.

fascistbullettip.jpg


Clip and strip all of the other wires coming off of the bike. Leave enough room on the back of that 4 connection pigtail to be hooked back up later if you, for some reason, decide to use it again.


If you have a fuseblock with all of the fuses being powered by one common lead, then you’ll have to have a separate in-line fuse for that starter solenoid. You’ll only be able to power the orange wires from the fuse block.

If you don’t run the red wires separately try to power all of the fuses with the red wire from the harness, then your indicator lights (neutral, oil pressure) will be on all of the time. The bike will start and run and the lights will come on, but you’ll be jumping around the switch, and you don’t want to do that.
In other words, you don’t want it to look like this:
Notthis.jpg
 
Last edited:
If you were fortunate enough to find a fuse block with independent in-and-out slots for each fuse, then all of your fuses can be run from this block. You’ll have to link three of the hot sides together for that solid orange wire and the red for its own circuit.


Independentfuseblock.jpg


I didn’t have one of those, so I ran the orange ones off of the fuse block, and put an in line fuse in for the starter solenoid (red wires). If you’re doing the coil relay mod and your fuse block is powered off of one common lead rather thane each circuit having its own supply, you’ll need another inline fuse for the relay mod. There are other, better tutorials for the coil relay mod. I’ll not go into detail with that here.


5) Get Crazy With the Wire Nuts
Cut a half foot or so section of wire for each of the outgoing sides of the fuses. Crimp a spade terminal on one end heat shrink each of those half foot sections. Go ahead and connect one end of each of these wires to the fuse block, and wire nut the other end to the corresponding orange wire. Put them on in any order you please, so long as the amperage is correct. That’s why you wrote it all down, right? The wire nuts are for testing purposes and aren’t permanent.

(I had it wired wrong, so ignore where the wires are going, just notice that they’re wire nutted)

wirenuts.jpg


6) In Liners
If you had to run an in line fuse for the starter solenoid (if you had a fuse block with one common lead) then now is the time to hook that up. Find a nice safe place for it to go, put the red wire from the harness into one side of the fuse and the red to the starter solenoid in the other side. Wire nut the connections together for testing purposes.


7) Testing
Re-connect the battery and turn on the bike. Let it set for a second.
No smoke or fire? Good.
Start it.
Make sure all of the lights work.
Turn your bike off and disconnect the battery.

8 )Solder On
Solder your connections.
Rough mount your fuse block wherever you want it to go. Mine (amazingly) mounted up just fine. Most won’t be so lucky. You’ll have to figure out what will work for you, but mine fit right back where the old one came from.

One at a time, undo the wire nuts, cut the wire to the appropriate length, put a piece of heat shrink tubing on one side of the wire and then solder it.


Do this with each wire, mount the block.

9) Go For a Ride
 
Not know how to solder?
It ain?t hard.

You?ll need a soldering iron and some rosin core wire. You won?t need much solder, but once you get the hang of it, you?ll be soldering everything in sight.

If you?re just making a connection between two wires, strip ? an inch or more on either side, slide a piece of heat shrink tubing over one half, and perform the following:

Introduce the wires.

wremeet.jpg


Now make them hug.


wirehug.jpg


Make a soldering Iron Sandwich. (Kinda hard to take pictures of this, so use your imagination)

You?re going to want to heat the wire, not the solder. Hold the roll of solder in one hand (probably your non-dominant one). Roll a bit of it out so the roll looks like a number 6. Lay the solder you pulled off of the roll on top of the wire and hold the iron on the bottom side. You want the wires to get hot enough to melt the solder. It might take a little bit, but when it happens, it happens quick. Don?t let it drip on you or your wife?s carpet. Solder should flow through the connection. When it cools, it will be as though the two wires were one. Pull the heat shrink tubing up over the connection, and shrinkify it.

You just soldered a connection. Pat yourself on the back. But put the soldering iron down first.
 
Thanks for sharing! I fully agree the glass fuse holders should be replaced and even fitting a fuse block with some extra fuses will make life easy when you rewire coils, headlights and horns via their own fuses.
Thanks.\\:D/
 
LOL... I love this tutorial. Nicely done uud!

This one will be on my back burner for now as I'm dealing with some more pressing matters, but will definitely keep this in mind for the future. I know there was a fusebox thread somewhere, hopefully someone will post one up that seems to work well and has a few extra spaces for horn/coil/whatever mods! I haven't seen anything locally.
 
hopefully someone will post one up that seems to work well and has a few extra spaces for horn/coil/whatever mods!

Well, there it is.
I bet someone else has done one before but it's buried somewhere in the annals of GSR history.
 
I found it, I think it was page 2 or 3 of the coil relay mod thread. I was looking around a bit on my own. I liked this one because it has the option of two inputs like you suggested:

http://www.centechwire.com/catalog/panels/ap2.shtml

"The AP-2 fuse panel is identical to the AP-1 panel with the exception that the AP-2 is divided into two electrical sections. The main section contains three fuses and feeds five outputs while the second section has two fuses and three outputs. The advantage of having two sections allows the enthusiast to have fused power available for devices which need constant battery power and those which need to be switched “OFF” with the ignition key. The AP-2 can handle a maximum of 60 amperes divided into a 40 ampere and 20 ampere section."

It's kinda pricey, and even though it says it has 8 outputs, I'm not sure how it works to have outputs sharing fuses ??? ALso not sure that's enough enough to run everything I would need it to run, to function as a normal fuse block and to supply power to the future add on relays.
 
Well, the one I bought came from a chain auto parts store and cost seven dollars. It only had one common hot lead, though, but inline fuses were only a couple of bucks apiece. For what it's worth.

I guess it just depends on what you want to come on with the switch.
 
Last edited:
Yep! To be honest I have no idea why we have an always hot wire (not that there isn't a good reason, I'm sure there is, I'm just no electrical guy by any means). Looks like I'd only need one 15 amp inline fuse for the red wire that runs from pos term to rectifier and ignition switch. It also splits to a 10amp fuse but it terminates, so I'm assuming for now that's an extra accessory fuse or something.

This could be a lot of fun! Thanks again for your tutorial. I love this site =]
 
Back
Top