• Required reading for all forum users!!!

    Welcome!
    Register to access the full functionality of the GSResources forum. Until you register and activate your account you will not have full forum access, nor will you be able to post or reply to messages.

    A note to new registrants...
    All new forum registrations must be activated via email before you have full access to the forum.

    A Special Note about Email accounts!
    DO NOT SIGN UP USING hotmail, outlook, gmx, sbcglobal, att, bellsouth or email.com. They delete our forum signup emails.

    A note to old forum members...
    I receive numerous requests from people who can no longer log in because their accounts were deleted. As mentioned in the forum FAQ, user accounts are deleted if you haven't logged in for the past 6 months. If you can't log in, then create a new forum account. If you don't get an error message, then check your email account for an activation message. If you get a message stating that the email address is already in use, then your account still exists so follow the instructions in the forum FAQ for resetting your password.

    Have you forgotten your password or have a new email address? Then read the forum FAQ for details on how to reset it.

    Any email requests for "can't log in anymore" problems or "lost my password" problems will be deleted. Read the forum FAQ and follow the instructions there - that's what we have one for...

  • Returning Visitors

    If you are a returning visitor who never received your confirmation email, then odds are your email provider is blockinig emails from our server. The only thing that can be done to get around this is you will have to try creating another forum account using an email address from another domain.

    If you are a returning visitor to the forum and can't log in using your old forum name and password but used to be able to then chances are your account is deleted. Purges of the databases are done regularly. You will have to create a new forum account and you should be all set.

GS1000S paint work started

nvr2old

Forum Sage
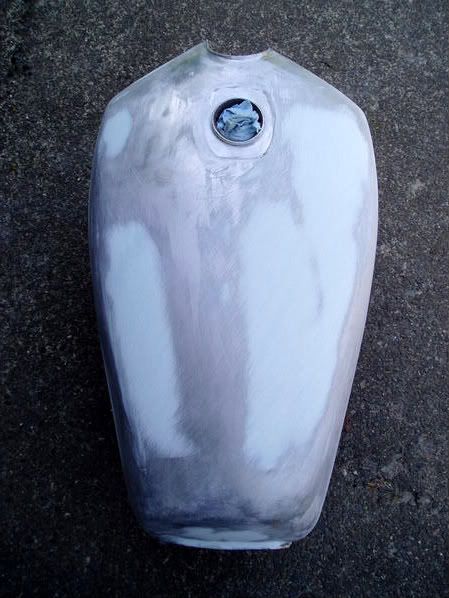
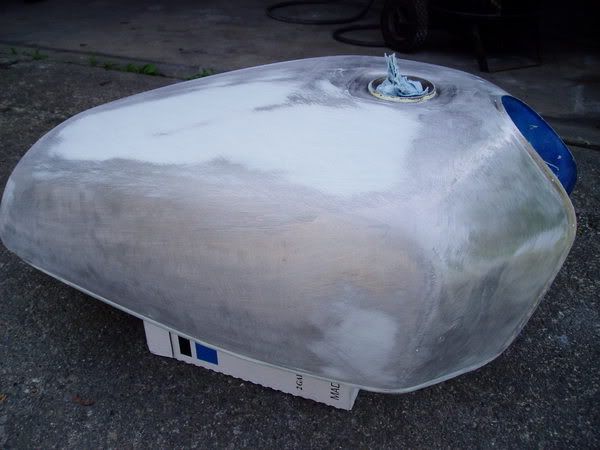
Finally got a good day of work in the garage this past Saturday. Pretty much got all the body work for the S done with the exception of some finish details on the front fender.

GS1000fenderroughglass.jpg

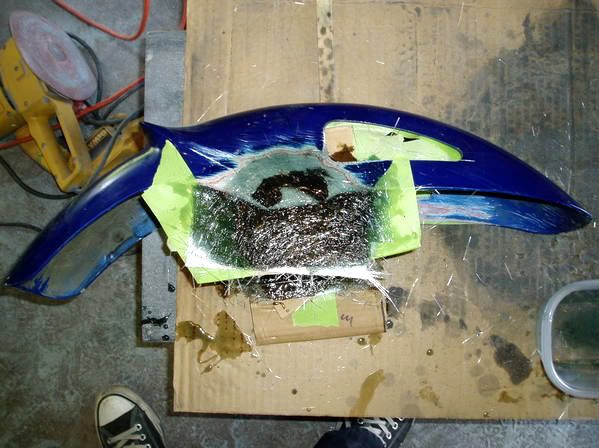
Had to lengthen the mounting point on the Honda CB1100F fender. Need another 1/2" so I fiberglassed it on both sides. It's really strong.

GS1000fenderholesdrilled-b.jpg

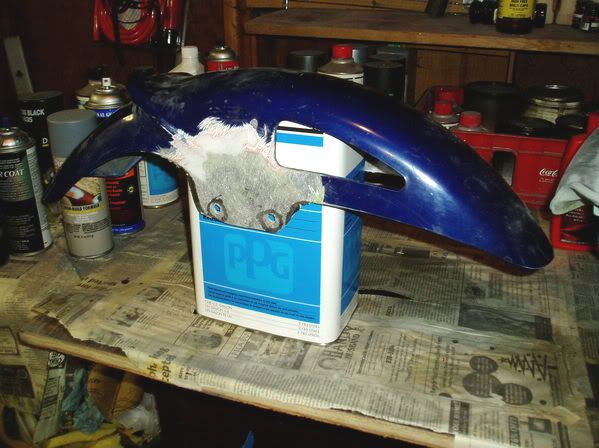
After grinding it a little closer to the finished shape, I drilled the new holes for the GS forks.

GS1000fenderholesdrilled.jpg

I'll take it closer to the holes and make the lines a little more flowing looking before a skim coat of body filler to finish it off.

GS1000fairingprep.jpg

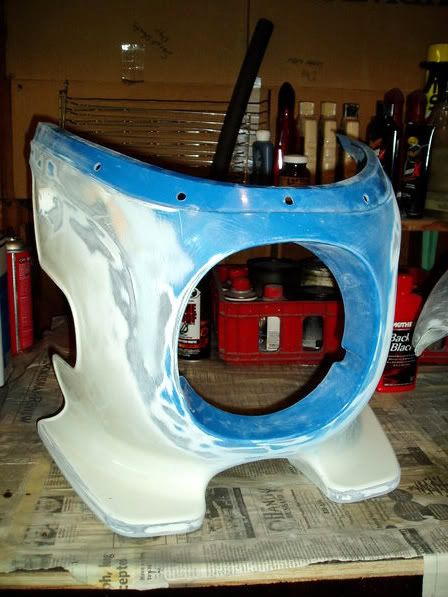
Fairing came out good. One small scuff on the right front to repair. A pain to get all the factory decals off after 30 years.
 
Last edited:
GS1000sidecoversprep.jpg

Had to fix a couple of cracks and I also filled the dimples in the center of the side covers.

GS1000tanktop.jpg

The top of the tank had a few dings, light dents, and waves.

GS1000tankright.jpg

The right side of the tank was really clean.

GS1000tankleft.jpg

The left side needed the most work. Pretty good sized dent in the front, several dings and waves along the bottom. Smoothed out real nice. Should have primer in the next couple of days, and possibly the first of the three colors by the weekend.
 
Those sanding marks in the panels and left side of tank look pretty deep, is it just camera trickery or have you a spot more flatting to do before paint?

Can't wait to see this finished, you gotta love a fresh paint job. I'd love to "S" my "E" but time and other "wants" won't allow it.
 
Those sanding marks in the panels and left side of tank look pretty deep, is it just camera trickery or have you a spot more flatting to do before paint?

Can't wait to see this finished, you gotta love a fresh paint job. I'd love to "S" my "E" but time and other "wants" won't allow it.


I thought the same thing, like it needs a higher grit
 
180 grit is fine before priming. Then after sand to 400 in steps before the base coat. She looks good - nice work. Did you use a 2-part filler?
 
I wouldn't go to paint on those side panels as shown in the pics. You can still clearly see the original stripes on the sides of the panels and those scratches just look too deep to me. It may be camera trickery i s'pose.

I'm not a pro paint sprayer so i may be way off here, i just hate doing something twice (which i have plenty experience of!), worth a bit more effort with a finer paper in my opinion before going to paint.

I'm sure nvr2old knows what he's doing anyway, can't wait to see the fresh paint laid on there.
 
All of the pieces are far from done. The body work has just been roughed-out. Everything is sanded with 80 grit at this point. Starting with course paper works really well for getting the correct shape. Too fine, and it doesn't "cut". The side covers will get some 100 grit block sanded over them to feather out the edges a bit more and then 4-5 coats of primer. The tank is ready for primer at this point. You need "tooth" for the product to adhere. I'll shoot everything with a high-fill primer, block sand with 180 grit, prime again, block with 400, and then see how it feels. If it needs a few more coats of primer then blocked again, no sweat. I use automotive PPG paint and primers that are all 2-3 part products. Nice stuff. As far as sand paper, 36 grit to start, 2500 grit to finish, everything else in between. It'll have a way better then factory, show-quality finish when it's done, I gaurentee. :D
 
I was going to butt in here with "depends on the primer used". I Always use a high build one to start off with....

Dan :)
 
I was going to butt in here with "depends on the primer used". I Always use a high build one to start off with....

Dan :)
On the tank I'd use some self-etching to get a good surface, then go with a build primer.

Next week I need to spray if the bike is going to be ready for the wedding.
 
I use automotive PPG paint and primers that are all 2-3 part products. Nice stuff.

When I used that on my ED, it made it sooooo easy. :rolleyes:

My tank and panels were not bad at all, but after a little filler in some dents, I was stressing about feathering the Bondo into bare metal. I was not sure how well the PPG primer would fill. Well it worked great and I only had to to do one primer coat.

Great stuff.

i have several moto paint jobs planned this summer (maybe 4).

Pos
 
Today's paint products are amazing. The high-fill primer will easily fill 80 grit scratches, and the final clear coats will totally bury the stripes and lettering. I always hesitate (especially to customers) to show the prep stages of a really nice paint job. They're always horrified at how scratched up and ugly all the parts are..until seeing all the steps, and how each progressive one smooths and straightens out the parts right before their very eyes. Painting is pretty much secondary, prep is everything. It's a cool and very satisfying process.
 
NVR2OLD-Thanks for taking the time to post these pics. I'm learning paint and autobody now as a hooby, and knew you know your stuff by the way you are feather your sanding. Goog job, please keep up the photo's. I appreciate the in between stage pics!:D
 
Posplayer-how many pads did you go though total for the tank, 4 or so? Are the Bosche sanding pads expensive?
 
what did you use the prep the plastic?

I'm getting ready to do all of my fairings, and the factory decals are looking like a PITA!! I was thinking a heat gun to try and remove the decals but what should I use to prep the rest before I paint?

Thanks pos.......
 
Orbital Sanding tips

Orbital Sanding tips

I hit the side covers and tail with the orbital sander. No need to get down to "bare plastic".

I go bare metal on the tank to get rid of the possibility of any latent rust.

The Bosch orbital is a great variable speed sander

  • If you are worried about being too aggressive used a finer pad (120)
  • Safer to to start on with plastic with some 120 grit.
  • Concentrate on flatter areas and do corners by hand.
  • Don't grind across a straight edge; it is a pita to bondo the edges and get get back to OEM sharp.
  • 60 grit orbital is like doing 100-120 by hand in terms of roughness and depth of cut
  • With metal it doesn't really matter too much 60 grit is fine.
Good Luck

Sorry to Hi jack the thread. :rolleyes:

Pos
 
On the tank I'd use some self-etching to get a good surface, then go with a build primer. Next week I need to spray if the bike is going to be ready for the wedding.

+1: Yup, for the bare gas tank you need to shoot epoxy primer first then followed by high build primer. If you use high build primer first the base will never be solid and in time it will move and your beautiful paint job won't last. In your case with all the substrates visible you should use a primer sealer before base.

PPG Omni 170 series is a excellent epoxy primer which when reduced properly can be used as a primer sealer. If your first base coat is white (S right) I believe you would choose Omni 171 white.

I have been hanging around here searching and asking questions . .

http://www.autobodystore.com/forum/index.php
 
what did you use the prep the plastic?

I'm getting ready to do all of my fairings, and the factory decals are looking like a PITA!! I was thinking a heat gun to try and remove the decals but what should I use to prep the rest before I paint?

Thanks pos.......

If we are discussing your GS550EF avatar plastic which is presently red, blue etc I would say take the orbital sander and get it down to one color of plastic. If you don't you are almost certain that you will need all three different primers to sufficiently make the plastic surface smooth & uniform in color for the base coat.

Regardless your first coat will be epoxy primer.
 
Back
Top