• Required reading for all forum users!!!

    Welcome!
    Register to access the full functionality of the GSResources forum. Until you register and activate your account you will not have full forum access, nor will you be able to post or reply to messages.

    A note to new registrants...
    All new forum registrations must be activated via email before you have full access to the forum.

    A Special Note about Email accounts!
    DO NOT SIGN UP USING hotmail, outlook, gmx, sbcglobal, att, bellsouth or email.com. They delete our forum signup emails.

    A note to old forum members...
    I receive numerous requests from people who can no longer log in because their accounts were deleted. As mentioned in the forum FAQ, user accounts are deleted if you haven't logged in for the past 6 months. If you can't log in, then create a new forum account. If you don't get an error message, then check your email account for an activation message. If you get a message stating that the email address is already in use, then your account still exists so follow the instructions in the forum FAQ for resetting your password.

    Have you forgotten your password or have a new email address? Then read the forum FAQ for details on how to reset it.

    Any email requests for "can't log in anymore" problems or "lost my password" problems will be deleted. Read the forum FAQ and follow the instructions there - that's what we have one for...

  • Returning Visitors

    If you are a returning visitor who never received your confirmation email, then odds are your email provider is blockinig emails from our server. The only thing that can be done to get around this is you will have to try creating another forum account using an email address from another domain.

    If you are a returning visitor to the forum and can't log in using your old forum name and password but used to be able to then chances are your account is deleted. Purges of the databases are done regularly. You will have to create a new forum account and you should be all set.

Help to rescue fork lowers.

  • Thread starter Thread starter Flyboy
  • Start date Start date
F

Flyboy

Guest
Guys, and ladies, I would appriciate your collective help on this one.
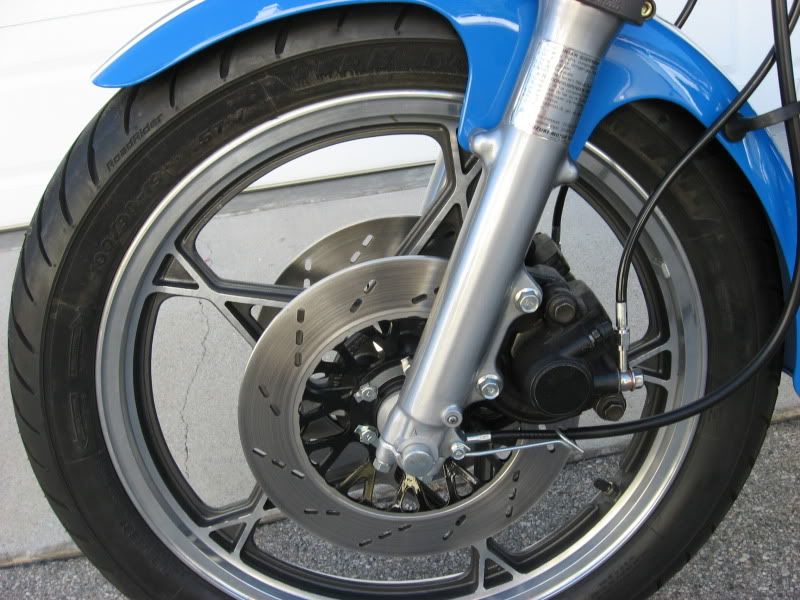
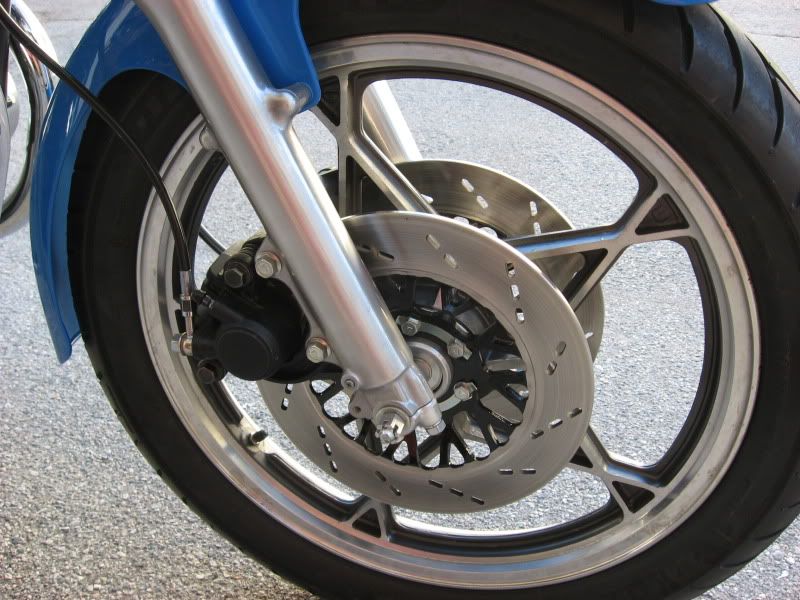
As you know, Jennifer is currently undergoing a major rebuild and makeover and I have the forks stripped down at the moment to replace seals and clean out all the 30 year old gunge and repalce the fork oil.
So while the forks are stripped down, I decide it would be a good time polish up the lowers and bring them to better than new condition, so i sand and buff and polish, but it is just not coming out nice and shiney and even like it should, now half the lower is sort of acceptable shiny and half is not, and I can't seem to get an even polish on the whole thing, the casting is quite rough in some places and just will not shine up nicely.
The problem with polishing them is that if the whole thing is not the same and has an even shine, you see it straight away.
It also brings out all the imperfections and scratches for all to see.

So I am thinking of trying to get them back to the original brushed aluminium finish that they came from the factory with.
is this possible, and if so, how do I go about it.
Or, if I go on polishing them exactly what is the best way to go about it?
What would look better?
Please help, and please, I am looking for an idiots guide here, a "step by step, take your hand and lead you step at a time" explination.
Not just; sand first then buff with xyz rouge.
I mean, what sandpaper, followed by what sandpaper, buffer with what cloth and with what juice.
Please, I would like to put in some time this Sunday sorting these out.
I don't have a bench polishing wheel, the best I can do is a drill attachment.

What would be the way to go? Polish or return them back to original brushed aluminium?
many thanks.
 
Last edited:
For the rough areas I would use say 120 grit wet and dry to start and when it starts to flatten off move up to 800 before polishing. With the smoother areas I wouldn't go below 240 grit unless there are deep scratches. Use all wet and dry paper with a drop of detergent in the water.

For polishing I start with Solvol Autosol and a mop that resembles hessian carpet. You are using a mop on a grinder / in a drill aren't you and not polishing just by hand? You'll be there for hours otherwise. You can get a very good shine just with the Autosol but you can go mirror finish if you change to a lint mop and the white polish bar (sorry, I don't know what the wax bar is otherwise known as and it might be different colours in different countries).

It's hard work and the more you put in to it the better the results.
 
Hi HH, ya, i am using one of those linen cloth type wheels in the drill, looks like a whole bunch of cotton sheet type material sewn together to form a disc about 5cm wide.
I am using the red bar for polishing because that is what the guy at the store said was needed for aluminium.
Another thing, the bar of polishing "soap" for want of a better word seems very hard and dry to me, but I don't know what hey should be like, should it be softish so one could dig a finger nail in without too much effort?
I am sure this thing is dried out, but like I said, i don't know what it is supposed to be like.
And my cloth buff is totally black from polishing, how does one clean it, if it can be done, or is it not required.
 
So I am thinking of trying to get them back to the original brushed aluminium finish that they came from the factory with.
is this possible, and if so, how do I go about it.

Please help, and please, I am looking for an idiots guide here, a "step by step, take your hand and lead you step at a time" explination.
Stan, you're not a idiot, so no idiots guide is necessary.

this is a general guide to getting the factory style finish back. wash them well in soap and water, sand with 600 or 800 grit wet or dry paper ripped like a piece of cloth used to polish your dress shoes. wet the paper as HH suggested and polish the tubes the same way as you would shine your shoes. degrease the tubes very well and follow up with your favorite clear.

my .02 Rand...
 
Thanks Dale, I have no problem tackling on anything mechanical, from a weed wacker motor to a jet engine, but when it comes to the artistic side of things an crating things of beauty, I am afraid I am seriously lacking, so I leave the creation of the works of art to the likes of yourself , Ed and various other members on this board.
I am going to get some 800 tomorrow and give it a go, I just want to ask, do you wet sand from side to side, or along the length of the fork?
the way you descibe it, like shining up your shoes with a rag would really only be possible if ne drapped the strip of sand paper around the fork and pulled from side to side, yet does one not want to get he "grain" so to speak, along the length of the fork, just asking. I really do not know?
And yes, thank you both, your simple terminology is exactly what I need, I understand that.
I just really want to get this bike to the be the best she can be.
 
Stan, side to side is the way the factory sanded them, not length wise. I don't know how well regular wet/dry paper will hold up as I haven't tried it yet. one possibility would be to use some rather stout sand paper first before going to normal wet/dry paper wetted?
 
No polishing to replicate the factory finish. Use progressively finer sandpaper until you get to 600 (or maybe 800) grit and then stop. We can not tell you what paper to start with since we don't know how deep the corrosion is, but I've had similar parts that required 220 grit as the starting point. Wet sanding is way more productive, and less messy, than dry. As Dale says, you need to sand sideways, and hit the casting with clear if you want to replicate the factory finish. I like POR-15 Glisten clear. It's two part urethane and is designed for use directly on metal like that.

Have fun.
 
Thanks Dale, would yu recomend giving it a go with 800 grit emery cloth dry first, that stuff is pretty hardy, and should get it back down to clean aluminium before softening the finish with a once over with wet and dry, wet.
 
Thanks Ed, I think if I start with 600 and end with 800 I should be good, no corrosion at all luckily, one of the joys of living at 5500ft above sea level in a pretty dry climate.
I am going to do exactly as you guys say....I have seen your work, I will be happy to get them looking half as good.
I think in trying to keep with the factory look I am going to definatly go with the stock look as opposed to polished, don't know what I was thinking.

kdo58, thanks for the link, lots of good simple info there, I am going to go through all of it.
 
Last edited:
Do you have a grinder like this?
2011_01080001.jpg

Done my polishing with this.AZR has done the same.Dedicated buffers are better for sure but this is what I use,
 
Forget to mention that it's best to use paint stripper on the legs before sanding to remove the old clear. And again, no polishing is needed if you want the legs to match the original appearance.
 
Ok, will paint strip first, but I don't have any aircraft paint stripper, just the nasty super strong jelly like stuff, I am just worried that it is going to chomp up my forks. :eek:
Or am I worrying too much?
No I don't have a bench grinder yet, so unfortunately I am limited at the moment to a drill attachment.
It has been a bit of a double edged sword since started the rebuild, a I didn't really have any sort of workshop or real tools to speak of, so I have had to try and skim a bit off the grocery money here and there every month, not only to buy bike bits and consumables, but kit myself out at the same time.
I pretty much started with a 60 piece tool kit which contained your basic spanners, screw drivers and sockets.
Kicked the car outside and started to kit out the garage as my workshop, getting there slowly, built a nice big work bench put up decent lighting, bought a drill and angle grinder, and so on.
The three things I still need are a vice, bench grinder and compressor.
Although, living in a complex, not sure how well the compressor is going to go down. :eek: Oh, and a little elecroplating kit for all the fastners and such.

So its always a toss up, come payday, do I spend on the bike, or equipment? Hense my super slow progress, but as Pete says, we will get there one day.

Anyway, I will go with the brushed original look, any ideas on ending off with steel wool, or not nessecary?
 
I thought that might be the case.Don't think I have much stuff like that either but I really do have quite a bit.
 
I messed around with a bad pair of tubes using my bench grinder wire wheel. It actually worked pretty well taking off the clear coat and smoothed out some deep scratches/grooves.

Then I used my buffing wheel with red compound. Not show room quality but much better than before. If you're using wet sanding that would take out any swirl marks created by the wire wheel.
 
You can do it Flyboy! Elbow grease and patience :D

I was fortunate enough my housemate has a bench grinder, so I just wheels and compound and away I went, but it sounds like Ed and Dale have you covered...
 
Thanks Pete, ya, I think my course of action today is going to be as follows, paint stripper, the vile stuff that looks like a bubbling witches cauldron and could easily run a jet engine, none of this namby pamby, greeny beeny, watered down bunny hugger stuff.
Followed by 600 grit on a foam sanding block, followed by 800 grit, both wet.
Finish off with 00 steel wool and finally 000 steel wool to hopefully get a nice satin finish.
I am going for niether polished nor raw aluminium, but more of a satin, in between type of thing, if you know what I mean.

Ya, Dale and Ed definately make me sit up and pay attention when they dispense thier valuable advice.........I have seen their work, I would be over the moon if Jennifer turned out only half as good as one of thier workd of art.
That said, I also value the advise of everyone who chips in with thier piece on anyone of my questions, it is greatly appriciated.
 
WOW:eek:....Holy kamolee, now that is exactly what I am talking about, jeeez, looks like I have my next 10 Sundays planned for me.
please Ed, you have to tell me exactly how you got that finish, well you don't have to, but I would be very greatful if you could take a few minutes to tell me what the steps were.
 
Back
Top