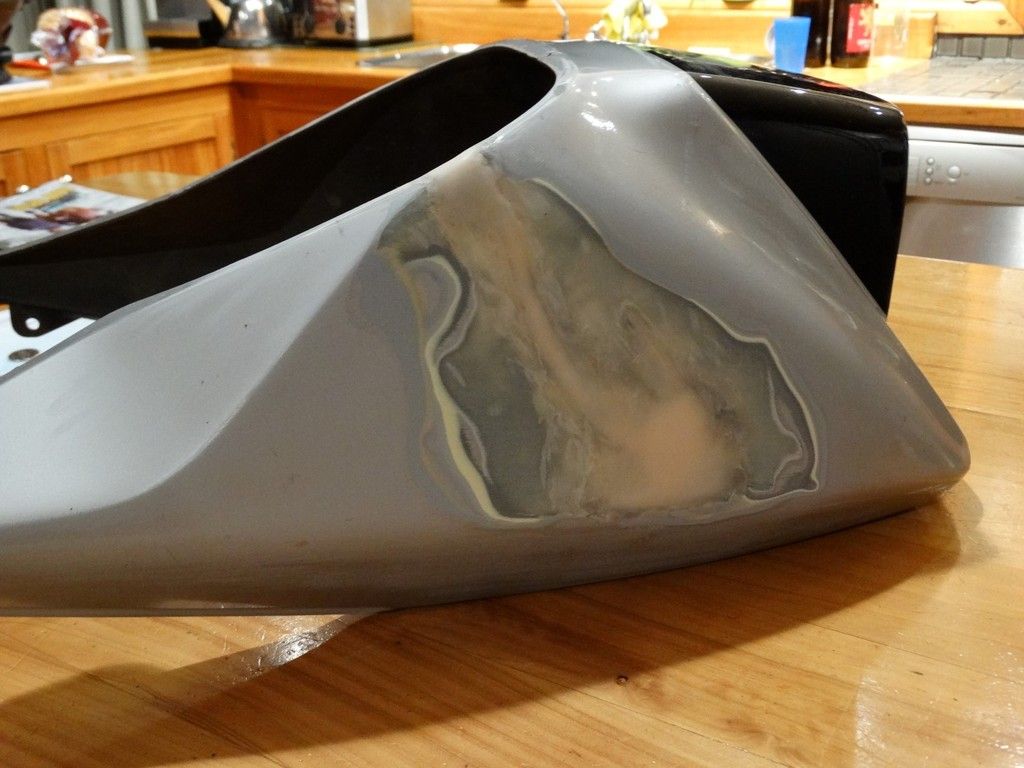
Thats an easy repair, you need some fibreglass matt (thicker 1/8") or fibreglass cloth, fibreglass resin and hardner, a few wooden paint paddles for mixing, small stiff bristle brushes, container for mixing ( 1/2 soda bottle) cut lenthwise,or any throw away container. Tools: small grinder(angle) or drill with grinder attachment, 36grit grinding disc, assorted sand paper, primer, bodyfiller.
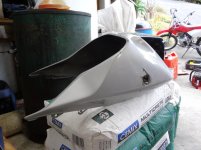
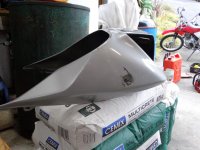
If your part is fibreglass, abs or smc the above kit will fix it.
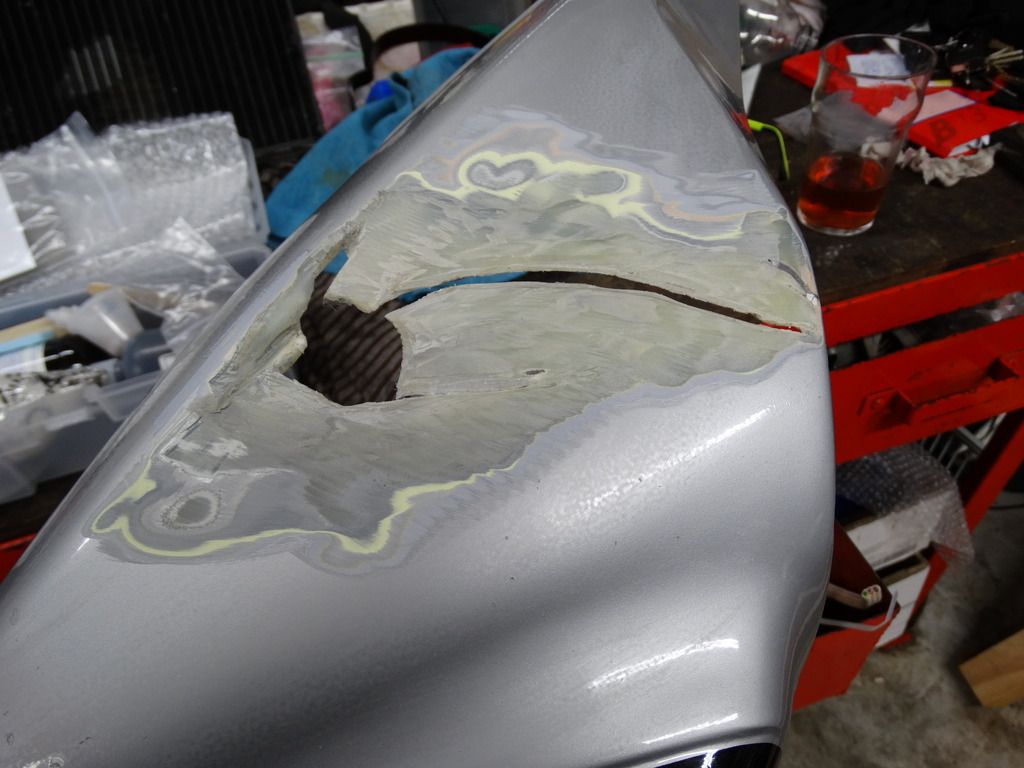
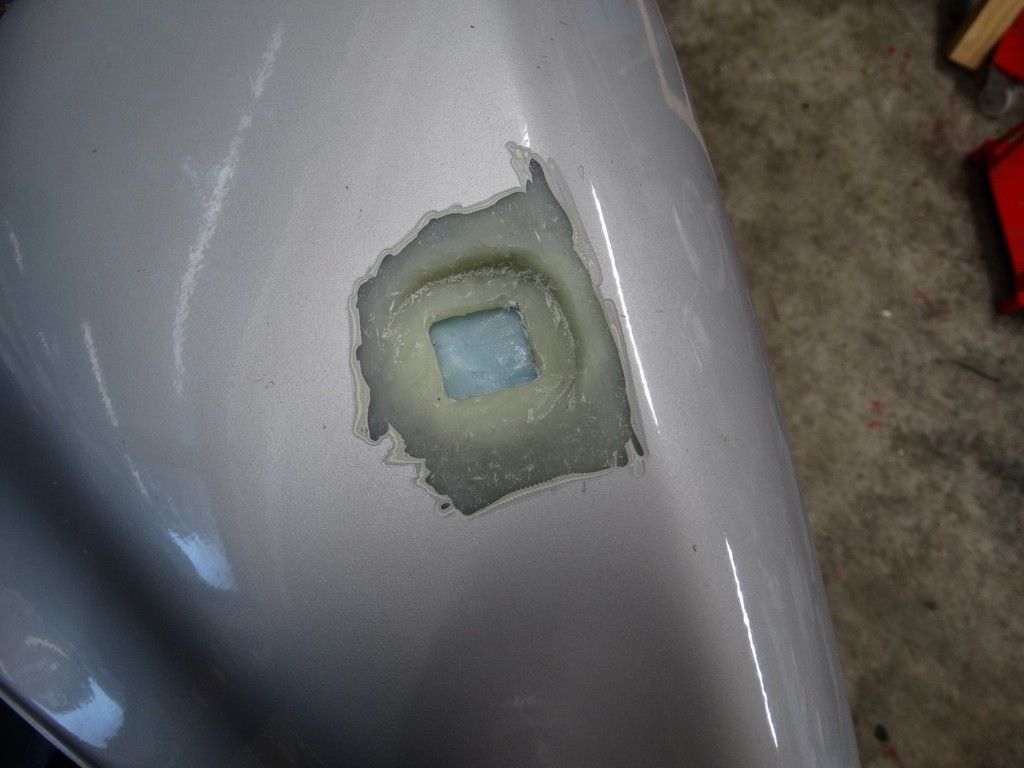
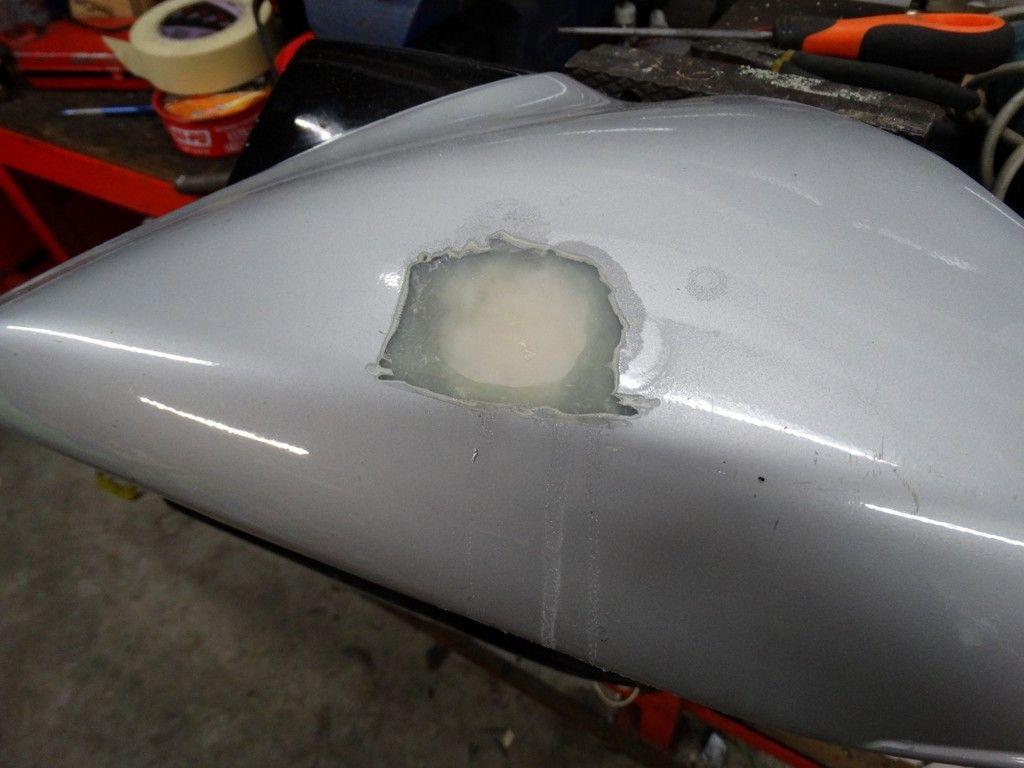
You need to grind the back side of the area to expose the strands and rough up the area so the patch will adhear, the outside, you will do the same but only rough up the repair area and remove a small amount of top surface. You want to extend your repair area a couple of inches beyond the hole and cracks. before you apply your patches, make sure that the area is dust free. On the inside area, cut a piece of matt about 3/4"- 1" larger than the repair, mix resin per instructions, usually about 15 drops hardener to an ounce or so of resin, the resin will turn kind of purple color when mixed. Cover the outside with a strip of masking tape, this way you can force the matt towards the outside area of repair. saturate the patch in the resin, the material is white to start with, when it looks greyish apply the patch to the prepped area, use the stiff brush to squish out any air bubbles, you will see them go away as you apply pressure on the patch, it won't take much, brush a little bit of resin over the repaired area and walk away, set the part out in the sun for about an hour, the hardener starts a chemical reaction which starts to cure the product, check on it, it should become stiff, when it is you can remove the tape from the outside, once dry you can repeat the process on the outside, depending on how much of the matt has been forced out, grind the outside just enough to take the gloss off of the fibreglass now exposed, feel the area with your hands and fingertips to see if it is higher or lower, the area should be a bit lower than the existing undamaged area, or lay a small straight edge across it. You won't have to do anything else to the inside repair, you may have to grind a small V notch in the cracks on the outside, you can use matt or cloth on the outside, I would use the matt, chop some up with sissors and mix with resin/hardener to make a paste and spread over the outside repair, ues a putty knife or body filler spreader and get it smooth, Once these parts are hard, now the work begins, you have to use a polyester type bodyfiller, or finish filler which is mixed 2 parts, filler/ hardner and this is spread over your fibreglass repair to blend the repair into the undamaged area, the bulk of your repair is going to be the fibreglass on the backside and it will also reinforce that area as well. When you sand the bodyfiller you will start with 80grit or 100grit to shape the repair, stepping up to finer grit of 180/220, you may need another skim of filler to get the area flat and free of pinholes and rough scratches, once you think its smooth enough, sand the area beyond with 220/320 grit paper. Now come the primer filler, more choices, rattle cans are cheap, automotive grade primer surfacers are expensive and you also need an air compressor, spray gun, solvents, respirator mask. There are some spray can primer surfacers that will work but you will not get the film thickness and chemically cured hard finish that a 2K urethane primer will give you, but then you did say you wanted to repaint the bike yourself, nows your chance to try it out, i've been painting over 35 years and in the collision repair industry just as long. Working on plastic/ fibreglass is more forgiving than steel, easier to redo your mistakes. I'm sure there will be replies from many now that this post has arrived and what is right and wrong.
")

")