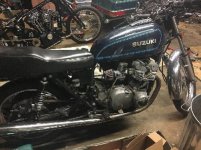
Welcome to the GS family!
One thing you'll really want to do is pick up a new top cover gasket, & a $20 GS/Suzuki valve shim tool (OEM or Motion Pro), & a set of thin feeler gauges from .001" - .003" / .02mm - .08mm, & check the valve clearances, as they usually get substantially neglected over the years and they will tighten up the clearance to the camshafts due to the valves wearing, to the point where the valves won't fully close tightly onto their seats because they can't come up any higher due to the cam, hence they wont fully seal. If any are too loose, measure how loose they are, then pull the shim out and look at the size Inked on the underside of it (or measure with calipers if someone installed it upside down and wiped out the size markings from camshaft contact), add the shim height plus the extra clearance together, then subtract the factory clearance spec .02mm - .08mm, & that is the size shim you need. There are videos on YouTube to help. Read the factory manual. Cam lobe position is critical when measuring (refer to manual),
On the ones that are too tight, you will probably want to do a similar process by taking the thinnest shim in the whole engine and installing it on each cylinder that is too tight, and measuring the clearance and figuring out how much thicker than that shim that you need to purchase.
There is a GS valve shim exchange club on here, I think you just pay for shipping if you send your old shims in. Before I got a full factory valve shim kit, I liked having a half a dozen or a dozen spares so that it would make calculating additional sizes needed a lot easier, and some I would already have.
Beyond that, do you know what the condition of the carburetors is? Have they had a good cleaning recently and a new o-ring kit and top and bottom gaskets?
A member here named Robert Barr has a site called cycleo-rings.com that has all the GS carburetor O-rings sold in kits. As well as the intake boot O-rings and stainless steel fasteners for the intake boots, which should be replaced at the same time because they lose their seal as well.
One last thing to check would be that the fuel petcock is not ruptured and leaking gas back in on the vacuum line, which would foul the number 3 cylinder spark plug substantially more than the others
Also a weak ignition could make the bike look like it is running rich among other symptoms
The other critical thing that you need to know is that the original Factory regulator rectifiers on every GS model made in the 70s and 80s is absolute garbage. And often the stator gets fried because of it.
The best thing to do is get a $45 used unit from a Polaris side by side ATV, part number 4012941 I believe is the most common one. There is also another part number for Can-Am models, and another one for Sea-Doo models. They are all shindingen sh775 regulator rectifiers, but you need to search the OEM manufacturer part number that I listed to find them used on eBay. Then there are a ton of listings for all sorts of different models of bikes and ATVs for the wiring plug kit that is really nice to have for these but not necessary. It's around 13 or 14 dollars. Just a quarter inch crimp on female blade connector will do, but the watertight connector kit is really nice
Those regulator rectifiers are leaps and bounds better than most everything else on the market, as they are not a shunt style, they are a more complex series style regulator unit which lets the stator run much cooler so much that the engine oil temperature overall is slightly cooler.
There is some basic rewiring that GS owners do to upgrade power distribution, this is nice to do at the same time. Also adding an ignition relay for about $15 in parts is a really beneficial upgrade, all of the old wiring, connectors, ignition switch, kill switch, Etc really drop the voltage substantially between the battery, all that wiring and connections and switches, and the actual ignition components. A 2 volt loss is typical, but I have seen as much as 5 volts less at the ignition coils vs battery, which causes very poor running conditions. Test this with the bike running and the gas tank off, it will run about 30 to 45 seconds without the gas tank on just from the gas in the carb bowls.
Then onto performance upgrades!!!!!
Look up the twinpot brake mod to get substantially better front brakes...
Avon am26 roadrider tires are decent cornering tires with pretty good grip for the mileage that they get, around 8,000 for the rear, 10 or 12 for the front. Bridgestone Battlax BT 45 V Tires are even better grip, but rear only lasts 5000mi.
Shinko 230 Tour Master are the budget soft sticky good grippers. 4,000 - 5,000 miles for the rear, 10,000 front.
Heavier riders or carrying a passenger will wear out the rear much faster, which is where I would recommend the Avon especially. Or for higher mileage long road trip riding, the Avon would be the best choice. For ultimate cornering, the Bridgestone or Pirelli sport demon. 90/90-19 or 100/90-19 front or inch equivalent (4.25 - 19? 4.00-19?), 110/90-18 rear or 120/90-18 in some will work as a listed okay fit if you want a fatter look (the 110 will give a bit quicker lean-in and better acceleration due to less weight and shorter diameter to quicken the gearing final ratio). 4.50-18 rear I think is the inch size that fits.
These are the upgrades that I highly recommend for any stock gs750, 550, Etc... these will all make the bike either more reliable or substantially better handling and stopping. I love my 750's!

")


