M
Matchless
Guest
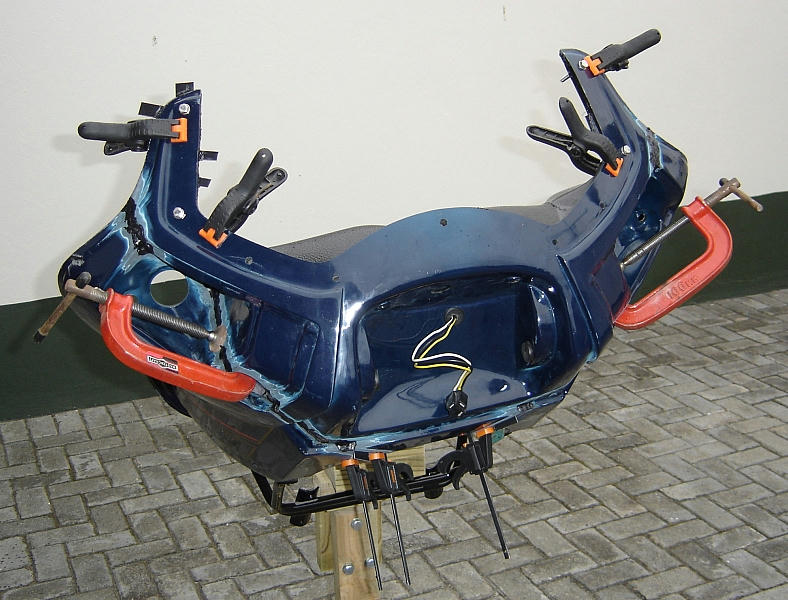
The left side prepared for joining:
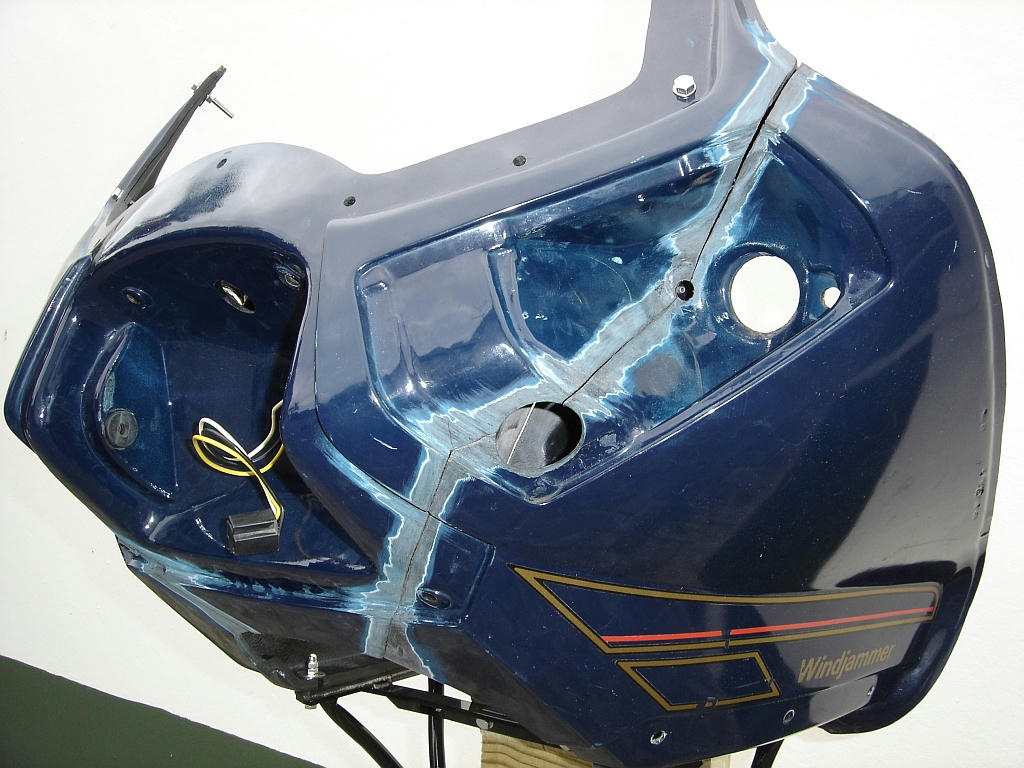
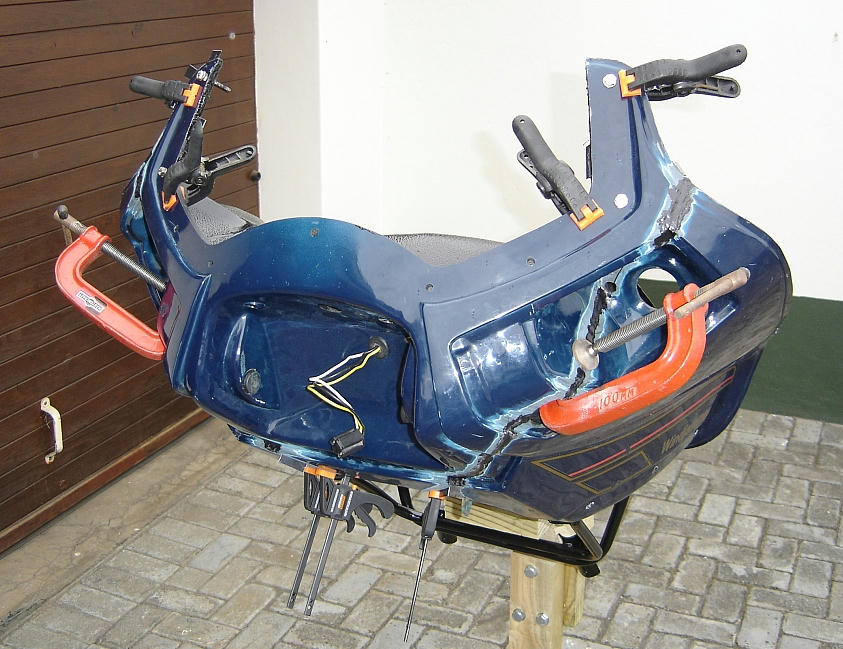
The right side prepared for joining:

The right side prepared for joining:
Required reading for all forum users!!!
Welcome!
Register to access the full functionality of the GSResources forum. Until you register and activate your account you will not have full forum access, nor will you be able to post or reply to messages.
A note to new registrants...
All new forum registrations must be activated via email before you have full access to the forum.
A Special Note about Email accounts!
DO NOT SIGN UP USING hotmail, outlook, gmx, sbcglobal, att, bellsouth or email.com. They delete our forum signup emails.
A note to old forum members...
I receive numerous requests from people who can no longer log in because their accounts were deleted. As mentioned in the forum FAQ, user accounts are deleted if you haven't logged in for the past 6 months. If you can't log in, then create a new forum account. If you don't get an error message, then check your email account for an activation message. If you get a message stating that the email address is already in use, then your account still exists so follow the instructions in the forum FAQ for resetting your password.
Have you forgotten your password or have a new email address? Then read the forum FAQ for details on how to reset it.
Any email requests for "can't log in anymore" problems or "lost my password" problems will be deleted. Read the forum FAQ and follow the instructions there - that's what we have one for...
If you are a returning visitor who never received your confirmation email, then odds are your email provider is blockinig emails from our server. The only thing that can be done to get around this is you will have to try creating another forum account using an email address from another domain.
If you are a returning visitor to the forum and can't log in using your old forum name and password but used to be able to then chances are your account is deleted. Purges of the databases are done regularly. You will have to create a new forum account and you should be all set.
")
I see you have re-painted the fairing bracket; it looks very nice as per your usual style.
now for the big question... is Georgie mad at Me for helping with this project?
I was not aware of acetone as a product for working with ABS and this opens up a whole slew of possibilities for repairing and fabricating.
Spyug.
Well this has been quite the undertaking. I remember volunteering the fairing back some months ago. Glad to see it will be used. It had followed me around for a few years. I will be very interested in seeing the thing actually on the bike repainted and up and running. Hope the radio housing and radio suit your needs as well..beat wishes, Chuck.
Interesting, I thought the fairings were fiberglass. As I had a very old one on a KZ650 I gave to my friend with a KZ1000. It had cracked in the back from the pocket openings on top to the bottom of the pockets. I got some seriousglassing done then. When did they go to the plastic?
Tanx
G
That is really outstanding! Hypothetically, if the acetone slurry truly melds everything together, there shouldn't even be a seam left when you've sanded smooth... What a fantastic way to have gotten around the prohibitive cost of shipping that monster!
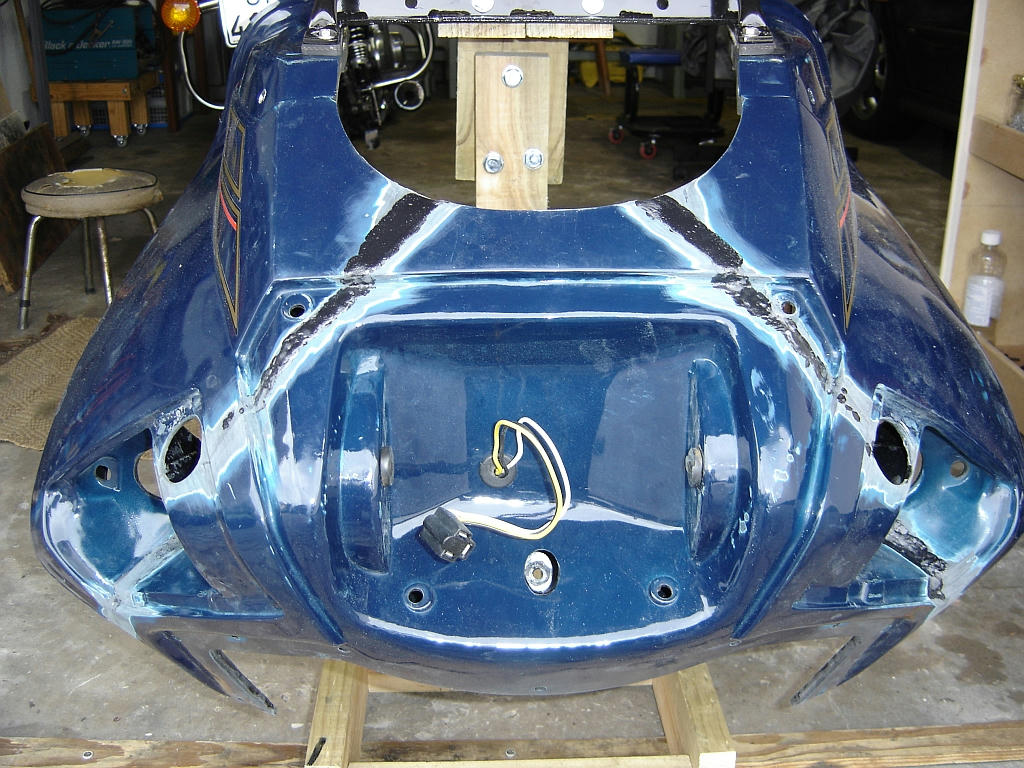
I am planning to use my bikes OEM headlight which already has a H4 Silverstar in it. I have not tried to fit it with the Windjammer V type headlight shroud. Hope it will fit though! I will check that out, thanks.By the way, on a side note ... In that last picture I was reminded (from looking at the headlight plug) that if you want to fit an "H4" bulb (preferably Silverstar because they are AWESOME!) to the Vetter fairing you will need to chop that original plug off and replace it with a shorter alternative. The Vetters used a very deep OEM plug, but most auto parts stores sell a much shorter "standard" replacement plug that will allow for the better bulbs and deeper housings required to use them.
I am planning to use my bikes OEM headlight which already has a H4 Silverstar in it. I have not tried to fit it with the Windjammer V type headlight shroud. Hope it will fit though! I will check that out, thanks.
I must actually remove that cable for the painting and will pop the spade connectors from the H4 plug anyway.
With all that ABS you could probably mold your own H4 Plug around the spade connectors, hehe! The other possibility is that once you remove the connectors from the OEM plug you might simply be able to cut/grind off the back so that it becomes the shorter plug you're most likely going to need. Either way, at least you now know to watch for the clearance problem...
Regards,