• Required reading for all forum users!!!

    Welcome!
    Register to access the full functionality of the GSResources forum. Until you register and activate your account you will not have full forum access, nor will you be able to post or reply to messages.

    A note to new registrants...
    All new forum registrations must be activated via email before you have full access to the forum.

    A Special Note about Email accounts!
    DO NOT SIGN UP USING hotmail, outlook, gmx, sbcglobal, att, bellsouth or email.com. They delete our forum signup emails.

    A note to old forum members...
    I receive numerous requests from people who can no longer log in because their accounts were deleted. As mentioned in the forum FAQ, user accounts are deleted if you haven't logged in for the past 6 months. If you can't log in, then create a new forum account. If you don't get an error message, then check your email account for an activation message. If you get a message stating that the email address is already in use, then your account still exists so follow the instructions in the forum FAQ for resetting your password.

    Have you forgotten your password or have a new email address? Then read the forum FAQ for details on how to reset it.

    Any email requests for "can't log in anymore" problems or "lost my password" problems will be deleted. Read the forum FAQ and follow the instructions there - that's what we have one for...

  • Returning Visitors

    If you are a returning visitor who never received your confirmation email, then odds are your email provider is blockinig emails from our server. The only thing that can be done to get around this is you will have to try creating another forum account using an email address from another domain.

    If you are a returning visitor to the forum and can't log in using your old forum name and password but used to be able to then chances are your account is deleted. Purges of the databases are done regularly. You will have to create a new forum account and you should be all set.

Slowly Rebuilding my GS450l

  • Thread starter Thread starter 81gs450l
  • Start date Start date
8

81gs450l

Guest
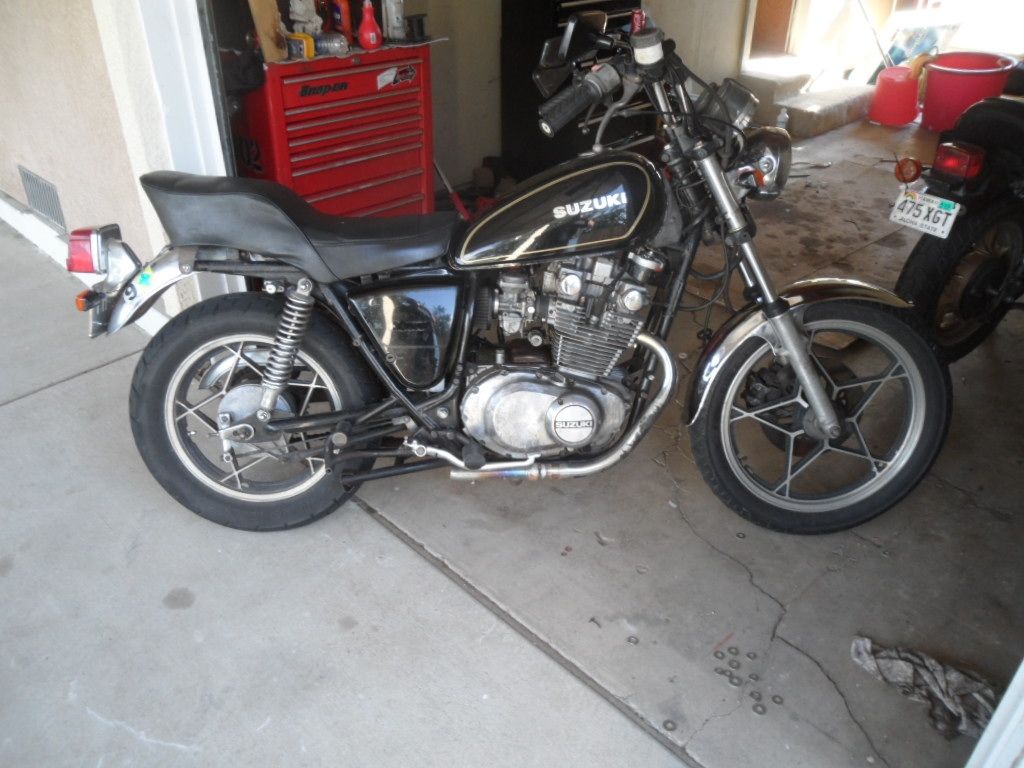
I bought this 1981 GS450L from my brother in law for $150. Cleaned the carbs and put 3000 miles on it last summer. After last summers hail storm I decided it was time to ditch the styling of the L and see how much weight I could shave off the bike. I also planned on doing this as a home build with as little money in it as possible.
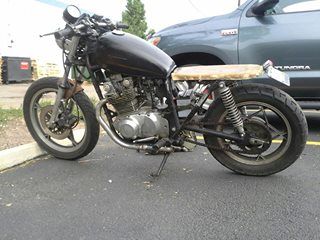
Here is a picture of how the bike looked when I first started, minus the sissy bar, the small rack on the back, and the crash bar and highway pegs.

I chopped the rear frame and had a friend weld on a rear hoop. I traded a box of ammo I got free for his time and welding skills. I also relocated the electronics under the seat


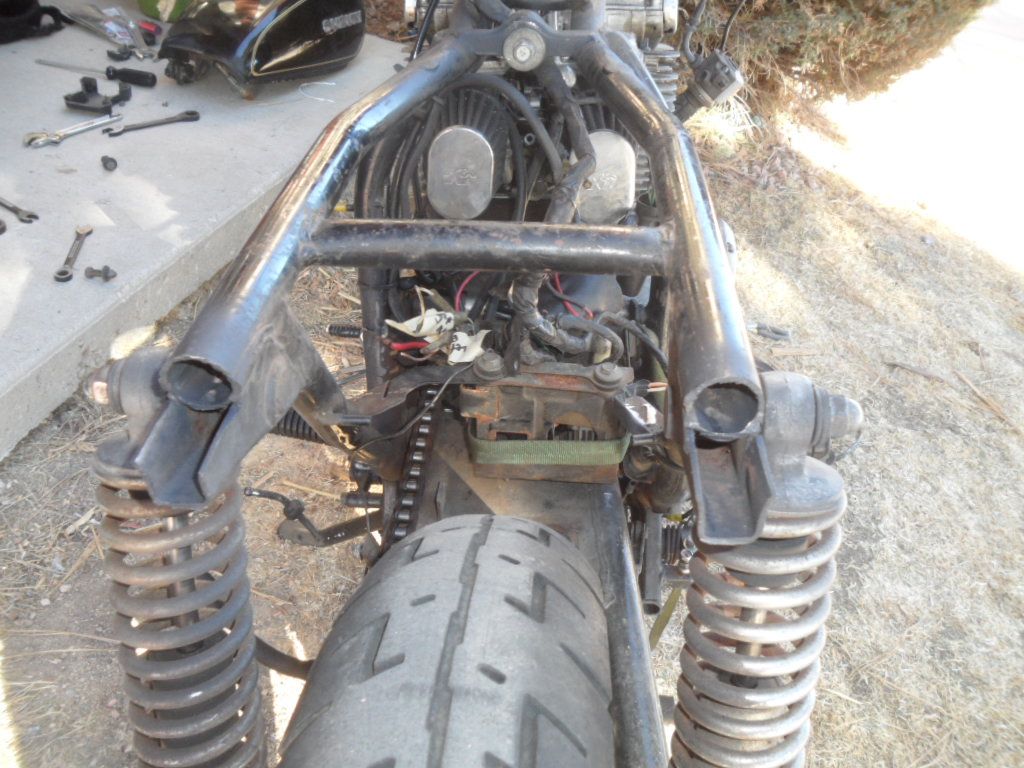
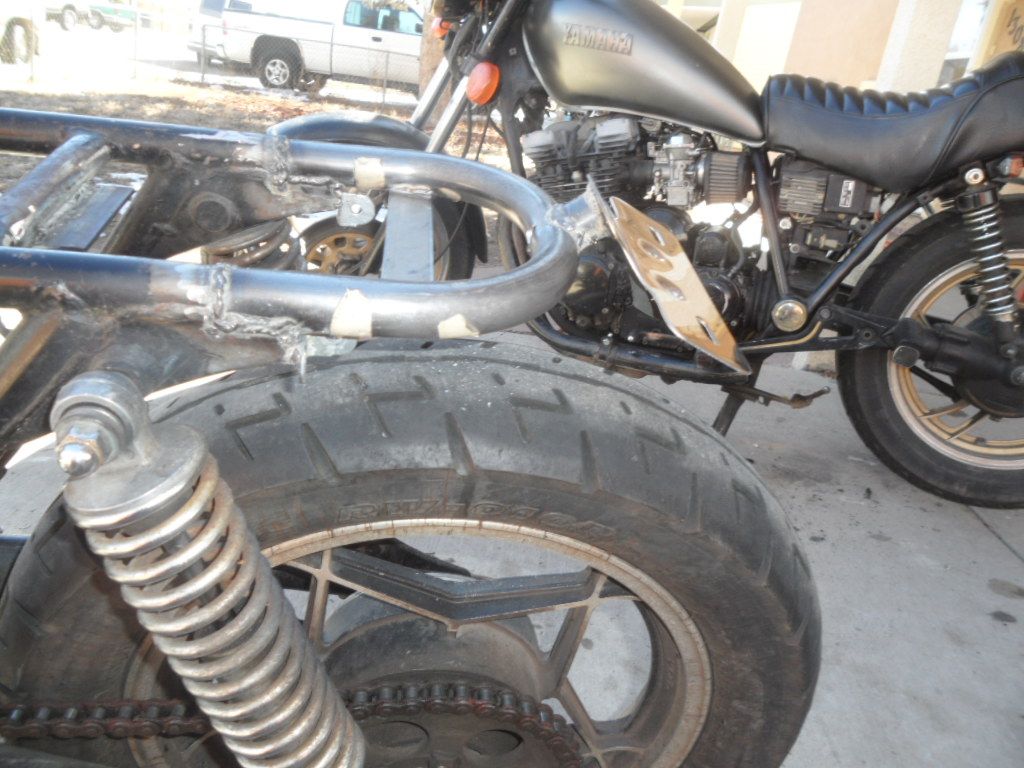
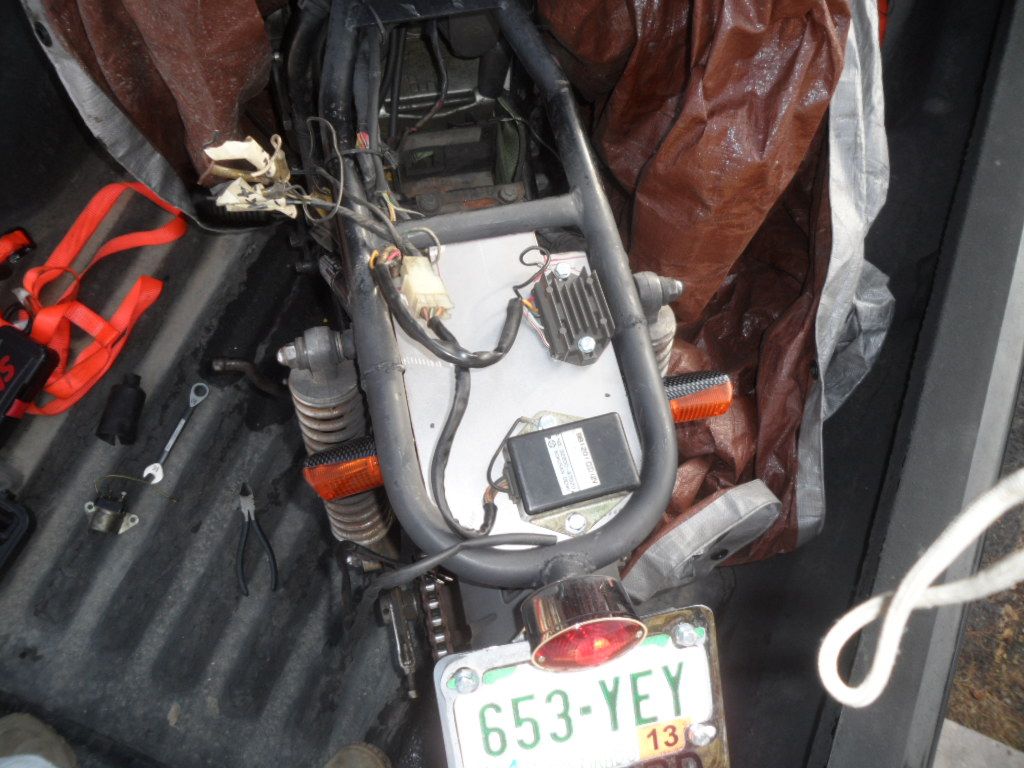
I got my seat pan made. Then I made a dumb move and let my neighbor ride my bike. Now the bike went from a budget build to start tearing it down and cleaning up everything. I cant have a freshly painted
tank going on a dirty bike.

The other thing that keeps my bike moving slowly is me helping my cousin build is Honda 250 bobber project and I am working on rebuilding a friends xj650.
 
Hey, I like the rebuild so far. Some folks will cringe at chopping these old GS' but I understand the desire on the "L". Keep the pictures and progress updates coming.
 
I planned on keeping it all L until the hail put dents in my chrome fenders. I took the bike down from 410lbs down to 340lbs. I plan on keeping the frame black, paint the wheels an aluminum color, along with the forks, headlight and taillight housings, and then replace the leaking gaskets and seals on the engine. My neighbor bent my bars, headlight brackets, and dented the tank. So I have new bars and grips on order. The tank is getting a paint job because my neighbor is paying for it. The tank made it 32 years with no dents. Plans to do the tank 2 different paint colors from Ford's paint line up. Looking at using Frosted Glass and a Pearl white on the tank. The seat pan is now in the upholstery shop getting stitched and padded. Using a smooth black marine vinyl and a textured black marine vinyl.
 
i went to do some work on the bike tonight. I had an issue with the electronics under my seat. There wasn't enough clearance between the seat and electronics. I did some cutting and grinding. Kept the mount looking the same, just added a bend to help the electronics clear the seat. I also bent up a mount for the starter solenoid.
here is a new pic of the new electronic pan.


here is how I mounted the starter solenoid

then here is a pic when I made my seat pan. it fit tight over the frame, so I trimmed the edges to curve just over the frame. its being upholstered this week.
 
Glad to see a rebuild thread starting, looking like a good start!

Mount your R/R under the seat instead of on top so it gets lots of air flow, but I'd be replacing that dodgy stock one with a good Shindengen one as well.
 
I know its hard to tell from the pic, but I mounted the regulator on a downward slope under the seat. air can reach it from the area above the battery. once I get a garage I will be taking it down to the bare frame. I am amazed how much work I actually get done with an open parking spot. should be looking at houses over the next month.
 
new bars
they are bike master 0 up and 3.84 back. I originally ordered emgo bars with a 0 up and 3.5 back, but they were on a 2-3 month backorder

new grips

new throttle tube

here are the seals and gasket for the timing chain tensioner

the next parts going to be ordered will be the clutch rod seal, the plug for my tach drive, oil pan gasket, valve cover gasket, float bowl gaskets. I found a pair of carbs on ebay for $40. So i bought them. Going to clean and rebuild them.
 
Good stuff... the seals and O rings for the tensioner... did they come from BWringer's write up on the rebuild? I need to do mine next service as it seems to be the only thing left now that is weeping and it's very annoying...
 
yes. that is the write up I got the part numbers from. I plan on rebuilding mine tomorrow. if you want I can take pictures also and keep you posted on how everything works out. I have a few leaks on this bike and plan to fix them over time. the tensioner is the worst leak and I figured why not give it a shot. my bikes leaks, but I always carry tools and oil when I ride.
 
Good stuff, and pic's are always a help! Ours looks different externally but apparently they're all the same internally, so would be good to see the insides.

That's one "short cut" I took during my rebuild along with not checking out the starter motor properly... both items now have come back to haunt me :rolleyes:
 
it is really starting to suck not having a garage. It rained this weekend and I couldn't get any work done. I discovered some how my trip knob on my speedo came up missing. I cant seem to find a used one locally and I don't want to spend money on used or new speedo just for the trip knob. I guess my next project after replacing the bars and rebuilding the timing chain tensioner is making a knob for it.
 
here is the damaged grip


here are the new bars being drilled. also a pic of my indoor work space. just enough room to stand in one spot and work on the edge of my tool box. if there isn't enough room I use my patio or a parking spot.

new bars and grips installed
 
Last edited:
swung by the upholstery shop today on my lunch break.
here is the seat pan after I trimmed it and smoothed the edges

the upholstery guy had the foam glued down. he told me it would be shaped and stitched up Friday.
 
here is the seat stitched and shaped. I forgot to make mounting brackets. so that's my next project. man it feels good to have padding. I put 500 miles on just a bare fiberglass seat pan.


I am not sure what foam my upholstery guy used. I do know its 1 1/2 inches thick. I am sure you can ask an upholstery shop what they recommend. The vinyl is marine grade.
 
I didn't get much done today. I made some brackets to keep my seat from sliding side to side and then took it for a ride.
here is a pic of the 2 cut down L brackets that I riveted to my seat pan

they were 3 in. L brackets. I left the side that riveted to the seat at 3 in. I cut the other side down to a 1 in tab


the brackets fit tight against the inside of the frame rails.

here is the seat sitting all the way down
 
I did find time to make a speedometer trip knob today also. I haven't figure out where my old knob went, but it disappeared. I used a door lock knob I had laying around. I cut it down to size and filled it with gorilla glue. Then I slid it onto the shaft for the trip odometer.


Back
Top