• Required reading for all forum users!!!

    Welcome!
    Register to access the full functionality of the GSResources forum. Until you register and activate your account you will not have full forum access, nor will you be able to post or reply to messages.

    A note to new registrants...
    All new forum registrations must be activated via email before you have full access to the forum.

    A Special Note about Email accounts!
    DO NOT SIGN UP USING hotmail, outlook, gmx, sbcglobal, att, bellsouth or email.com. They delete our forum signup emails.

    A note to old forum members...
    I receive numerous requests from people who can no longer log in because their accounts were deleted. As mentioned in the forum FAQ, user accounts are deleted if you haven't logged in for the past 6 months. If you can't log in, then create a new forum account. If you don't get an error message, then check your email account for an activation message. If you get a message stating that the email address is already in use, then your account still exists so follow the instructions in the forum FAQ for resetting your password.

    Have you forgotten your password or have a new email address? Then read the forum FAQ for details on how to reset it.

    Any email requests for "can't log in anymore" problems or "lost my password" problems will be deleted. Read the forum FAQ and follow the instructions there - that's what we have one for...

  • Returning Visitors

    If you are a returning visitor who never received your confirmation email, then odds are your email provider is blockinig emails from our server. The only thing that can be done to get around this is you will have to try creating another forum account using an email address from another domain.

    If you are a returning visitor to the forum and can't log in using your old forum name and password but used to be able to then chances are your account is deleted. Purges of the databases are done regularly. You will have to create a new forum account and you should be all set.

Smokin's 82 Kat Restorification project

  • Thread starter Thread starter Smokinapankake
  • Start date Start date
Thanks Mac, but I really don't have a ton of time. Mostly I get weekends after the kids are in bed. It helps that I work 4 10's so I have 3 nights a week to get after it.

I really want a nice, reliable (and yes, pretty) machine when I'm done.
Reading through Posplayr's resto and seeing the fabulous work that Nessism does were my inspiration, and I hope to deliver a product that they would consider "good enough", because I guarantee their good enough is definitely good enough for me.

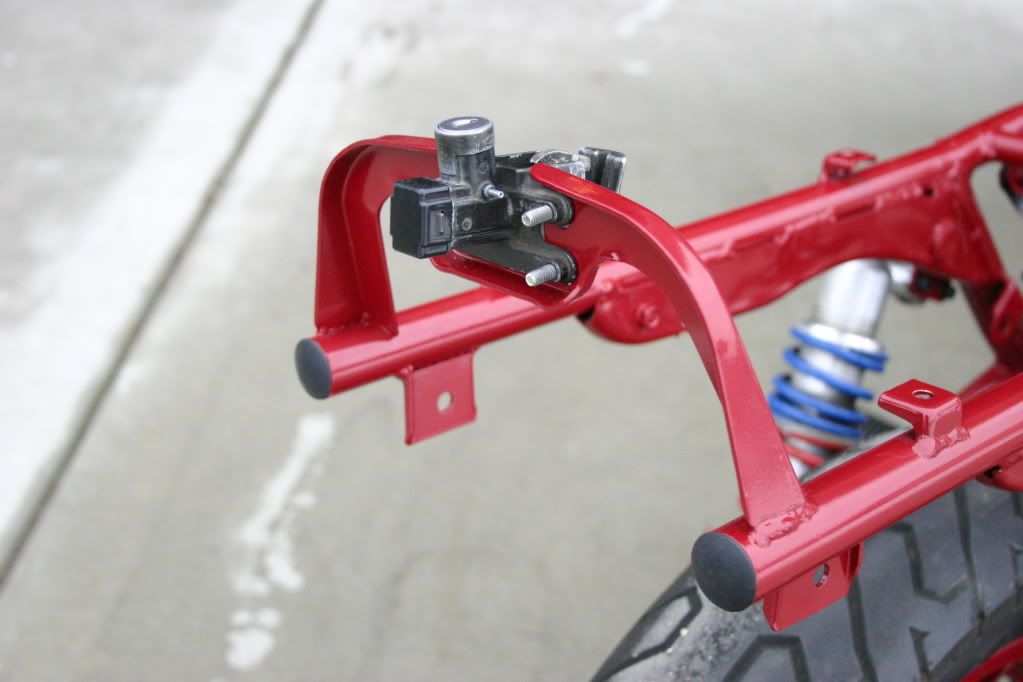
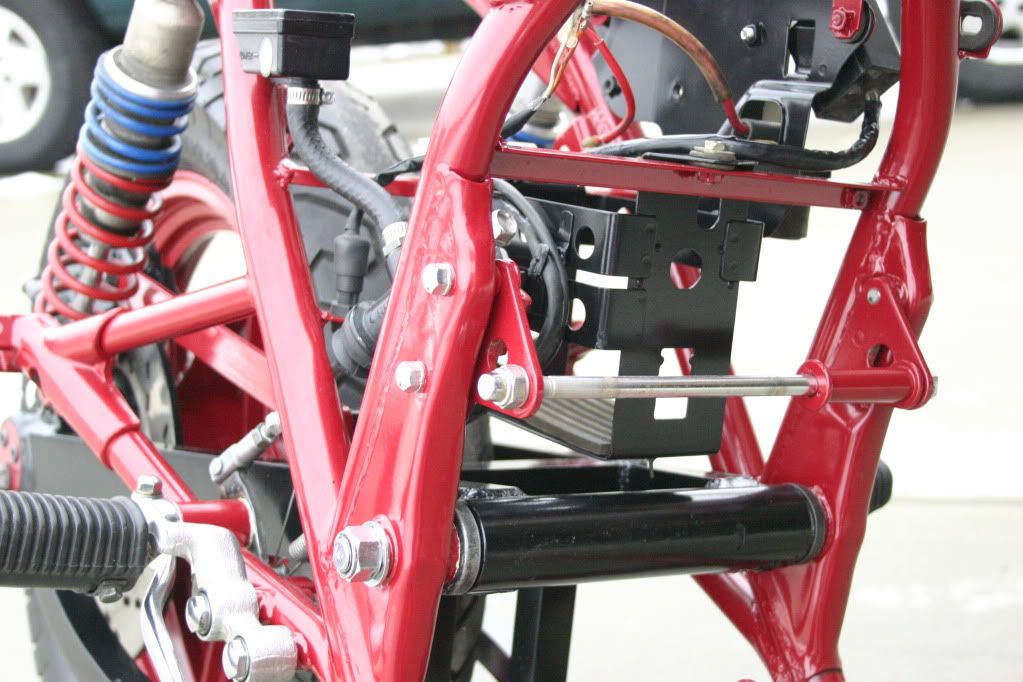
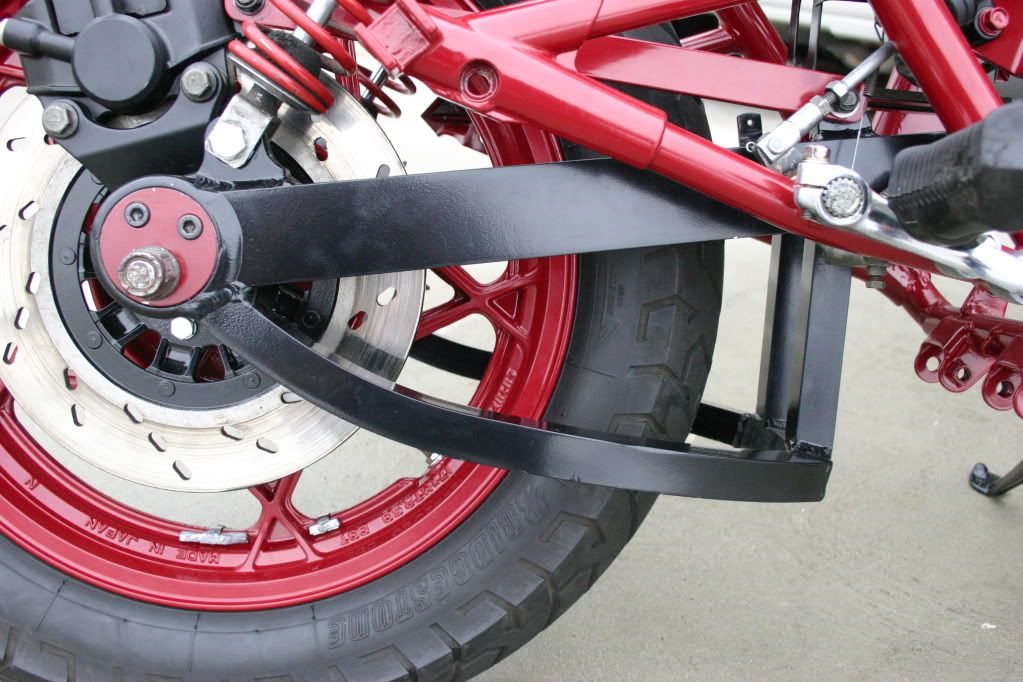
I bought this bike at a garage sale 1 street over for 200 bux. Wires were hanging out, fairing was gone, spray paint all over it and the butt-ugliest seat I've ever seen. But looking underneath revealed the Metmachex swinger, steel braided lines F&R, Dyna coils, and that sweet fork brace, so I figured it'd be worth the investment. This was about 4 years ago, and after doing a minimal repair to get it safe and roadworthy I rode it for a year, then tore it apart 2 years ago to do what I just got around to doing.
I debated about parting it out to get a GSX 1100G, but just couldn't bring myself to that.

So, figuring I could spend 3k to buy something newer and difinitely more plebian, or I could spend 3k(ish) to do a full blown resto on the sexiest motorcycle ever made, well, the decision was pretty easy.

Thanks for the compliments!
 
well i would love to see what the project looks like but photobucket has removed about 99% of your photos
time for a better host i think
 
So I solved my wiring harness issue with the help of Russr33 - He happened to have a new complete wiring harness and offered it to me at a reasonable price. I'd rather send my dough to a fellow GS'r than some mail order reseller. Thanks Russ!

I know you all like photos, and I have a bunch, but my wife will have to prepare them for you first. But I do have some shots of some bar end weights I had turned down by a fella at work. They are made of Zirconium (which is used in the manufacture of nuclear fuel rods) as I work at the only Zirc manufacturing plant in the states. It is similar to stainless in that it doesn't corrode, but it has another interesting property - it is transparent to radiation. This makes it perfect for the manufacture if fuel rod tubeshell as all the radiation is used to heat the water in a nuclear power plant.

Anyway, here are the bar ends which were made to match the bar end weights on my old Kawi GPz 750:
034.jpg


035.jpg


More photos forthcoming once my wife gets around to them.
 
Liking the bar ends!

Liking the bar ends!

:D Very nice! If you don't mind me asking, do you know how much they weigh?

How do they take a polish?

Keep up the great work!
 
Thanks Mac, but I have no idea what they weigh. I don't know how they polish either because I'm just too lazy. Those have been on the bike for a year and then kicking around on the shelf for two more, so they seem to hold up okay.....:D
 
So I promised pictures and I intend to deliver:
This is the front brake switch contacts. The wires had broken off so I resoldered them in place:
001.jpg


Here we have the wiring connector that comes off the throttle side switchgear. As you can see the connector is melted and one of the contacts is in rough shape. Will have to get a connector on order:
002.jpg

003.jpg

006-1.jpg


Put in some stainless socket head cap screws while I was at it:
004-1.jpg

005-1.jpg


Here is the reworked rear seat latch complete with stainless SHC screws. Note the roll pin sticking out of the side. This was the pin I drilled out in order to remove the drum and rearrange the tumblers to match my existing key. I stuck a way long one back in in the unlikely eventuality I may need to remove it again:
007.jpg

008.jpg

I'm toying with the idea of putting a little bracket bolted to the upper right hand bolt (looking from the rear) to butt up against the roll pin to prevent it from "walking" out due to vibration. That'd suck.

I'm considering making a stainless "ground bus" to span between the two holes in the electrics panel. These two holes are where the reg/rec mounts, and if I just used two longer bolts I could add a grounding point -a wiring manifold, as it were - where I could ground the battery to the frame and also have multiple bolts to ground other things (like the reg/rec, starter solenoid, etc...). Just an idea and would like some input from you wiring /electrical pros out there.
015.jpg
 
Some gratuitous bike porn

Some gratuitous bike porn

Rear brake caliper done with new dust boot that was missing:
009.jpg


Control center with new stainless socket head cap screws and those aforementioned bar end weights:
010.jpg


Battery box and front of swinger. I've installed some of the electric components:
012.jpg


Rear Metmachex swinger - Oh man thats sexy! I know, the nut looks like a$$ but the replacement I bought won't thread on (even though its the same thread - need to get a die on there!) so this will be a temp until I can get a die:
013.jpg


Front wheel with the brake lines hanging there. They need to be cleaned up and the banjos aligned better:
014.jpg


Brake splitter. What else do I say about this?
016.jpg


Good times folks!
With Russr33 coming to the rescue on the wiring harness I guess I can't put off getting to the engine any longer. Have to get some ring sets on order I guess....
 
On looking at it again, rather than put in some kind of rigged up bracket to hold in the roll pin, I think I may just drill and tap for a tiny screw to fit in where the roll pin goes:
008.jpg


Additional grounding points is what I was thinking with the long bolt in the lower right hand side, but I like the idea of a bus bar with a bunch of holes drilled and tapped. I could then run a heavy gauge pigtail to the frame, and one to the battery neg. A heavy dose of dielectric grease should solve any ground problems these old Zuk's are known for:
015.jpg


Any input on this idea?
 
Excellent work sir. You are setting the bar very high for the rest of us.:(

Your posts are keeping me motivated to complete my Kat project and I am in a good position to get most everything, other than the bodywork, back on the frame this weekend.

I'm not good at documenting on film but I'll try and pop up a few shots once its reassembled. Won't be near as pretty as yours however.

Keep it coming, I'm dying to see the finished bike.

Cheers,
spyug
 
So I just got the wiring harness in the mail from Russr33. Looks great and I'm excited to put it in! Thanks Russ!
 
Additional grounding points is what I was thinking with the long bolt in the lower right hand side, but I like the idea of a bus bar with a bunch of holes drilled and tapped. I could then run a heavy gauge pigtail to the frame, and one to the battery neg. A heavy dose of dielectric grease should solve any ground problems these old Zuk's are known for:
Any input on this idea?

Here's a pic of what I did. I used two pieces of stainless flat-braided grounding strap. One goes to the grounding post of my electrickery tray, the other goes through the dielectric saturated, frame grounded, engine mount bolt to another strap which connects to the engine to provide ground.

The stainless ground strap is available at most autoparts stores, or farm supply stores. It is available in many lengths, from 6" up to a few feet IIRC.

Just an idea.
 
Photobucket does suck. Having problems with it on another forum, too...ah well, "free" has it's cost, eh?

-KR

-PS> GREAT project.
 
lookin good man im glad to see you opted to save it instead of making a few bucks,another restored piece of screamin history:)
 
Thanks for the compliments folks - they help keep me motivated to make progress. I try to do a little every week; and if I only have a little to do, then I tend to do a better, more thorough job of it. Seems less overwhelming. Your encouragement helps, too;).

Thanks again, ultimately I'm trying to just have a nice bike when I'm done.
 
Nice work and details. Glad you are thinking about grounding now. Personally I use the method below. which is to tie all the returns to a single point under oen of the mounting bolts. If you don't like the look then the SS plate at the back would do the same think without showing all of the external connections. The R/R (-) ring lug still needs to be the recipient of all return current and making that wire longer is not a good idea.

On other thing if you want to be anal ; I made a copper heat sink that you can just make out in the attached picture. I flattened some copper pipe bolted it under the R/R. The pipe comes up behind the frame member and is bolted into teh frame there provideing an excellent heat sink for the R/R Since it is copper it is a soft mount and it also provides a great electrical frame ground as well. I used EMI gasket material and heatsink grease with SS bolts and nylocks to attach the copper bands to the frame.

After riding around I measured only about a 10 degC difference between the R/R temp and the frame about 10" away from the mount (using a differential temp measurement placed under the seat).

http://www.testequipmentdepot.com/fluke/thermometers/50series2.htm

RR_Grounds.jpg


picture.php
 
Last edited:
Thanks Pos for posting that picture; very informative. Basically what I'm considering with the bus bar is the same thing, just mounted on the back side with multiple mounting points. This would make future servicing easier as I don't have to line up 3 or 4 different connections on one bolt...

Your heatsink idea is great; I may take it and run with it if you don't mind.

Also, I'm bidding on this reg/rec, according to a list I found somewhere on this site it should work:
http://cgi.ebay.com/ebaymotors/ws/e...0549013317&viewitem=&sspagename=STRK:MEWAX:IT

Any thoughts?
 
Back
Top