• Required reading for all forum users!!!

    Welcome!
    Register to access the full functionality of the GSResources forum. Until you register and activate your account you will not have full forum access, nor will you be able to post or reply to messages.

    A note to new registrants...
    All new forum registrations must be activated via email before you have full access to the forum.

    A Special Note about Email accounts!
    DO NOT SIGN UP USING hotmail, outlook, gmx, sbcglobal, att, bellsouth or email.com. They delete our forum signup emails.

    A note to old forum members...
    I receive numerous requests from people who can no longer log in because their accounts were deleted. As mentioned in the forum FAQ, user accounts are deleted if you haven't logged in for the past 6 months. If you can't log in, then create a new forum account. If you don't get an error message, then check your email account for an activation message. If you get a message stating that the email address is already in use, then your account still exists so follow the instructions in the forum FAQ for resetting your password.

    Have you forgotten your password or have a new email address? Then read the forum FAQ for details on how to reset it.

    Any email requests for "can't log in anymore" problems or "lost my password" problems will be deleted. Read the forum FAQ and follow the instructions there - that's what we have one for...

  • Returning Visitors

    If you are a returning visitor who never received your confirmation email, then odds are your email provider is blockinig emails from our server. The only thing that can be done to get around this is you will have to try creating another forum account using an email address from another domain.

    If you are a returning visitor to the forum and can't log in using your old forum name and password but used to be able to then chances are your account is deleted. Purges of the databases are done regularly. You will have to create a new forum account and you should be all set.

Smokin's 82 Kat Restorification project

  • Thread starter Thread starter Smokinapankake
  • Start date Start date
Need: to formulate some sort of valve spring compressor. Pics of some homemade versions would be helpful. Or, alternatively, I may be able to borrow one from a fellow enthusiast at work, if he has one. I'm thinking if I fabricate one it will be along the lines of a big C-clamp with an "adapter shoe" made from brass or plastic (PVC?) tubing with access windows cut in to insert the spring retainer keepers. Hate to buy one for a one time use and I don't know anywhere I can rent one of the correct configuration/size. Granted, I haven't looked around anywhere either.

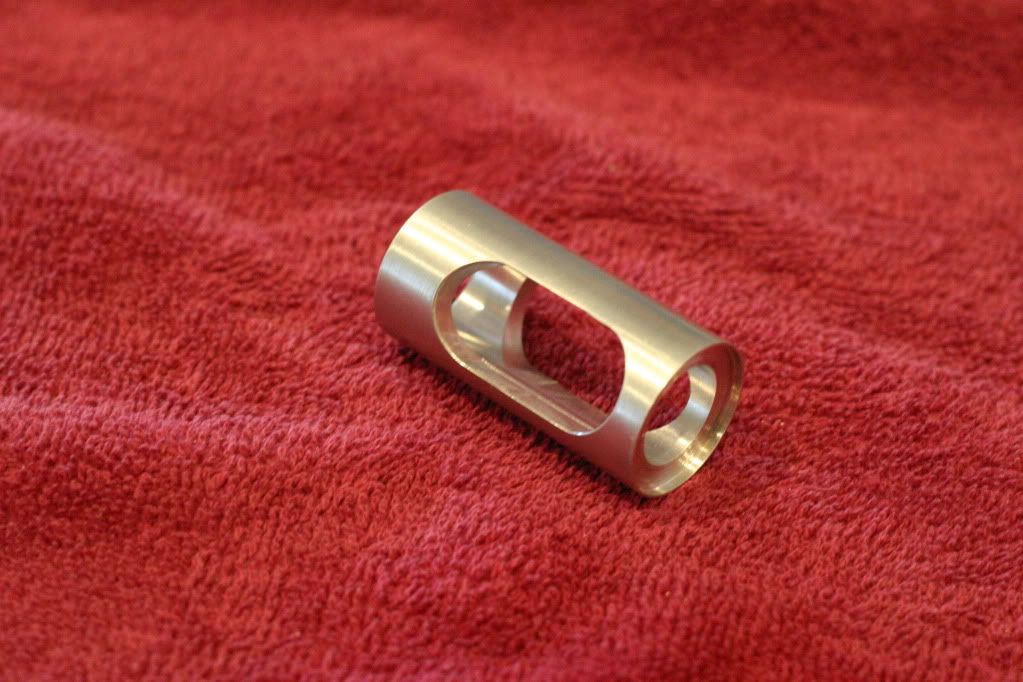
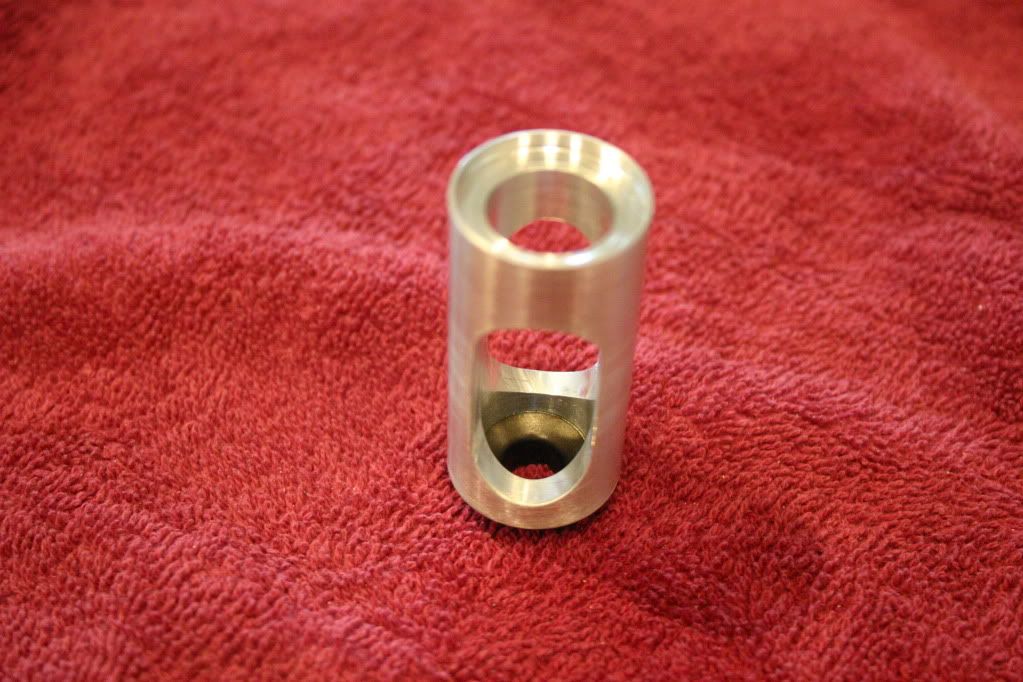
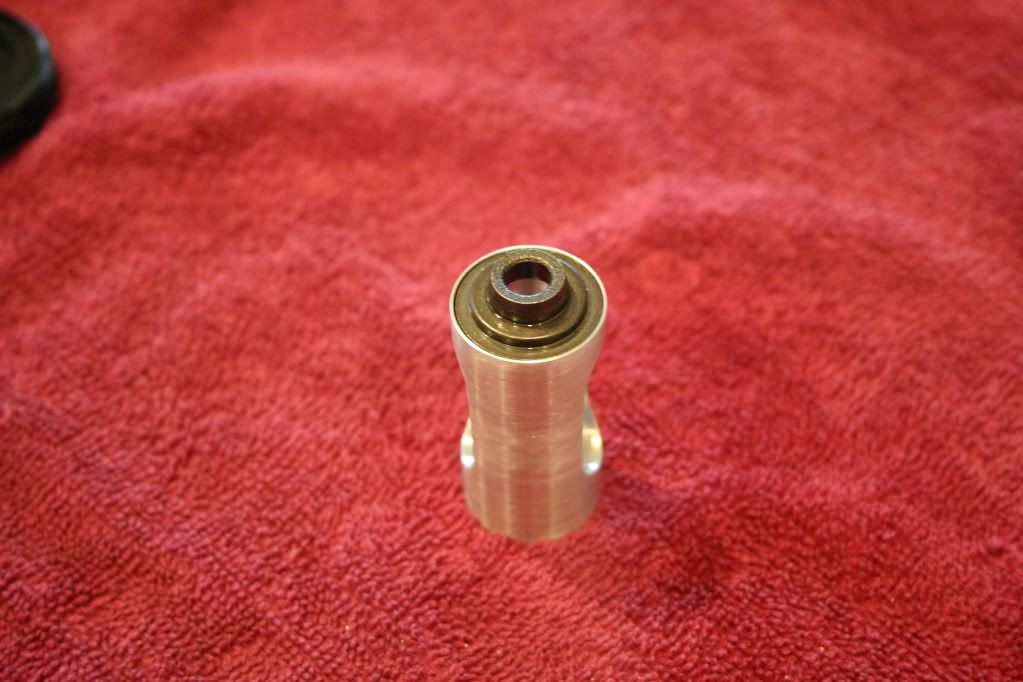
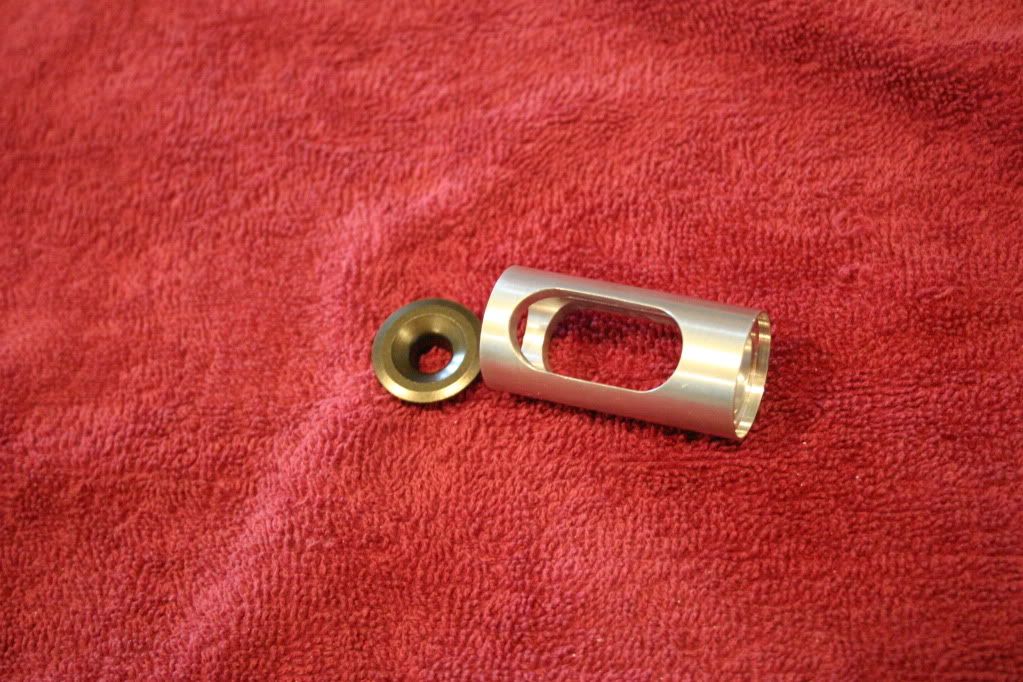
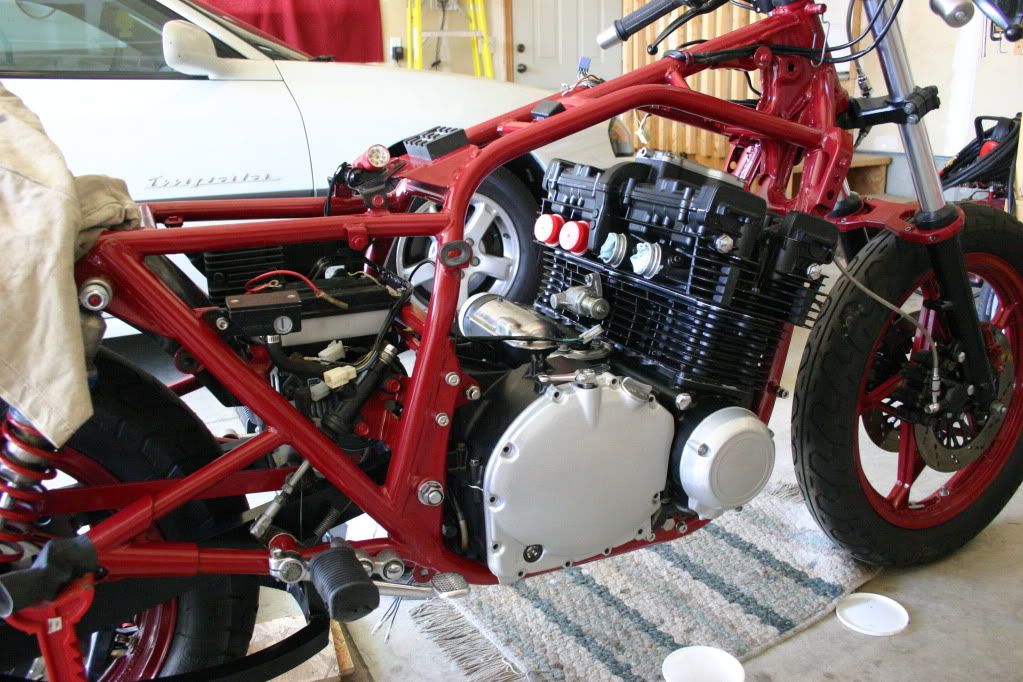
Here's some pics of the one I made for my 1100EX 16 valve head...

MVC00036.jpg


MVC00037.jpg


MVC00038.jpg


MVC00041.jpg


MVC00042.jpg


MVC00043.jpg


MVC00040.jpg


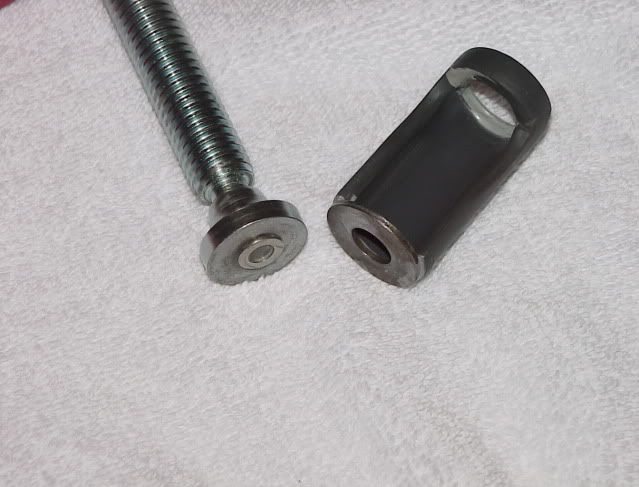
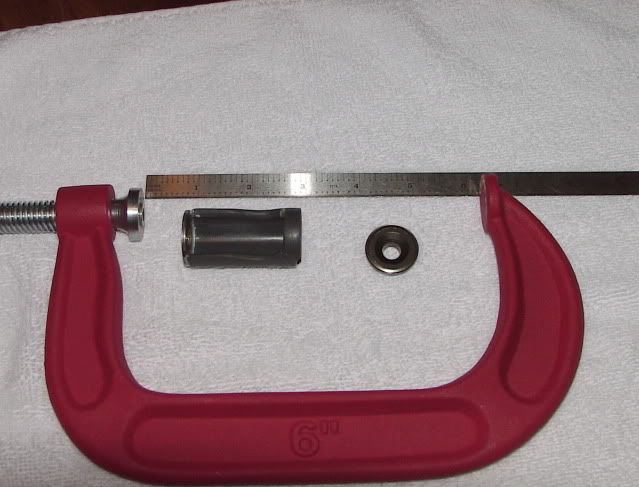
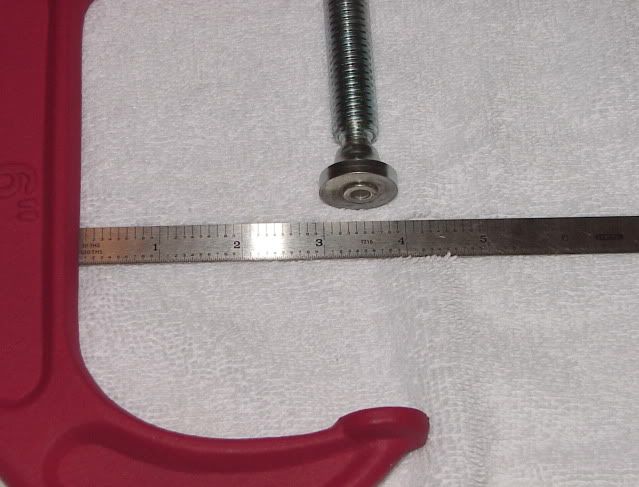
The plastic pipe is 3/4" - I epoxied a large flat washer on the top where the C-clamp swivel end sits. I then epoxied another small flat washer on the face of the swivel that fits inside the hole of the larger flat washer on the pipe end. That keeps the tool secured & centered on the C-clamp while you tighten it...

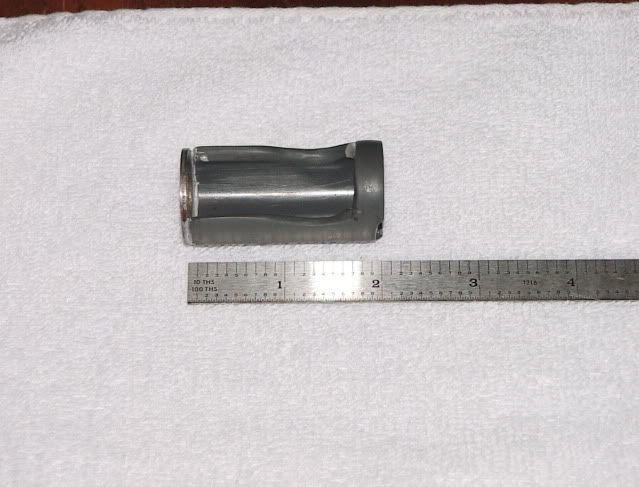
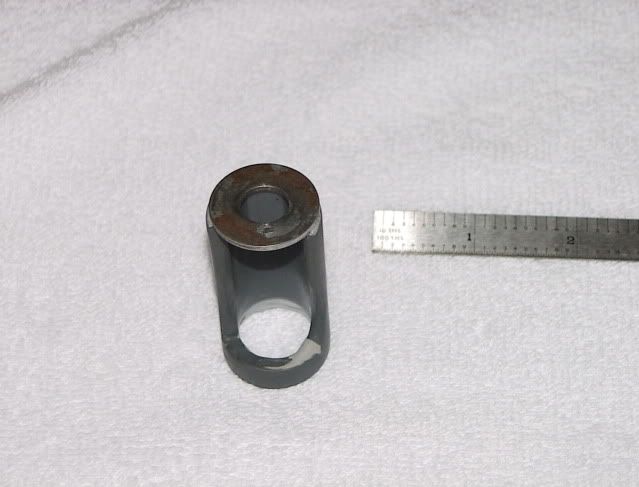
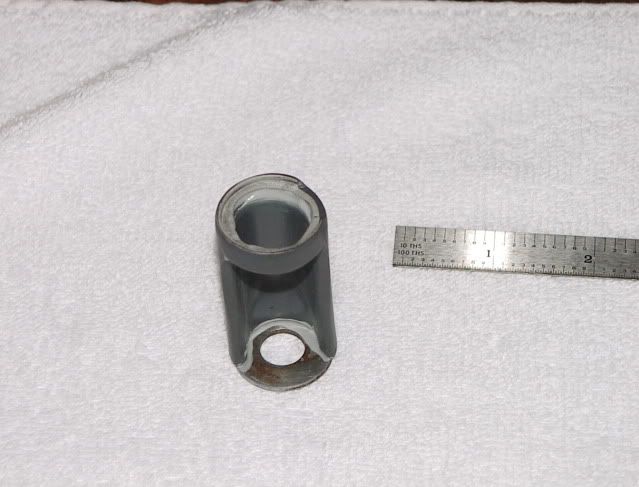
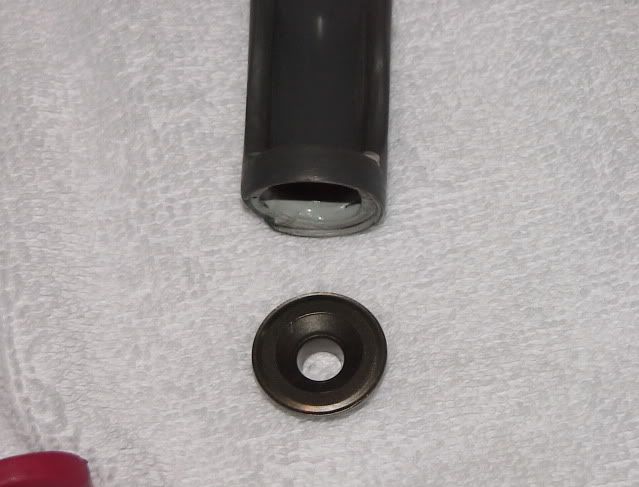
On the "spring cap" end of the pipe I beveled the ID so the spring cap would fit into the ID flush with the end of the pipe; then I mudded up the ID with some epoxy and pressed the "greased" spring cap into it to make a "mold" the spring cap fits into (the grease keeps the epoxy from sticking to the pipe). This kept the pipe from slipping off the spring cap (which it wants to do...).

You will also have to sand down the pipe OD a bit so it will fit better - it's a tight fit into some of the valve spring cavities.

The C-clamp has to have enough "throat" to reach the valve caps without rubbing against the side of the head, The clamp I used was from Home Depot and had 3.5" of throat, this was just enough.

The process of installing all the valves back into the head took me about 2 hrs, it's a real PITA to get those keepers in position on the valve stem so you can release the spring. My method was to apply a little dab of grease on the keeper and then pick it up with the end of a magnetized screw driver - once I'd gotten it into position I used the wooden end of a long q-tip to push it off the screw driver. Sounds hard, but once you get the hang of it it's not so bad - VERY time consuming.

Good luck!!

Mike
 
Thanks Mike,

That's exactly what I was looking for! I may have my machinist guy at work spin me something up on a lathe.... Now that would be sweet!

And of course, pics of the final product will be posted:).
 
Thanks Mike,

That's exactly what I was looking for! I may have my machinist guy at work spin me something up on a lathe.... Now that would be sweet!

And of course, pics of the final product will be posted:).

I originally cut a slot into a deep-dish socket, but I couldn't keep the spring cap end from slipping off the cap - hence my funky epoxy "cap-mold" idea...
 
So my guys at work were able to turn me one on a lathe out of aluminum, and since we all love pictures, here we go:

Valvespringcompressor002.jpg


Retainer in the bottom:
Valvespringcompressor003.jpg


Now flipped end for end:
Valvespringcompressor004.jpg


Valvespringcompressor006.jpg


And in the head checking for clearance:
Valvespringcompressor007.jpg


Dan, my friendly and very accomodating machinist at work, did this for me. He was also the one to do the grounding bus bar mentioned earlier - thanks Dan!

Material is aluminum, and the swivel end of the C-clamp I bought fits down into the recess on the top of the tool. The the slot end that is closest to the tool end is the retainer end (does that make any sense?) and the retainer fits down into a matching recess, holding everything in place while I squish the valve springs. At least thats the theory. The video Steve made and that can be accessed on BassCliffs site is really helpful in explaining how this whole mess goes together. Thanks to Steve and as always to BassCliff for his excellent website!

Will post updates Friday or Saturday as to how it all went!
 
Last edited:
Hi Smokin', hey mate great follow-up with the machined tool photos, now thats quality work to get the job done! Your very fortunate to have access to the gear and skills to have things like that done and share the results here. Thanks for the pics and details, cheers.
 
OH I AM SO JEALOUS. I literally just left the garage about an hour ago after removing my valves. I used Jethro's spring compressor but he did not have any chucks for it so I mad one out of a PVC fitting. I had also bought a 6 inch C-clamp to go with it but the throat was not deep enough on it so it won't work, hence i am using Jethro's compressor with my PVC connector. Got em all out but it slid all over the place. After seeing these last few post I may again visit the hardware store and try this again this time with washer and epoxy and a bigger C-clamp.
 
Check out Matco Tool part #VT103. BY FAR the easiest way to install/remove valve keepers.
 
Now is that a smack and remove thing. Looks kind of like an impact driver with a magnet inside to catch the keepers.
 
a practical tool? definitely. BUT also a BEAUTIFUL piece of machine work!
 
Check out Matco Tool part #VT103. BY FAR the easiest way to install/remove valve keepers.

not cheap though... as compared to a piece of pvc tube and a C clamp that does the same job in the same manner
 
not cheap though... as compared to a piece of pvc tube and a C clamp that does the same job in the same manner
Yes ,but in about a 1/4 of the time!!!!! You can disassemble a 16v head in about 5 min.
 
What about reassembling the valves....how do you put the shims back in.
 
What about reassembling the valves....how do you put the shims back in.

"Shims, wee don kneed no stinkin' shims"! A Blazing Saddles sign-up day misplaced quote. Yeah those adjustable tappets are great, no drawer full of shims to sort through and keeping buckets in their right order makes life a little sweeter, gotta love the GSX.
 
So sports fans, we now have a complete, reassembled engine installed into the chassis!

I still had clutch, stator, sprocket, and signal generator cover to refinish, and after spending a half an hour with a wire wheel trying to break through the factory clear coat I decided on powdercoat. Let them sand blast it! That'll teach that clear coat a lesson!
I went with what they called Silver Sparkle. I wanted a darker grey but they would have had to order it in so I said to heck with it:
Engineinstall010.jpg


Friday night Tim came up and we put that heavy old lump in the chassis. I didn't get too many pictures of the frame prep or the method we used but it went in really well with no problems whatsoever.
After dropping a nut getting it up out of the basement we decided to pull the head to put it in the frame. It hadn't been timed (cams were still not in) or even torqued down, so we figured no harm done removing the head.
So the engine went in consisting of the bottom end and cylinders. Much easier to move around than with the head on....
I padded the frame with old bicycle inner tubes slit lenghtwise and secured in place with zip ties. Left a white powder everywhere but that just wipes off with a dry rag. Worked really well.
We also positioned my floor jack under the frame with a square of 3/4" plywood to support the sump and facilitate wiggling to line up the mounting bolts.
The rear bottom bolt went in first, followed by the top front, just under the cylinder block. After that it was a matter of assembling the pieces. Kind of like a big Erector set that will hit 130 when you're done:D

Cam install and timing went pretty smooth with lots of assembly lube being employed; getting the 20 pin spacing right took a bit of tongue wiggling but in the end it all came together. We manually rotated the engine a few revolutions to be sure all was well with the world and sat back and toasted our success. All in all the whole process took about 3 hours.
A big thanks to Tim for his backbreaking labour and to GSR for the inspiration!

Now, onto the pictures!

The morning after, with the engine in place. Still some things to do, but definitely on the downhill slide!

Engineinstall005.jpg

Engineinstall006.jpg


Note the new oil level sight glass. Also take note for any that are interested - the oil seal that seals the clutch pinion arm is the same oil seal used for the shift shaft - a handy coincidence! I know the clutch cover is not bolted down - I still need to lock down that clutch hub nut!
Engineinstall007.jpg


Now onto wiring harness install, carb work, and bodywork. I'm thinking that a dark metallic grey would look funky next to that silver on the engine so I may just match the body to the engine silver..... any thoughts?
 
Last edited:
Bike looks killer. You are doing a great job!:)

Those engine covers look a little bright but if you keep with silver for the body work like a stock Katana, I think it will look pretty slick.
 
Bike looks killer. You are doing a great job!:)

Those engine covers look a little bright but if you keep with silver for the body work like a stock Katana, I think it will look pretty slick.

I agree, the silver bodywork will look good with the silver accents. G.
 
Or a pearly white, maybe? I think the dark metallic grey is out - too wierd with the accents. Too bad because I like that look.
Prolly just stick with silver......
 
Back
Top