• Required reading for all forum users!!!

    Welcome!
    Register to access the full functionality of the GSResources forum. Until you register and activate your account you will not have full forum access, nor will you be able to post or reply to messages.

    A note to new registrants...
    All new forum registrations must be activated via email before you have full access to the forum.

    A Special Note about Email accounts!
    DO NOT SIGN UP USING hotmail, outlook, gmx, sbcglobal, att, bellsouth or email.com. They delete our forum signup emails.

    A note to old forum members...
    I receive numerous requests from people who can no longer log in because their accounts were deleted. As mentioned in the forum FAQ, user accounts are deleted if you haven't logged in for the past 6 months. If you can't log in, then create a new forum account. If you don't get an error message, then check your email account for an activation message. If you get a message stating that the email address is already in use, then your account still exists so follow the instructions in the forum FAQ for resetting your password.

    Have you forgotten your password or have a new email address? Then read the forum FAQ for details on how to reset it.

    Any email requests for "can't log in anymore" problems or "lost my password" problems will be deleted. Read the forum FAQ and follow the instructions there - that's what we have one for...

  • Returning Visitors

    If you are a returning visitor who never received your confirmation email, then odds are your email provider is blockinig emails from our server. The only thing that can be done to get around this is you will have to try creating another forum account using an email address from another domain.

    If you are a returning visitor to the forum and can't log in using your old forum name and password but used to be able to then chances are your account is deleted. Purges of the databases are done regularly. You will have to create a new forum account and you should be all set.

Stripped exhaust bolt, very messy attempt

  • Thread starter Thread starter tbrand69
  • Start date Start date
T

tbrand69

Guest
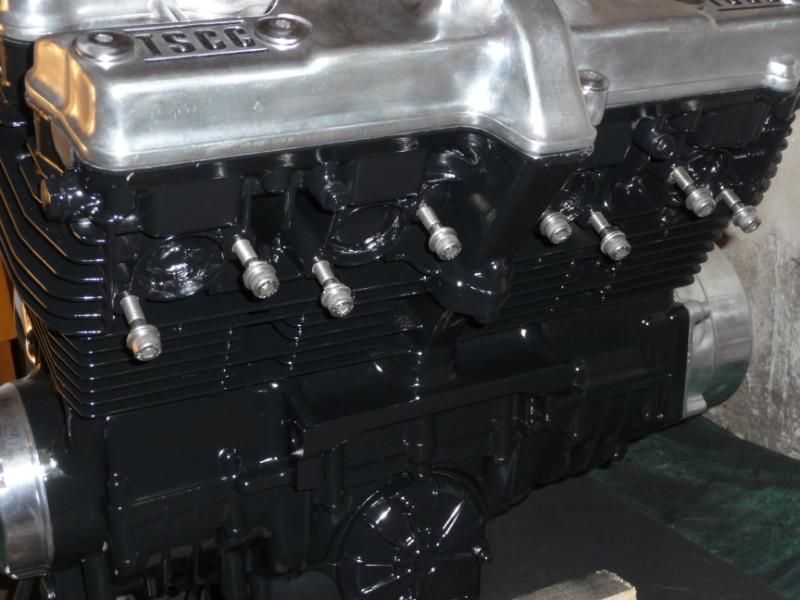
Alright so I totally f4cked up the extraction. There used to be a al little nub sticking out, like this:
ac57eca3.jpg


Tried welding a nut onto the end, and that worked for half a turn until the rest of the protruding bolt snapped off. So then all I had left was a bolt that was flushed to the engine.

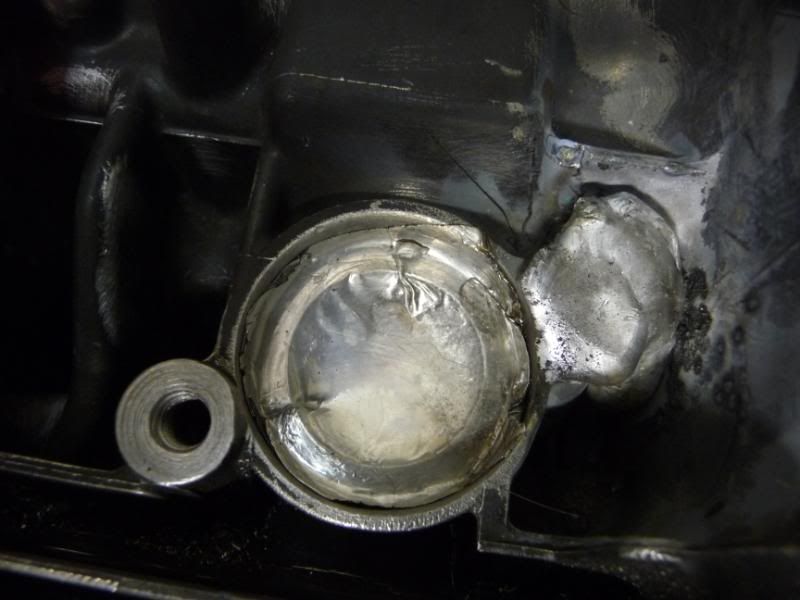
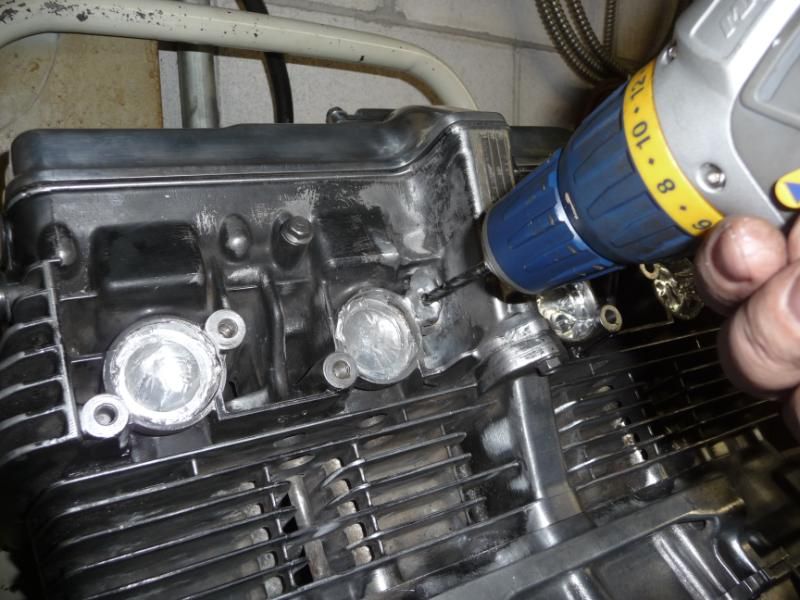
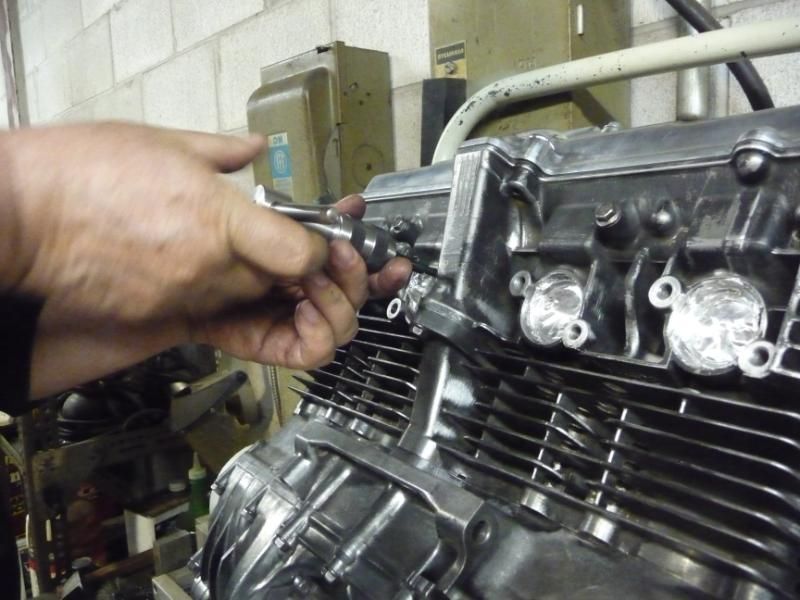
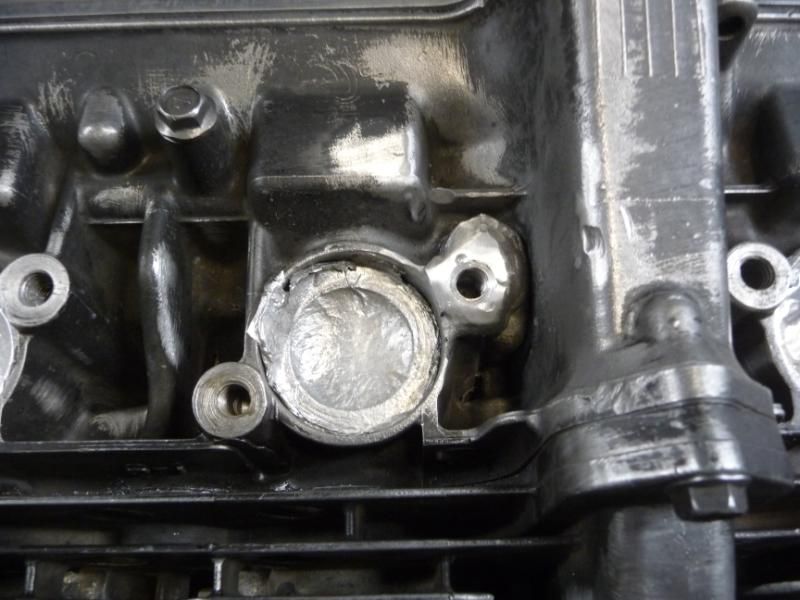
So I figured I'd try the left handed drill bit method. I drilled a pilot hole, then sent in a larger lefty to finish up. Unfortunately, the lefty snapped off about a quarter inch into the hole. And then I got angry and started drilling and beating a punch into the hole. It's messy now:
0a8b2d40.jpg


God that looks awful. So I'd rather avoid taking the head off and paying a machine shop to drill out the hole and retap it, so do you guys have any suggestions? I feel real bad and embarrassed about this, as it reflects on my ability to get things done. But all I care about is getting this thing fixed.

Tommy
 
I know that feeling. I tried an ez out that then broke off. I would try drilling a small hole to the side of the broken bit. Then another on the opposite side. You may be able to loosen the broken piece and get it out. Then use progressively larger bits to remove what's left. Drill all the way thru the frozen bolt. There is some space behind it. After it's out, helicoil your way to freedom.
 
I would weld another nut on there. Just stick a blob of weld on first to give the nut something to sit on.
 
I had to drill mine out completely, then get it filled with weld, then drill and tap a whole new hole

P1070616.jpg


P1080641.jpg


P1080643.jpg


P1080644.jpg


and after bieng painted you can't even tell


P1080721.jpg


.
 
no problem,,,,,,I had no choice but to drill the hole even bigger, you need to get all of the metal out from the bolt, and then had it filled with aluminum weld, we found center, marked it, drilled it and made a new thread....no jigs used, it was all eye balled, I did put the exhaust header on, to at least get an idea of where we needed to drill, and we put in a few long bolts in the other hole to get an idea for the angle...

lucky me it worked.....

.
 
Awesome fix! Looks great as well!!!!! Does that paint give you any overheat issues??
 
Try welding on the bolt and building it up so it sticks out. You can try welding a nut onto that, but I've had better luck using vise grips on said weld.
 
Awesome fix! Looks great as well!!!!! Does that paint give you any overheat issues??

Thanks....

I don't think, there will be an issue with heat, I at least hope not, but I will find out soon, bike has not been running yet, I am almost done the rebuild, so I will know soon....

It's just regular engine paint....
 
Okay so I admitted defeat. I'm just going to drill out the entire area--bolt, threads and all. I read a tech article about drilling the hole larger than stock, then tapping it for a larger bolt. I would seal the larger bolt shaft in there, then drill and tap that to the stock 8mm size. I can't weld aluminum so this would be simpler choice. Bad thing is that I have to remove the heads from the engine; I have almost no leverage to drill anything with everything still in the frame.

I'll worry about this later. Once I get the carbs rebuilt, the sprockets and chain replaced, and the forks reconditioned, I'll pull the heads and do what needs to be done, then reinstall and check the valves. Then I can finally tune the damn thing.

Tommy
 
Since you are not able to weld, then your going the Heli-Coil route

Helical insert

Helical inserts, more commonly known by the trademark Heli-coil,[7] are inserts made of coiled wire. The insert is inserted into a tapped hole that is larger than the desired hole. They are usually over-sized so that they anchor themselves. Some have tangs to install them while others don't. Special tools are required to install the inserts.[3][8

220px-Helicoil_plus.jpg

Don't do what you wrote lots of work, and you will be in a bigger mess....

lots of info on heli-coil inserts

https://www.google.ca/search?q=heli...s=org.mozilla:en-US:official&client=firefox-a

.
 
Keep in mind that there is not an unlimited amount of area around that bolt to play with. I had the same thing happen to me and succeeded a repair by drilling small, around 2mm, holes around the bolt along the thread line. Then I drilled and tapped for a helicoil. Swapping bolts for studs is a standard fix for this.
 
You will need to get the piece of drill bit out before you can drill it larger. I had the problem with a Yamaha I had, drilled it out (to 3/8" if i recall correctly) and tapped it for a chevy exhaust manifold stud.
I bought a set of studs for mine, so I dont have to worry about that happening again.
 
Last edited:
Since you are not able to weld, then your going the Heli-Coil route


Don't do what you wrote lots of work, and you will be in a bigger mess....

lots of info on heli-coil inserts

https://www.google.ca/search?q=heli...s=org.mozilla:en-US:official&client=firefox-a

.

Never heard of heli-coils, but I will definitely look into it. Thanks for the info.


Keep in mind that there is not an unlimited amount of area around that bolt to play with. I had the same thing happen to me and succeeded a repair by drilling small, around 2mm, holes around the bolt along the thread line. Then I drilled and tapped for a helicoil. Swapping bolts for studs is a standard fix for this.

Ah yes, the studs. Definitely something I'm interested in. I already started drilling the whole thing out with a 5/16 bit (I think, I'll double check); that's enough to bore out the bolt and the threads, and make it just slightly larger than stock. Probably not the right way but it's too late now. Wooo!


You will need to get the piece of drill bit out before you can drill it larger. I had the problem with a Yamaha I had, drilled it out (to 3/8" if i recall correctly) and tapped it for a chevy exhaust manifold stud.
I bought a set of studs for mine, so I dont have to worry about that happening again.

From what I've drilled so far the bit that was stuck has already been chewed up, so at least that part is out of the way. I'd like to keep everything as close to stock as possible, so the studs I would buy would have to be the same diameter and thread, which is 8mm x 1.25 I believe.

Thanks for the reply guys, I'm getting some good info.

Tommy
 
Never heard of heli-coils, but I will definitely look into it. Thanks for the info.

I already started drilling the whole thing out with a 5/16 bit (I think, I'll double check); that's enough to bore out the bolt and the threads, and make it just slightly larger than stock. Probably not the right way but it's too late now. Wooo!

I'd like to keep everything as close to stock as possible, so the studs I would buy would have to be the same diameter and thread, which is 8mm x 1.25 I believe.
If you have already drilled it out "too big", it's the PERFECT time to install Heli-Coils. :D

Get the kit for the M8 x 1.25 threads, it has a special bit (or tells you what bit to use) and will also have the special tap to use. Install your coils and you are good to go.

Note: do not use that tap for ANYTHING else, the ONLY thing it is good for is installing M8 x 1.25 Heli-Coils.

.

Perfect. I measured the depth of the other screw holes to about 25mm. I assume I should drill this guy out to the same depth?

Tommy
 
I would not go any deeper than the existing holes. You do not want to drill them all to match that one, they might not have the room behind them before getting into something that should not have an extra hole in it. :eek:

If you are going to install Heli-Coils in other holes, measure the depth of the hole, drill it larger, but not deeper, tap it, install the coil, move on to the next hole.

.

Oh no no no, just the one hole lol. I see no reason to install the coils in the other holes. They are perfectly fine and good to go. I will probably install studs on them at some point, though.
 
I would not go any deeper than the existing holes. You do not want to drill them all to match that one, they might not have the room behind them before getting into something that should not have an extra hole in it. :eek:

If you are going to install Heli-Coils in other holes, measure the depth of the hole, drill it larger, but not deeper, tap it, install the coil, move on to the next hole.

.


Actually I had a question. Upon further research, it says the M8 coil requires a 1/4 inch bit and hole. I have started drilling the hole with a 5/16 bit, so it's 1/16 larger. Common sense tells me that this will be a problem when trying to install the coil.

The hole should be about 25mm deep, and I have only drilled down to about 5mm. I could conceivably drill the remaining 20mm with the correct 1/4 inch bit. My question is: would it be okay to have the new coil threads starting 5mm below the surface of the hole? As a result, there would be a 5mm gap where there are no threads. Would that severely compromise the strength of the mount?

Tommy
 
Actually I had a question. Upon further research, it says the M8 coil requires a 1/4 inch bit and hole. I have started drilling the hole with a 5/16 bit, so it's 1/16 larger. Common sense tells me that this will be a problem when trying to install the coil.
I am not near my helicoil set to verify, the 1/4" bit seems a bit small, bit might actually be correct.


The hole should be about 25mm deep, and I have only drilled down to about 5mm.
What makes you think the hole needs to be that deep? How deep is the original hole?
I would not go any deeper than that, there are oil passages and whatnot lurking just below the surface.


My question is: would it be okay to have the new coil threads starting 5mm below the surface of the hole? As a result, there would be a 5mm gap where there are no threads. Would that severely compromise the strength of the mount?
See my previous comment, I think the only thing that will compromise your strength will be drilling into a void.

.
 
Last edited:
Back
Top