Announcement

Collapse
No announcement yet.

Some More Stupid Painting Questions

Collapse
X
 
  • Filter
  • Time
  • Show
Clear All
new posts

    Some More Stupid Painting Questions

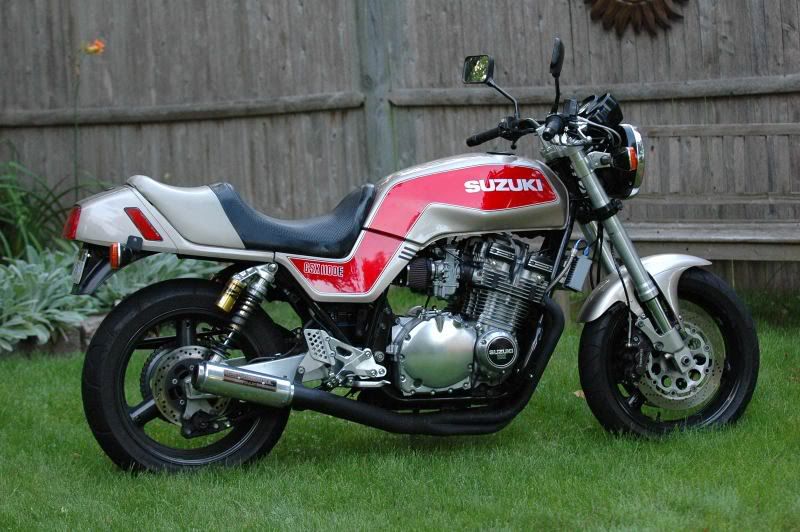
    In the continuing saga of making my 1100E look good again, I am working up to painting it myself. I have a good compressor, a set of el cheapo HVLP guns from Costco and a garage to work in. So far, so good. But, I have never worked with 2 part paints and have some questions I have not seen answered in the many paint threads.

    1) What kind of shelf life is there with 2 part urethane paints?
    2) For the side covers, I assume prep consists of sanding and filling any scratches, then primer? No stripping old paint off, right?
    3) For the tank, it is best to strip it and then prime from what I have read. Would hot tanking it be a good choice for stripping or just sanding until I see clean metal?
    4) is it reasonable to use a laquer or enamel for the base colors and then simply clearcoat with urethane clear? I am just thinking the other paints are easier to work with and less toxic to me.
    5) What kind of setup should I use in my garage as a temporary spray booth? I have seen people hang sheets of poly to create a room within a room as their paint area, does that work OK? Portable fan with a filter attached? Anything else?
    6) What other equipment do I need on the spraying side of things? A water knockout setup of some sort is often used, do I need that if our ambient humidity is very low? Any other filters, regulators, etc.?

    More to come, I am sure...

    Thanks,
    Mark

    #2
    If youre gonna use a fan in a makeshift paintbooth, make sure it's "explosionproof". Make sure you use a respirator, fitted correctly, that is rated for toxic fumes. Use enamel, not laquer. Practice with the el cheapo HVLP, cuz most of the cheapos really aren't. Everything else you mention is right on. Good luck, take your time, and buy the paint from a reputable distributor.

    Comment


      #3
      Now I have seen people use box fans with a filter box in front of it and always wondered about "explosion proof".

      I guess I should avoid visiting while the painting is happening huh?

      Comment


        #4
        Originally posted by PAULYBOY View Post
        If youre gonna use a fan in a makeshift paintbooth, make sure it's "explosionproof". Make sure you use a respirator, fitted correctly, that is rated for toxic fumes. Use enamel, not laquer. Practice with the el cheapo HVLP, cuz most of the cheapos really aren't. Everything else you mention is right on. Good luck, take your time, and buy the paint from a reputable distributor.
        Good point on the explosion proof fan. I have no desire to be a statistic. For the amount of painting I will be doing, I think a respirator and no fan should be more than adequate. I forgot to mention a respirator, but I have no intention of spraying without one. I appreciate being able to breathe without help.

        Where do I buy non-rattle can enamel? Can I use the urethane clear over that?

        Thanks,
        Mark

        Comment


          #5
          Good to hear another enthusiast is going to give painting a try. Bravo.

          I'm no expert and I still make tons of mistakes and redos ....but I'm learnin.

          First things first. Think safety above all. Especially as it relates to you, family and pets. The chemicals in paints and solvents are nasty and can be explosive. Always wear a correctly rated mask none of those "hospital" paper keep out germ gizmos. Inhale paint vapurs and you'll soon have clogged lungs. Also no open flames or sparks. If you have a water heater in the garage make sure it is turned off.

          Good ventilation is also very important but watch out for drafts and air movement as overspray can and will travel and get on things you don't want painted. Cover everything and move your vehicles far away from your "Booth".

          I use an old door set over two saw horses. I built 3 4'x4' screens ( 2x2 frames covered with trash bags) which i clamp together in a "U" shape and set on the table. Clamp another trash bag to the top to cover. If you have access to a big carboard box like a TV or old style monitor came in you can open it up (slit one side) and use it in the same fashion.

          Now the big secret about painting. Preparation, preparation, preparation.
          You don't need to remove old paint but if you have nicks or dings you need to fill them. Bondo for big stuff and deep dents. Surface filler for nicks and scratches. Wet & dry paper in 320 and 600 grit. Use it wet and sand the whole piece til its baby butt smooth. If you are changing colour or putting light colours over dark shoot a couple of coats of light colour primer. Smooth again with 600 grit. Always wipe down the piece after each sanding with minerals spirits on a clean rag or shop towel. Blow off with your compressed air. When handling the piece before and during paint wear latex or vinyl gloves. Oil from your fingers can bugger the paint. Any imperfections will show through the paint so don't rush get it smooth before you pick up the gun.

          Now before painting make yourself some stands and rests to support the pieces. I have a mini saw horse that I can rest the tank on so it sits upright like on the bike. Easy to turn and manouver in my spray booth.

          Painting. As mentioned, use enamel for your basecoat and cover with urethane clear. Easiest and cheapest. I shoot my bases with rattle can and then 2 coats of urethane clear. Quick and easy. For custom colours you need to go with urethane 2 or 3 part (paint, reducer and hardner). The auto paint stores can make you any colours under the sun. Bring in a sample and they can match it (i.e. helmet, jacket whatever).With some brands of paint you can even get a super shine component built in so you don't need to clearcoat. Good for newbies to try but you can't beat a few coats of clear on top.

          Secret number 2. The gun. HVLP guns are designed to shoot at 15 to 40 pounds psi or there abouts. In order to get that at the gun you need to set your compressor output to 80 or 90+psi depending on the length of hose you run. Having a regulator on the gun handle helps a lot in setup. When you get the paint they should give you a materials sheet on it which gives you all the info like what pressure to spray, ratios to mix, recoat time, pot life etc. etc. Ask for it if not offered.

          To set the gun up get the compressor output at the recommended 80 psi and dial in the regulator to that recommended by the paint manufacturer. Put a few ounces of the reducer or cleaner you bought with the paint and set up a piece of dry carboard as a target. Wearing your mask, shoot the gun and play with setting until you get a nice constant spray pattern and pressure. If the gun sputters you need to setup your outlet and gun pressures. Once you have it dump out the rest of the reducer and shoot the gun until only air is coming out. Mix your paint and get ready to shoot.

          No watchers, kids or dogs & cats unless they are masked. Wear old clothes and shoes (wrecked my new deck shoes last time). Use your target again and shoot a few passes at about 6 to 8". Paint should go on fairly dense but not to the state of running. This might take a bit of practice and all painters have had sags and runs at times. When applying the paint the old adage is"it should lay down looking wet" but again too much and you'll have drips, runs and sags. Practice, practice and you'll get it. If you do get a sag or run wait until it dries , sand it out and repaint. If you go for multiple coats you can usually do 2 or more within a few hours of each other without sanding between. If you go several coats over several days it is good to light sand (1000 to 1500 grit wet and dry)wet between coats. Always remember to wipe down and blow off between coats.

          After painting clean the equipment right away. Urethane can set up in minutes in some climates and hardened paint in the gun is a sure way to kill it. Immediatelly pour in some reducer and shoot it through the gun. Collect it in a bucket or empty 1 gal. oil, antifreeze or windshield fluid jugs. when full dispose of them properly as per your community guidlines.
          Strip the gun and drop the components into a container with more lean reducer. Wipe dry and reassemble. Dry with your compressed air.

          Stand back and admire your work.

          This is a simplified resonse and there are a few more things to it like humidty and temperature to consider but that should be outlined in the paint instructions or the paint supplier can advise you.

          So crank up that puppy and lets see what you can do.

          Good luck with it....and welcome to the painter's union!

          Cheers,
          Spyug
          Last edited by Guest; 06-11-2008, 01:43 PM.

          Comment


            #6
            Hey Mark You and ME both

            I have some pics of my project and am preparing for painting by Red GS1100ED and am sorting out, surface prep, tank coatings, metal etching, bondos primer, base coat, pearl and clear coats......

            I dont know if it is all correct, but it is what I am doing (at least until I redo it).


            A summary:

            * So far as far as painting body parts, I built a small paint booth behind my garage with lights and a pusher fan.

            * I have a Harbor Freight touch up gun that works with a smaller capacity 120V compressor. I have an air filter with gauges on the regulator.

            * I measured the decals locations on the gas tank.

            * because of the amount of rust I have seen under paint on MC gas tanks I decided to sand/sand blast off most all of the paint on the tank.

            * I will need top do some side cover repairs, but dont plan of stripping just sanding and priming.

            * I'm also using a spare parts bike tank as a test subject (80 GS750).

            * I used Por 15 light grey to seal the outside after acid dipping and preparing using the Por-15 marine degrease and metal prep.

            * I acid etched the inside of the tank for 2 days to remove all rust, then rinsed , Marine clean, metal prep and rinsed again and dried as quickly as I could to minimize further rust.

            * I then used the Por 15 tank sealer.


            * I'm about to start bondo-ing a few small dents on top of the Por-15. Probably be primering and base coat this weekend.

            * Ordered Decals for a 83 Red GS1100ED from Restoration decals (The first set I understand).

            * I got a very expensive set of supplies for primer, base (custom matched Red), Pearl, and clear.

            I'll be watching your link.

            Posplayr

            Comment


              #7
              Spyug's Right On The Money

              Lately I've been using a type of dupont product called Value pro. You can get 1 step acrylic enamels, which would really require no clear, but i still clear the tank. Also, 2 step are the kind that require step 1 as the base coat and step 2 as the clear for best gloss and durability. as with most paints, the flash time is anywhere from 10 minutes to 12 hours. I've put as much as 4 coats, thickly, on in one hour before, with out any problems. The flash time is so that the layers can cross link to each other chemically. Except for the newer disposable 2 part spray cans mentioned in another thread, all professional use paints cure by chemical catalyzation. 20 years ago I did a pair of helmets for a husband and wife that I was really proud of. I used spray can stuff, let the helmets dry for a couple days, then cleared them. Ayear later, one came back with the clear coat crackled into a thousand specks, and the other one had obviuos paint failure under the clear. That;s the only reason I don't use spray cans.

              Comment


                #8
                Originally posted by Mark M View Post
                I forgot to mention a respirator, but I have no intention of spraying without one. I appreciate being able to breathe without help.
                A cartridge respirator is only good for about 8 hours from when the package is open until its no good, so keep it sealed up when not in use. (you should make/buy a fresh air setup when spraying urethane and use it)

                Originally posted by Mark M View Post
                Where do I buy non-rattle can enamel? Can I use the urethane clear over that?
                Thanks,
                Mark
                That would be acrylic enamel and it should be available from an automotive paint supplier.
                yes you can clear over it, but why would you want to? you would have to use a hardener in it then wait a week or so, wet sand it then clear it. use a base/clear urethane and you can do them back to back.
                or ssu "single stage urethane"

                spraying and adjusting a hvlp... http://autobody101.com/ "basics of basics" by Brian Martin.
                good read and enjoy it's a lot of fun.

                don't discount a cheepo gun...
                astro evo4014 adjusted properly http://i32.photobucket.com/albums/d4...o/PICT1931.jpg
                or a homemade "professional" paint booth http://i32.photobucket.com/albums/d4...ictures091.jpg

                "all the above provided as encouragement/safety"
                Last edited by rustybronco; 06-11-2008, 02:40 PM.
                De-stinking Penelope http://thegsresources.com/_forum/sho...d.php?t=179245

                http://www.thegsresources.com/_forum...35#post1625535

                Comment


                  #9
                  Thanks for the info guys, it is very helpful. I forgot to add that I am not a rookie at painting, just at using an HVLP gun and 2 part paints. I have painted a couple of my own helmets (with rattle cans) that turned out quite good, so I do understand the prep work required. A few more questions:

                  1) What kind of shelf life does the acryllic enamel have? Can I buy a can to practice with now and then expect it to still be useable in a couple of months?

                  2) For Rustybronco, i want to clear the enamel with urethane for the toughness and chip resistance. Can I not just spray enamel, let it sit for a few days and spray urethane?

                  3) How much paint do I need to do my bike? Related to this, how many coats of base color would normally be used? I plan on the same color scheme as Isleoman's 1100E, but with white base/red accent. So, how much white and how many coats and then how many coats of red trim?

                  4) Can I spray over galvanized sheet metal?8O:-) This relates to practice time. I have a galvanized sheet metal stand for my MX bike and it could stand a coat or two of white... And if I screw it up, NBD.

                  5) Is this style of filter/regulator all I would need in the line for painting: http://www.houseoftools.com/product.htm?pid=15618

                  Edit: here is Isleoman's bike, mine will be the same pattern, but white base/red accent.


                  Thanks,
                  Mark
                  Last edited by Guest; 06-11-2008, 05:22 PM.

                  Comment


                    #10
                    As to the regulator/separator, you can get the same thing at Harbor Freight for less than 20 bucks.
                    There is a specific metal prep chemical if you want A good job on galvanized, but if it's not a showcase, NBD. Just DON"T sand it without using the same respirator!!!!! It will cloud your lungs just like the paint will.
                    As to the quantity of paint, figure on a quart of paint, a gallon of reducer, and whatever amount of catalyst/hardener they reccomend. Times however many colrs. Most paint suppliers will only sell pints to a very limited clientele, as in body shops, car dealers, detailers, etc.
                    Again, if you're spraying rattle can enamel, which dries by evaporation instead of curing by chemical reaction, you need to make sure as much solvent has evaporated from the paint film before clearing it, because the more latent solvents you trap under a chemically cured film, the better chance of failure exists for the whole job after some time, especially after the bike sits out on the first sunny, hot, 95 degree day in the full sun. That will cause the trapped solvents to try and migrate and cause a potential clearcoat failure resuting in either bubbls or ruptues in the film of clear.

                    Comment


                      #11
                      Originally posted by PAULYBOY View Post
                      As to the regulator/separator, you can get the same thing at Harbor Freight for less than 20 bucks.

                      <snip>

                      Again, if you're spraying rattle can enamel, which dries by evaporation instead of curing by chemical reaction, you need to make sure as much solvent has evaporated from the paint film before clearing it
                      Not in Canada... I can live with the $30 instead of $20 as long as that is the correct item to use.

                      I was thinking of buying a can of acryllic enamel and spraying that with the HVLP gun, then clearing. I am in no hurry, if letting it cure for a couple of weeks before clear is a good idea, then I can do that.

                      Thanks,
                      Mark

                      Comment


                        #12
                        Originally posted by Mark M View Post
                        Not in Canada... I can live with the $30 instead of $20 as long as that is the correct item to use.

                        I was thinking of buying a can of acryllic enamel and spraying that with the HVLP gun, then clearing. I am in no hurry, if letting it cure for a couple of weeks before clear is a good idea, then I can do that.

                        Thanks,
                        Mark
                        did you check out http://www.thegsresources.com/_forum...d.php?t=126301
                        it really helped me out!!

                        Comment


                          #13
                          Originally posted by Mark M View Post
                          1) What kind of shelf life does the acryllic enamel have? Can I buy a can to practice with now and then expect it to still be useable in a couple of months?

                          2) For Rustybronco, i want to clear the enamel with urethane for the toughness and chip resistance. Can I not just spray enamel, let it sit for a few days and spray urethane?

                          3) How much paint do I need to do my bike? Related to this, how many coats of base color would normally be used? I plan on the same color scheme as Isleoman's 1100E, but with white base/red accent. So, how much white and how many coats and then how many coats of red trim?

                          4) Can I spray over galvanized sheet metal?8O:-) This relates to practice time. I have a galvanized sheet metal stand for my MX bike and it could stand a coat or two of white... And if I screw it up, NBD.

                          Thanks,
                          Mark
                          1. properly stored and sealed can a year or two with no problems
                          2. acrylic enamel must be dry with no solvents being released (ether by being baked or with a hardener)
                          personally I would not use air dry enamel it never hardens. with a hardener I would wait a week then sand and clear, but with a base/clear no waiting.
                          3. i'm guessing, 1/2 pint of each base and a pint of clear, with the proper hardener for the clear and and reducers for both. ask your paint supplier or I can ask a painter at my wifes work.
                          extra for practice! (mis-mixed samples?)
                          base for complete hiding plus a extra coat to be sure.
                          4. why not? just clean, degrease and prime it.
                          Last edited by rustybronco; 06-11-2008, 09:23 PM.
                          De-stinking Penelope http://thegsresources.com/_forum/sho...d.php?t=179245

                          http://www.thegsresources.com/_forum...35#post1625535

                          Comment


                            #14
                            As I mentioned, I have started to use rattle can enamel as a base (Tremclad) followed by urethane 2 part clear. The first time I did it, I let the enamel outgas for about ten days before clearing. Recentley, I have repainted my XS tank ( base coat white) and clearcoated right after it dried ( within the hour). Three weeks later and I don't see any issues. longer term, I don't know but I'm guessing it will be fine.

                            I base coated my GS in Black with one can, tank, fairing, side panels, fender and tail. Clear coats (2) about 3 or 4 ounces total. Cost for paint, I'm thinking about $15.

                            The XS took maybe 2 or 2.5 cans of white as I was covering a darker colour. I didn't prime between dark and white but if I did I'd have used one of each. Again about 4 ounces of clear in 2 coats.Light colours need a bit more than darks.

                            No problem shooting galv but I'd rattle can primer first for a better finish (depending on colour).

                            Experiment a bit. There are lots of options to explore. I was looking for a quick way to do a "presentable" but not award winning paint job and I'm happy with my results.

                            Shoot some test panels and see what you can do. Pics for us too please.

                            Cheers,
                            Spyug

                            Comment

                            Working...
                            X