Announcement

Collapse
No announcement yet.

A+ Paint Job, in Your Garage?

Collapse
X
 
  • Filter
  • Time
  • Show
Clear All
new posts

    A+ Paint Job, in Your Garage?

    Hi Folks!
    It seems the most difficult part of bike restoration is doing an A+ spray job in your garage. Or is that bogus? I want to set up my own garage to paint my own bike restorations, maybe 1 a year. I'm sure some of yous' guys have done this. Will you share some of your smarts with me?
    Thanks! Bill
    "Only fe' collected the old way, has any value." from His Majesty O'Keefe (1954 film)
    1982 GS1100G- road bike, body, seat and suspension modded
    1990 GSX750F-(1127cc '92 GSXR engine) track bike, much re-engineered
    1987 Honda CBR600F Hurricane; hooligan bike, restored

    #2
    You can do a pretty good job with a rattle can, I usually do it outside on an almost windless day, I get good results. If you want to do it in your garage, I would set up a fan in the window or door that pushes air into the garage, pressurizing it drawing air through a furnace filter will remove any dust. Then the air will exhaust through your garage door or through your roof vents. You also need LIGHT that is essential, which is why I do it outside, great big star in the sky gives me lots of light.

    Comment


      #3
      The key to good rattlecan paint is preparation. Also don't expect it to be gas resistant so you have to be pretty careful with it afterwards.

      Good news is that it's both easy to repair (blend etc) as it has no topcoat & if you follow my example & get loads of coats on then you have enough for cutting back later (when gas expands on a hot day in Nevada & comes out your filler whilst you're eating breakfast... )

      Start off by sanding with some 320 wet & dry wet. Hit it with High Build (filler primer). You probably want 3 coats with about 3 mins between each. Then another 3 half hour to an hour later. Sand it down. If your have shallow dents use the 320 or 400 again wet & a block. If you break through anyway then you have to re-hit it with the primer.
      If you want you can follow the filler primer with a conventional primer, same application model. Before you hit it with colour sand with 600 grit wet.

      Colour - Hit it in the same way as the primer. 3 coats with a few mins between them then rest. As you get more paint on there you need to let it rest longer. When you have 6 coats on leave overnight & come back in the morning. Sand with the 600 & hit it again, at least another 3 coats, 6 is better. Leave overnight. Sand back in the morning with min 800 grit, 1000 is better but will take longer. Hit it with 1 "good" topcoat.
      Leave overnight. Sand with min 1500 grit to 2000 grit to flat back the surface. You can use a bit of soap as well as water to help on the paper. You should end up with what looks like a matt finish. No glossy spot anywhere.

      Get some light cut polish (Meguiars do a good one, think they call it "swirl remover" or something) & polish the tank. You probably need to put a lot of elbow grease in it & polish it 4 or 5 times to get a really high gloss.

      Lastly polish it with your favourite wax. Carnuba is good stuff.

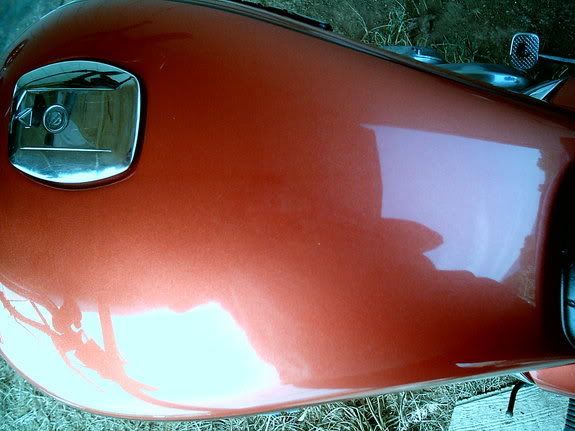
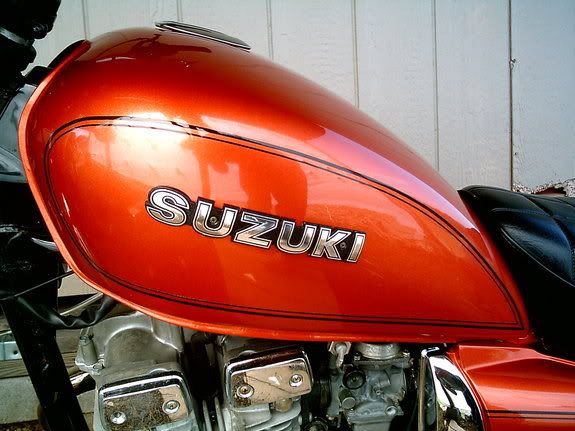
      You should end up with something like this...


      This is the exact procedure I followed except it needed about 12 coats of high build to fill some shallow dents & I may have put a couple more top coats on it.

      If you mess up any coats just sand back any runs etc till it's smooth again & hit it again.

      Anyone who's seen my paint on here will tell you that it's at least A- if not A+!

      Dan
      1980 GS1000G - Sold
      1978 GS1000E - Finished!
      1980 GS550E - Fixed & given to a friend
      1983 GS750ES Special - Sold
      2009 KLR 650 - Sold - gone to TX!
      1982 GS1100G - Rebuilt and finished. - Sold
      2009 TE610 - Dual Sporting around dreaming of Dakar..... - FOR SALE!

      www.parasiticsanalytics.com

      TWINPOT BRAKE UPGRADE LINKY: http://www.thegsresources.com/_forum...e-on-78-Skunk/

      Comment


        #4
        You used no clear coat at all Dan?

        Comment


          #5
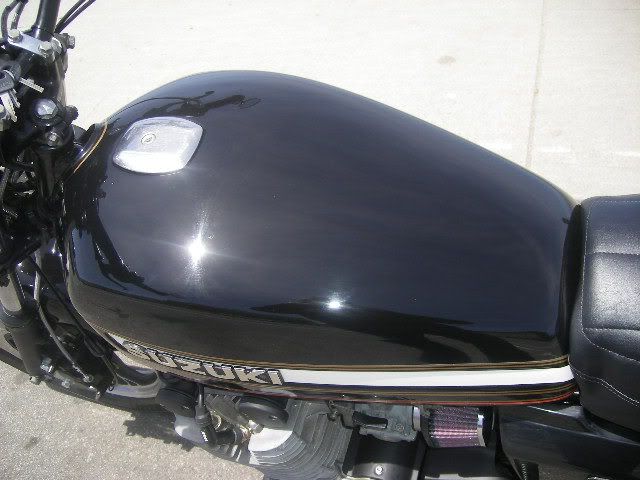
          here you go. i used dupli-color spray paint then a dupont clear for the gas rest. I think it came out nice


          Comment


            #6
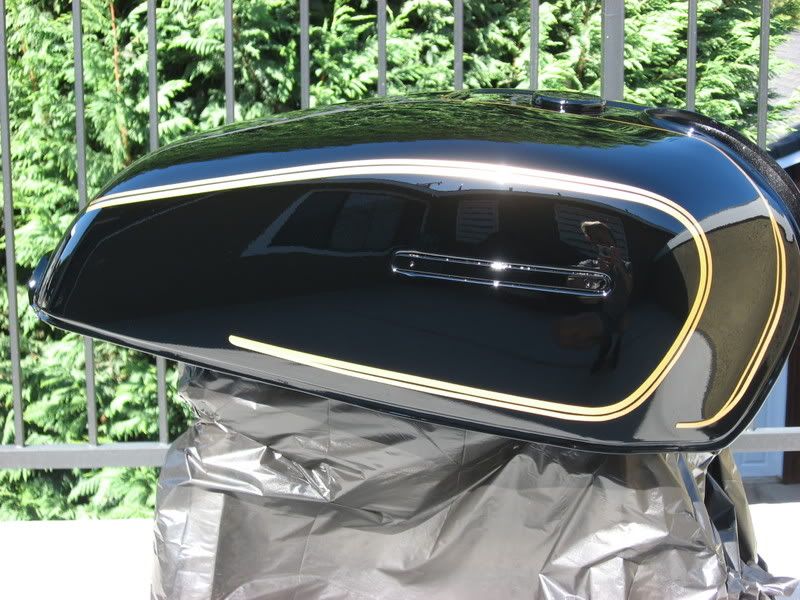
            No disrespect to the rattle can guys but if you want a truly "A+" paint job, you need to use two part catalized automotive paint. This stuff hold up much better to scratching, chiping, and chemicals than rattle cans. This kind of paint is both toxic and expensive so to each their own.

            I painted the tank below using PPG Deltron system epoxy primer/base coat/clear coat. I ride a couple of bicycle frames using the same kind of paint and it still looks great after years of hard use.

            Ed

            To measure is to know.

            Mikuni O-ring Kits For Sale...https://www.thegsresources.com/_foru...ts#post1703182

            Top Newbie Mistakes thread...http://www.thegsresources.com/_forum...d.php?t=171846

            Carb rebuild tutorial...https://gsarchive.bwringer.com/mtsac...d_Tutorial.pdf

            KZ750E Rebuild Thread...http://www.thegsresources.com/_forum...0-Resurrection

            Comment


              #7
              Very nice

              How do you guys do the pinstriping?
              Tape, by hand? Need some tips for that.
              Larry D
              1980 GS450S
              1981 GS450S
              2003 Heritage Softtail

              Comment


                #8
                consider this- there's time, there's money, and there's expected results. If your strengths lie in mechanical repair/restoration, but you want to deliver a whole package for yourself or for sale, why would you settle for rattle can jobs when the money invested in the proper bare bones paint gear will outstrip the lost time investment after the first job. If you live in a fair weather area and keep the bike clean and garaged, krylon or autoschlub cans will do nicely. But, if you're one who has actually placed a monetary value on your time, whether its for you or others, then the time reduction in proper spray equipment is more thana fair trade. My time is placed at different dollars per hour dependoing on which artistic endeavor I'm attempting. As to paint, I'd feel better not having to wonder everytime I ride if a big bug or a drop of fuel is going to tarnish a spray can paint job.Then there's this-if you see yourself as accomplished at electric or mechanical work, would you settle for used wiring to patch a wiring job? Would you use 99 cent oil in a rebuilt motor? Would you slap dirty, untested and possibly warped junkyard cams in a fresh rebuild? Would you put bicycle mirrors from a toy store on your 1100?

                Comment


                  #9
                  Originally posted by Nessism View Post
                  No disrespect to the rattle can guys but if you want a truly "A+" paint job, you need to use two part catalized automotive paint. This stuff hold up much better to scratching, chiping, and chemicals than rattle cans. This kind of paint is both toxic and expensive so to each their own.

                  I painted the tank below using PPG Deltron system epoxy primer/base coat/clear coat. I ride a couple of bicycle frames using the same kind of paint and it still looks great after years of hard use.

                  Damn Ed that looks FANTASTIC!!!

                  Comment


                    #10
                    No clear on mine... putting a rattle can clear over the top provides no resistance to gas & makes it a lot harder to repair if there is any damage.

                    These guys are right, the proper expensive paint is harder wearing etc. I did mine rattle can for a few reasons...

                    It was easy
                    I don't want to buy all the paint gear as I have a set in the UK already.
                    I wanted to mask the pinstripes rather than re-create them & rattle can made this easier to work in sections (for example I could have hit Ed up for some help but my tank was messed about with for a couple of weeks....)
                    I wanted to be able to repair it easily. With the rattlecan it is a lot easier to damage but I can repair it very easily & get back to the finish I have now, with an automotive 2 part I wouldn't be able to do that, it would be a "start from scratch".

                    It's really each to their own.... comparing paint to cheap oil or to second hand wiring or second hand cams is not really fair BUT with that said, would the 2nd hand cams work if they were in good condition, very likely. Would the wiring work if it was in decent shape... of course it would. It's all about choice.

                    Dan
                    1980 GS1000G - Sold
                    1978 GS1000E - Finished!
                    1980 GS550E - Fixed & given to a friend
                    1983 GS750ES Special - Sold
                    2009 KLR 650 - Sold - gone to TX!
                    1982 GS1100G - Rebuilt and finished. - Sold
                    2009 TE610 - Dual Sporting around dreaming of Dakar..... - FOR SALE!

                    www.parasiticsanalytics.com

                    TWINPOT BRAKE UPGRADE LINKY: http://www.thegsresources.com/_forum...e-on-78-Skunk/

                    Comment


                      #11
                      Originally posted by Larry D View Post
                      How do you guys do the pinstriping?
                      Tape, by hand? Need some tips for that.

                      well? Give up your secrets!!!

                      does the clear go over the tape....or does the pinstripe tape go over the clearcoat?

                      Comment


                        #12
                        Originally posted by Larry D View Post
                        How do you guys do the pinstriping?
                        Tape, by hand? Need some tips for that.
                        Common method is to use adhesive pinstripe tape available from automotive repair stores. I used electrical tape on the tank, both sides, to act as a guide before putting down the pinstripes.

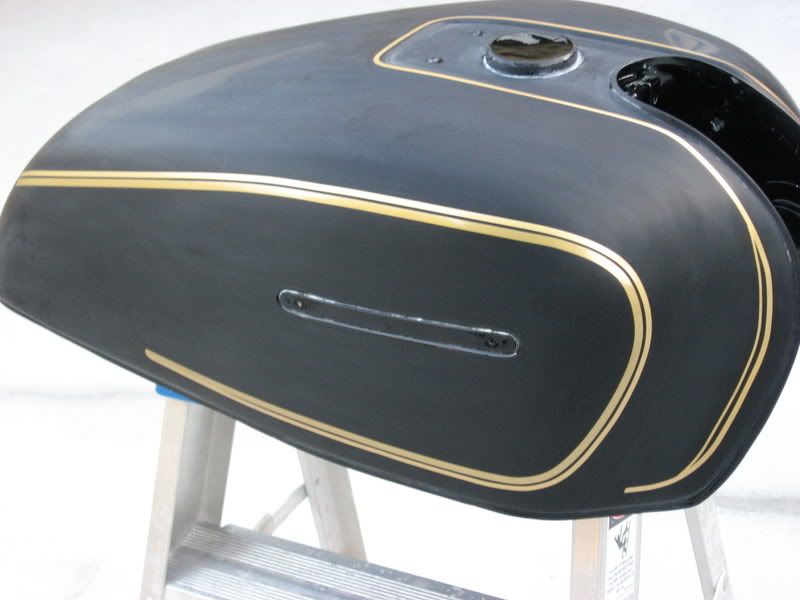
                        To prep the tank I shot two full wet coats of clear and let it dry for a couple of days followed by wet sanding with 1000 grit. Clean the paint with wax and grease remover followed by the pinstripes. I let the pinstripes harden for a day before shooting another two layers of clear on top. No buffing afterwards on my tank.

                        Hope this helps.

                        Photo below shows the tank just before the last two layers of clear.

                        Ed

                        To measure is to know.

                        Mikuni O-ring Kits For Sale...https://www.thegsresources.com/_foru...ts#post1703182

                        Top Newbie Mistakes thread...http://www.thegsresources.com/_forum...d.php?t=171846

                        Carb rebuild tutorial...https://gsarchive.bwringer.com/mtsac...d_Tutorial.pdf

                        KZ750E Rebuild Thread...http://www.thegsresources.com/_forum...0-Resurrection

                        Comment


                          #13
                          Tips, sources and links, please!

                          So we have good start here. Clone and Salty Monk have shared some rattle can technique. Some bragging. Nessism shared some pinstripe tips. How 'bout some home paint shop set ups, books and links for supplies?
                          Thanks.
                          "Only fe' collected the old way, has any value." from His Majesty O'Keefe (1954 film)
                          1982 GS1100G- road bike, body, seat and suspension modded
                          1990 GSX750F-(1127cc '92 GSXR engine) track bike, much re-engineered
                          1987 Honda CBR600F Hurricane; hooligan bike, restored

                          Comment


                            #15
                            Whats you r budget?
                            As to the Monk, my analogy is comparing used, less than 100% parts to new stuff, which is like comparing a proper paint job to a spray can job. Always in the back of your mind is this- how long will it last, and how much more careful do I have to be?
                            Back to the budget- if you want to make a portable booth, you can do it with pvc piping and shower curtains. Ventilation is acceptable with a 20" box fan fitted with a 20" furnace filter. Get a compressor with at least a 10 gal tank. You can go silly with spray guns. For bikes, you don't need a quart gun. Get a touch up gun with an 8 oz cup, that way you can be refilling it to take the flash time between coats up, so you don't get tempted to recoat too soon. Harbor freight at 10 bucks is a good start, especially if you have limited experience. They also sell a chemical respirator with replaceable cartridges. 20 bucks or so. Find a good automotive paint supplier near you, get to know the counterman if he is friendly and knowledgeable. You'll nedd tape, masking materials, a couple light duty drop cloths, good, tight fitting nitrile gloves ( the latex ones melt at the first hint of reducer or thinner). Get a strainer, stir sticks (popsicle sticks) a good all purpose paint scraper tool so you can poke a hole in the inner rim of the paint can so it doesn't drip over the edge when you pour, tack cloths, rags, a metal trash can for safety, with a lid, graduated mixing cups, wax free paper cups, good lighting ( color corrected if you can afford the bulbs) and a good color wheel or color chart. You can do all this for an initial investment of maybe 450 bucks, or you could spend that much on an Iwata air gun by itself. If you plan to do details or graphics, buy a decent airbrush and hose. You'll need a regulator if the compressor doesn't have one, and some inline moisture traps, either the grenade type added to the end of the gun or at the compressor outlet.There's a website for a company called TCP global that does paint, air guns, airbrushes, and all the body and finishing supplies you'll need . Their freight is pretty reasonable, and they take about 4 to 6 work days to get it to the midwest.
                            Hope this helps. As for prep, get some isopropyl alcohol and some simple green, along woth a few substantial spray bottles. Sandpaper from 80 all the way to 2000 grit. If you use paper towels, use Bounty because they don't fuzz abd leave lint. Get a hair cover or do rag. Bondo, some scratch filling primer in 2 colors....man, I didn't realize how much stuff I had!
                            Last edited by Guest; 08-27-2008, 11:03 AM.

                            Comment

                            Working...
                            X