Announcement

Collapse
No announcement yet.

raped sidecover

Collapse
X
 
  • Filter
  • Time
  • Show
Clear All
new posts

    raped sidecover

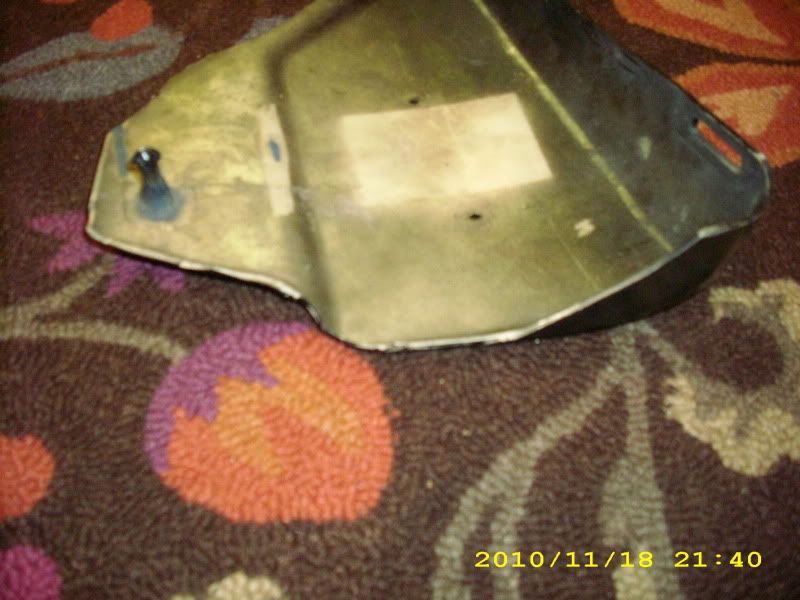
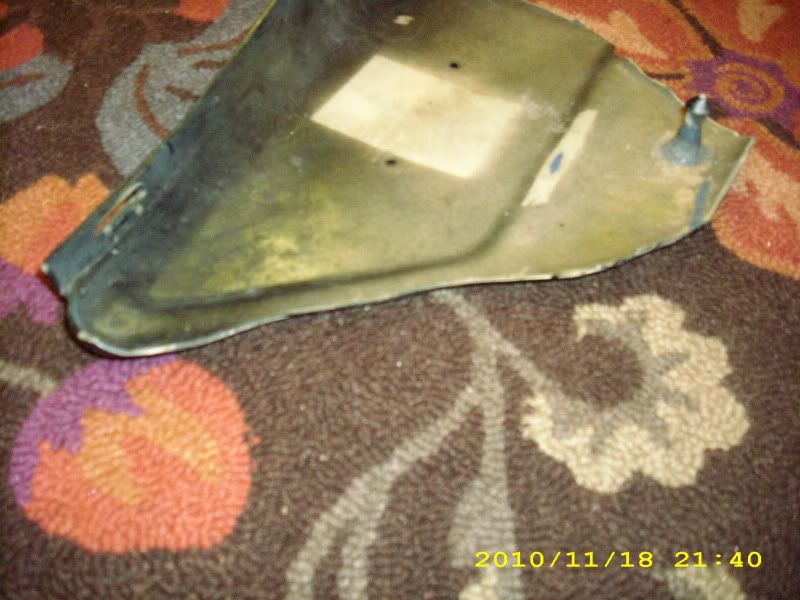
    I suppose Im not really expecting any suggestions on this, more of an exibit, but on the off chance someone can think of some way to rehabilitate this sidecover I thought Id ask.

    Here we have, what appears to be, what happens when you forget to feed your dog...


    Though I'm pretty sure the PO didnt have a dog. Im not really sure why he thought it was a good idea to cut off the edge of the left sidecover but he did and its a shame he didn't care more about the bike because he was a professional fiberglasser and I bet it would have been easy enough for him to fix it.

    Anyone see a way to make it nice?

    #2
    A good used one from Ebay?

    Daniel

    Comment


      #3
      The weird thing is I seem to find TONS of right sidecovers all the time... No lefts. Im thinking there is some common problem with the left cover, maybe the battery pees on it or something.

      Comment


        #4
        People tend to break off the lower peg that mounts tight in the grommet when trying to fix the charging system.
        I take a piece of rough sandpaper and smooth out the peg.
        Also, a little bit of anti-sieze on the grommet.

        Keep searching, you will find a good one.

        Daniel

        Comment


          #5
          Yeah, sooner or later everything shows up on ebay. Any ideas why the right covers are so much more available?

          Comment


            #6
            I see no way to fix that. Looks like trash can food to me.
            Current Bikes:
            2001 Yamaha FZ1 (bought same one back)

            Comment


              #7
              I see this as the perfect opportunity to practice your body working skills, if you have the time and inclination. There is absolutely no "value" in it (compared to simply waiting for a used one to show up on the net), but for fun and amusement here's what I'd do:

              1. Use some thin sheet steel or aluminum to form tabs along the edge of the broken area, in order to build a "framework" matching the contour that should be there.

              2. Bend a 90 degree "foot" into each tab that can be epoxied (I like to use quick set / 5-min epoxy - JB Quick is a favorite) to the existing sidecover. For added strength I'd drill small holes through the "foot" so that once the epoxy is applied it locks the structure together. When I fix broken sidecover studs I usually drill through the sides of the studs to allow the epoxy to flow through and permanently anchor itself to the stud. The other thing I do is to gently use a drill to add small dimples to the inside of the side cover, in order to provide more "bite" for the epoxy to bond to. Be careful NOT to drill through to the other side of the cover!

              3. Once you have your tab framework bonded, you can use screen mesh (I prefer plastic to avoid corrosion issues later) to create a scaffolding for the new material to bond to.

              4. Use epoxy (my preference) or go the fiberglass route to cover the screening and reproduce the "lost" part of the sidecover. Once you've built a new lip around the edge of the sidecover you will, of course, have to sand and smooth the outside so it matches the original exterior contour ... and then you can prime and paint it.

              Once again, this is a LOT of work to revive a piece that looks pretty far gone, but if you look at it as an opportunity to practice useful skills during the winter season it could wind up being very rewarding.

              Regards,
              Last edited by Guest; 11-19-2010, 11:52 AM.

              Comment


                #8
                Originally posted by Highway_Glider
                I had a guy weld my fairing as it developed cracks. He thought it was PVC, from the year, but could not be sure. (You need the same plastic for a good weld)

                He suggested cutting a strip off the bottom of the fairing to use with the welder.

                I asked him to try PVC first...
                Your fairing should be made out of ABS plastic.

                so far Matchless and I have found that you can use acetone as the 'adhesive' in small cracks. capillary action will draw it into the crack which softens the ABS allowing it to adhere to it's self after the acetone evaporates. if the cracks are large, you can dissolve ABS shavings in acetone to make a 'slurry' (paste), then force it into the cracks using a polypropylene bottle.

                care to know how this is going to be re-assembled? http://thegsresources.com/_forum/sho...4&postcount=17
                De-stinking Penelope http://thegsresources.com/_forum/sho...d.php?t=179245

                http://www.thegsresources.com/_forum...35#post1625535

                Comment


                  #9
                  Originally posted by Planecrazy View Post
                  I see this as the perfect opportunity to practice your body working skills, if you have the time and inclination. There is absolutely no "value" in it (compared to simply waiting for a used one to show up on the net), but for fun and amusement here's what I'd do:

                  1. Use some thin sheet steel or aluminum to form tabs along the edge of the broken area, in order to build a "framework" matching the contour that should be there.

                  2. Bend a 90 degree "foot" into each tab that can be epoxied (I like to use quick set / 5-min epoxy - JB Quick is a favorite) to the existing sidecover. For added strength I'd drill small holes through the "foot" so that once the epoxy is applied it locks the structure together. When I fix broken sidecover studs I usually drill through the sides of the studs to allow the epoxy to flow through and permanently anchor itself to the stud. The other thing I do is to gently use a drill to add small dimples to the inside of the side cover, in order to provide more "bite" for the epoxy to bond to. Be careful NOT to drill through to the other side of the cover!

                  3. Once you have your tab framework bonded, you can use screen mesh (I prefer plastic to avoid corrosion issues later) to create a scaffolding for the new material to bond to.

                  4. Use epoxy (my preference) or go the fiberglass route to cover the screening and reproduce the "lost" part of the sidecover. Once you've built a new lip around the edge of the sidecover you will, of course, have to sand and smooth the outside so it matches the original exterior contour ... and then you can prime and paint it.

                  Once again, this is a LOT of work to revive a piece that looks pretty far gone, but if you look at it as an opportunity to practice useful skills during the winter season it could wind up being very rewarding.

                  Regards,
                  Yno... I think I may very well try this... Do you think that after placing the backing screen I could use fiberglass bondo as the filler agent to build up the walls?

                  Whatever I do... there will likely be pictorial evidence of it...

                  Comment


                    #10
                    Bondo could be used for a topcoat/finishing layer, but I kind of doubt it would have enough structural resilience in an application like this, even with the backing screen. Truth be told, I haven't used the stuff since the early eighties, so it's possible the newest incarnations are tougher than the brittle stuff I once used.

                    Incidentally, you may want to drill a line of holes completely through the side cover about a quarter inch in as a way of giving the new "lip" an even better anchor point. When you sand it all down to finish and paint you'd want to leave it just a touch thicker near the lip (for structural integrity), but a gentle feathering back to the original surface ought to leave you with a nice looking outer surface...

                    Look forward to watching the project develop if you decide to take it on!

                    Regards,

                    Comment


                      #11
                      Toast!

                      Man if you were stuck on a deserted island, and this was the only cover you had I would say to go for it and fix it. Find one on Ebay, I bought a new old stock one a few weeks ago for $10 buy it now, I spotted it just after it was listed. Normally you can get one for $20 to $35, that is is good shape. You might have to hunt a while, like a few weeks, or a few months, but they come up all the time. You could fix it, and these fixes sometimes crap out, you would be miles ahead with another cover.

                      Comment


                        #12
                        Will these work for you?


                        Daniel

                        Comment


                          #13
                          No I'm quite sure the sidecover design switched in 1980. thanks though.

                          Comment

                          Working...
                          X