Announcement

Collapse
No announcement yet.

Oh Flyboy!

Collapse
X
 
  • Filter
  • Time
  • Show
Clear All
new posts

    #16
    I've pulled the seat cover off already. The seat was soaked with water when I got the bike, so I removed the cover to help it dry. It's been 7 months now so I think it's dry. The pan has a bit of rust on the under side and I'm sure it's under the foam. I'd like to do it right, but was unsure how well the foam would hold up to being removed. I think the spray contact adhesive would work better than the brush on as it would give you time to set the seat in the right spot. I wasn't sure if the adhesive would eat the foam. I try a small hidden spot before going wild. Thanks again!

    cg


    This is what my pan looks like. Not to bad.
    Last edited by Charlie G; 11-19-2011, 10:02 PM.
    sigpic
    83 GS1100g
    2006 Triumph Sprint ST 1050

    Ohhhh!........Torque sweet Temptress.........always whispering.... a murmuring Siren

    Comment


      #17
      Charlie, compared to what seems to be the norm, that pan of yours looks to be in good nick. won't take much to get it as new again, being proactive and stripping it to get the water away from the pan straight away is good common sense.

      Comment


        #18
        Dale ..run a piece of 1X down the center of the pan and another on the cover side. Use some wood clamps or deep C clamps and compress the foam that way. Keeps it all held down and makes everything else hands free.
        MY BIKES..1977 GS 750 B, 1978 GS 1000 C (X2)
        1978 GS 1000 E, 1979 GS 1000 S, 1973 Yamaha TX 750, 1977 Kawasaki KZ 650B1, 1975 Honda GL1000 Goldwing, 1983 CB 650SC Nighthawk, 1972 Honda CB 350K4, 74 Honda CB550

        NEVER SNEAK UP ON A SLEEPING DOG..NOT EVEN YOUR OWN.


        I would rather trust my bike to a "QUACK" that KNOWS how to fix it rather than a book worm that THINKS HE KNOWS how to fix it.

        Comment


          #19
          Chuck, I'll give your idea a try when I go to reassemble it. thanks for the tip!
          De-stinking Penelope http://thegsresources.com/_forum/sho...d.php?t=179245

          http://www.thegsresources.com/_forum...35#post1625535

          Comment


            #20
            Just be sure you have evrything lined up and centered on the foam as precisely as you can. Then lay the cover side board on and flip it all over. add the bottom board and the clamps. You dont need to compress it very much..just enough so you can work the edges over and rehook them. May i also suggest that you get a small can of seam sealer for like on canvas tarps and do the underside of the seat cover that faces the foam. This will seal any pores or tiny imperfections in the lining so rain or wash water doesnt seep thru and get the foam wet..which may mildew and mold. I think thats the reason the usually had a plastic film between the two from the factory. Or of course you can wrap the foam in some 3 mill poly.
            MY BIKES..1977 GS 750 B, 1978 GS 1000 C (X2)
            1978 GS 1000 E, 1979 GS 1000 S, 1973 Yamaha TX 750, 1977 Kawasaki KZ 650B1, 1975 Honda GL1000 Goldwing, 1983 CB 650SC Nighthawk, 1972 Honda CB 350K4, 74 Honda CB550

            NEVER SNEAK UP ON A SLEEPING DOG..NOT EVEN YOUR OWN.


            I would rather trust my bike to a "QUACK" that KNOWS how to fix it rather than a book worm that THINKS HE KNOWS how to fix it.

            Comment


              #21
              PS....The wider the board on the cover side the better...compresses the foam more evenly. Maybe a piece of plywood would work well too.
              MY BIKES..1977 GS 750 B, 1978 GS 1000 C (X2)
              1978 GS 1000 E, 1979 GS 1000 S, 1973 Yamaha TX 750, 1977 Kawasaki KZ 650B1, 1975 Honda GL1000 Goldwing, 1983 CB 650SC Nighthawk, 1972 Honda CB 350K4, 74 Honda CB550

              NEVER SNEAK UP ON A SLEEPING DOG..NOT EVEN YOUR OWN.


              I would rather trust my bike to a "QUACK" that KNOWS how to fix it rather than a book worm that THINKS HE KNOWS how to fix it.

              Comment


                #22
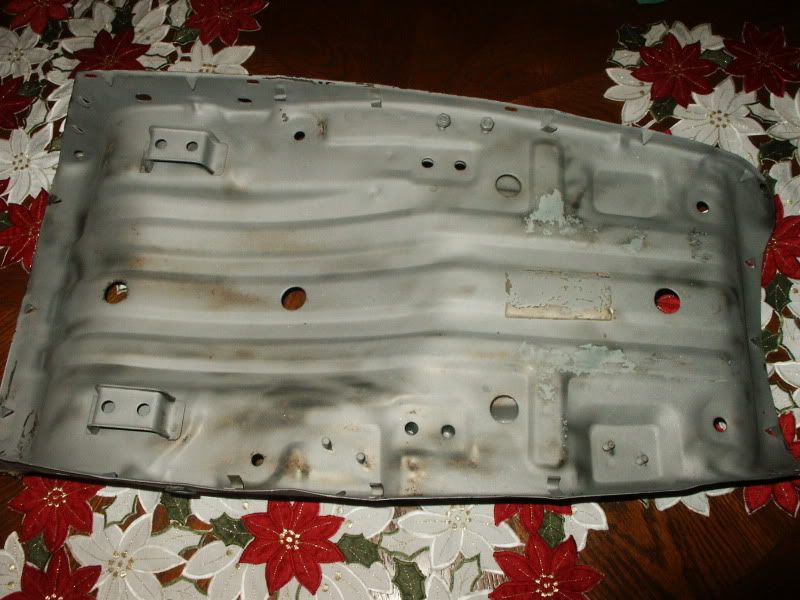
                I finally got a chance to get started on the seat pan. I still have to clean off the old tar, adhesives, ect. the sand blaster wouldn't remove and straighten the bent flanges, then I can touch up what little rust is left and I hit it with primer tomorrow. I just ran out of time to finish it today.

                as I said, it's a nice seat you bought there Flyboy!

                Last edited by rustybronco; 12-12-2011, 10:56 PM.
                De-stinking Penelope http://thegsresources.com/_forum/sho...d.php?t=179245

                http://www.thegsresources.com/_forum...35#post1625535

                Comment


                  #23
                  Many thanks Dale, you know I have a good set of eyes looking and a keen nose sniffing out bargins over there in the good ole US of A.

                  Comment


                    #24
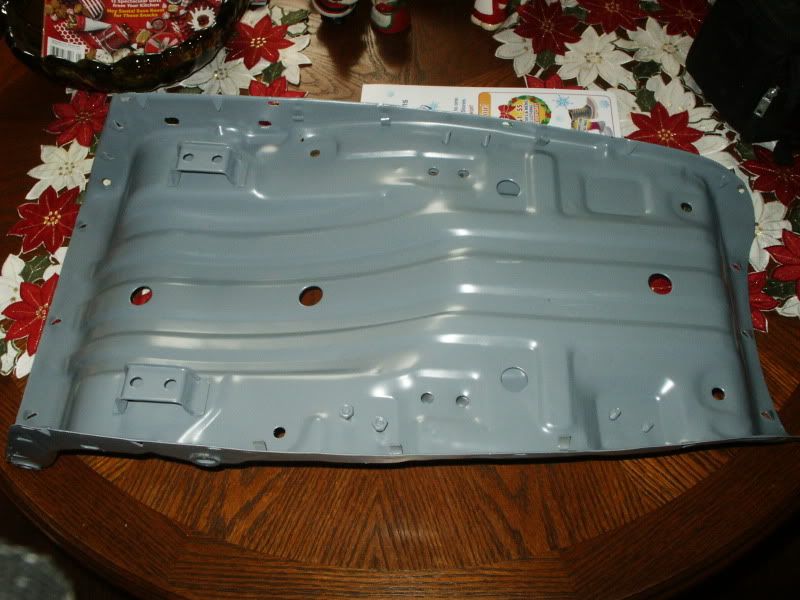
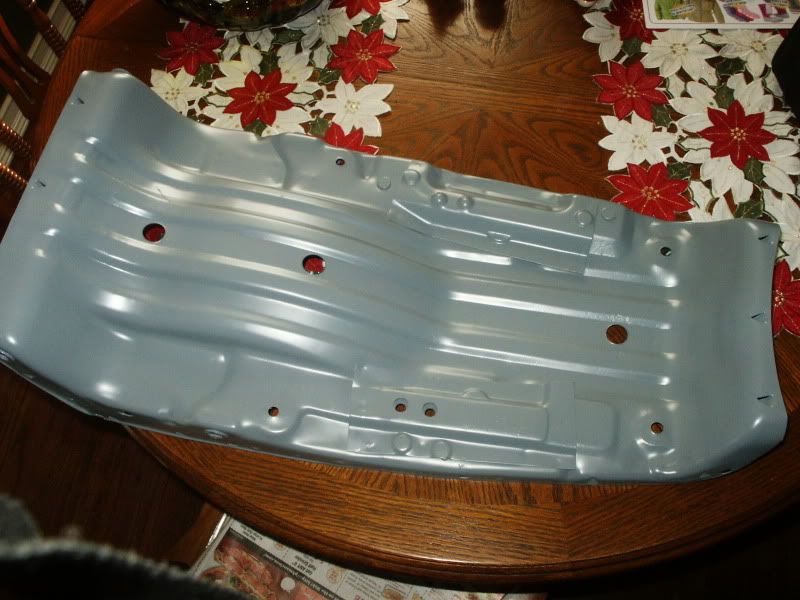
                    I straightened the flanges during work yesterday and shot the epoxy primer on it after work. the top of the seat pan is a little pitted from the rust so I'll let it harden until Monday, scuff it all up and hit it with high build primer.

                    having access to a paint booth when you need it sure is nice


                    De-stinking Penelope http://thegsresources.com/_forum/sho...d.php?t=179245

                    http://www.thegsresources.com/_forum...35#post1625535

                    Comment


                      #25
                      Nice work Dale! That's gonna be one clean and solid seat pan there
                      1982 GS450E - The Wee Beastie
                      1984 GSX750S Katana 7/11 - Kit Kat - BOTM May 2020

                      sigpic

                      450 Refresh thread: https://www.thegsresources.com/_foru...-GS450-Refresh

                      Katana 7/11 thread: http://www.thegsresources.com/_forum...84-Katana-7-11

                      Comment


                        #26
                        Wow Dale, you have been busy, that pan is looking brand new, it's going to be the best part of the bike, will have to park it with the seat open to brag wherever I go.

                        Comment


                          #27
                          Buzy? I just wanted to try out the gun I bought.

                          The top of the pan will still remain pitted after I'm finished with it as it won't matter after you've glued the foam back on and reinstalled the seat cover. now on the other hand, the bottom should look it came from the factory.

                          p.s. I've seen what your side covers will look like after they are finished. I highly doubt it will be best part of the bike...
                          De-stinking Penelope http://thegsresources.com/_forum/sho...d.php?t=179245

                          http://www.thegsresources.com/_forum...35#post1625535

                          Comment


                            #28
                            You guys are lucky... this was MY seat pan prior to any work...


                            Comment


                              #29
                              That's a rough one for sure... how much metal, welding and time did it take to restore it?

                              on the other hand, Stan got lucky with this seat.... $50 USD.
                              De-stinking Penelope http://thegsresources.com/_forum/sho...d.php?t=179245

                              http://www.thegsresources.com/_forum...35#post1625535

                              Comment


                                #30
                                Holy Kamoly Adler, thats a seat pan??????
                                Yes I did get lucky indeed, but its all about having the right people on your side, I have a top class purchasing agent in the States, has a nose for a bargin like a blood hound.

                                Comment

                                Working...
                                X